Android and iOS are two of the most popular operating systems of smart phones. Although these two Operating Systems or OS for short are not technically made for every smart phone, several users have found and discovered a way to install Android on iPhone. With these easy five steps, you can run and install Android 2.2.1 on your iPhone 2G/3G originally installed with iOS.
If you have an iPhone 2G/3G, make sure that you won’t be experiencing battery issues and you are running 3.1 to 4.1 iOS firmware. These steps may only work specifically in iPhone 2G/3G with 3.1 to 4.1 iOS firmware and jailbroken with Redsn0w, Limer1n or Pwnage tool. Before you install Android to iPhone, an important big step is to jailbreak your iPhone. It is already assumed that you have already known and done the first steps like performing the actual jailbreak on iPhone if you are attempting this. If not, make sure to fully read and understand the steps and risks in performing a jailbreak on iPhone before you proceed with this tutorial. Also, like jailbreaking, make sure that you fully understand and know the risks.
So, if you are a tech savvy and wants to run Android on iPhone, follow these 5 easy steps:
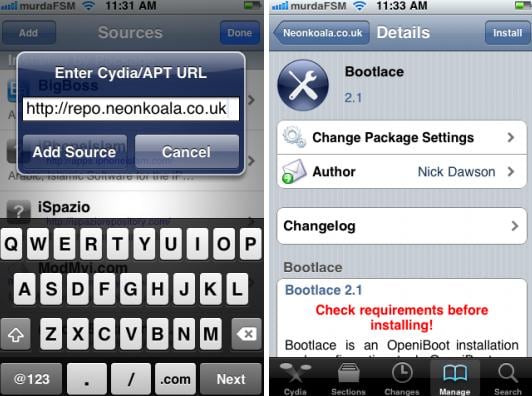
Step 1: Connect your phone to Wifi and install BootLace
Once you have your jailbroken device, open up Cydia and add repo.neonkoala.co.uk/ as a source. If you do not know how to add a source, click manage, then go to sources and then click edit and then add. After it is added, you can click on your newly added source and then see Bootlace. Install Bootlace on your device and after that, the phone will reboot. After this has successfully been done, proceed to the next step.
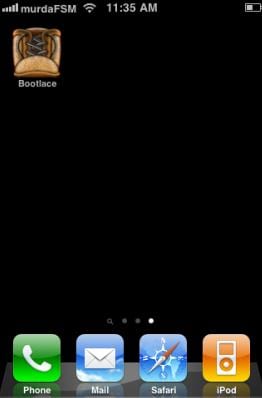
Step 2: Open Bootlace and then wait for patching
After the reboot of your device, you can see in your phone an app called Bootlace. Open this app and wait for patching to finish. Bear in mind that the patching may take a while to finish.
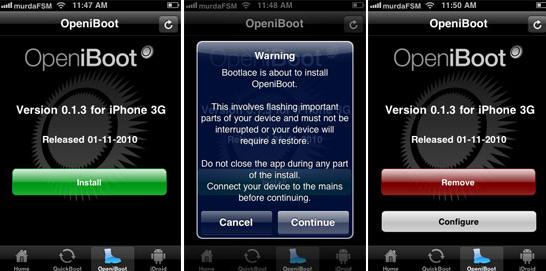
Step 3: Install iBoot
Once it is done patching, you can see the ‘OpeniBoot’ in the options below. Click on it then press install. Wait for the ‘OpeniBoot’ to finish installing and then you can proceed to the next step.
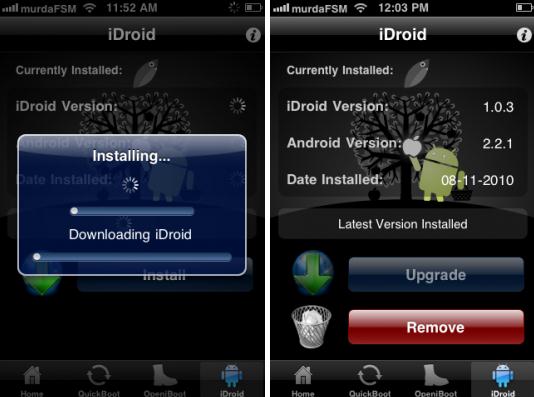
Step 4: Install iDroid
After it has finished installing ‘OpeniBoot’, you can see ‘iDroid’ as one of the options below along where ‘OpeniBoot’ can be found. This will be the next thing that you will need to install. Click on ‘iDroid’ and then like the previous one; install it and then wait for it to finish. This process may also take a while to finish. After this, you can proceed to the next step.
Step 5: Go to QuickBoot
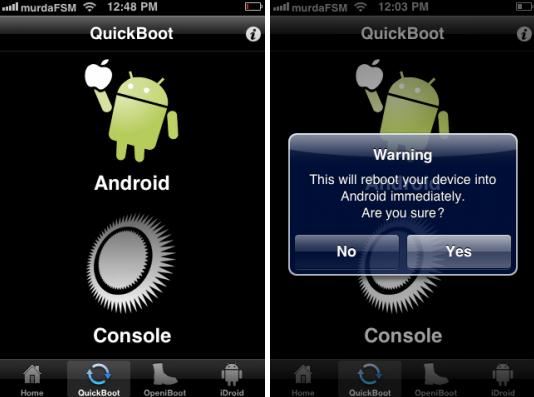
After you finished installing the necessary components such as the ‘OpeniBoot’ and then ‘iDroid’ you can now proceed to this step. Open up ‘QuickBoot’. ‘QuickBoot’ also can be found in the options together with ‘OpeniBoot’ and ‘iDroid’. After you have correctly navigated, you can click on the Android Logo to finish the set up. The process will take a long time so make sure that your battery is up for the work because a shut down because of a battery failure may cause irreversible errors.
If the above steps are correctly done, your iPhone will now boot in Android 2.2.1.
People who are naturally curious can now explore and discover the differences and similarities between Android and iOS all in one device.


