Looking for an easy way to import your contacts to your Samsung device? Maybe you recently bought a new device and you now want to equip it with all of your existing data from the old one. When you do have a backup of the data, it is usually only a matter of exporting the data to the new device. But a lot of times, people run into problems when trying to import detail sensitive data such as contacts to their Samsung devices.
If this is the predicament you currently find yourself in, we're here to help. We understand that trying to import a large number of contacts to your device can be problematic especially when there are so many methods to choose from, you don’t know which one suits you best. In this article we are going to provide you with different methods to Samsung import contacts. In each one of these methods, we are going to provide a detailed step-by-step guide. This will help you easily assess every method and figure out which one is best for you.
- Part 1: How to Import Samsung Contacts from USB Storage
- Part 2: How to Import Samsung Contacts from SD Card
- Part 3: How to Import Samsung Contacts from SIM Card
- Part 4: How to Import Samsung Contacts from CSV
- Part 5: How to Import Samsung Contacts from iCloud
- Part 6: How to Import Samsung Contacts from Gmail
- Part 7: How to Import Samsung Contacts from Outlook
- Part 8: How to Import Samsung Contacts from Facebook
Part 1: How to Import Samsung Contacts from USB Storage
One of the major advantages of having an Android device is that it gives users the ability to easily import and export contacts on their device. This way if you lose any of the data on your device for any reason or if you happen to buy a new phone, you can simply import the contacts and pick up where you left off. One of the options when importing data on to your Samsung device is from USB storage. The following are the simple steps you can follow to use this method.
Step-by-Step Guide to Import Samsung Contacts
Step 1. From the home screen on your Samsung device, open the App Drawer and then launch the Contacts app.
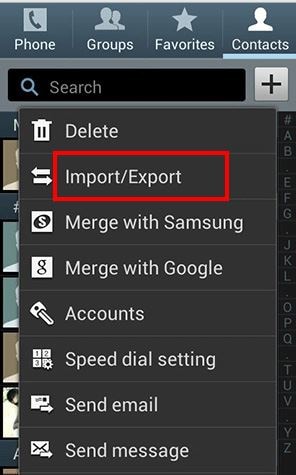
Step 2. Once the contacts app is open, simply tap on the menu button on your device. You will see a number of options. Tap on "Import/Export" option to begin the process of importing contacts on to your device.
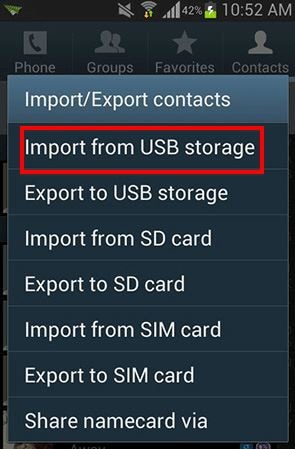
Step 3. In the next window, you will see a number of options from where you would like your contacts to be imported. Select "Import from USB Storage" to continue.
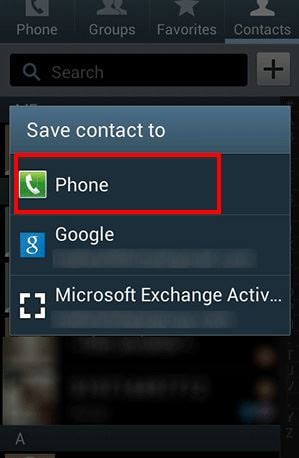
Step 4. The device will then ask you where you want to save the imported contacts. Since we want to save them on to the device, select "Phone".
Step 5. On the screen that follows, you will be able to select the contacts that you want to import. Once you have selected the contacts, tap on “Done” and wait while the contacts are imported on your device.
Once the process is complete, you should be able to see them and use them from the contacts app.
Part 2: How to Import Samsung Contacts from SD Card
If you had backed up the contacts on your SD card, you can easily use the very same method to import them to your Samsung device. Most people will move their contacts to an SD card to protect the data from loss or when they want to root the device and want to keep the data safe just in case something goes wrong with the rooting process. No matter the reason you saved the contacts on the SD card to begin with, here's how to import these contacts back to your device.
Step-by-Step Guide to Import Samsung Contacts
Step 1. Launch the contacts app on your device by opening the app drawer and then tapping on the contacts icon. Once the contacts app is open, tap in the menu button. This will open a number of options. Select "import/export" to continue.
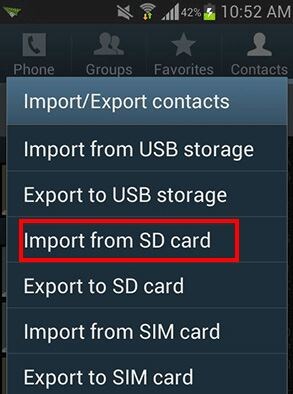
Step 2. From the next window, select "Import from SD card" option.
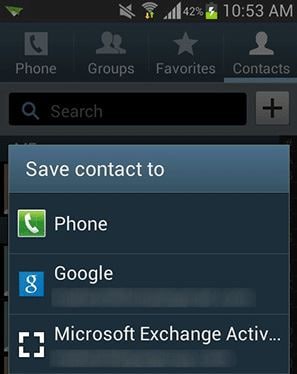
Step 3. In the next window, you will be requested to specify where you want the imported contacts to be saved. You can select "Phone" to save them directly on your device or any of the other options such as "email accounts" or even "Google".
Part 3: How to Import Samsung Contacts from SIM Card
A SIM card can also be used to store contacts and hence is an option when you want to import contacts on your device. It is not uncommon to find that some people can export contacts to a SIM card which can then be removed from one device and inserted into another device to import the contacts to the second device. The following is how you can import contacts from your SIM card to a Samsung device.
Step-by-Step Guide to Import Samsung Contacts
Step 1. Begin by launching the contacts app on your device. once it is open, tap on the menu button to open up a number of options. From the options, select "Import/Export" to begin the process.
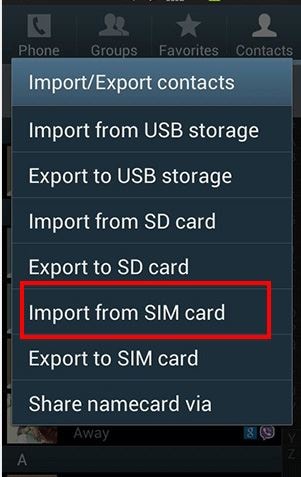
Step 2. In the next window, select where you would like the contacts to be imported from. In this case, choose "Import from SIM Card".
Step 3. You will then be required to select a destination for the imported contacts. If you want to save them on the device select "Phone" otherwise, you can select any of the other presented options.
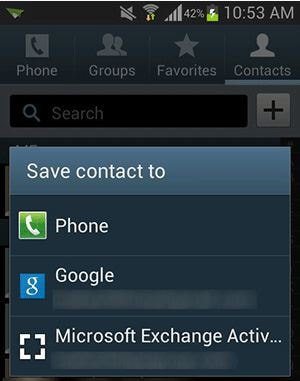
Finally, just select the contacts you want imported and then tap on "Done" to allow the device to import the contacts from the SIM card. It goes without saying that the SIM card you want to import the contacts from needs to be inserted into the device. Once the process is done, you will be able to see all the contacts on your device. Just open the Contacts app and the contacts should be there.
Part 4: How to Import Samsung Contacts from CSV
CSV or Comma-separated values files can be used to export contacts from android device. They often offer a great way to back up all the contacts on your device and also a great way to import the same contacts when you need to. The problem is that it is not very easy to import contacts from CSV. Most people recommend that you use a third-party app but most of them are not reliable or safe. You can however make use of Samsung Kies to import CSV files to your Samsung device. Begin by downloading the software to your computer and then follow these very simple steps to import Samsung contacts from CSV.
Step-by-Step Guide to Import Samsung Contacts
Step 1. Once you have downloaded the program on your computer, rub the program and then click on "Open Contact File" button to open the "Contacts Library" and then browse to for the CSV file on your computer.
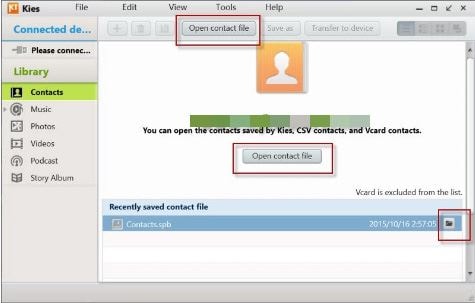
Step 2. Now connect the Samsung device to your computer using USB cables. Kies will recognize the device. Select the connected device and then select the contacts in the CSV file you would like to transfer to the device. Copy the selected contacts and click on "Transfer to device".
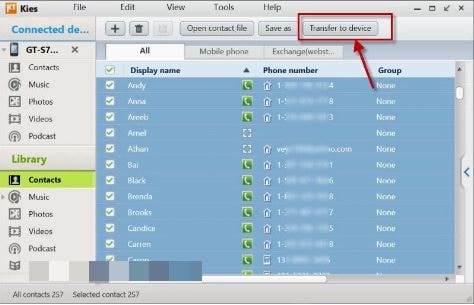
Samsung Kies will not delete any of the existing data on your device. It is also the safest method to use for Samsung device because it is designed to manage a Samsung device.
Part 5: How to Import Samsung Contacts from iCloud
If you are switching from iPhone to Samsung, you may have contacts in your iCloud backup that you would like to import to your Samsung device. Anyone who has ever tried to do this appreciates how difficult it can be to do this. Without the right tool, it can be nearly impossible to move contacts from your iCloud backup to a Samsung device.
Fortunately for you, we have the right tool. This tool will not only make it very easy to import the contacts but will also ensure that the entire process is seamless and 100% safe. This tool is MobileTrans for Mac (or MobileTrans for Windows). The program comes with a whole host of features that are essential in the proper management of your device. It offers an all rounded solution that will help you manage all aspects of your device including data transfer, backups and restoring the data on your backup files to your device.
Key Features of iSkysoft Phone Transfer:
- The entire transfer process takes no more than 5 minutes as we shall see shortly, it is a simple 3-step process.
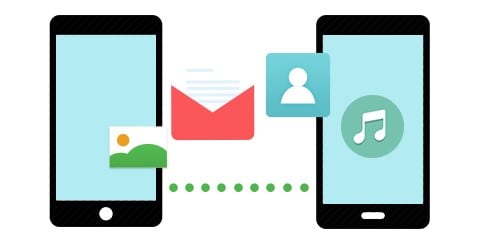
- Aside from contacts you can use MobileTrans for Mac to restore any type of data from your iCloud and iTunes backups to your Samsung device.
- The program is primarily a data transfer tool. This means it can be used to transfer all types of data between devices including contacts, messages, call logs, music, photos, videos and many others.
- You can also use the program to create a backup of all the data on your device and restore the same backup.
Step-by-Step Guide to Import Samsung Contacts
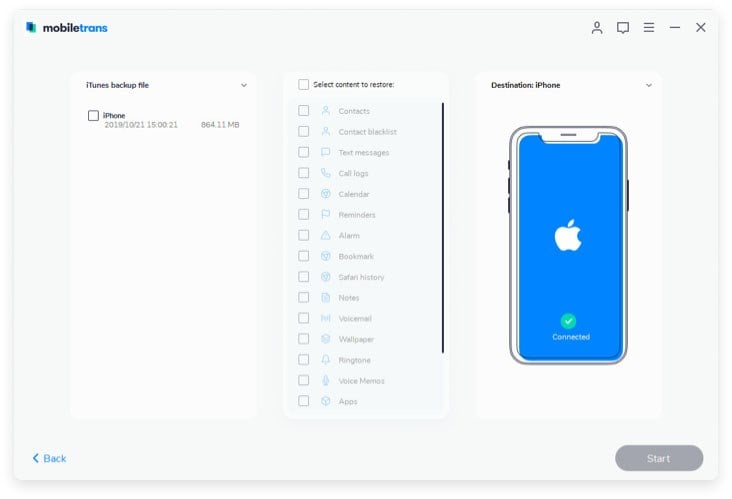
Step 1. Begin by downloading and installing the program on your computer. Launch the program and you should see the following primary window.

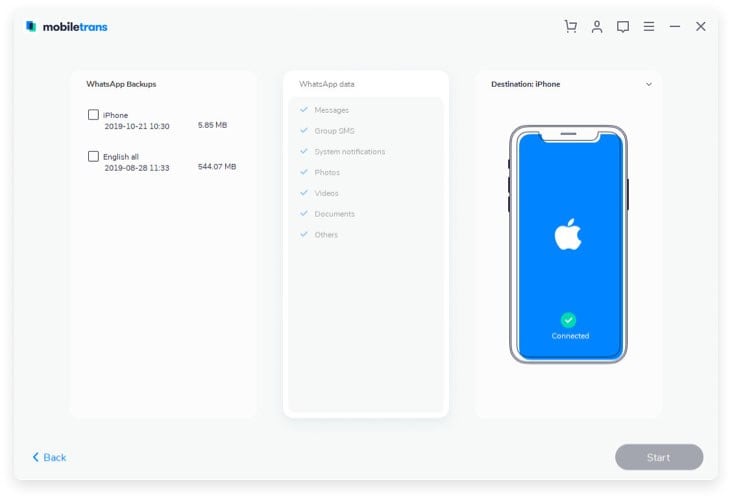
Step 2. Connect the device to the Mac and from the options in the primary window select "Restore from Backup" tab. From the options presented, select iCloud.
Part 6: How to Import Samsung Contacts from Gmail
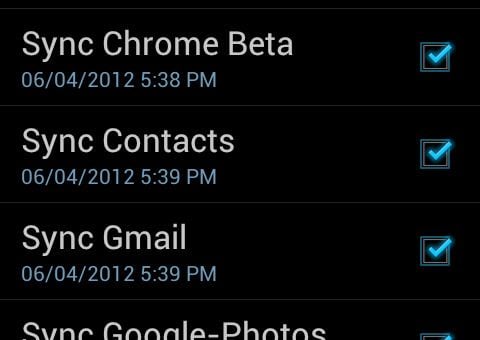
For those who have backed up their contacts via Gmail account, you can also import these same contacts on to your device. The process is easy but in order to import the contacts, they first must have been downloaded to your computer either in CSV format or another format. Before you can be able to upload the file on to your Samsung device, make sure that the contact Sync setting is turned on.
To do this go to Settings > Accounts > Google ad under accounts look for your Gmail address and verify that "Sync Contacts" is checked.
Now sign in to your Google account from your computer. It is important that you ensure that this is the same Gmail account you are using on your device. Once here, select "Gmail" from the drop-down menu at the top left corner and then choose "Contacts".
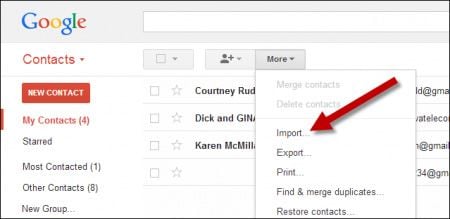
Then select the "more" button above the contacts list and then select "Import". In the popup window that appears click "Choose File" and select the CSV or VCard file containing your contacts. Click on the "Import" button to complete the process.
The contacts will then be uploaded to your Gmail account and they should be synced to the device in time. This process could take up to a few hours depending on the number of contacts you are importing.
Part 7: How to Import Samsung Contacts from Outlook
If you manage your contacts using Outlook, you can easily import these contacts into your Samsung device by syncing with your Gmail account. This is a three step process as seen below.
Export Contacts from Outlook
Step 1. Launch Outlook on your computer and then click File > options > Advanced.
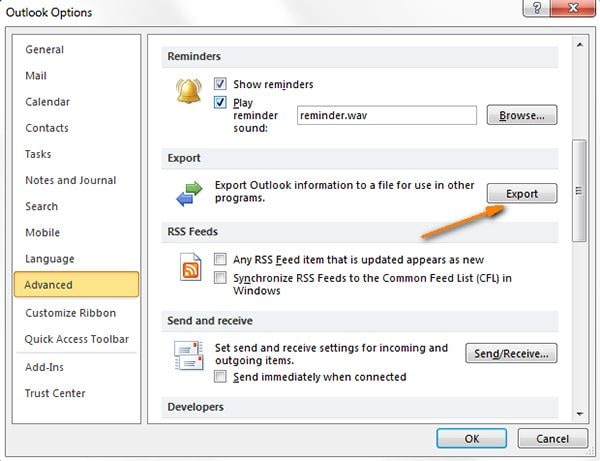
Step 2. Click "Export" in the Export section and then select "Export to a File". Click "next" to continue.
Step 3. Select CSV as your export format and then select the contacts folder. Click on "Next" to continue. Select the location where you would like the exported file to be saves by clicking on Browse > Enter a file name and then click "OK" Click "next" and then "Finish".
Import the CSV to Gmail
Step 1. The next step is to upload the file to your Google account. To do this, follow these very simple steps. Login to your Gmail account and click "Gmail" at the top left corner and then select "Contacts". Choose "More" and then select "Import".

Step 2. Click "Choose File" and then select the file you exported from Outlook. Click "Import" and then wait for the file to be imported to your Gmail account.
Now all you have to do is sync the Gmail contacts with your device and the contacts will be imported on to your Samsung device. To do this go to Settings > Accounts and then select your Google Account. Tap "Sync Contacts" and wait a few minutes.
Part 8: How to Import Samsung Contacts from Facebook
When you install the Facebook app on your Samsung device you may be prompted to sync all pf the contacts on your Facebook account with those on your Phone. Sometimes you may skip this step during the initial set up process. If you chose to skip the step and you now want to include those Facebook contacts into your contacts list, you can do this in one of two ways.
The first method is not so easy. You can uninstall the Facebook App and then reinstall it without skipping the sync your contacts step. This is obviously not an ideal solution as it is time consuming. The other solution is much simpler. You can simply sync your Facebook contacts with your Samsung device. Follow these very simple steps to do it.
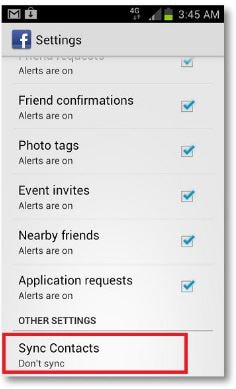
Open the settings app on your device and then tap on "Accounts & Sync". Click on Facebook from the options presented. If you don’t see Facebook in the list of accounts, it may be because you haven't added your Facebook accounts to your Android accounts. You can simply tap on the bottom of the screen to add it. Select "Sync Contacts" option and then click "Sync Now".
All of the methods described above to help you import contacts to your Samsung device, are effective depending on your own particular situation. Our goal in writing this article is to help you strike the balance in finding the best way to import contacts on to your device. we hope you’ve found the best one and that you are able to import the contacts easily.


