To transfer contacts or messages from Android to iOS 11 is not that difficult task how people think. Since we are blessed with the today’s technology that has vanished difficulty at any level and transferring contacts from Android to iOS 11 is one of those difficulties. Switching between two different operating systems can be a big step and also a good decision, and now let us come to the point. This article is going to teach you how you can transfer contacts & messages from Android to iOS 11 device with ease.
- Part 1: Best Solution to Transfer Contacts/Messages to iOS 11 Devices
- Part 2: Transfer Contacts/Messages to iOS 11 Device Using Gmail
Part 1: Best Solution to Transfer Contacts/Messages to iOS 11 Devices
This is what you need when thinking about transferring between Android and iOS 11. MobileTrans for Mac (Windows) is a platform that focuses on transferring data in one click between different devices even having different operating systems. Plus, it provides many others important facilities as well which we will discuss later. The tool is the preference of many users and you’ll also fall in love with this. And why not, this tool has some easy steps to execute the process. Now back to the facilities point, here are its features offered by iSkysoft Phone Transfer.
- This software is having no risk and is fully safe to transfer various kinds of file types like your contacts, music, videos, SMS and more.
- iSkysoft Phone transfer can help in transferring the data between Android, iOS, Blackberry or Windows Phone with full compatibility over 3500 phones.
- Also, it can work with numerous networks.
- You can backup your phone to the PC securely with this tool as well.
- Moreover, it helps in transferring iCloud data to your phone. Or you are also able to retrieve the iCloud backup.
- Plus, same with iTunes also, you can retrieve or transfer from iTunes to your device easily.
How to Transfer Contacts & Messages from Android to iOS 11 via iSkysoft Phone Transfer
Step 1. Launch iSkysoft Phone Transfer
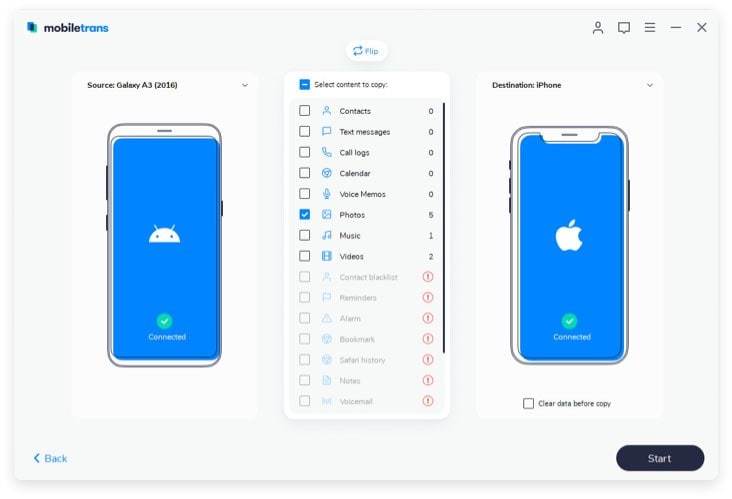
Start with downloading the iSkysoft Phone Transfer tool and install it now. Open it to begin transferring and choose “Phone to Phone Transfer” from the given tabs. Then click on “Start” to proceed to the next window.

Step 2: Connection between Devices and Computer
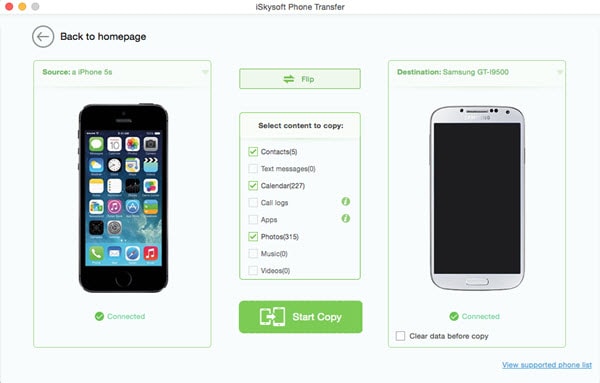
Now, take USB cables for both devices and plug the devices to your computer. When you plug the devices successfully, the software will recognize your source device and will bring up the data on the middle of the screen.
Step 3: Transfer data
Now the last step is to transfer contacts & messages from Android to iOS 11 device. For this, check “Messages” and “Contacts” from the given list of the data. Now, last of all, hit on “Start Copy” in order to begin the process. Wait a little and you will be done with transferring from Android to iOS 11 device.
Part 2: Transfer Contacts/Messages to iOS 11 Device Using Gmail
There is another way to transfer contacts from Android to iOS 11 device which is using Gmail. It is a mailing platform that Google had provided us. Apart from effective e-mailing service, it supports the smartphone users to successfully save their contacts and transfer them to other devices when needed. It doesn’t matter the device runs on Android, iOS or Symbian. So, now jump to the steps involved in this method.
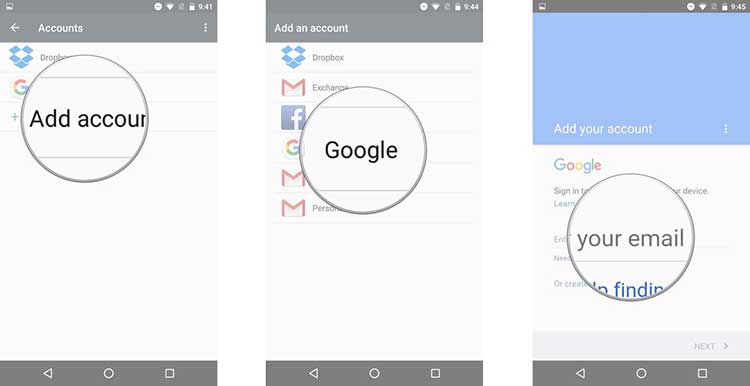
Step 1: Grab your Android device and open “Settings”. From there, navigate to “Accounts”. Subsequently, tap on “Add Account” option.
Step 2: As soon as you tap on “Add Account”, you will get to see an option of “Google”. Just tap on it and enter all your Gmail details into it like your email address and password.
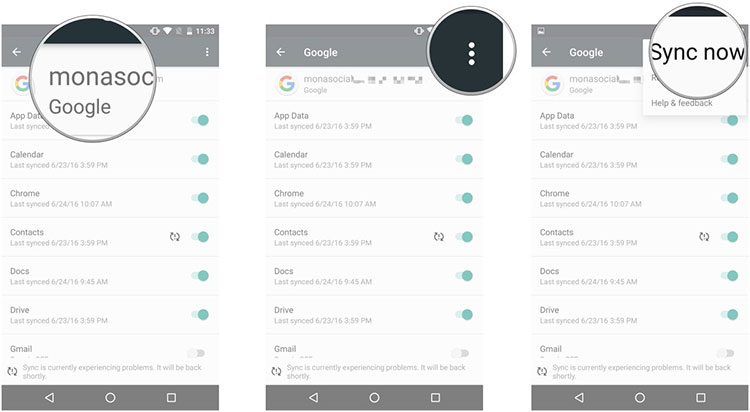
Step 3: Once done with this, look “Contacts” from the list of contents and make sure they are checked or not. After this, hit the three vertical dots you will be able to see on your phone screen easily. Then tap on “Sync Now” option.
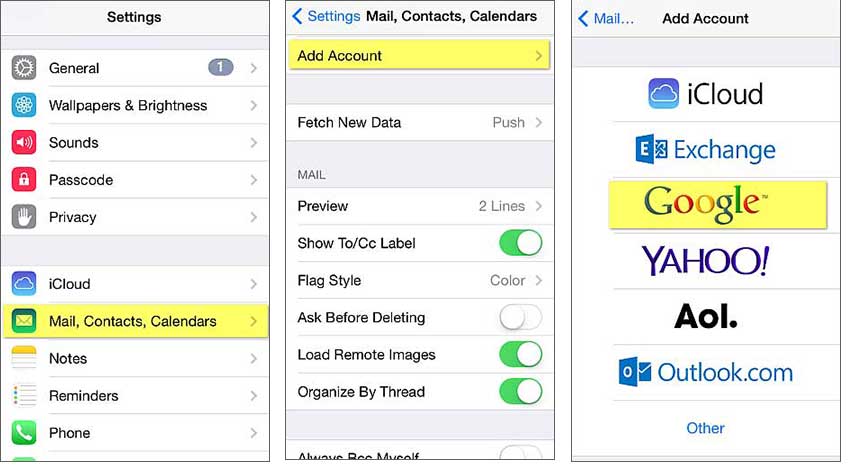
Step 3: Now take your iPhone or iPad having iOS 11 version. Run to “Settings” and select “Mail, Contacts, Calendars”. Once done, go for “Add Account” option. Again you will find Google. Tap on it and type the same email address and password you entered previously in your Android device.
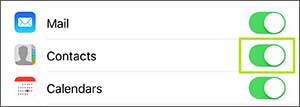
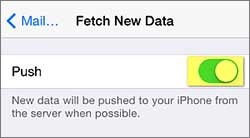
Step 4: In this step, ensure that the switch of “Contacts” is enabled or disabled. Enable it if it is not. After this, once again go to “Mail, Contacts, Calendars”. There, find the “Fetch New Data” option and lastly turn “Push” on. Now, you’re done.
