There are many ways to transfer data from Android device to an iOS device but most users get confused about the most productive way. Also, these days when a lot of people drifting to iPhone 8 (Plus) need a hand for the best way between Android and iPhone 8 transfer processes. So, those users’ search ends here as we are going to list 6 ways (with tutorials) on how you can transfer data from Android to iPhone 8/iPhone X. Let’s scan those methods one at a time.
Part 1: The Best Tool to Transfer Data from Android to iPhone 8/iPhone 8 Plus/iPhone X
MobileTrans for Mac / for Windows is the most powerful tool that will make Android and iPhone 8 transfer much easier than any other method. It can help in transferring almost any kind of items fromy your Android device like your contacts, messages, photos, music, video, and more. a lot more can be done with this tool that you will learn in the features’ section ofMobileTrans.
Features of MobileTrans
- This skilful tool provides an easy transfer between Android, iOS, Symbian, Blackberry or Windows devices.
- MobileTrans can help in the backup and restore the data too.
- You are also able to transfer the iTunes data to your device.
- Moreover, the iCloud data can also be retrieved using this tool.
- This tool doesn’t invite any virus or malwares and gives a perfect result.
- The service is unbelievably fast and your money can also be refunded (within 30 days) in case you are not satisfied with the product.
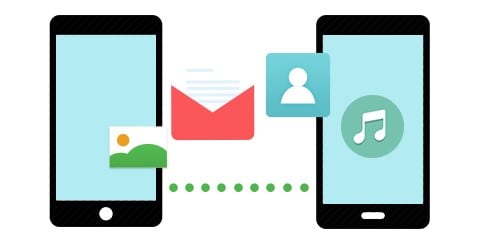
How to transfer Android to iPhone 8/iPhone X with MobileTrans
Step 1 – Install MobileTrans
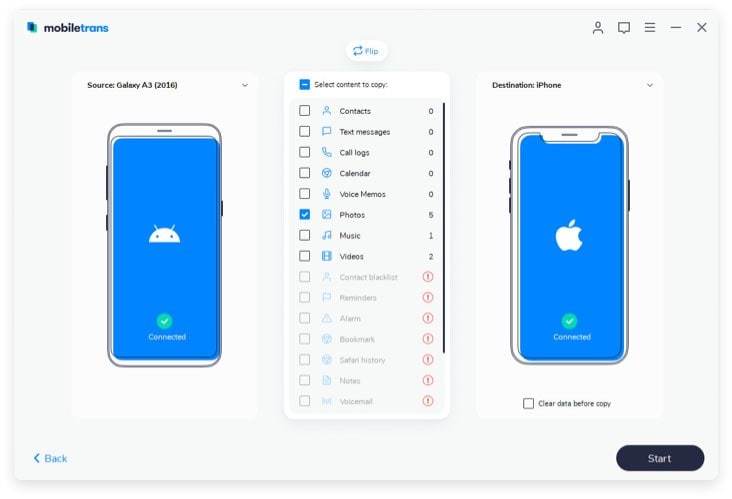
Get the toolbox in your computer by downloading and installing it. Run it when installed and click on "Phone to Phone Transfer" option.

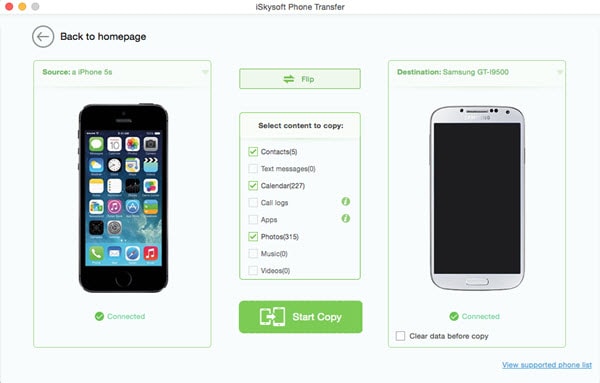
Step 2 – Choose the Data
Connect your Android and iOS devices to the computer. Your devices will come on the screen, one as the source and other as the target device. The file types will also displayed in the middle of the screen. Select the data types you want by checking the boxes beside each type.
Part 2: Android to iPhone 8 Transfer Using Move to iOS
With the launch of iOS 9, the Apple’s Move to iOS app also came into light and was proved out to be the most helpful way to transfer user’s data i.e. messages, contacts, photos, videos, documents, web bookmarks and DRM-free books and songs, from any Android device to the iOS devices.
Here’s how to transfer data using Move to iOS app:
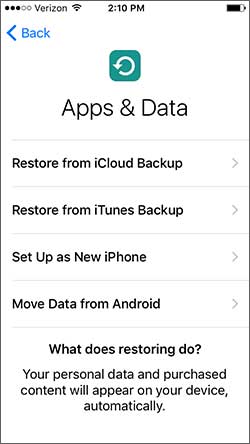
Step 1 – Be attentive to the App & Data screen while setting up your new iPhone and tap on the option "Move Data from Android". This step is vital to transfer data from Android device to iPhone 8.
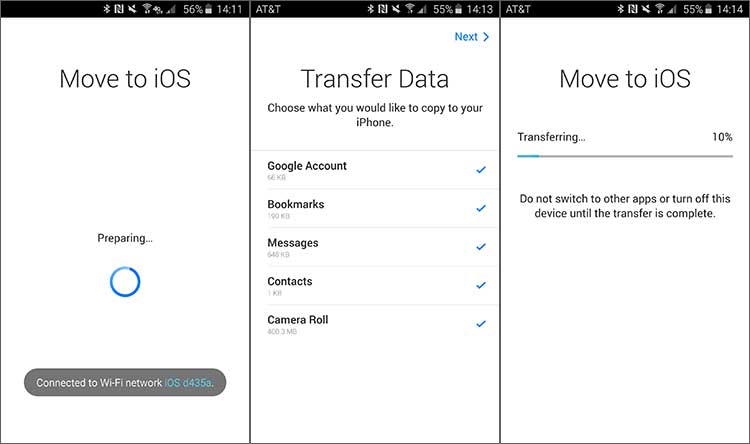
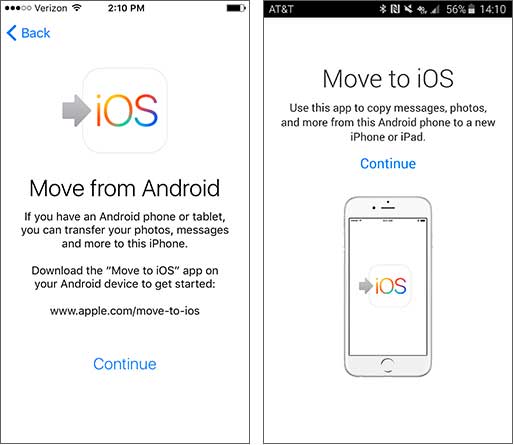
Step 2 – Download and install Move to iOS app on your Android device. Launch the app and accept the terms. Now on both the devices hit "Continue". Then push "Agree" and then "Next" on your Android device.
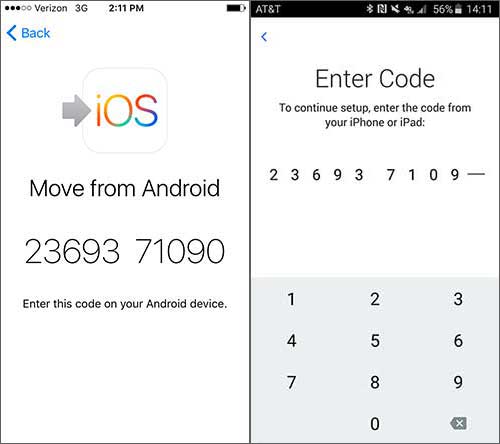
Step 3 – A 12 digit code will appear on your iOS device, punch in this 12 digit code in your Android device. As soon as you punch in the correct code both Android & iOS device will connect with each other over the peer-to-peer (P2P) WiFi connection.
Step 4 – Next, on the Transfer Data screen select the data that you wish to transfer from Android to iPhone 8. If you’ve selected all, then all of your contact, photos, videos messages and bookmarks will be transferred successfully. But remember, Android apps are different from those of iOS apps, so only those apps will be transferred which are freely available on both Google Play and App Store.
Part 3: Transfer Android to iPhone 8 Using Dropbox
Dropbox is a cloud based file hosting service where anyone can upload their files, be it music or photos or videos or any documents, free of cost up to a limited free storage space. Dropbox app has easy to use interface and is available for both Android and iOS devices.
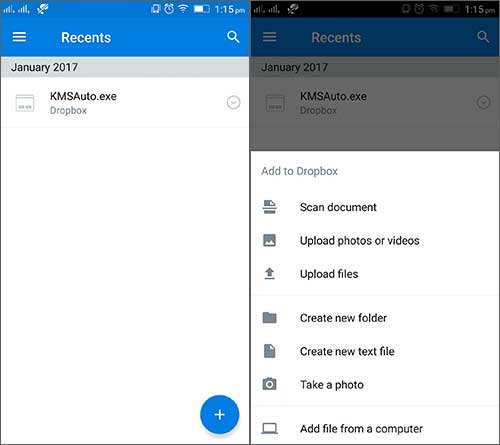
Step 1 – On your Android device, launch the Dropbox app and hit the "+" icon to upload the files on it.
Step 2 – Next, tap on "Upload files" option and select the files you wish to upload from your device.
Step 3 – After selection, tap on "Upload"
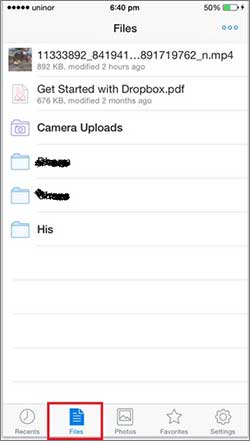
Step 4 – Grab your new iPhone 8 now and launch Dropbox on it. Now, locate the files you wish to download to your device and open it.
Part 4: Transfer Photo from Android to iPhone 8 Using Google Drive (Photos Only)
Google Drive is yet another cloud storage service provided by Google. Users can store almost any kind of file on their Google Drive and that too free of cost but yes, only up to a limited space. Google Drive is, therefore, considered as the best option amongst all other cloud storage service providers.
Method 1: Download all the photos from the account to a computer and then sync them to your iPhone
Assuming that files have already been uploaded to the Google Drive account, we are here in this guide going to download all the files to the computer and further sync it to your iPhone using iTunes. Let’s follow the steps to get this done.
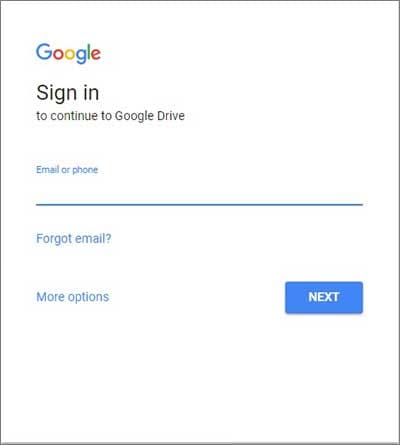
Step 1 – Sign in to your Google Drive account on your computer using a web browser.
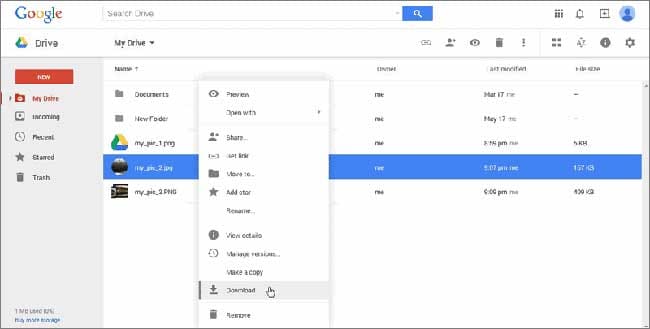
Step 2 – Now, "right click" on the image file you want to download and from the appearing menu tap on Download.
Note: If you wish to download multiple files at once, press and hold down the “Shift” or “Ctrl” key while clicking to select multiple files.
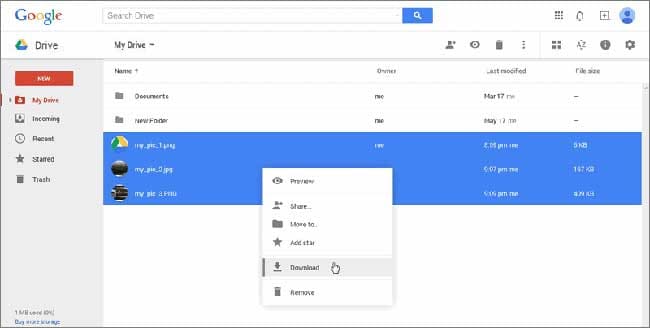
Step 3 – Your browser will download all the selected files in a ".zip" file. Next, open the .zip file and extract all the files contained in it.
Step 4 – Launch the iTunes app and connect your iPhone 8 to the computer.
Step 5 – Tap on the "device" icon in the navigation bar and hit "Photos".
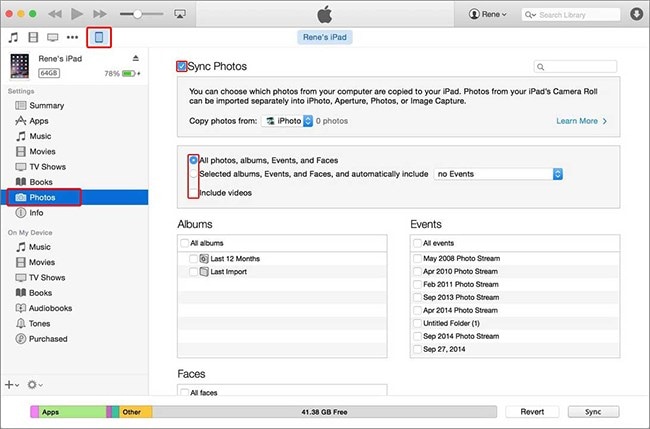
Step 6 – Now, tap on the checkbox adjacent to Sync Photos and from the drop down menu hit on "Choose Folder".
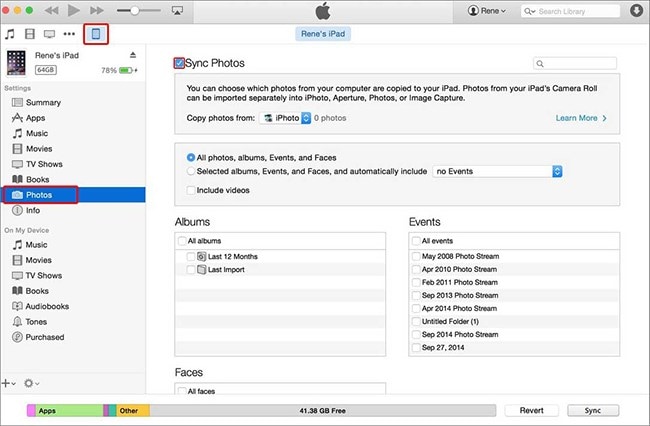
Step 7 – Navigate to the folder where all your extracted files are.
Step 8 – Now you have to choose whether you want to sync "All photos and albums" or "Selected albums"
Step 9 – Lastly, hit on the Sync button at the bottom right of the window.
Method 2: Download Google drive on iPhone 8 and save the photo one by one
Now, here in this guide, we’ll be installing Google drive on iPhone 8 and then manually, download all photos to the camera roll. This method is quite time consuming and is not preferred much by users.
Step 1 – Download and install the Google Drive app on your new iPhone 8. Launch the app once installation completes.
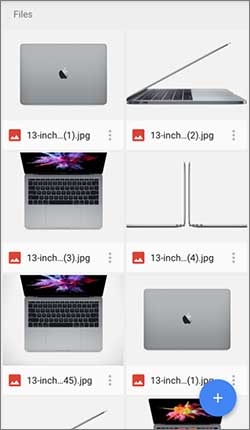
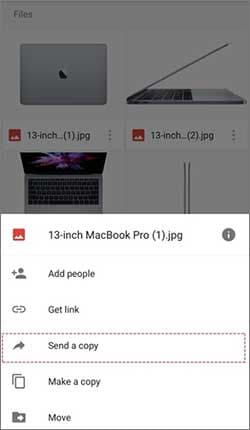
Step 2 – Locate the desired photos and tap on the "3 vertical dots" beneath the photo’s thumbnail.
Part 5: Transfer Contacts from Android to iPhone 8 Transfer Using Gmail (Contacts only)
Gmail is a well known service provided by Google and is very effective in backing up all your contacts from any of the smartphone devices, be it Android or iOS or Symbian. Let’s discover how one can use it to contacts transfer from Android to iPhone 8.
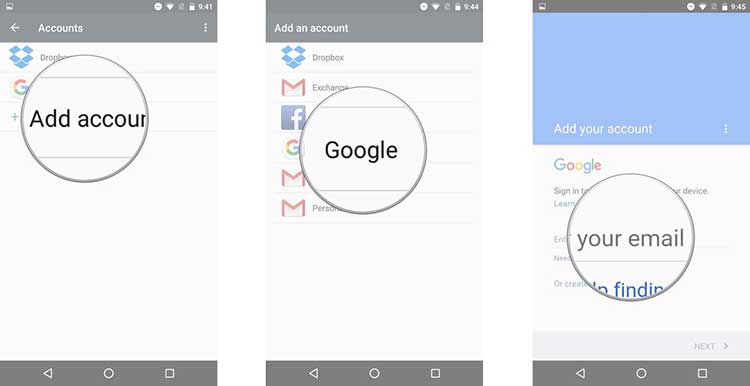
Step 1 – On your Android device, Get into "Settings", hit the "Accounts" option and tap on "Add Account" and lastly, tap on "Google". Now, punch in the Gmail account credentials to which you wish to backup your contacts..
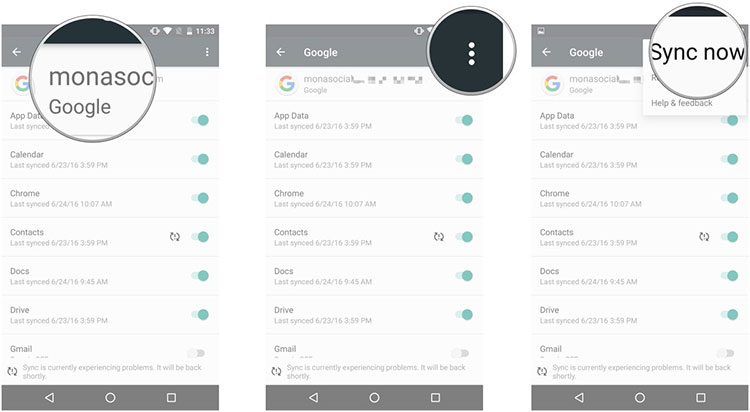
Step 2 – Next, make sure that the Contacts is checked on the list provided and then tap on "3 vertical dots" on the upper right corner. Finally, hit the "Sync Now" option.
Step 3 – Grab your iPhone 8 now and open "Settings", then tap on "Mail, Contacts, Calendars" and then hit "Add Account". Now, tap on Gmail and enter the same credentials you entered on your Android Device.
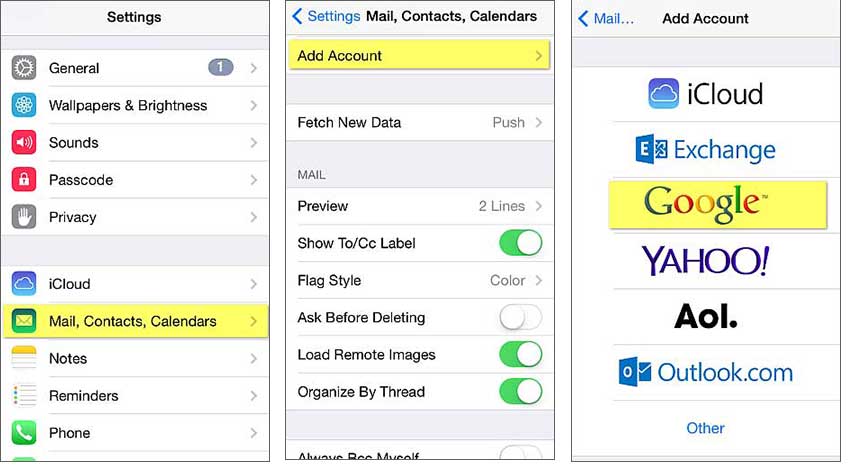
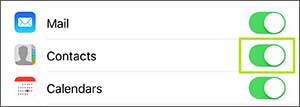
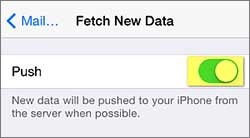
Step 4 – Lastly, make sure if the "Contacts" switch is turned on or not. Now, head to "Mail, Contacts, Calendars" and look for "Fetch New Data" to turn on the "Push".
That’s it! All your contacts will then be transferred from Android to iPhone 8.
