Part 1: How to Transfer Photos from iPhone to iPhone in 1 Click
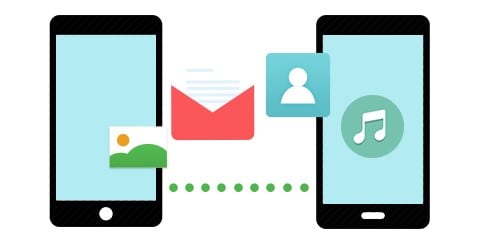
To transfer iPhone photos to iPhone (iPhone 6S included), we highly recommend you to use dr.fone for Mac (or dr.fone for Windows). It is a powerful yet easy-to-use phone transfer tool that allows you to transfer any data from iPhone to iPhone. Only 1 click is need to process the transfer in high speed. You can get many benefits with this phone to phone transfer.
Why Choose Phone Transfer:
- 1 click transfer contacts, photos, music, videos, messages, call logs, and more from phone to phone.
- Easily transfer data between iPhone iOS, Android, Windows phone, Blackberry and more.
- Safely backup phone data to your Mac or Windows PC.
- Restore phone data from iTunes and iCloud backup.
Steps on How to Transfer Pictures from iPhone to iPhone
Step 1: Run the phone transfer
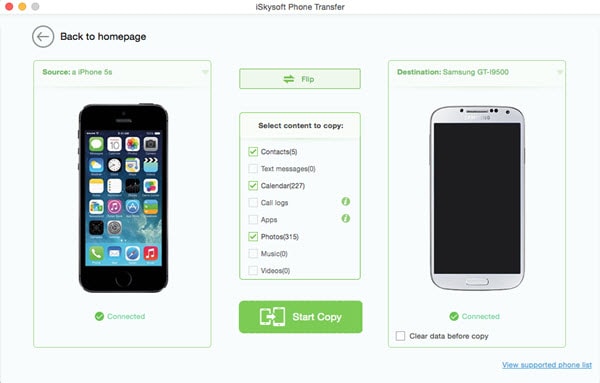
After downloading and installing the phone transfer, launch it. In the main interface of the program, click the "Phone to Phone transfer" tab to open the transfer window.
Step 2: Connect iPhones to the computer
And connect your two iPhones to your computer. You can view your two phones in the program main interface.
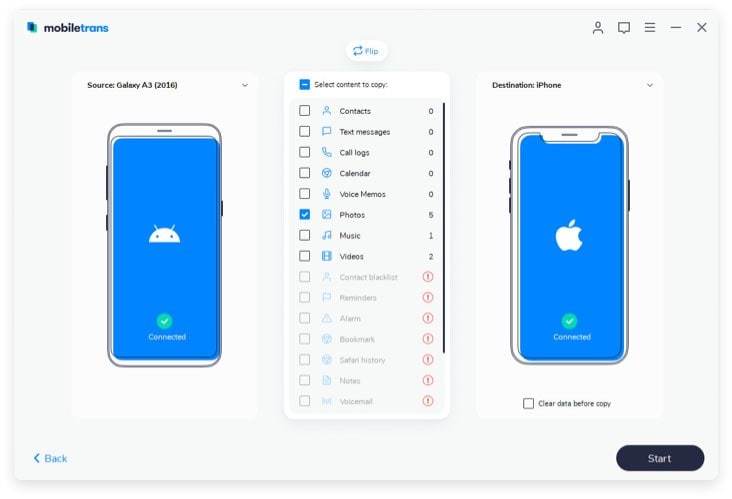
Please confirm the source phone, and if it is not correct, click "Flip" to change the position of the two phones.
Part 2. How to Transfer Photos from iPhone to iPhone Using iTunes
Please note that this method will only work if you have disabled the iCloud on your iPhone. However, disabling the iCloud on your iPhone may result in deleting the photo stream from the iPhone. So, you should be very careful while using this process.
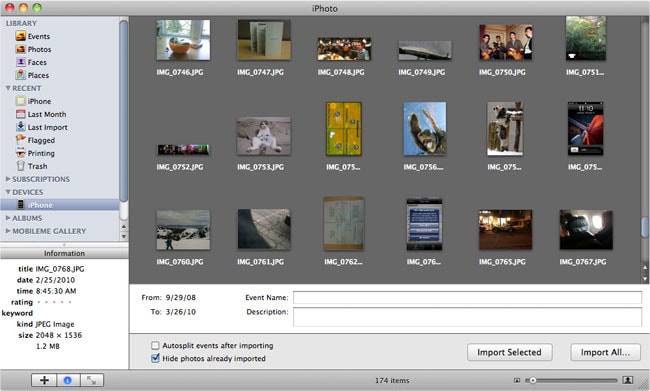
Step 1: First of All, connect that iPhone from which you want to import the Photos. On Mac, Open iPhoto and select the photos which you want to copy to another iPhone and Click on “Tap Selected Photos”. On windows, open windows explorer and double click on iPhone. Open the album from which you want to copy the photos. Select the photos and copy them on your PC somewhere else, for example: In “My Pictures”.
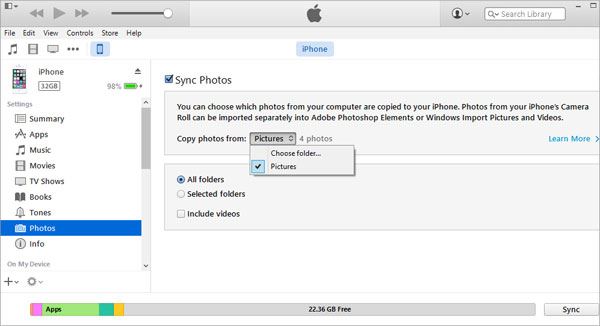
Step 2: Now, remove the first iPhone and connect the second iPhone and open up the iTunes. From the Top, select the iPhone and Click on “Photos” in the left menu. Now, Select the “Sync Photos” and select the folder from which you want to transfer the photos to the second iPhone. Here we will select the “Pictures” from documents because the photos were copied to the “Pictures” in the documents folder. After selecting it, click on “Sync” or “Apply” button at the end of iTunes.
Advantages and disadvantages of copying photos from iPhone to iPhone using iTunes:
Practically, there is not even a single significant benefit of using iTunes to transfer photos from one iPhone to another iPhone. But it is usable for the older iPhone such as iPhone 3Gs, 4 or 4S. One significant point is that this process will only work when you have turned off iCloud on your iPhone which is done by only a very few users now-a-days. If the iCloud is turned on, you will not be able to sync photos from iPhone to another iPhone. Moreover, it is a very lengthy, time consuming and hefty process because first you will have to copy photos from one iPhone to PC and then will use iTunes to transfer photos from PC to another iPhone.
In Conclusion, the best way of transferring photos from one iPhone to another iPhone is by using dr.fone which will not only save the time but it is also a very short process.
Part 3. How to Transfer Photos from iPhone to iPhone via Photo Stream
Just like dr.fone, another perfect way of transferring photos from iPhone to iPhone is using Photo stream. In this way, you can share as many photos as you want and you will not have to delete any data on your iPhone. All you have to do is to make sure that both iPhones are using the same iCloud account. In this way, sharing the photos will become very easy.
Before you continue, Make sure that you have enabled the Photo Stream on both iPhones. You can follow these simple steps to enable photo stream on your iPhone.
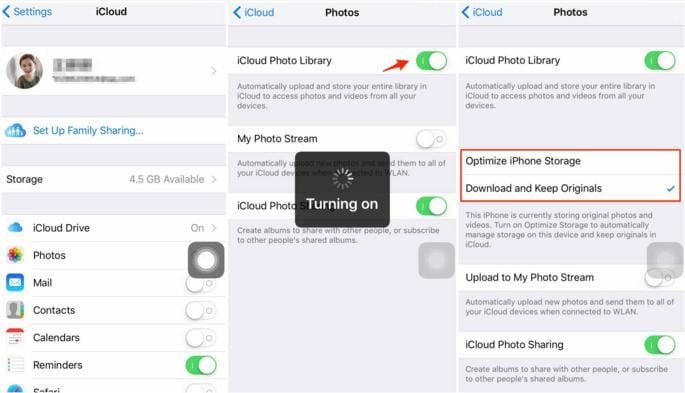
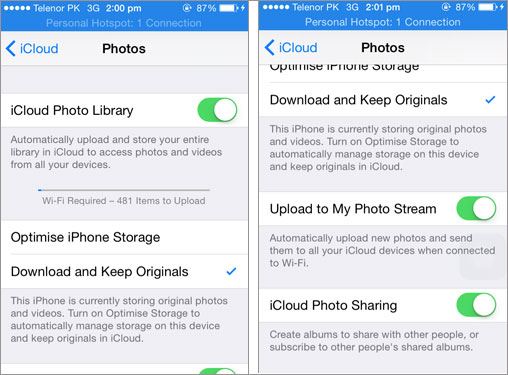
Go to settings, scroll down and tap on “iCloud”. Click on “Photos” and make sure, you have enabled the “iCloud Photo Library”. Scroll down and Enable the “Upload to My Photo Stream”. That’s it! Enable the Photo Stream on another iPhone. After enabling the Photo stream on both iPhones. Go to Photos and Tap on Albums. Here you will find another Album by the name of Photo Stream on both iPhones.
Part 4. How to Transfer Photos from iPhone to iPhone Using iCloud
iCloud allows you to transfer photos between iPhones. However, before transferring, you need to make sure the two iPhones should running iOS 8.3 or later. And both iPhones need to enable iCloud Photo Library. And you have to make sure the two iPhones go with the same Apple ID and have enought storage for the photos.Step 1. On your iPhone, go to "Settings" and tap the "iCloud" option.
Step 2. Tap on "Photos" and slide the "iCloud Photo Library" ON.
Step 3: You can make a choice on "Optimize iPhone Storage" and "Download and Keep Originals".
After all above steps, the photos will be uploaded to iCloud. Now you can get the photos from an All Photos album in the iPhone’s Photos app.
