Is There Any Way to Remove Background from Image?
It is not always that Gimp will be flawless when removing background from a photo or undertaking general editing. There are many problems common with the program. One of the problems is having the active layers invisible. This can result in having the layer being blocked by others or its visibility is turned off. Adding a layer mask to the image is another problem as well as inability to view the saved image in a separate program.
The Simplest Way to Remove Background - PhotoScissors
PhotoScissors will always offer you a simple option for removing background from your images. It's not a very popular program compared to many others in the market but its suitability will drive you into considering it for personal use. You don't have to worry about the annoying backgrounds in your still images when this software is available for consideration. If it's an object or even person that you want to cut out, you will not have any problems doing that so as to allow for easy background removal. PhotoScissors will allow you all the freedom that you need in removing background from a still image. Poor backgrounds in your images will always be an enemy that you must confront without fear and this program is there to help you achieve that with ease.
The following are the main features of PhotoScissors:- Inpaint - this one helps to reconstruct the image that has been highlighted by removing everything that is unwanted like text, watermarks and logos.
- PhotoStitcher - it's there to combine all photos that are overlapping and come up with a panoramic photo.
- iResizer - this feature will make sure you have edited the photo but important content like animals and people remain untouched.
Step-by-step Guide on How to Remove Background from Images with PhotoScissors
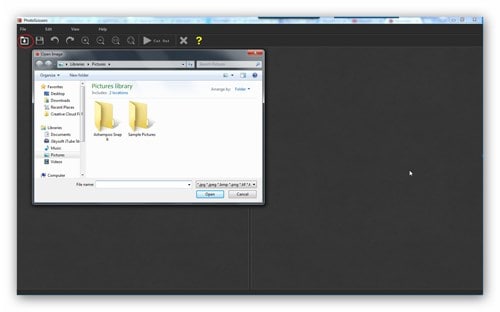
Step 1. Import Image
The program has to be downloaded and installed to your computer then you confirm its working perfectly. After you're done, import the photos you want to edit simply by dragging and dropping.
Step 2. Outline Your Photo
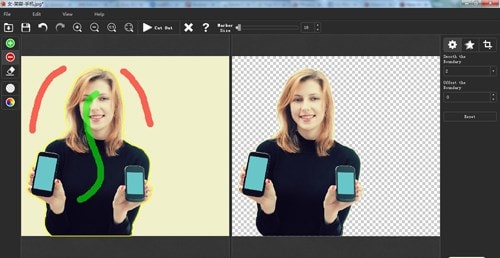
Marking out the sections you are to retain and those that you must remove which is basically the background. Use the in-app two-color marker for doing that. Even after outlining the editing area for your photo, you will have to go deep into details and cutout key areas like fingers and hair using a precise marker. These will be the areas where outlining only will not cover. The marker should be set to lower values with very accurate strokes. All that should concentrate on both the foreground and background.
Step 3. Actual Editing
Once you have set out all those parameters, the actual editing will be in line with what you have set out. PhotoScissors will apply all the changes you have made instantly so make sure there are no flaws. After that, you can have your final edited photo saved as PNG or JPEG whichever is compatible with your system.
Can I add backgrounds to photos using PhotoScissors?
Yes, it's possible to have backgrounds added to still images using PhotoScissors. The procedures are more or less the same as with removing background. This program has a wide selection of colors to ensure you settle on the most preferred one as your photo background.


