It is not a challenging thing removing background from still images using Inkscape. The program has its own tutorials that you will have to follow for a successful process. If you overlook anything, it will not deliver the desired results which will be only frustrating. This program is very professional in the way it edits photos and works on Linux, Mac OS X and Windows platforms.
- Part 1. How Can I Remove Background Using Inkscape?
- Part 2. The Quick Way to Remove Background You Need to Know
Part 1. How Can I Remove Background Using Inkscape?
Inkscape has very many filters for selection which promotes creativity. It offers the opportunity to add new functions and it comes with a good selection for editing tools while the intuitive interface makes up for everything good about Inkscape. An extremely user-friendly interface is the main feature that will attract you into using this program for editing your photos. It is well accessible and easy to navigate through. There is also the drawing feature of Inkscape for outlining photos. Some of the filters are not very effective as you might expect while extensions are difficult to install within the interface.
Are you wondering on how it is possible to erase backgrounds from still images using Inkscape? Well, worry no more because this guideline will highlight all the steps involved to make it simpler for you even as a beginner:
- Step 1. Add Image - Start by installing Inkscape to your computer and launch it. When successful, click on "File" from the menu bar and then "Open" to allow you to add the image you are going to edit.
- Step 2. Open Layers - Once you have the image in the program, go to the menu bar again and click on "Layer" and then "Layers" for the palette to appear.
- Step 3. Select Layers - Lookout for the layer that has the background image and then selects that. You will have it easy because the layers have buttons that make it easy maneuvering through as you edit your photo.
- Step 4. Erase Background - When you click on the "Delete" button, the background layer will be erased completely. Make sure you have saved your edited file with a compatible format.

Part 2. The Quick Way to Remove Background You Need to Know
Never struggle again to get backgrounds out of your still images when there is PhotoScissors available for your free consideration. Most of the programs available in the market are not that much reliable and it's a gap that PhotoScissors promises to fill in the best way possible. It will make sure you don't go through a lot of hassle in erasing background from your photos. It is very easy to use with a user-friendly interface, can process multiple images at the same time and has a guarantee of high quality for edited images. Furthermore, it's very affordable with the alternative of a free version.
Most Useful Features of Teorex PhotoScissors:- Shadow color - this is a feature common with latest versions of the program.
- Setting image as background - that will make everything easier for you.
- Upgraded edges handling - this is in line with modern technology advancements.
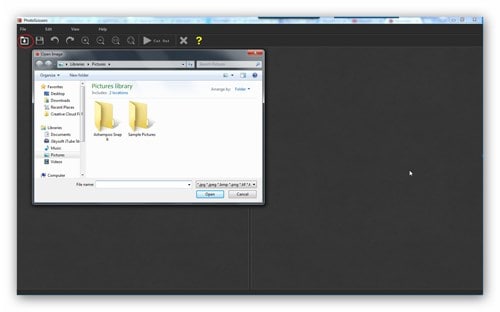
Step 1. Add Images
You must use the given instructions for the program to work effectively. When installed, launch the program and then browse through the computer to add your image for editing.
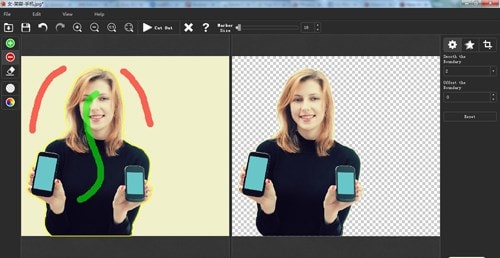
Step 2. Mark out Image
You must be certain that the background and foreground of the image are separated from each other for easy removal. There are green and red markers to use for that.
Step 3. Apply Changes
Applying all the changes made to the image will be the last step and save with the right format.


