Does Anyone Know How to Remove Background in Pixelmator?
Even for those people who don't know how to use Pixelmator in removing backgrounds from photos, there are many tutorials that offer good guidelines. You can hook up with one in case you are a new user and it will ease your experience.
- Part 1. How Can I Remove Background Using Pixelmator?
- Part 2. Excellent Way to Remove Photo Background
Part 1. How Can I Remove Background Using Pixelmator?
Pixelmator is not a new software program in the market for editing photos. It is very powerful and can allow you to edit photos from mobile devices with ease and while on the move. It's full-featured so you will get almost everything that you want for your photo editing including removing backgrounds. You have your image background removed and it will be upon you to decide how to do with it. It can remain like that or you can add a different background but it's all for you to decide. Pixelmator has very many formats that are compatible and you will have to choose the one that suits your image storage. It comes with an intuitive interface, has very useful filters and editing tools. Moreover, it's affordable and has sharing options. However, new users might be intimidated when using this program because of the multiple options and it lacks zoom slider.
- Step 1 - It should all start by opening up the image that you are planning to edit and remove background. You should import the image in advance to an already installed program in your computer.
- Step 2 - From the tools palette of Pixelmator, you will get to see the "Magic Eraser Tool" which you will be required to select. This tool is the main secret and magic that makes it possible to remove backgrounds in Pixelmator.
- Step 3 - Using the eraser tool, click and then drag the image to a white background. It will turn to be transparent immediately and you can repeat that for another time if there is need.
![]()
Part 2. Excellent Way to Remove Photo Background
The interactive nature of this cutout tool makes it the ideal choice for removing backgrounds from photos with ease. PhotoScissors has all the editing tools you need to have the best experience while its features are top-notch to guarantee high quality for edited photos. Don't feel intimidated in case you are using PhotoScissors for the first time to remove background from your photo. You will get used to it with time for it's user-friendly.
Key Features of Teorex PhotoScissors are:- There is additional options for changing shadow color.
- Enhanced edges handling.
- Additional options for setting image as background.
Step-by-step Guide on How to Remove Photo Background with PhotoScissors
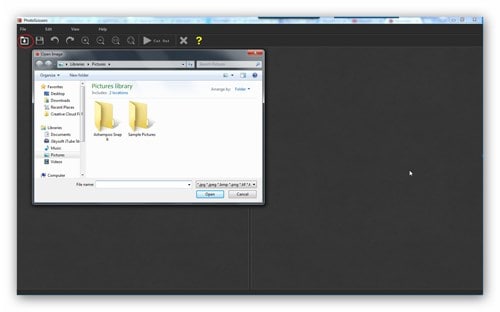
Step 1. Import Image
You are supposed to have the program pre-installed but if it's not, this step will be critical. Download PhotoScissors from the best online site and install to your computer to get started. Ensure you have followed all the given installation instructions for the program to function properly without hitches. When you're done, import your images to the program.
Step 2. Outline Your Image
In this one, you will use the red and green markers offered by PhotoScissors to mark out the foreground as well as background of the image to edit. The foreground will remain while the background will be erased, so make sure you have a clear outline of that. Further, refine the outlined areas to leave to it that all small sections have been covered.
Step 3. Apply Changes
Once you have applied the changes made to your image, the final step will be saving the edited file. You should use a format that is compatible and the good thing is that PhotoScissors has support for a wide variety of file formats for photos. Choose the best one from that.


