QuickTime is a free to download multimedia framework designed and developed by Apple Incorporated. It's capable of handling various formats of digital video, picture, sounds, panoramic images and interactivity. In short, it supports all of the most popular formats on the internet for news, sports, education, movie trailers and other forms of entertainment. Many other third party programs now rely on QuickTime to be installed in order to function correctly including, iTunes and iMovie.
- Part 1: How to Download QuickTime on PC
- Part 2: How to Install QuickTime in Windows
- Part 3: How to Check and Update QuickTime in Windows
- Part 4: How to Uninstall QuickTime on PC
Part 1: How to Download QuickTime on PC
As for the Windows users, you also can download QuickTime from Apple directly, or via some of the other trusted free download websites available on the internet. We've set these out for you in a little bit more detail below:
QuickTime: Apple official download
QuickTime 7.7.5 can now be downloaded for Windows directly from the Apple website. This version of QuickTime improves security, and is recommend for all users on Windows based computers. To download this version of QuickTime for your Windows based computer please click here.
QuickTime: Download it from other websites (free)
SOFTONIC: This website also provides ratings for QuickTime, the number of downloads this month and full details of the file size and its pros and cons. QuickTime can be easily downloaded here.
TOM'S GUIDE: This website provides detailed information about related products, together with the file formats that QuickTime supports. It's well worth checking out.
Part 2: How to Install QuickTime in Windows
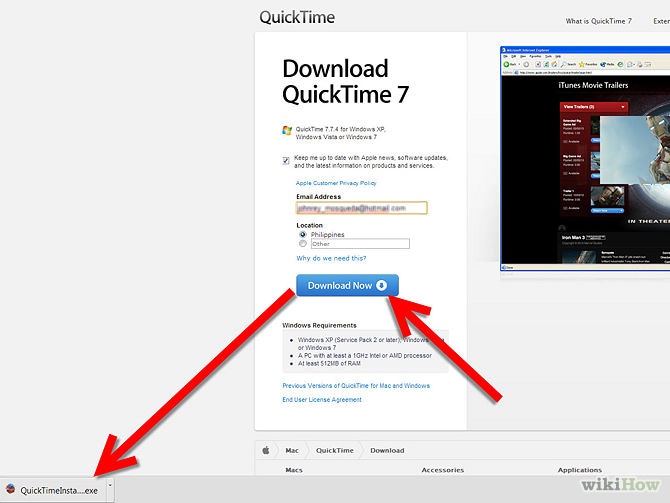
In order to install QuickTime you've downloaded, make sure that you are connected to the internet. You will need to download the installer via one of the links referred to above (making sure that you download the Windows version of QuickTime).
Steps of QuickTime installation
Step 1. When prompted choose a language and fill in the contact information if you would like to be kept up to date with updates and offers. Then click the option to download QuickTime, and your web browser will download the installer.
Step 2. Once the installer has been download click on the file and a compressed (zipped) file warning notice will appear. Click extract all and the next screen should be the QuickTime installer welcome page.
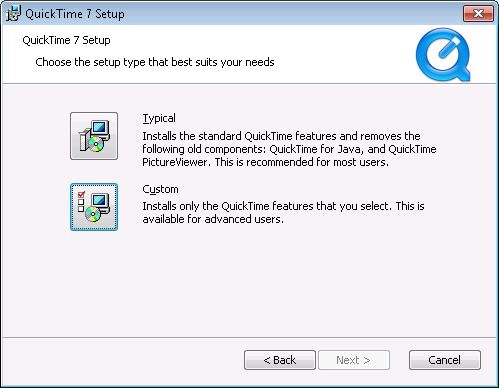
Step 3. Then simply click next and choose the destination where you want QuickTime to be installed. You will then need to decide which type of installation you want to install, there are three options Minimum, Full and Custom. Click next and the QuickTime plugin window should appear together with the registration window, and the setup window.
Step 4. When you have completed these screens with the correct information you will be given the option to install the QuickTime software. Click continue. The next screen you will be prompted with is a screen confirming that QuickTime has been installed successfully.
How to test QuickTime on PC
After you have installed QuickTime, it is essential to test it to make sure that it has been installed correctly. You should carry out a QuickTime Test that allows you to playback any steaming video or HD movie contents immediately embedded on a web browser, i.e. Safari. If QuickTime has been installed correctly you will get a message saying, QuickTime has been successfully installed.
Troubleshooting
If you are having trouble installing QuickTime on your Windows computer it might help to do the following, as these are common problems:
1. Empty your temporary folder, and restart your computer. To do this, you should choose Start > My Computer and then open the C: Drive from there go to Documents and Settings and open the folder with your username. Open your Local Settings Folder and choose Tools > Folder Options before clicking the View Tab and selecting Show Hidden Files and Folders. Next you will need to right click on the Temporary Folder and then click Delete (in the configuration dialogue that appears next, click yes). The simply restart your computer.
2. Disable any conflicting software. In Windows, sometimes some background processes can cause problems for QuickTime (as well as other processes). These problems can prevent applications such as QuickTime from working properly, or installing. You can disable any processes that are getting in the way by starting your computer to a selective startup using MSConfig. Additionally, if you have security software installed on your computer and you are having issues installing QuickTime for Windows, you may also need to disable or uninstall the software while troubleshooting your installation problems.
Part 3: How to Check and Update QuickTime
Steps of checking the version of QuickTime on pc
Step 1. Click the Start Menu and choose Settings > Control Panel.
Step 2. You should then open the Control Panel window and select the option for QuickTime.
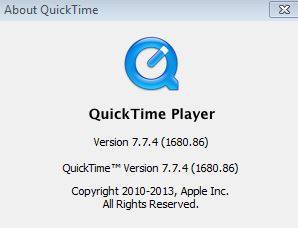
Step 3. The next step is to select Registration from the pop-up menu – the QuickTime Key will reveal which edition of QuickTime is installed on your computer. If you want to find out what version of QuickTime is installed, please repeat the same process but select the About QuickTime option instead.
How to update to the latest version of QuickTime in windows
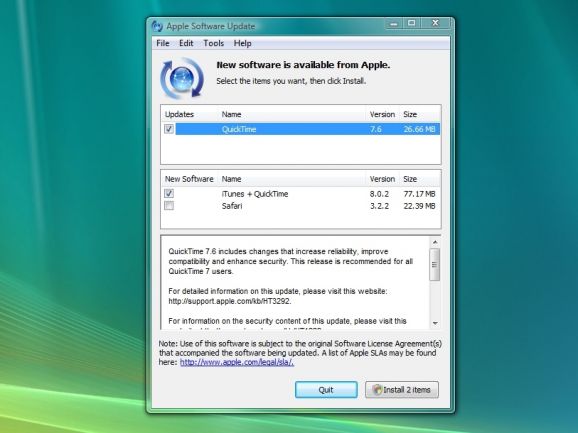
From time to time Apple releases newer versions of QuickTime. These can be downloaded (assuming you are connected to the internet). If you are connected to the internet and QuickTime is open, typically you will be notified that a newer version of QuickTime is available by your Windows Computer and you will then be prompted to start the download. However, if you want to check for an update manually, choose: Preferences > QuickTime Preferences > Update Check. You Windows Computer will then check to see if there are any updates available. If so, all you have to do is follow the on-screen prompts and the newest version of QuickTime will be installed.
If you require help during any stage of this process (and you have QuickTime open) you can see instructions for performing tasks by choosing: Help > QuickTime Player Help. From there you will be able to type in 'update' and QuickTime Help will bring up a full list of instructions in order to guide you through the process.
Troubleshooting
If you are having problems installing updates for QuickTime (and reinstalling or repairing it does not work) we would recommend not only to remove QuickTime from your Windows computer but also any related components, reboot your Windows computer, remove any target installation folders and then attempt to reinstall QuickTime from the beginning.
Part 4: How to Uninstall QuickTime on Windows Computer
Steps of uninstalling QuickTime on PC
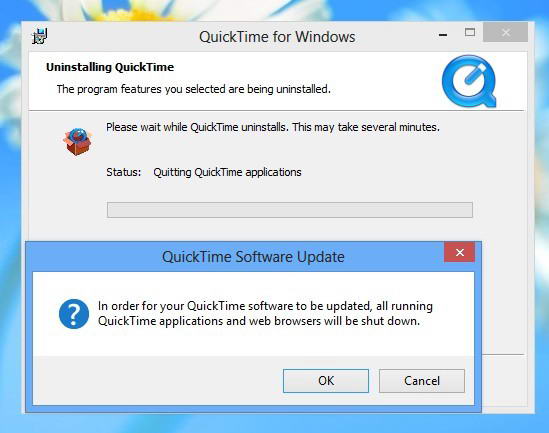
Open the Control Panel as shown in the picture below. You then need to go to the Add or Remove Programs area which is shown circled red on the picture, and locate QuickTime in the list, and select it. Click the Change/ Remove Button. If you have done that right a command box will open asking you if you want to completely remove QuickTime for Windows. You need to click that it is ok to remove it from Windows and then the Windows installer will begin to remove QuickTime from your Windows computer. When the process has been completed your computer will send you a message saying that the uninstallation is complete.
Troubleshooting
If you have deleted QuickTime from the program files, then the entry in the add/remove list will not function. It will try to access the uninstaller located in the program files (which of course is no longer there). In order to uninstall QuickTime in this situation, you will have to reinstall QuickTime and then only once it has been installed again, and repaired itself, will you be able to remove it via the entry on the add/remove list.


