When you want to share a game play with your friends, you can use a screen recording tool to do so. The same case applies if you want to show someone how to use certain software, or create an online video tutorial. With the BSR Screen Recorder and Filmora Video Editor, you can be sure that you will output high definition video that will please your audience. High definition video also brings out the finer details of your computer screen.
- Part 1: Step-by-step Guide to Record Screen using BSR Screen Recorder
- Part 2: Recommend BSR Screen Recorder Alternative - Filmora Video Editor
Part 1: Step-by-step Guide to Record Screen using BSR Screen Recorder
The following is a step-by-step process showing you how to create videos from your screen using BSR Screen Recorder.

Step 1) Install and launch the application. After downloading the installer, click on it and allow it to launch the tools when the installation is complete. Alternatively, you can launch the recorder from the Start Menu.
Step 2) Using the wizard. When you launch the program, the Wizard will be launched. This is a great starting point for you if you have never used the program. However, if you are familiar with the tools of the program, you can select “Do not open at startup”.
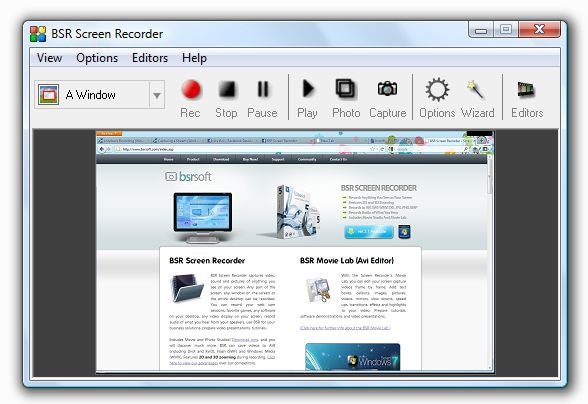
Step 3) Set your recording options. You will be presented with a number of options to choose from. These are:
A Region of the Screen – records selected region
A Window – records a window of your choice
Entire Screen – records the active screen
Multiple Region (Picture-in-picture) – records several regions into one video
Auto Pan – records where the mouse goes
Step 4) Set the output dimensions. Here you set the final resolution of the video.
Step 5) Set the audio and mouse cursor. Here you select whether you want any audio in the video, and also whether the movement of the cursor should be recorded.
Step 6) Record your video. Hit the “Record” button and the recording screen will turn red. You will have a set of buttons on the lower right side of the screen which will allow you to control the recording.
Step 7) Stop and save your video. Stop the recording by hitting the “Stop” button, and then you can decide whether to directly save your video, or whether you would like to edit it first.
Part 2: Recommend BSR Screen Recorder Alternative - Filmora Video Editor
For professional screencast video, Filmora Video Editor is one of the best tools available. It allows you to have full control of the recording of your videos. The video can be saved on the computer or uploaded to a video site. Game players and online tutors can now share their computer screen with fellow players or students using this powerful tool.
Key Features of Filmora Video Editor
- High definition video – This is one of the best features of this tool. Your videos will be crisp and clear, allowing your viewers to see every little detail.
- Control of recording area – You can decide which parts of your screen will be recorded. You can also record the full screen should you want to.
- Several recording sources – You can record video from your screen, chat, YouTube and other sites which stream video instead of allowing downloads.
- Audio recording – You have full control of the source of your audio recording; you can record from the microphone or system.
How to Record Screen with BSR Screen Recorder Alternative
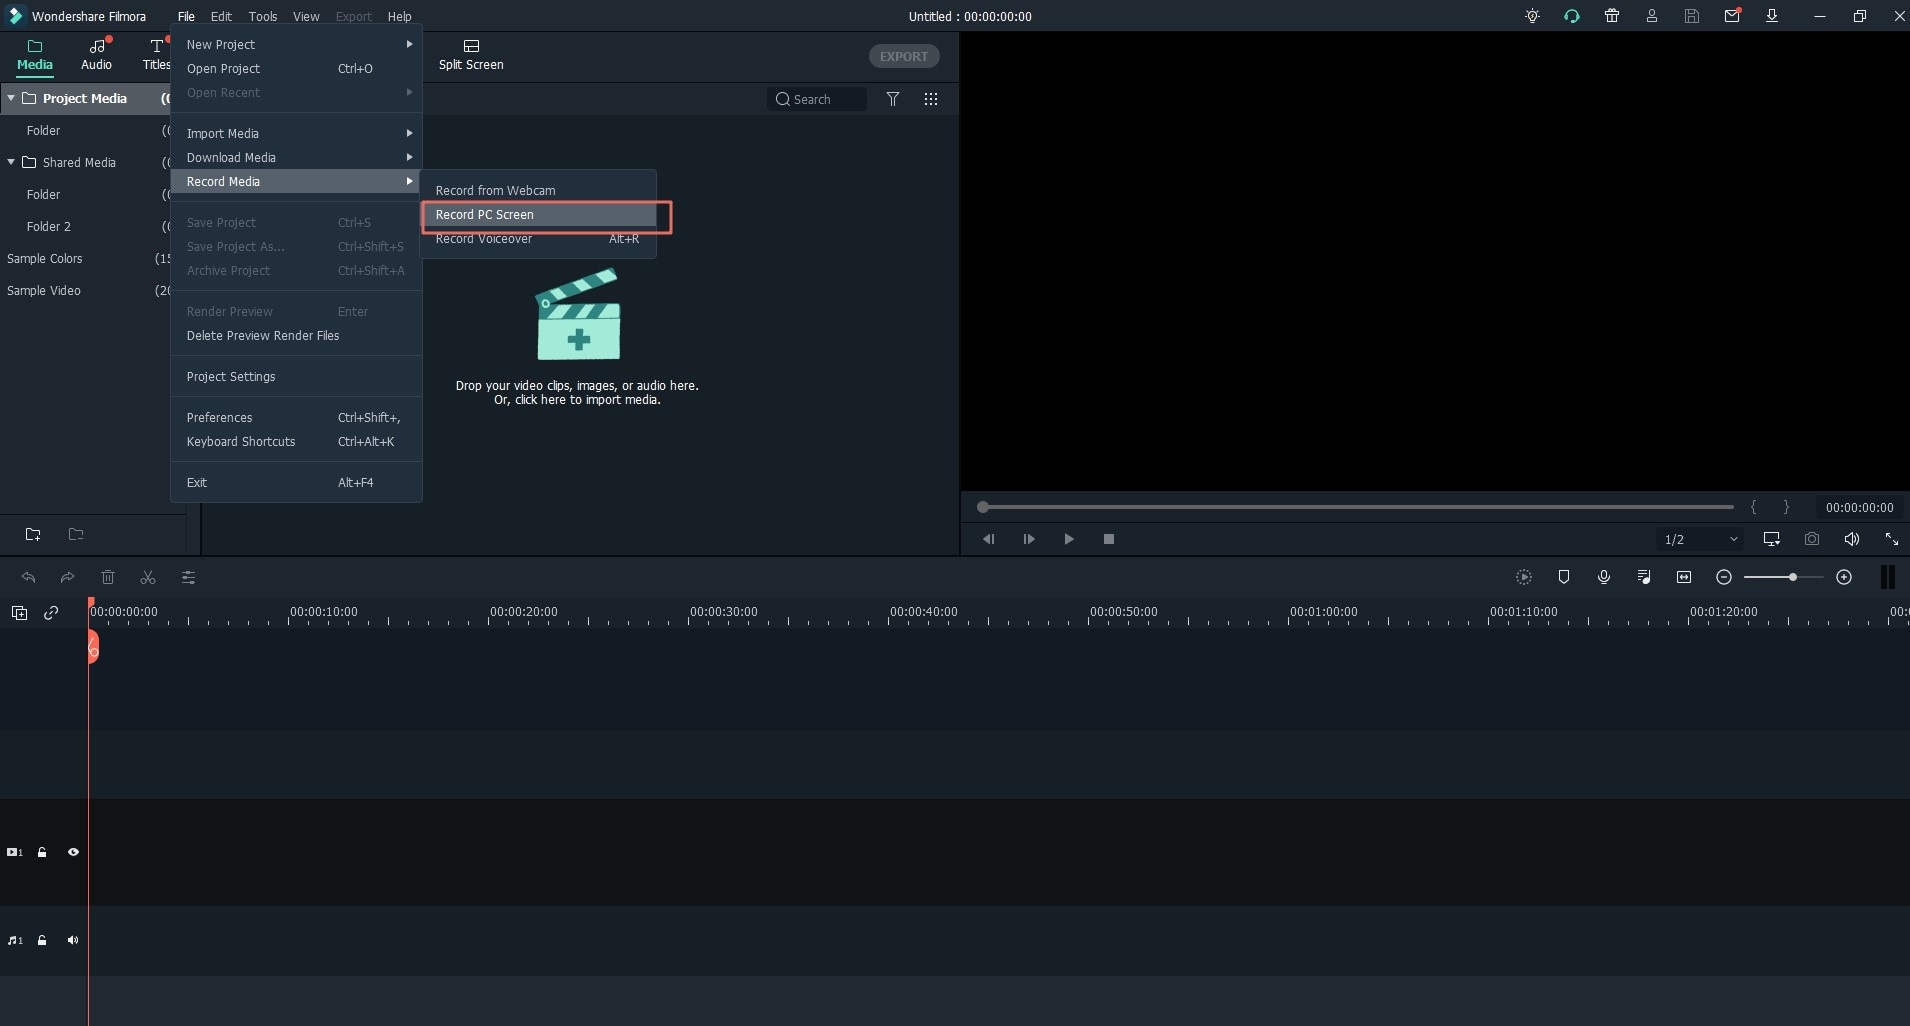
Download the installer and then click on it. After the program has been installed, you can start it from the Start Menu, or allow it to launch automatically.

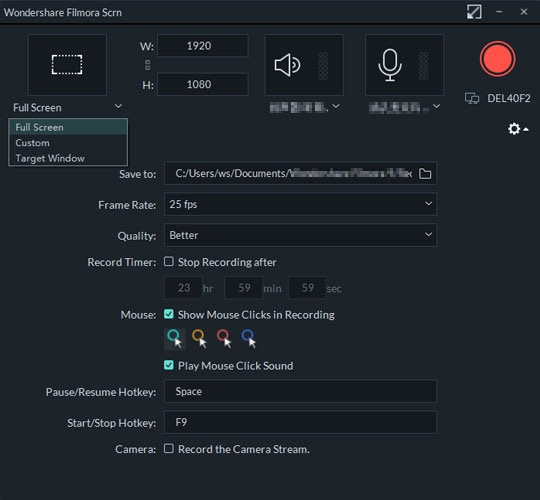
Step 1: Select the recording region
You can choose to select the full screen or define a particular area of the screen. Simply click and drag the mouse to define the area that you want to record.
Step 2: Make your audio settings
Select whether you want to record from your microphone or system. When you are on a chat application, you should choose both so you can record your speech and also that of the other person(s) at the other end. If you are creating a video tutorial, you should only use the microphone. For games, you should use both; and when recording videos from streaming sites, use the system audio only.
Step 3: Record the video
After you have defined the recording region and created your audio settings, simply click on the “Record” button to start your recording.

Step 4: Save your recording
When you are done with recording, hit the “Stop” button and you will be presented with several options. You can choose to upload the video, edit it, or save it as it is to your hard drive. The video can only be saved in .WMV format; if you want other formats, you will have to convert it later.


