What is a Camtasia screen Recorder?
It is a multipurpose screen Recorder that lets you record a video of whatever part of your computer’s screen you need, whether you need a video of a full desktop, windows or even specific regions of your screen. This software makes your work easier by letting you record whatever you need and as if that is not enough, it gives you a benefit of editing your recording. It enables you to import and edit the audio and the video separately. It will then help you export the video in different formats such as MP4 or AVI.
- Part 1: Record Screen Using Camtasia Screen Recorder
- Part 2: Recommend Camtasia Screen Recorder Alternative
Record Screen Using Camtasia Screen Recorder
Wondering how the Camtasia Screen recorder is used? First, you must install the Camtasia software on your computer.
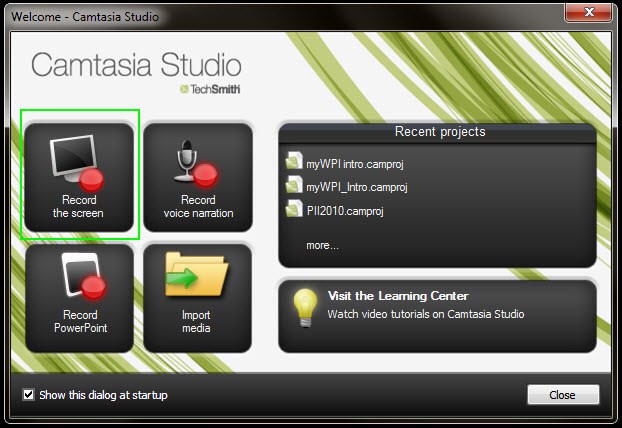
First, you should choose the content that you want to record, whether it is in Microsoft excel, Ms Word, or even on the desktop. When you click on the "Record the screen" button, it will give you the option of either to record the full screen or either to customize it to a smaller size. The better option is to customize it to give you a better view of what to record

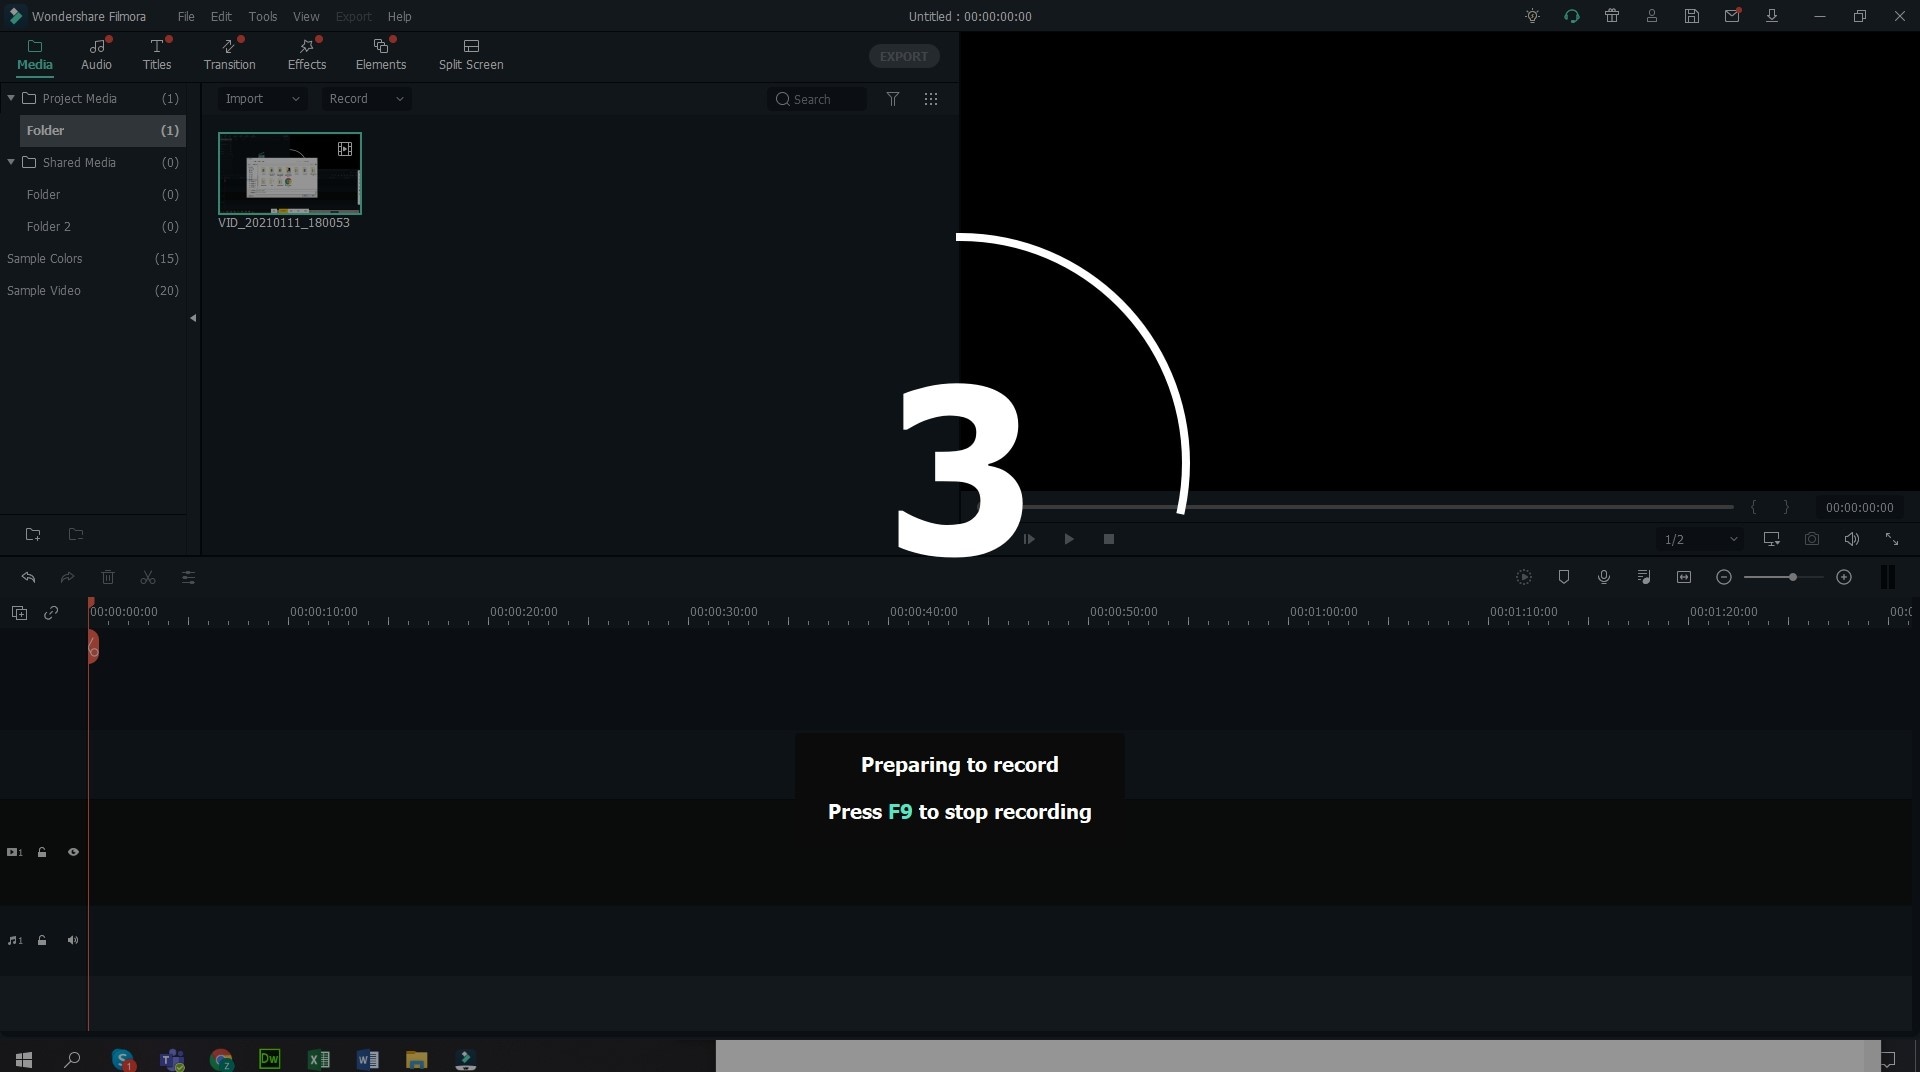
After customizing the content, you press the "Record" button. Recording will start after three minutes of preparation. When done recording the content, you can use F10 button to stop the recording and adjust the volume as well.
When you are done recording you will get a preview window of what you recorded. This is where you have the chance of editing the recording to your suited needs, to get the perfect content to serve its purpose.
You can save your content appropriately by choosing a name for it and save it in your desired location.
Recommend Filmora Screen Recorder Alternative
Apart from Camtasia Screen recorder, did you know that there is software that plays almost a similar role? Ever heard of Filmora? Filmora Video Editor gives you the option of recording the desired portion and size of whatever you want to record just like the Camtasia screen recorder, gives you the option of editing it to your satisfaction. You can record Skype chats, YouTube videos, internet tutorials and even conference meetings.

Key Features of Filmora
- It comes with a feature known as the “blue-light”. This feature will give you the best quality of the images not forgetting the quality of the sound.
- It will give you the option of choosing your desired size by adjusting the screen size and even the option of capturing a certain portion of the screen if you don’t want to capture everything on your screen.
- This software allows you to capture and record videos such as Skype chats and even record meetings and one-on-one lectures with the use of its microphone feature.
- Aiseesoft has a "System audio" button that will allow you to do that without the use of the ‘microphone’ feature for a clear sound of the recording.
- The best part of it is the fact that it has an interface that is user-friendly. You don’t have to struggle when using this software. A first timer can easily use this software without having any difficulties.
Step-by-step guide to record screen on Windows PC using Camtasia Screen Recorder Alternative
As usual before mastering the art of using the software, you have to install the software in our computer first. The following is step-to-step guide on how to use Filmora Video Editor.
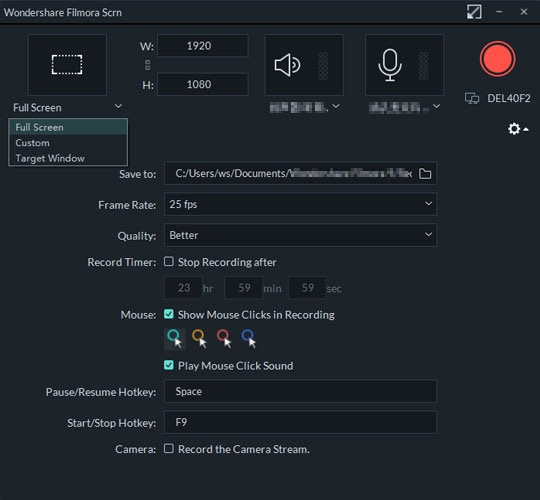
First, you have to select the part you want to record on your computer. Filmora will also give you the option of customizing whatever you want to record. You can record the full screen or choose a smaller part as long as you getting the best of what you need. If it is a recording that is meant to be uploaded to the internet, it is always advisable that you customize your recording.

Secondly, consider whatever you are going to record. If it is a YouTube video, a movie or music from a site such as iTunes for example, you will only have to click "System audio" button. You don’t need interference from the noise contributed by the microphone most probably. That will ensure you get the best of the recording. Contrary to that, if you are recording a Skype chat or rather a one-on-one lecture, you will have to click on both the "System audio" button and also the "microphone" button as well.
After that, the choice will be yours. If it is a direct recording like a lecture, you will click on the "Recording" button direct, but if it is an online recording like a YouTube video, you will have to open the link first before recording it. When the recording part is done, you can choose to view the video by using other formats such as MP4 or even audio formats such as MP3 by converting it using an application like MP3converter.

Lastly, you can save the recording by clicking on the "Export" button and then choose a desired name for the file. You will be probably good to go. You can now upload your recording or use it for whatever purpose you want to. Pretty impressive, right? Now you know.


