Fraps Screen Recorder is a Windows application that is universally used for capturing screens during game play, and outputting the result as a video. Currently it supports games that use OpenGL and DirectX graphics technology. It is great for benchmarking, capturing screenshots and also creating instructional videos. The videos have an outstanding high definition, ideal for showing people just how a game is played.
- Part 1: How to Record Screen with Fraps Screen Recorder
- Part 2: Recommend the Best Alternative to Fraps Screen Recorder
Part 1: How to Record Your Screen using Fraps Screen Recorder
The Fraps Screen Recorder is quite easy to use, and you start and stop recording with just a simple click of a button.
Step 1) Install and launch the application. Launch Fraps from your Start Menu after you have downloaded and installed it.
Step 2) Using the Fraps interface. After launching the program, you will get a small window, which stays on top of any other open window; this is the window in which you will adjust all Fraps settings.
Step 3) Select the Movies option. At the top of the window, you will find the “Movies” tab. Click on it so you can adjust the settings of your video recording.
Step 4) Set the output settings. By default the video will be saved in the same folder that your Fraps tool is installed. Change this setting if you want it to be saved in another folder. You should also set your hotkey for starting and stopping the recording; by default it is F9. You should also set the frames per second that you want the video recorded in. You should also set the resolution of the resultant video. All the video settings are quite straightforward.
Step 5) Set the audio. Select whether you want audio recorded with the video, and also decide whether to use the microphone or the system audio as your source Using both is best when you want to record your voice over the sound of the game playing.
Step 6) Record your video. Once you are satisfied with your settings, start the video and then hit the Hotkey that you selected to start the recording. You should get an overlay that shows you that Fraps is recording your session. If you do not get an overlay, then the game you are playing does not support Fraps.
Step 7) Stop recording and save your video. Using the same hotkey that you chose, stop the video and save it to your hard drive. Fraps does not encode video and the files tend to be very large. You should encode them before you upload them to the Internet; you will also save a lot of space on your computer.
Part 2: Recommend the Best Alternative to Fraps Screen Recorder
You are a fantastic gamer and want to share your expertise with your followers. To do this, you can use Fraps, but if the game you are playing does not support Fraps, then you can use Filmora Video Editor for the same purpose.
Key Features of Filmora Video Editor
- High definition video – You can be sure that every detail of your game play will be visible, thanks to the ability of this tool to record high definition video.
- Control of recording area – For purposes of game demo videos, you should record the full screen, but you can also decide to record a particular part of the screen too.
- Save video from streaming websites – You can now record the video that you usually stream from your favorite website and save it to your computer.
- Audio recording – Record audio from your microphone or system audio device with ease.
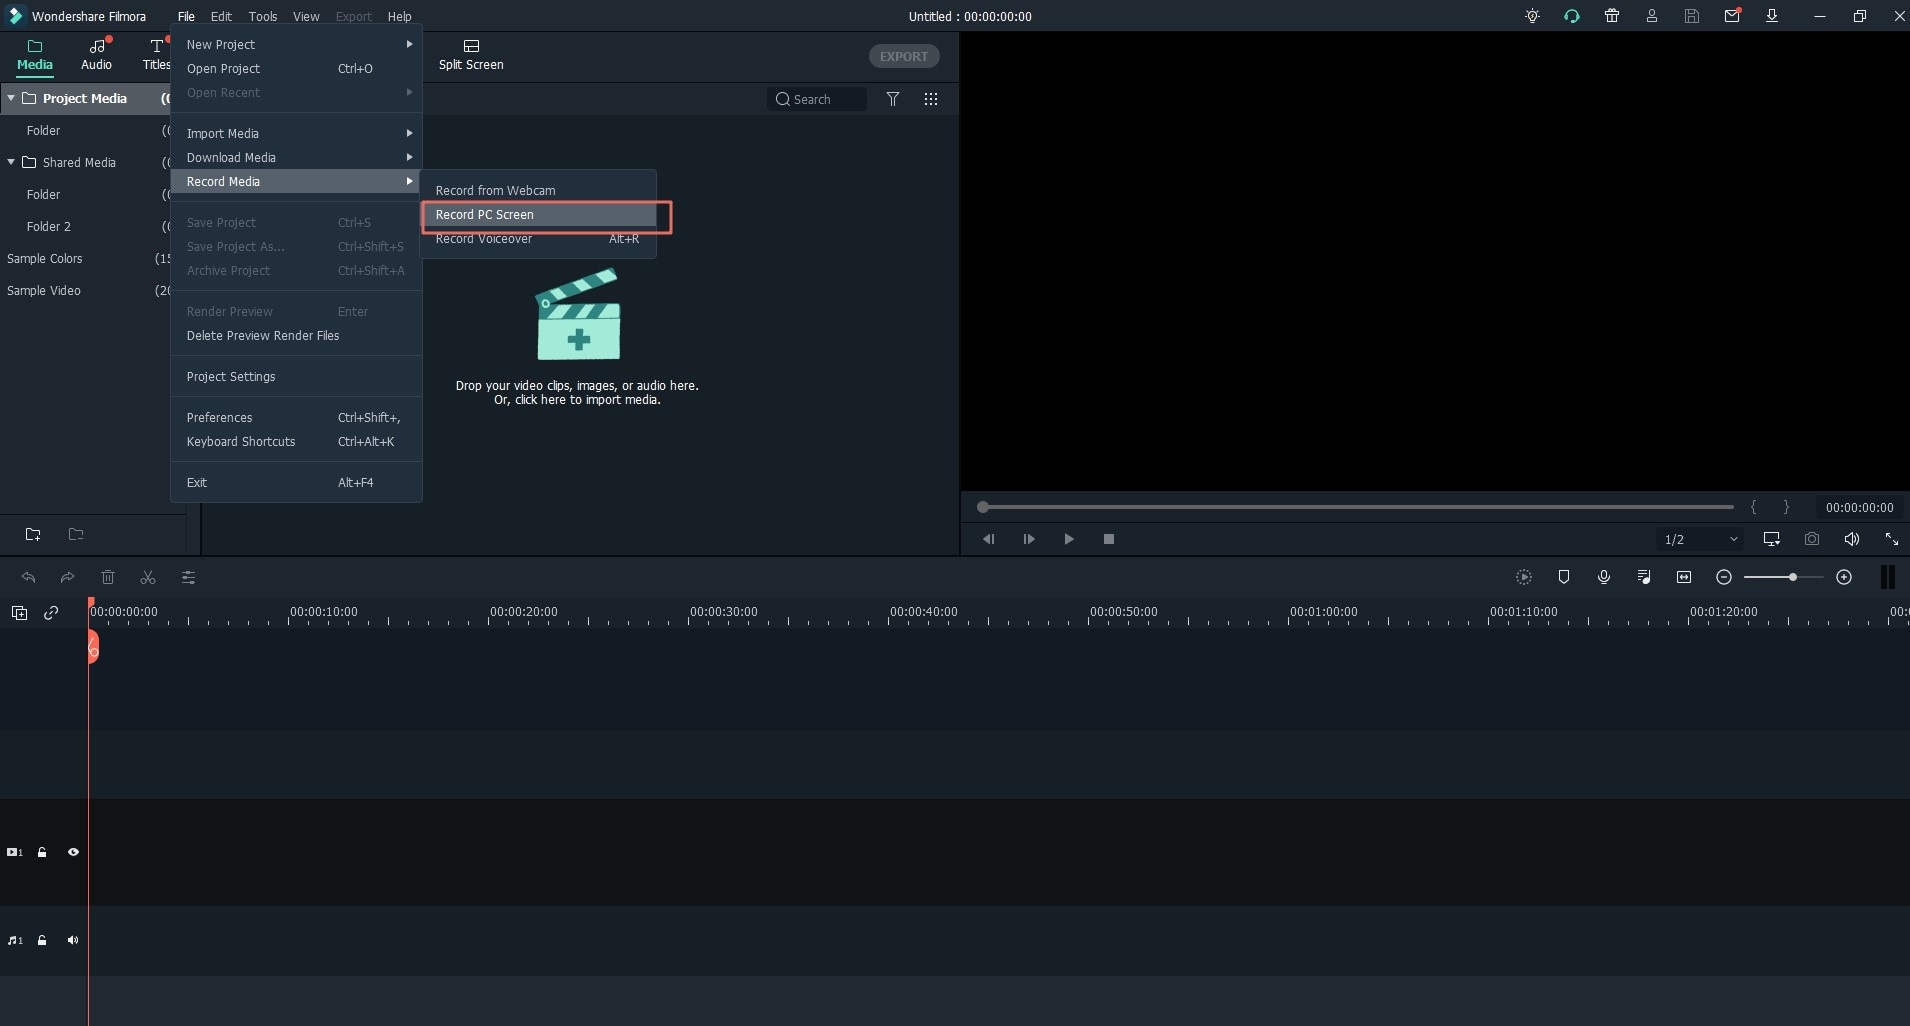
How to record screen on Windows PC using Filmora Video Editor
Launch the installer and let it complete the installation before launching the application. You can allow it to do so after the installation is done, or launch it from your Start Menu.

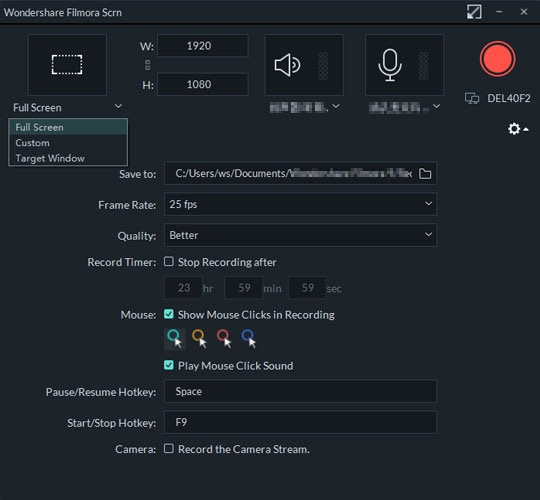
Step 1: Select the recording region
For a game demonstration, you should record the entire screen, but if you want to only show a certain part, you can click and define the area by dragging the mouse.
Step 2: Define your audio settings
Ideally, for a game demonstration, you should use both the system audio and the microphone, so you can add instructions as you go along. If you only want the game audio, then deselect the microphone and leave only the system audio.

Step 3: Record the video
Click on the “Record” button to start recording your video as you play the game.
When you have completed the level that you want to show, then hit the “Stop” button to stop the recording and save your video. You can edit it using Filmora Video Editor to polish it up before you upload it to your site or any other video host such as YouTube or Vimeo.


