I'm looking for a screen recorder utility from Microsoft, where can I get it?
Microsoft has got a screen recorder utility- a program that was developed in order to help Microsoft users to capture events to a video file. The beauty is that the file is so small such that you can easily send it via e-mail. This program allows you to explain some process to a person who is miles away from you as though you are just in one room or is sitting next to you. If you are looking for such utility, then you have come to the right place.
- Part 1: Step-by-step Guide to Use Microsoft Expression Screen Capture
- Part 2: Recommend Another Screen Recorder for Windows 10/8/7/XP/Vista
How to Use Microsoft Expression Screen Capture
Before you start to capture your screen, you must have enabled your video and audio sources for screen capture. You must also set camera options, hotkey options, screen options and other options. To set all these options, just go to Settings dialog box.
Step 1: Once you have set all the options well, then you are ready to begin. Click “Record” on the Microsoft Expression Screen Recorder’s main window. Red crosshairs will then show on the screen. Move the pointer in order to move the center of the crosshairs to pinpoint the region that you want to record.

Step 2: Select the area that you want to capture. If you want to capture the whole screen, move the crosshairs to either of the corners of the screen and click. To capture a specific area of a window, move the crosshairs to the area and click on that part.
Step 3: On the Select region dialog box that appears, make some adjustments to the corresponding dimensions by entering new values for the height and width. You can also make the adjustments manually by dragging either of the black square control points on the select region border. If you wish to move the whole region, then drag the anchor in the middle of that area. You can also resize the selected window by clicking “Resize selected window to fit the capture area”.
Step 4: Once you are ready to start the recording, click "Record" button on the Select Region dialogue box.
Step 5: At this point, you need to perform all the on-screen actions that you want. Once you have finished, you can click "Stop". If you had hidden the recording toolbar, you can click the Expression Screen Recorder menu. It is found on the taskbar, and on this menu, click Stop. You can also use the keyboard shortcut Stop option that you had set in the Edit Options dialogue box.
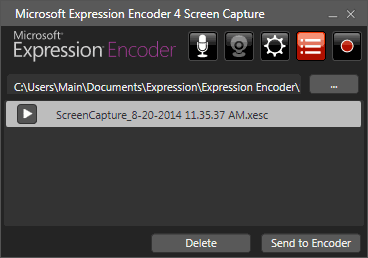
Step 6: The Capture Manager window will then appear once the capture has loaded completely. In this window, you can see all your recordings. To open the latest recording, click the Play button on the first recording on the list. The app will open the capture in a preview window.
Step 7: Close the Preview window. Click send to Recorder/Encoder if you want to further edit the recording. This app saves the recording to the hard disk.
Recommend Another Screen Recorder for Windows 10/8/7
Filmora Video Editor comes as the next best alternative to Microsoft Expression Screen Recorder. This app has been designed such that it is easy to use, exhibiting a very intuitive user interface. With it, you can get screencast of high quality. There is no quality loss in the audio and video recording that is captured using this app.
Key Features of Filmora Video Editor
- Filmora Video Editor has been equipped with "Blue-Light"; a real-time HD video encoding technology with which you can use to track your recordings as they happen.
- This app has been designed such that it can easily record any online video. The recorded videos are of high-quality that you will hardly notice that they are just recordings. This means that you no longer need a video downloading app in order to download your movies.
- Filmora Video Editor will also allow you to customize the size of you capture screen. You can also choose to set it to full-screen and record your videos.
- This app will also allow you to capture your webcam videos and be able to retrieve your Team Viewer and Skype chats any time that you will need them.
- Another brilliant feature exhibited by this app is the ability to capture all types of audio such as microphone audio, online audio, and streaming audio. Mic audio is especially important if you are narrating some process in a presentation or making a tutorial.
Step-by-step guide to record screen on Windows PC using Filmora Video Editor
Having known the great features exhibited by this app, it is time to learn how you can use this app to record your screen on Windows PC. At some point, you might want to make a tutorial, record you game success in order to share it with a friend, record a Skype chat, explain some step-by-step guide in a presentation, and much more. If you are using Filmora Video Editor, then here is how to record your Windows screen.
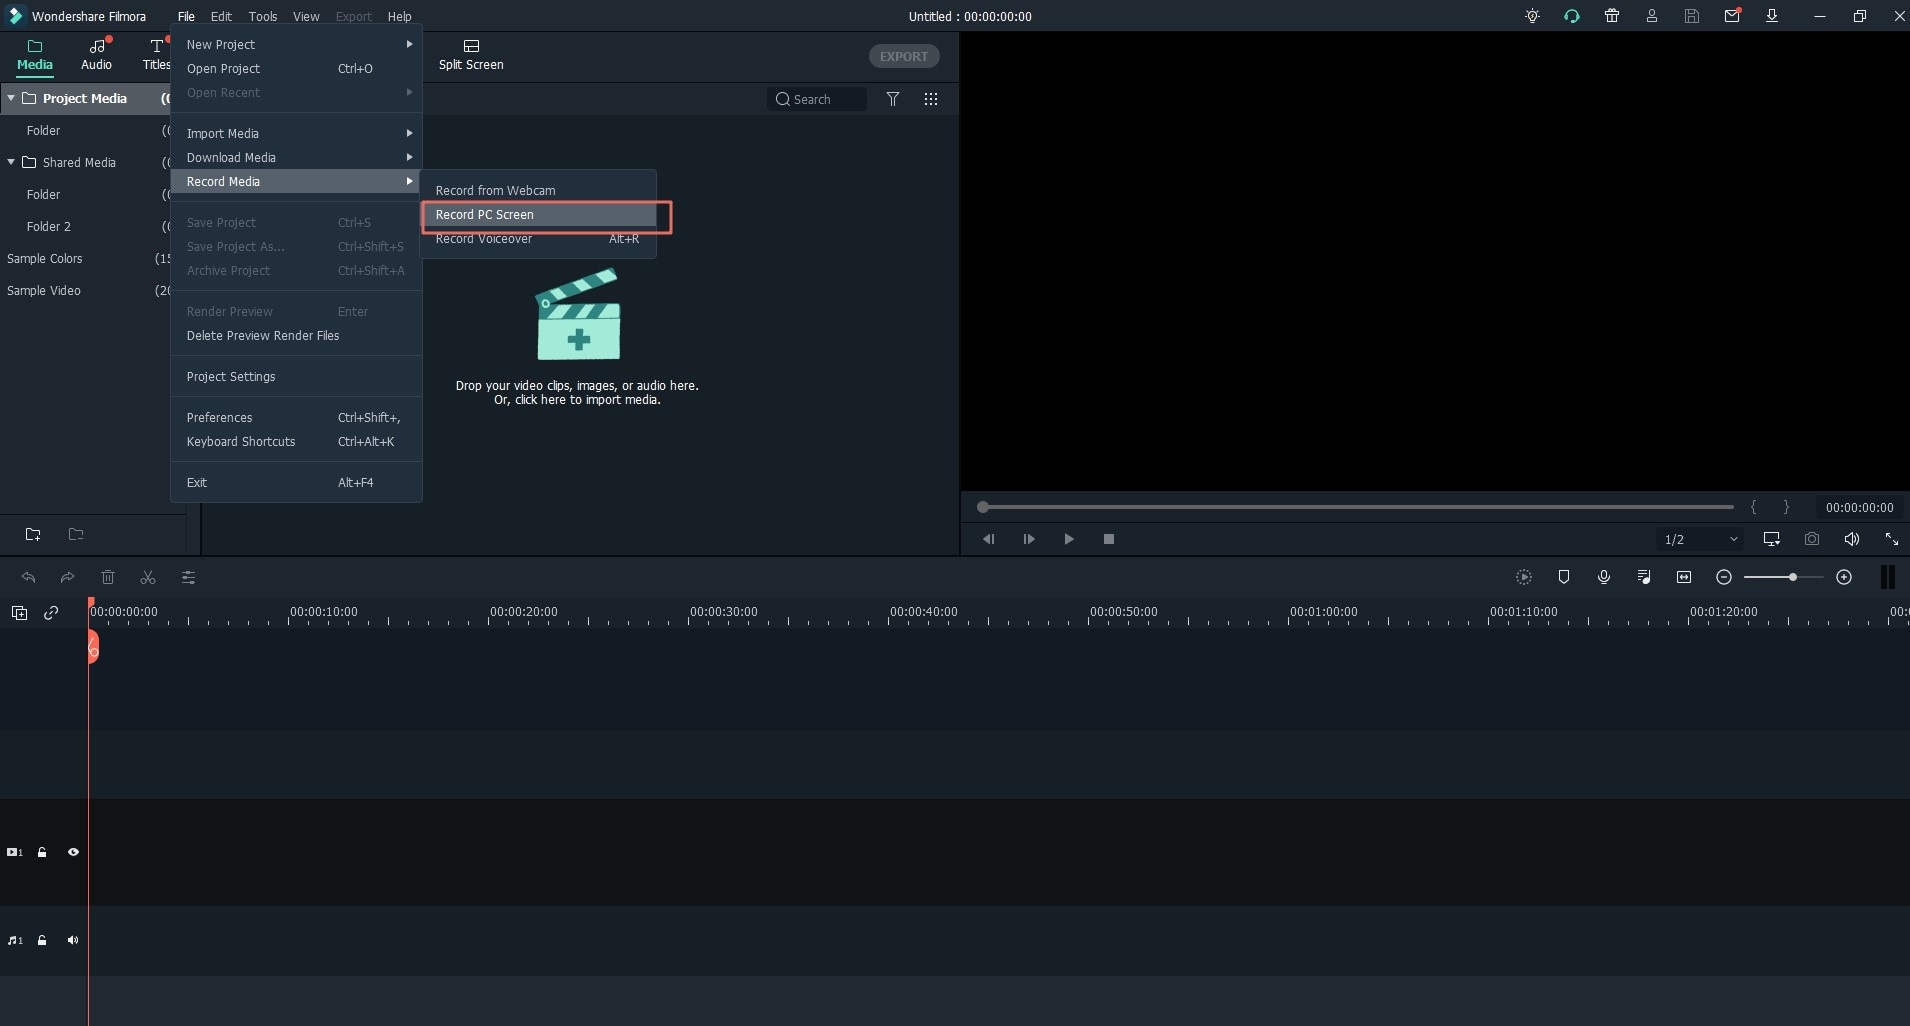
Step 1: The first thing to do is to download and install the Filmora Video Editor on your PC. Once you have installed the app, launch it.

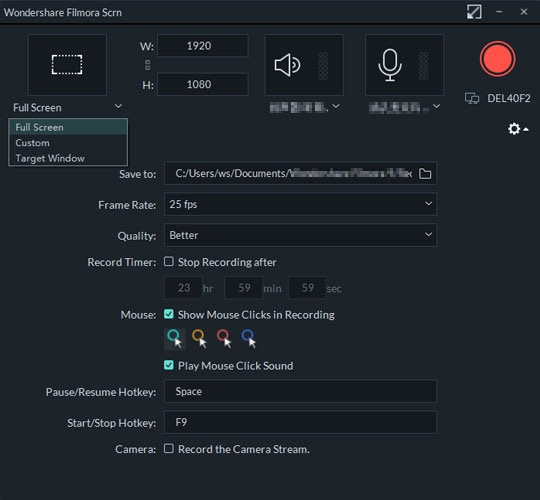
Step 2: Choose and customize the area to record. To customize, drag the cursor over the area that you want to record. Once you have chosen the region to record, the app will start recording your screen. You can set it to full screen or just a part of the screen.

Step 3: Set audio. Set both the system and Microphone audio if you are recording video conference or Skype Chat. To record streaming video, set the system audio only. Ensure that the mic audio and the system audio are selected.

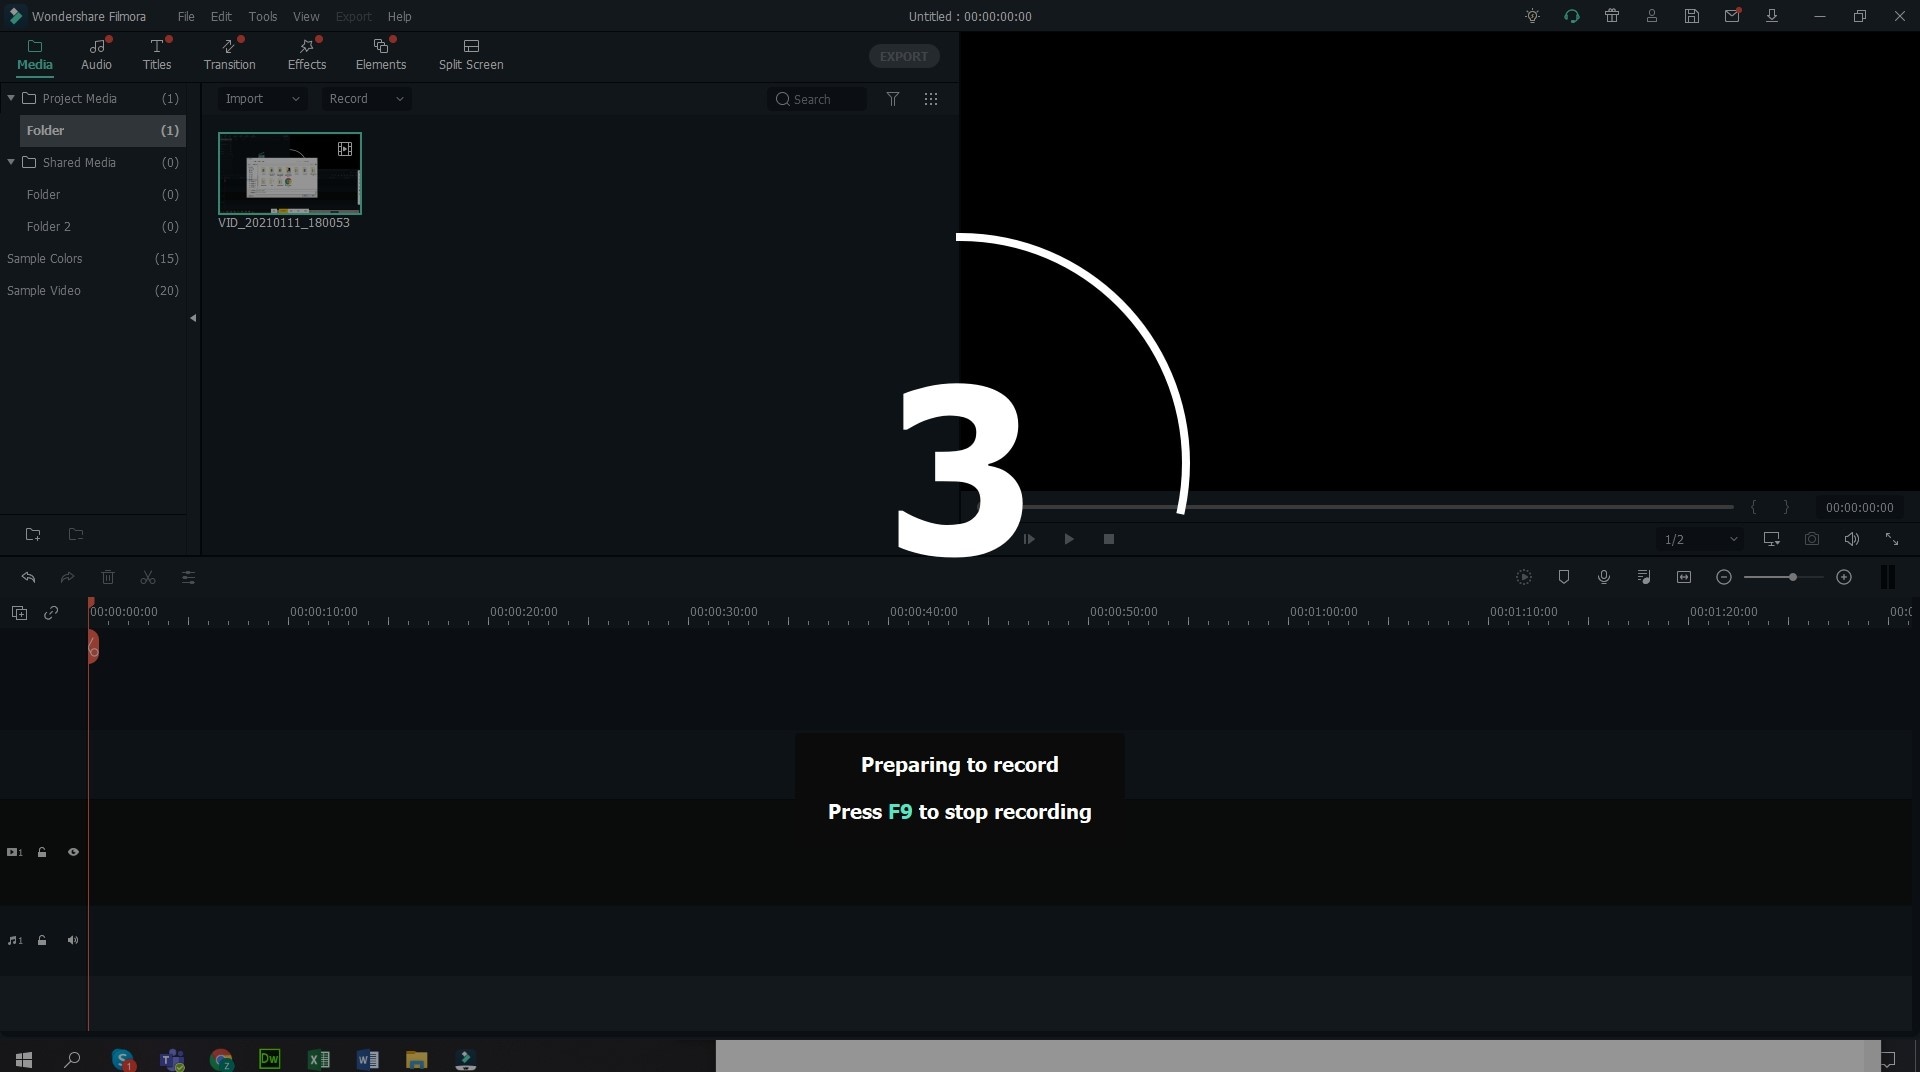
Step 4: Record your Windows screen. Ensure that you have set your recording region correctly and that the audio settings are right. If satisfied, click the “Record” button to start recording the screen of Windows PC.


