Is it possible to use VLC as a screen-recording tool?
This is a question that most people ask. VLC is a media player that is well known for its amazing features. Such features include playing any type of file, streaming videos, and much more. There is yet this media player exhibit another unique feature; the ability to record the desktop screen. So, it is possible to use VLC as a screen-recording tool. VLC allows you to record your screen to the maximum that is possible with it. It does it so well that it beats all the other screen recorders.
- Part 1: Step-by-step Guide to Use VLC to Record Screen
- Part 2: Best VLC Alternative to Record Screen
Part 1: Step-by-step Guide to Use VLC to Record Screen

You now know it is possible to record screens using VLC media player. You could now be wondering how this is done. Well, do not worry, as you are about to learn how to record the screen. Below is a step-by-step guide on how to use VLC to record screen.
Step 1: Open the VLC Media Player, click View and go to Advanced Controls. On the interface, you will see some more controls.
Step 2: In this step, go to media and click on “Open Capture Device”.
Step 3: Open Media dialog box will be opened. The default tab “Capture Device” will be opened in this dialog box. Set it to Desktop. At this point, set the desired frame rate to 10.00 fps. You can, however, set it higher but 10-12 fps is advisable.
Step 4: Click the play button. VLC will automatically show your desktop. Always ensure that the VLC is maximum and not minimized.
Step 5: To start recording, click the Record button. To prevent the VLC from showing up in the screencast, you will need to minimize it.
Step 6: Do all that you want to show in the screencast and once you have finished, restore the VLC and click on the Record button to stop the recording. The recorded file will automatically be saved to AVI in the folder containing your videos.
Part 2: Best VLC Alternative to Record Screen
Whereas there are several screen recording apps such as VLC, and many more, Filmora Video Editor is the best alternative that outshines all the other apps. This easy-to-use software has a very simple interface and has the following features.
Key Features of Filmora Video Editor
- Record high-quality video. Filmora Video Editor can record almost any type of digital video.
- It also allows you to record online videos. You no longer need to search for video downloading apps because you will not need them. You no longer need to download a video; instead, you can use Filmora to record it.
- This app will also help you to make video tutorials and record webcam videos. With Filmora video recorder, you can record and save all the webcam videos. You can always go listen to you Team Viewer or Skype chats at any time that you want.
- This screen recorder will also allow you to record the game that you are playing or that of your competitor. You can always share the success I n the game with your friends while at the same time improving your game skills by recording your competitor’s game.
- Apart from the recording of videos, this app will allow you to record any type of audio such as online audio, streaming audio, and microphone audio. You do not need to download online audio, as this app will just record the audio and the quality will be as good as the original.
How to Record Screen with VLC Alternative - Filmora Video Editor
There are some circumstances when you will be required to record your computer’s screen. You might want to record some useful presentations, record a Skype video chat, capture your game success, and more. To record your screen using Filmora Video Editor, follow the simple steps given below.
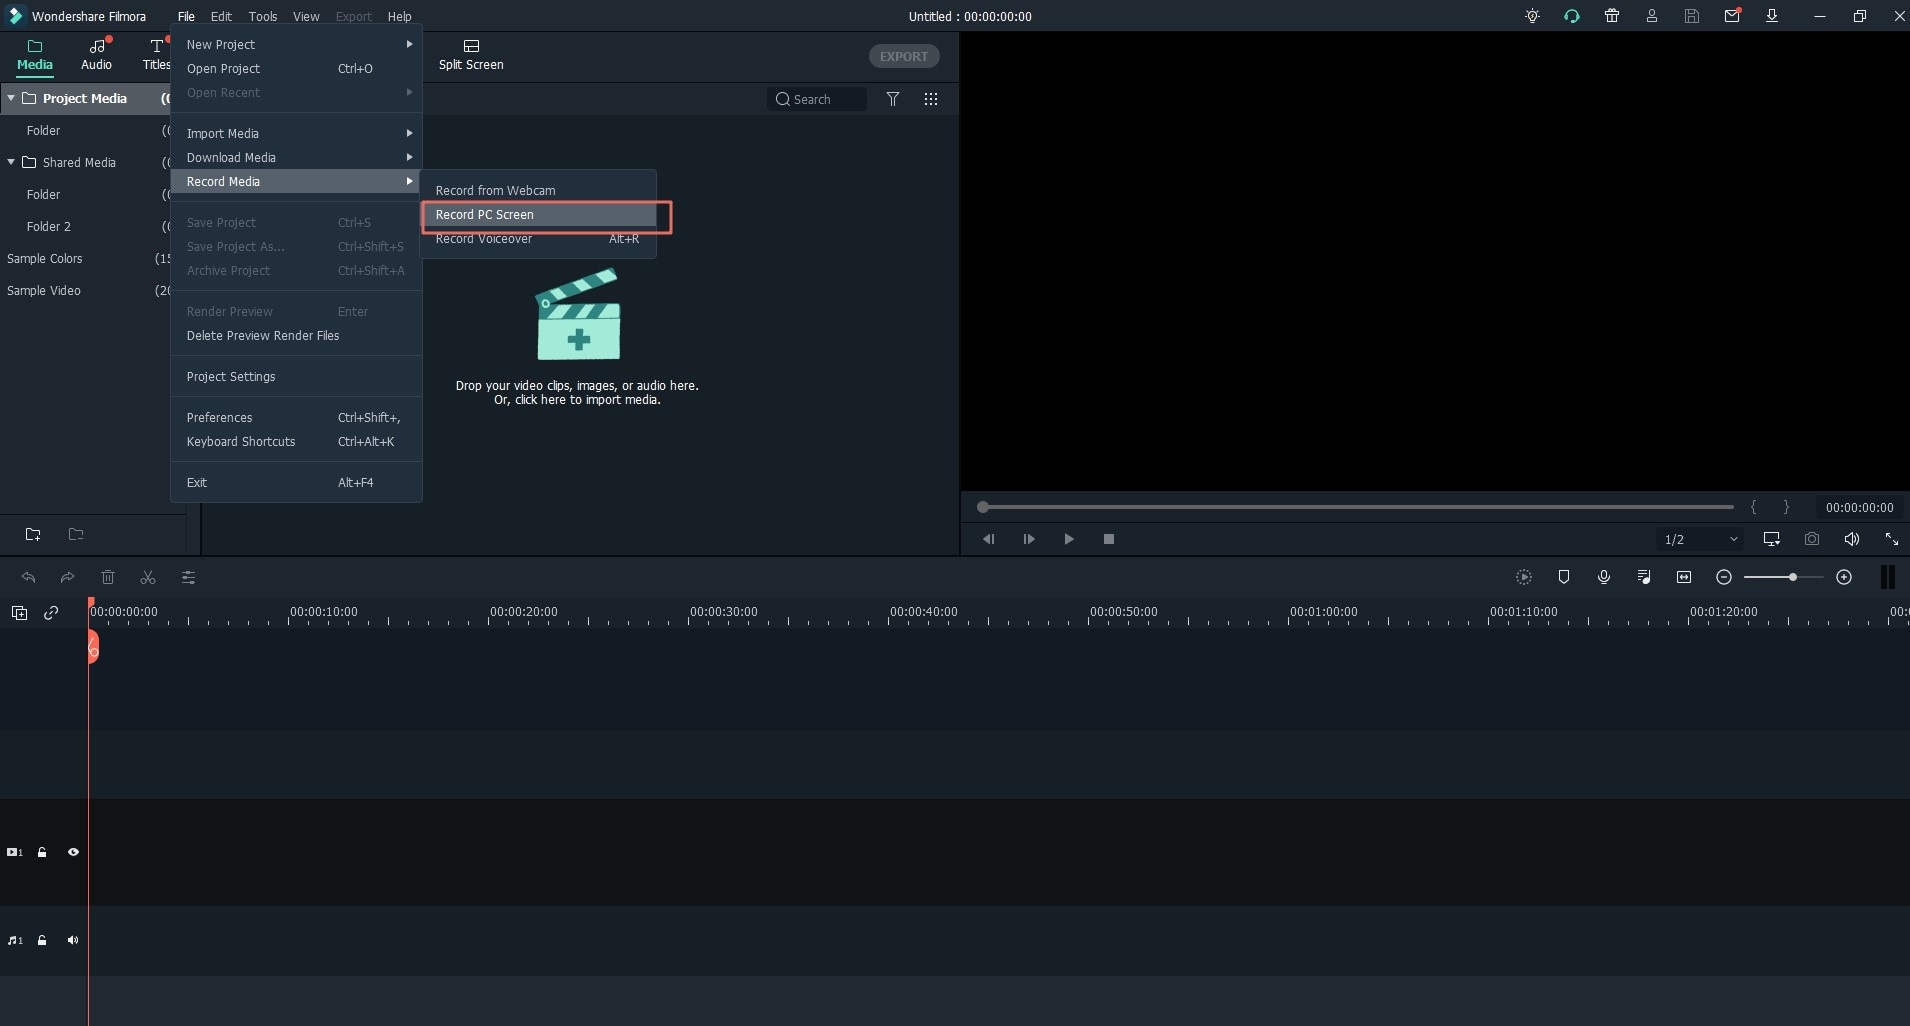
Step 1: Download and install Filmora Video Editor on your PC. Once you have installed, launch it by double clicking on the app icon on the desktop.

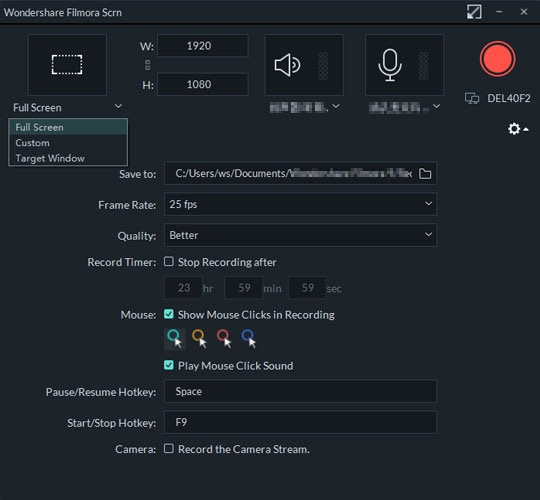
Step 2: Choose the recording area. Before you start the screen recording, you will need to make some adjustments to the screen recording area. Filmora Video Editor allows you to customize the recording area. You can also decide to select full screen.

Step 3: Set audio. For recordings such as Skype Chat or video conference, you will need to set both the microphone and the system audio. For recording streaming videos, you will only need the system audio. Click on the system audio and microphone to ensure that they are checked.
Step 4: Start recording the screen. Once you have successfully completed steps 1, 2 and 3, it is now time to record the desktop screen. Just open the area, which you want to record and then on the right-hand side of the screen capture, click REC, to begin the recording process.


