Pictures tell a story. A slideshow tells a better story. Using slideshows is a not a new concept, in fact, it’s as old as photography itself. But in modern times, making a slideshow has been perfected by the invention of slideshow editor. Besides been visually attractive, slideshows invoke better emotions from pictures, videos, and audios.
In this broad category of free slideshow editor software, I have been most impressed by the iSkysoft Slideshow Maker for Mac (or iSkysoft Slideshow Maker for Windows). This slideshow editor helps you turn your pictures, videos, and audios into one motion picture which is a better way to save your memorable moments like birthdays, weddings, among others. It comes with a range of useful features which all combine to make the best slideshow experience. These features include:
- Templates- There is a variety of templates to choose from which add flavor to your slideshow.
- High Definition experience (1080p) - You can make high definition slideshows which are easy on the eyes resulting in a better experience.
- Sharing- In this social media era, it’s all about sharing; nobody wants to make something awesome and watch it alone! You can share the slideshow through Facebook, YouTube, Google+, Vimeo, among others. And also through DVDs as the Slideshow editor has a DVD menu which allows you to burn slideshows to DVDs.
- Editing tools- There are a lot of editing options which not only make the procedure simple but also perfect. These include; filters, crop, brightness, Intro feature (which is awesome!), Add text, clipart, red eye repair, etc.
Steps for creating photo slideshows
Unlike in other programs where certain photography knowledge is required, making a sideshow with the iSkysoft program is a rather straight forward affair.
Step 1 Download and Run the iSkysoft Slideshow Maker for Mac
After you process the slideshow editor free download on your Mac, drag it to the “Applications” and installation will be finalized in the blink of an eye. After installation, double click to launch the program.
Step 2 Import Your Media (Pictures or Videos)
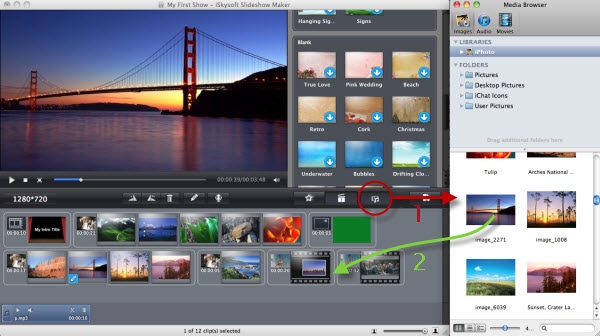
After starting the program, navigate to the Media Browser to easily import your media files. After your media is added to the storyboard, drag and drop the slides to arrange. Editing buttons like delete, rotate and edit are easily accessible in the slideshow maker window. The same can be accessed by right-clicking on the media. As an alternative, you can delete media by dragging it out of the slideshow Maker window.
Step 3 Change Styles
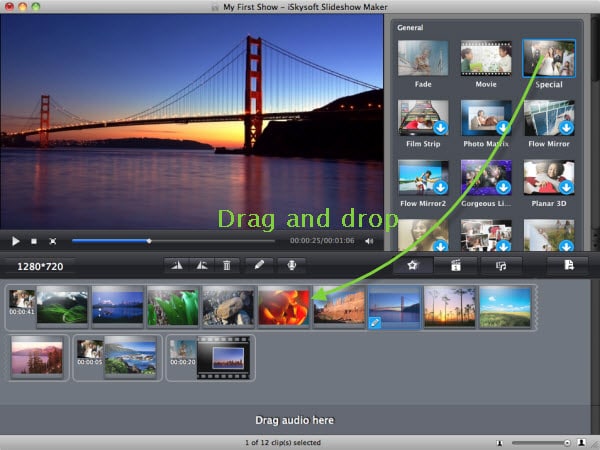
The iSkysoft Slideshow Maker has over 30 styles to complement your media. After import, random themes are automatically applied to your media which you can choose to keep or change. To change a style, select the one you want and drag it to your pictures or videos. You can also increase the number of clips in a style by hovering your mouse over a given style, clicking on the settings button when it appears and clicking “Apply to All”.
Step 4 Edit Your Media
- Photos- The programs allows you to either add a caption, crop (in any aspect ratio) and add a filter (more than 15 filters available) by clicking on the respective panels. The caption you add turns to animated as soon as you are done.
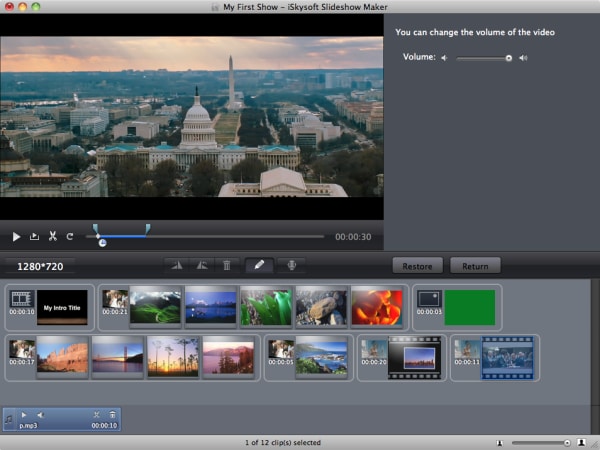
- Video- You can change the volume of the video, trim or split it into different pieces by using the easily accessible buttons.
- Audio- After adding audio, several buttons will show on the audio bar which has various options including scissors to cut Audio. Also, the program allows you to add a voice over in videos by clicking on the voice over button in the preview window.
- Adding an Intro or Credit Slide- an intro or credit slide helps in organizing your slideshow in an attractive manner while also adding some fun. To use the templates available, click on the Intro/Credit/Blank button, and drag & drop to storyboard to apply.
Step 5 Create Video Slideshow
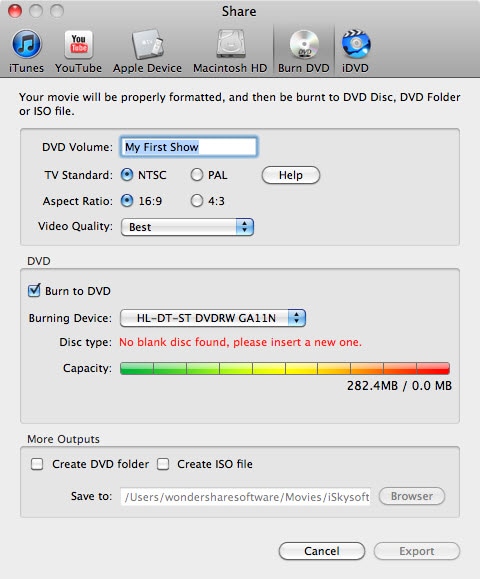
After doing all the above and your slideshow is ready, preview it to confirm it’s exactly what you wanted to make. If you are happy with the slideshow, click on the share button to either add it directly to your YouTube channel, burn to DVD, Export to iTunes library or watch it on your device.


