Slideshows are a fantastic way of preserving your most fantastic moments. While single images are good, they do not beat the beauty that comes with compiling several photos, adding some effects and even music in some cases to be viewed as a movie. As much as creating such slideshows can be termed as very easy for some individuals, the skill to create slideshow does not come very easy to most individuals, especially for users who are new or not familiar with Mac OS Sierra. So what is the best way to create slideshow on Mac (macOS Sierra included)? Look no further! Here is the best solution for you.
The Best Tool to Create Slideshow on Mac
Mac OS sierra users have a wide range of options to choose from in the event that they want to create a slideshow. However of all the options on how to create a slideshow on mac at their disposal, there is none that comes close to perfection as iSkysoft Slideshow Maker for Mac. It is a sleek software utility that easily makes it easy for anyone without prior experience of creating slideshows. The software is full of fantastic features that easily makes it the best among similar products for making slideshows.
Why Choose This Slideshow Maker:
- Supports both videos and images: iSkysoft slideshow maker does not limit one to the use of either videos or still pictures. One can use either one of the two or both of them in their projects.
- Has awesome templates: iSkysoft slideshow maker comes pre-installed with some awesome and easily customizable templates that are bound to make the creation of slideshows very easy.
- Social media sharing: iSkysoft slideshow maker for Mac comes with a social media sharing function that easily makes it possible to share created slideshows on popular social media sites and videos sharing websites such as YouTube, Facebook, Google+ and Twitter.
- Impeccable editing features: iSkysoft slideshow maker for maker comes with awesome editing tools that are geared to help you create very good slideshows. Such editing tools include a picture cropping function, a clipart function, an intro and credit function that functions to help you create a very good intro to your slideshow and ending.
Steps on How to Create a Slideshow on Mac (macOS Sierra)
Step 1 Launch the Program
The first step is to download and install iSkysoft slideshow maker for Mac. After installing it, run the program to view its first page interface.
Step 2 Import Pictures or Videos
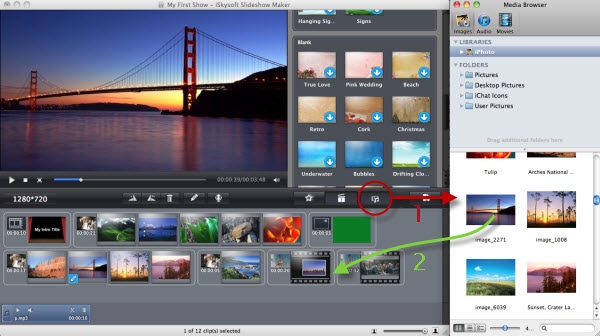
Click on "Create a New Project" and click on then media Browser’ icon to turn on media browsing to allow you to browse for pictures, audio and video files and import them. Browse the media of your choice and add them to your storyboard.
Step 3 Change Styles
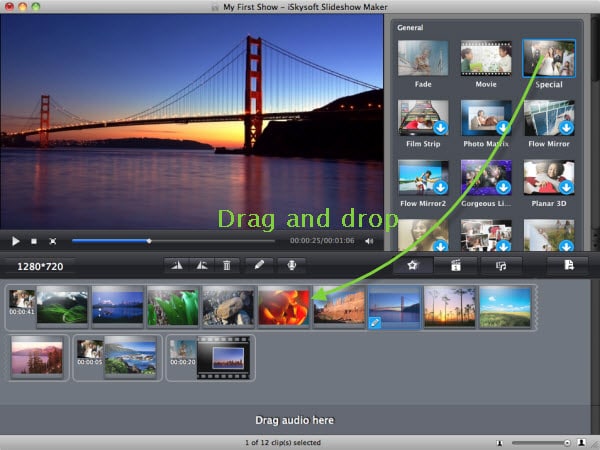
After adding your choice of photos and videos to the story board, a list of styles will appear. One has the option of adding any one of these styles onto the story board. Simply drag a style and drop it onto the story board to apply it.
Step 4 Edit Videos or Pictures
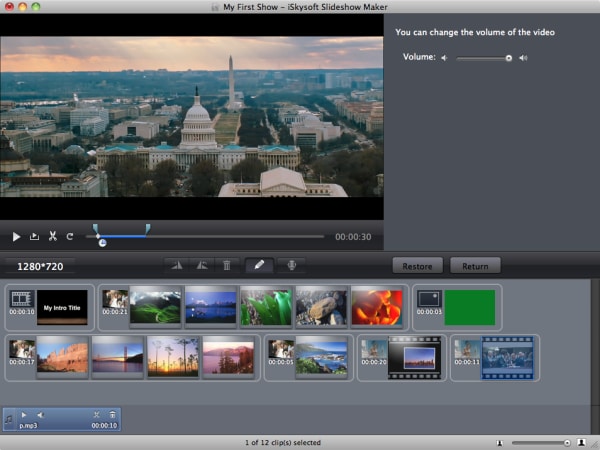
To edit a photo or a video, simply double click the photo or video to display the editing dialog. One also has the option to click on the editing’ button after selecting an image. You may then add captions, crop photos, add voice over on audios or split videos.
Step 5 Add Music
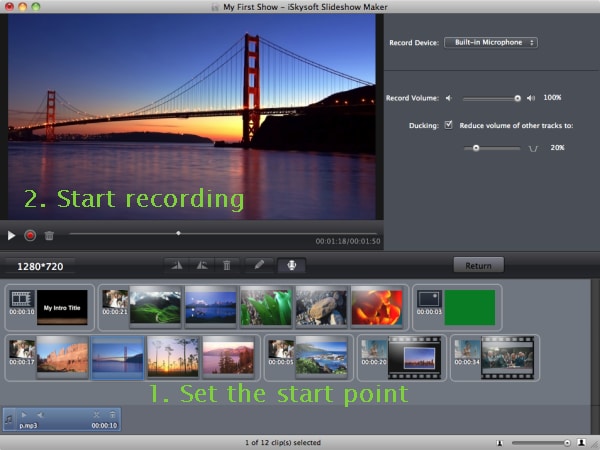
One has the option of adding music by using the media browser option. Add an audio file to the storyboard. Set the start point that you want to add the audio after editing it to your pleasure.
Step 6 Create a Slideshow on Mac
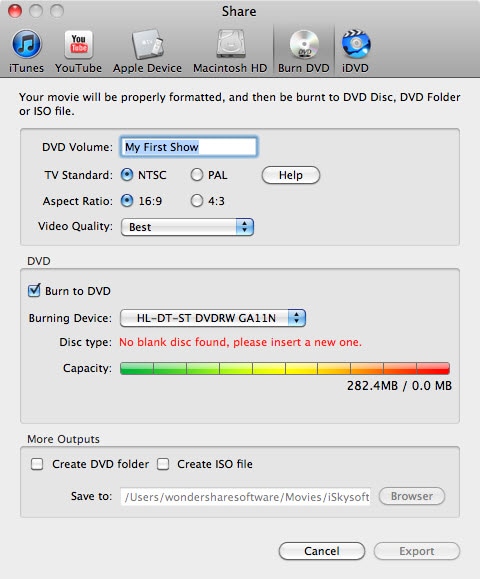
After editing your project to your satisfaction, preview your slideshow and if you are satisfied, create the project. You have the option to upload it directly to YouTube, Facebook, burn it to a DVD or export the project to iTunes library.


