Slideshow is a unique way to give new life to your photos. What ’s more, you can actually make the slide show more interesting by adding music to go with the photos. It is an exciting experience to view your photos or videos in a slideshow way while your favorite music is playing in the background. But is it possible to create a slideshow with music on Mac? Well, yes it is but only with best slideshow software. With that said, here is a simple and easy to follow guide on how to make a slideshow with music on Mac.
The Best Way to Make a Slideshow with Music on Mac
Although there are a variety of slideshow maker for Mac, each has its own pros and cons. However, some have more cons than pros compared to others. For this reason, finding the best tool that is easy to use and with various unique features is important. So to create a slideshow with music on Mac, the best tool to try is iSkysoft Slideshow Maker for Mac. Whether you are a novice or a techie kid, this tool is surely a solid choice for every passionate slideshow maker. Making slideshows with music is easy and effortless using this software.
Why Choose This Slideshow Maker:
- Allows you to create customizable slideshows with the help of different cliparts along with the crop feature.
- Come handy with different colorful and professional templates, which ensures a lively fresh look to your pictures.
- Built in trimmer that allows you to stitch your audio files according to your needs.
- Pre-audio feature gives you access to play an intro in all your audios as well as videos.
- Motion tool that enables you to add titles to your videos as well as edit them and a rotate feature so you can view your photos or videos from any angle as up-to 360-degrees.
Steps to Create a Slideshow with Music on Mac
Step 1 Launch the Program
To start making a slideshow on Mac, first download and then install the Slideshow Maker for Mac. Then run the program.
Step 2 Add Photos and Videos
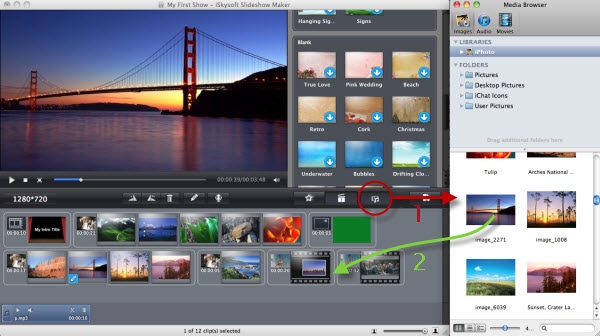
To add picture or videos into the software, simply click the Media Browser icon to either turn it on or off. Your media files will then be automatically added to the story-board and you just have to drag and drop the specific slide in order to arrange it. You also need to choose the right dimensions for your slideshow. To delete any media, just drag it out of the slideshow Maker or simply right click the photo and delete it.
Step 3 Choose a Style for Your Slideshow
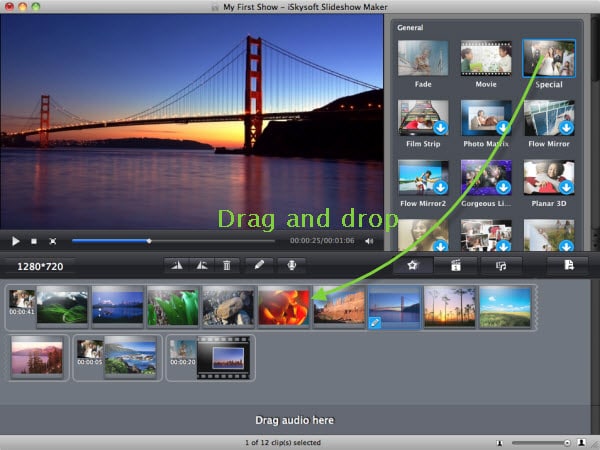
If you don’t like the themes of your photos or videos, you can change them any time. To change the styles, drag and drop the style that pleases you. On the other hand, you can drag your photos or videos from one theme to another.
Step 4 Edit Videos or Pictures
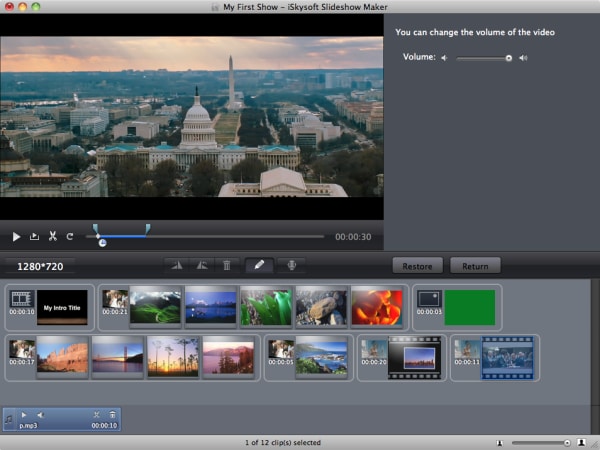
Slideshow Maker for Mac provides easy photo and video editing tools. To edit your photos, you can use the filter, caption and crop feature. To edit the videos, drag the slider if you want to change the volume on the panel which is next to the preview window. And in case you want to split your video into several pieces, set the start point and click on the Cut button. Both mark-in and mark-out buttons will pop up thereby allowing you to change the duration.
Step 5 Add Music to Slideshow
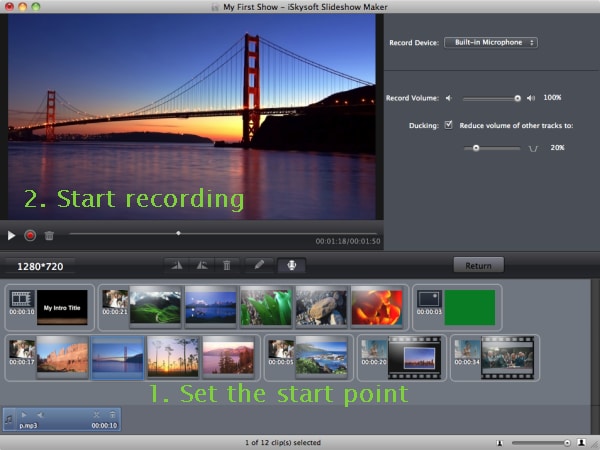
To add music, switch to the Music tab and then you can add the music from the iTunes library to the timeline. You can as well load music from other folders in your Mac hard-drive.
Step 6 Start Making a Slideshow with Music on Mac
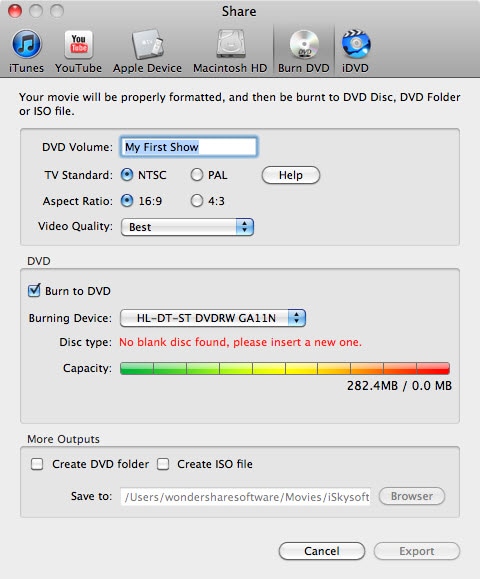
The last step is to create the slideshow and then save it in any popular format you want. You can also save it for uploading online using presets for YouTube, Facebook and other sites.


