What is the easiest way to make a DVD slideshow on Windows 10? For Windows users, you can use Windows Movie Player or Media Center to create a DVD slideshow with ease. However, these Windows applications stop working often for unknown reasons, especially for the new Windows 10 users. So if you are using Windows 10, below we recommend you the easiest way to create a slide show in Windows 10, Windows 8 and Windows 7.
The Best Software to Make DVD Slideshows for Windows 10

Filmora Video Editor is a highly recommended software program for making DVD slideshows, and you should try it out. It will be the ultimate solution to your concerns since it is capable of developing wonderful slideshows to share with close friends. One of the things you can manage to do with this software is crafting of very original stories using personal memories from the past. If you had some really good times during your vacation or a family gathering, This Slideshow Maker will help you to put all those memories together into a slideshow.
The intuitive interface of this program will offer you the right guide that will include proper organization of slides while conversion speeds are extremely high. Many people say they have never seen movies created using still images, but Filmora Video Editor will give you the opportunity to create one on your own. With a single click, it will be easy breathing life to your still images.
Key Features of Filmora Video Editor:
- Support to create slideshow from any videos and photos.
- Provide handy editing tools to customize the videos and photos.
- Add background music and other elements to personalize your DVD.
- Directly share the DVD slideshow online or burn to DVD disk.
Guide to How to Make a DVD Slideshow with Filmora Video Editor
Step 1. Import Videos
After downloading and installing Filmora, launch the program. And click the "Import" button and then choose your files to import it to the program.
Step 2. Customize your slideshow
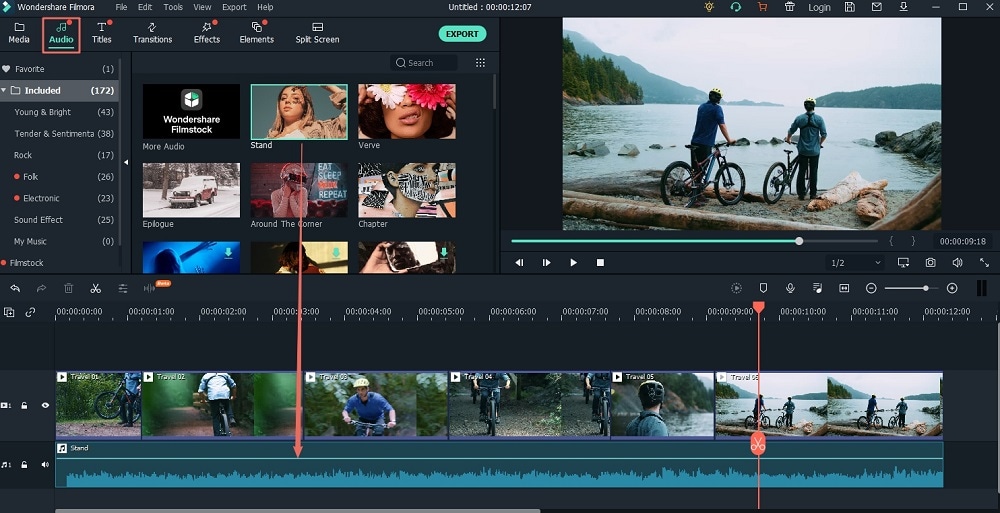
Add your photos and music to timeline to start customize your slideshow. Begin by customizing your DVD background music through clicking on the "Audio" button. Don’t proceed to create a DVD slideshow before you are satisfied with the level of customization you have achieved.
Step 3. Output Settings
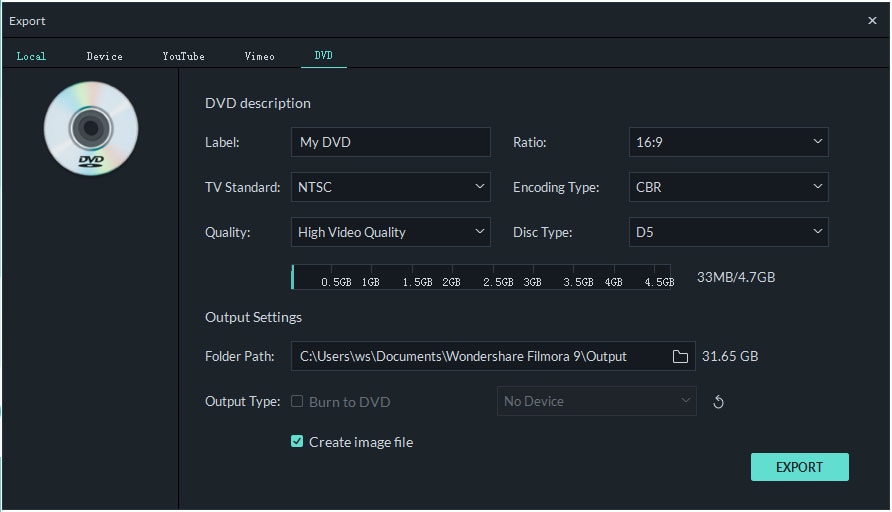
From the output settings tab, click on "Burn to DVD". It will become active only if there is a DVD burner that is functional. Don’t forget to be specific on the number of copies that you are to produce.
Step 4. Start Burning DVD Slideshow
Depending on the country you are residing, ensure you have set the correct TV standard settings otherwise there will be compatibility issues with your DVD slideshow during playback. Click on the "Export" button to begin burning your DVD slideshow. You can then have your burned DVD slideshow inserted to a DVD player and start enjoying your moments.

Burn Slideshow to DVD on Windows 10
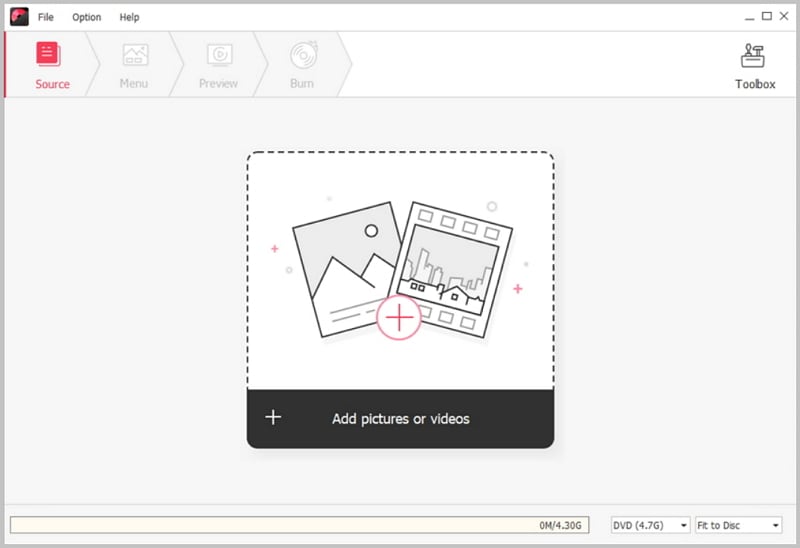
DVD Creator for Windows is the best DVD burning tool to help you to burn slideshow to DVD on Windows 10. It can help you to burn Blu-ray DVD and provide options with BD (25G) or BD DL (50G). You can also edit the video before burning to DVD by cropping, trimming, adding watermark or effects. See key features of this DVD creator:
- Burn any format videos to DVD in high quality.
- Create DVD with online videos and homemade videos.
- Provide many free DVD menu template to fit your theme.
- Enables to burn to DVD disc or other DVD output.


