Using your Mac, you can now create incredible picture slideshow to give you a recap of your best memories- whether it’s from birthday celebration, wedding, Christmas party, etc. You can even go ahead and personalize them to make the slideshows more appealing. You can add your favorite soundtracks, add cool effects, and add text. Best of all, you can easily share slideshows with your friends on the social media. But for you make a slideshow, you’ll need to use a top-rated picture slide maker. And I’m going to show you how to use the best application out there to make a picture slideshow.
How to Make a Picture Slideshow on Mac
To create picture slideshow, we’ll introduce you to the best picture slideshow maker available today. And that program is none other than iSkysoft Slideshow Maker for Mac. Designed by a team of professionals, this particular program lets you create amazing slideshow movies – that appeal to all your friends- from any of your photos. It gives you a wide range of slideshow templates to pick from so that you can create fantastic slide shows using your photos, favorite audios and video clips effortlessly. (iSkysoft Slideshow Maker for Windows is also available.)
Why Choose iSkysoft Slideshow Maker:
- It allows you to use ClipArt feature to fully personalize your slideshows; use this feature to organize and sync all your tracks.
- With numerous templates to pick from, you can easily create slideshows that makes your life life look more amazing than you can imagine. Besides, you can opt to create your own template that makes things even more exciting.
- Using the Filter and Effect feature, you can make your audio, photos, and videos more unique and attractive.
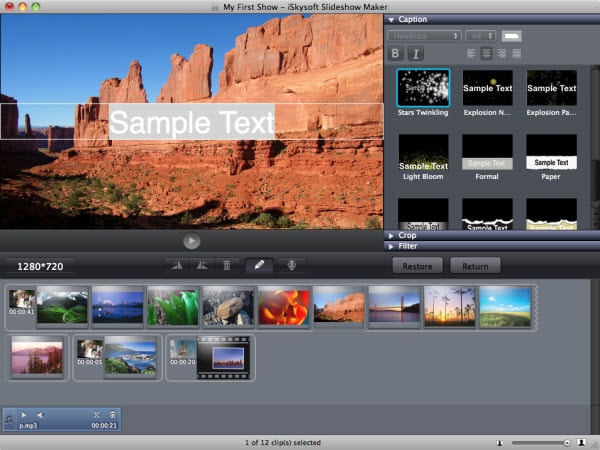
- Ability to add text makes it easy for you to create a highly captivating story for the pictures you’ve added text to.
- And the best part: the program offers you various social media icons so that you can easily your attention-grabbing photo slideshows anywhere as you wish.
How to create a picture slideshow
Step 1 Install and Launch the Program
Of course, the first thing you ought to do is downloading the program from the owner’s official site. Then install it and finally launch it so that it will take you to the main interface.
Step 2 Import Pictures
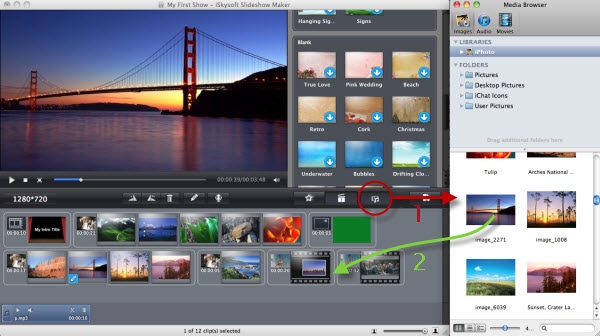
The program allows you to add images, audio and video files. To do this, simply click on the Media Browser icon to start the importation. When you’ve successfully added the necessary media to your storyboard, you can easily drag and drop a particular slide to arrange it. You can also delete unwanted media by simply dragging it out of the program.
Before you process to the next step, remember to set the appropriate dimensions for your photo slideshows. If you’ll play in on a mobile device, the dimensions might change during importation. For HD show, you can either select 1280 x 720 or 1920 x 1080.
Step 3 Choose a Slideshow Style
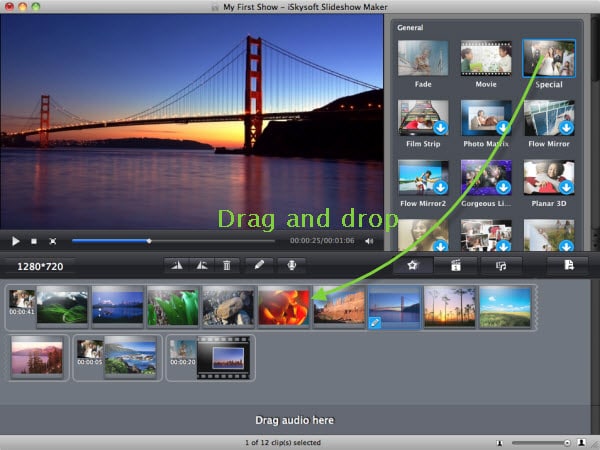
As soon as you import your photos and videos, random themes are applied automatically. Good thing is that you can opt to keep them or change them at any time. To add a style of your choice to your videos/photos, just need to drag and drop the style of your choice to replace the current one.
Step 4 Edit Pictures
This picture slideshow creator offers you a wide range of editing tools to help customize your slideshow fully. The editing buttons are easily accessible to make the process faster. Additionally, you can right click on the video/photo you’re working on for more editing options.
Step 5 Make Picture Slideshow on Mac
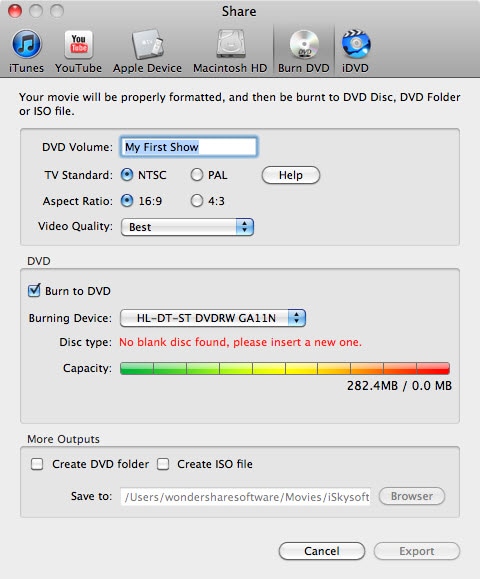
Lastly, preview the slideshow you’ve created, from start to end, and if you’re satisfied with it, click the "Share" button at the top to specify how you wish to share it with others or save on your Mac.
How to Make a Picture Slideshow Online
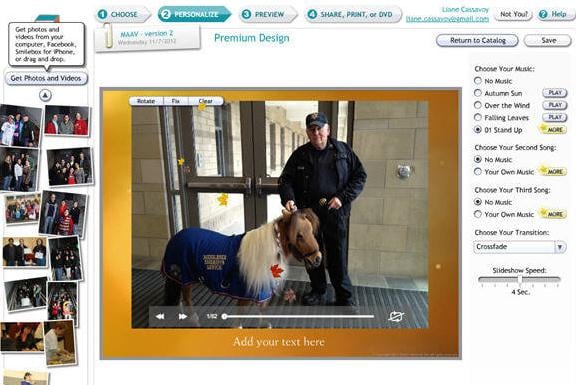
What if you want to create your picture slideshow online? Well, you can easily do this by using Smilebox, a program that lets you weave together your images, music, words, and even video clips to tell a dramatic story.
- Step 1. Open Smilebox and choose a design of your choice. You can do this by clicking “Browse by Format” on the homepage and select “Slideshows.”
- Step 2. Once you’ve selected a design of your liking, click on the “Personalize” button to enable you to import your photos, music track, and personalized text.
- Step 3. When you’re done, preview your new slideshow, make the necessary changes, and share/print it!


