How can I convert photo to video on Windows 10 to make a photo slideshow? Well, with a photo to video slideshow maker, you can do it easily. Here in this article, we will show you the simplest way to convert picture to video on Windows 10.
Part 1. The Best Software to Convert Photo to Video for Windows 10

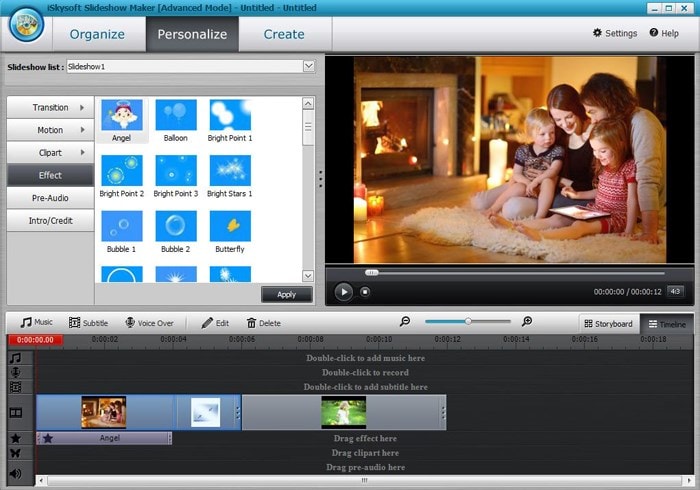
When you have a few or many photos that you want to turn into video, iSkysoft Slideshow Maker will definitely be a good photo video maker software to use for that. You will get to use basic editing tools for rotating, cropping as well as adding special effects that will help to give your video a personal touch. You can as well enjoy key features like background music, text effects, red-eye removal, transition effects and DVD menus.
It will be at your own choice to select what suits your needs best in a better way. If you have mobile devices like iPhone, iPad, Blackberry and iPod, this will be the best software program to use in turning your photos to video and enjoy while on the move.
Simple Steps to Convert Photo to Video with iSkysoft Slideshow Maker
Step 1. Add Photos
All the photos that you will be using to create a video should be imported to iSkysoft Slideshow Maker through clicking on the "Add Files" button. Browse through the computer and choose only those photos that you will be using.
Step 2. Choose DVD Menu
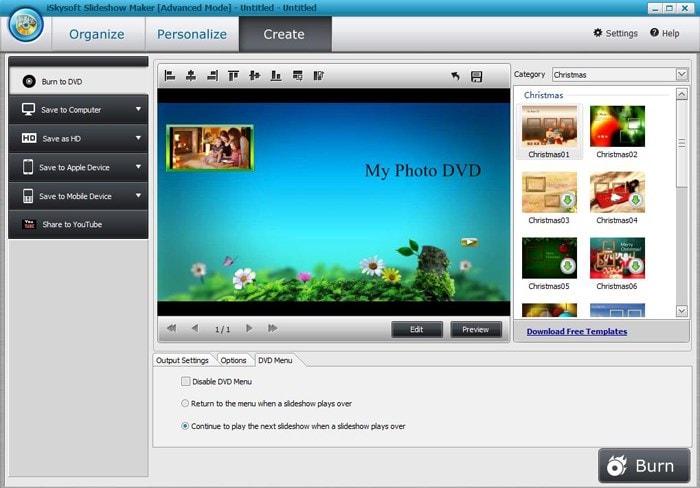
There will be very many templates for DVD menu to choose the ideal one from. Go for dynamic templates if you are keen on getting a professional video out of your photos.
Step 3. Publish Video
Finally, click on the "Create" button to have your video published on online sites like YouTube and others where friends can easily get to access.
Part 2. How to Turn Photos to Video on Windows 10 with Movie Maker
Movies are not only created from motion pictures but you can come up with one from your still photos. Thanks to the emergence of modern technology, it is very much possible turning photos to video on Windows 10 among many other platforms. All you need to get started is to activate your Windows 10 platform and then download the photos following the detailed guidance below:
- Step 1. Launch Movie Maker - Click on the "Start" button then "All Programs" and "Windows Movie Maker".
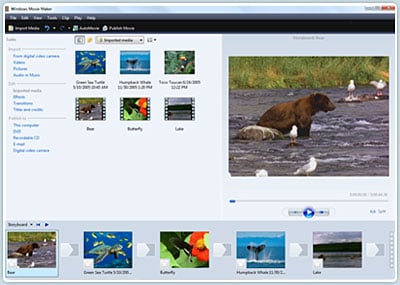
- Step 2. Import Pictures - You will then see the option for "Import Pictures" just below the "Capture Video" icon. Click on it. It will allow you to choose all photos that you will be using under the folder marked "My Pictures".
- Step 3. Add Music Files - If you want to add music files, there is the option of clicking on "Import Audio or Music" icon where you get the files on the folder marked "My Music". The photos should then be dragged to the storyboard and they should be added one at a time. The same will be done to transitions that you want to use with your photos.
- Step 4. Add Title - From the pane for "Movie Tasks", click on "Make Titles or Credits to Add a Title to Your Movie" before clicking on "Add Title at the Beginning of the Movie". After you have typed in your title, click on "Done" and the title will be successfully added to your movie.
- Step 5. Save Video - Now that you have done all the customization necessary for your video, click on the "Save Project" icon from the "File" menu to save your video. Ensure you have saved it in a compatible format and then share it with friends.


