Stunning YouTube slideshows with music enables you to gain more followers, customers, fans, friends and more. If you are looking for the best YouTube slideshow maker to make compelling YouTube slideshows, you are at the right place. There are two ways on how to make a YouTube slideshow with music. You can either use YouTube or a top rated third party slideshow maker.
Part 1: The Best YouTube Slideshow Maker
Filmora Video Editor is an incredibly easy to use program that lets you make more detailed and impactful HD slideshows from videos, pictures, and audio files. It allows you to add clipart, crop photos, utilize filter and effect, add texts, use intro & credit, adjust brightness and do so much more. Generally, the program comes with advanced features that entitle users to have more georgeous and personalized slideshows that can impress anyone.
Why Choose This YouTube Slideshow Maker:
- Slideshows can be burned to DVD or shared on various platforms including online, mobile devices, TV, etc.
- Pictures can be rotated at any angle, up to 360 degrees.
- You can select and repair the repairable portions of your photos, (Repair red eyes).
- Pre Audio feature is excellent for playing an intro in audios and videos.
Steps on how to make a YouTube slideshow video
Step 1 Launch the Program
Download the software and drag the setup file to "Applications" to install it on your Mac. Launch the program by double-clicking on its icon and then you'll see the primary interface which looks exactly like the image shown below.
Step 2 Import Pictures
The program uses "Media-Browser" that can be activated or deactivated by clicking its icon. It allows you to import videos and pictures with ease. When you add photos or videos to the storyboard, drag and then drop specific slides to arrange them. Here, you can also drag a media file out of the program to delete it.
Tips: If you're also looking for beginner-friendly video editing softwares, try Filmora for free now. Start your journey of video creating with Filmora and you're on your way to become an amazing youtuber!
Step 3 Choose Slideshow Styles
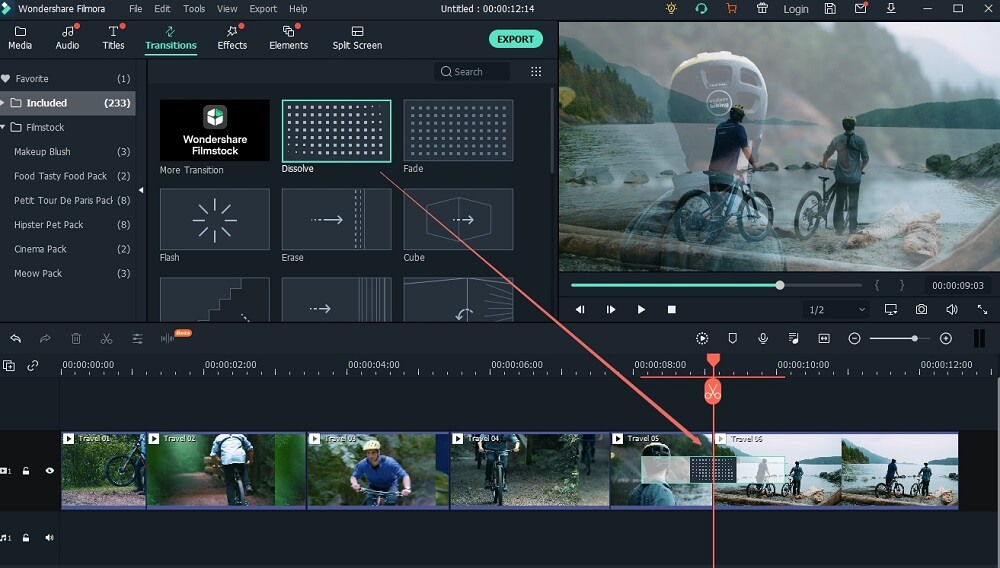
Over 100+ transitions are included, and if you want to add a transition to your slideshow, you just need to drag and drop the desired transition. You can also drag video/photo from one transition to another.
Step 4 Edit Videos
Adjust the volume by dragging the slider located on the panel just next to the "Preview" tab. You can split the video into various pieces at the bottom part of the "Preview" tab by setting the starting point and then select the "Cut" button. "Mark-in" as well as the "Mark-out" options will then appear, allowing you to adjust the duration with ease.
Step 5 Add Music
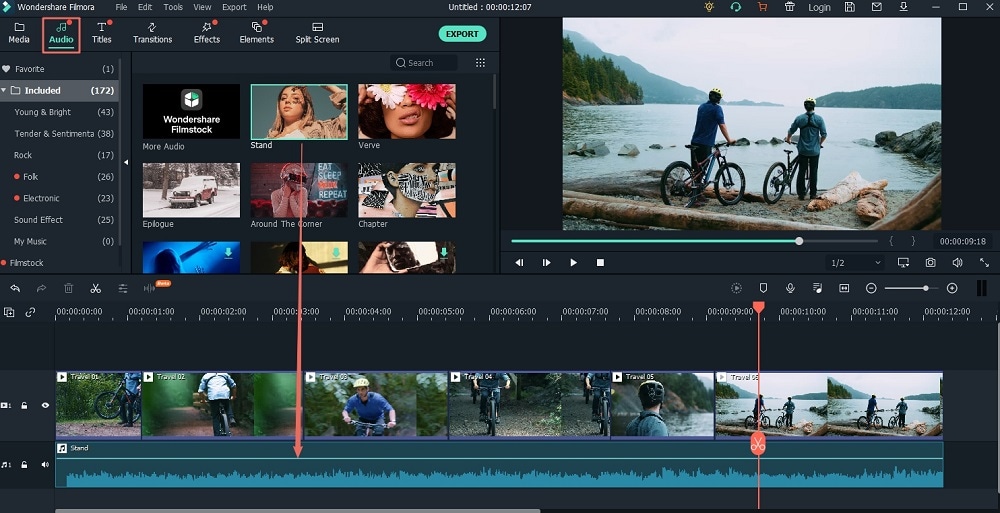
To add music, switch to the Music tab and then you can add the music from the iTunes library to the timeline. You can as well load music from other folders in your Mac hard-drive.
Step 6 Share Video Slideshow to YouTube
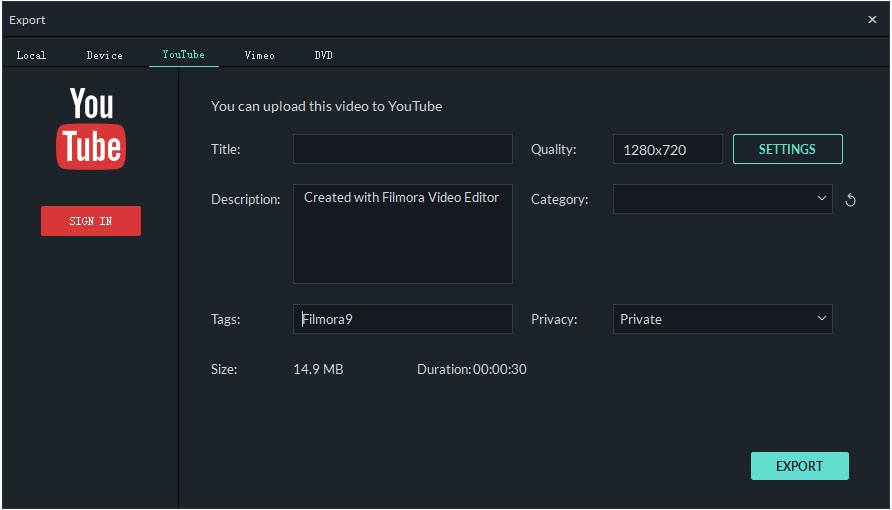
Preview the output slideshow movie and if you feel that its excellent, click the Share button located at the middle left-hand side or go to the "Share menu on top of the program's interface to select how you would like to share it with others. In this case, select "Share to YouTube," provide your YouTube account information and then click 'Publish" to directly upload the slideshow to YouTube.
Part 2: How to Make a Slideshow on YouTube
YouTube does support not only uploading of videos but also comes with a special feature that's designed for creating slideshows. The YouTube slideshow maker can be easily accessed from the upload page. Anyone can create slideshows with YouTube since it involves just a few simple steps.
Steps on how to create a slideshow on YouTube
Step 1
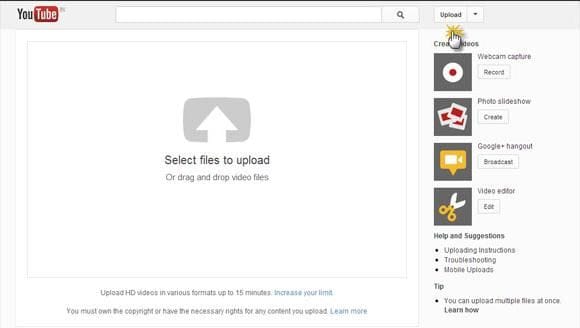
Go to the uploader page on YouTube by clicking here> https://www.youtube.com/upload.
Step 2
Click on the "Create button located under the Photo slideshow.
Step 3
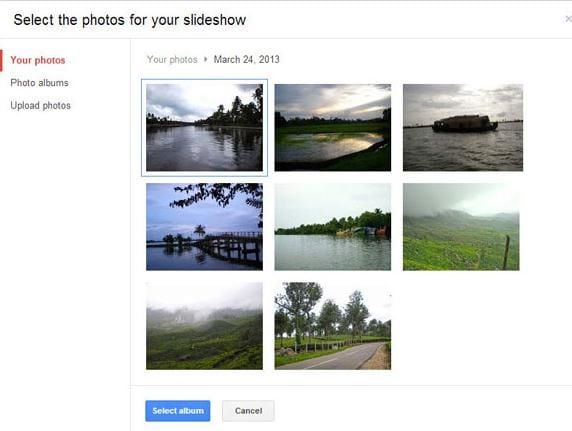
Upload photos from your computer by clicking the "Upload Photos" option and then drag and drop the selected photos from your computer. Alternatively select the photos from an existing Google+ photo album and then click the "Select" button to upload them.
Step 4
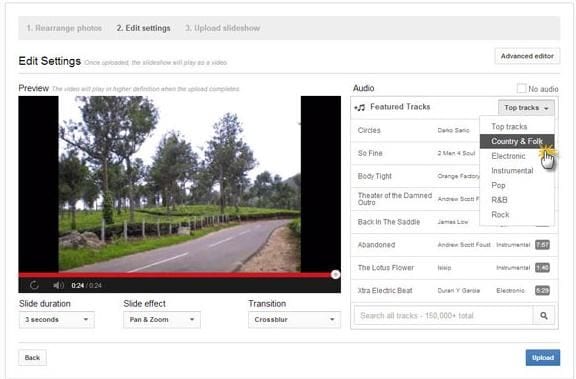
Once you have uploaded all the photos in the timeline, you can drag them around and even rearrange their sequence. Click the "Next" button to access the business end of YouTube slideshow creator. The screen will appear like the one shown below. Select your favorite audio track from the library just under "Audio" or click the "No Audio" option if you want your slideshow to play without music. Note that you won't be able to upload audio files from your computer.
Step 5
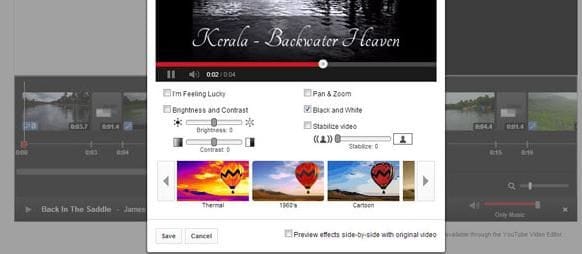
Go into the "Advanced Editor" to fine tune the slideshow by controlling the transitions, add text, apply Instagram styled effects and other controls.
Step 6
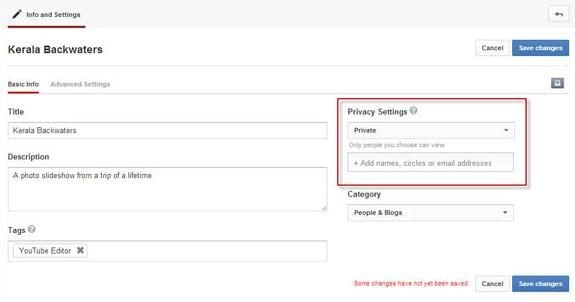
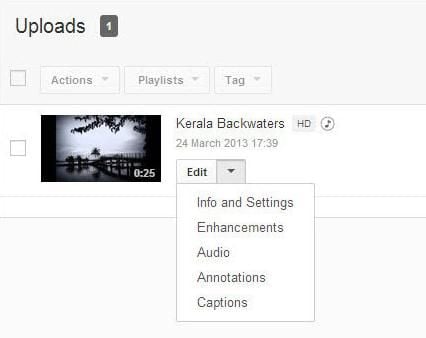
Change the "Privacy" from "Info & Settings." You can take it Public, keep it Unlisted or go Private and then share it with just a few people. You'll also be able to add the title and a description in the Info & Settings page.
Step 7
YouTube will take some time to process the video before it can be displayed on your profile. Click the "Upload" button if you are happy with the slideshow or go back and edit it again if you think that it's not up to the standard you expected.


