We have anniversary for wedding and other important time. The best way to keep record and memory of the anniversary is to make an anniversary video slideshow for storage or sharing with your friends. Below we will show you the easiest way on how to create anniversary slideshow on Mac OS X (El Capitan, macOS High Sierra included), so that you are able to keep the photos and videos of your unforgettable moment.
- Part 1. Make an Anniversary Video Slideshow Using Filmora
- Part 2. Make an Anniversary Video Using Slideshow Maker
- Part 3. [Tips] How to Add Life Events on Facebook
Part 1. The Best Way to Make Anniversary Video on Mac and Windows
Anniversaries are arguably important events in our lives. No matter the kind of event, you need to be posted on how to make anniversary video on Facebook or simply how to make anniversary video. Either you are a novice or an expert, there is no define style on how to make anniversary video. The key thing is to have the right software which is Filmora Video Editor for Windows (or Filmora Video Editor for Mac). This program is fully functional for both Mac and Windows OS. It comes with fully packed tools which include, pan and zoom to enhance still images, add texts for you to give genuine sentiments on the video and Flip which is ability to play the video in a reverse mode.

Why Choose This Anniversary Video Maker:
- Filmora Video Editor can handle almost any file format irrespective of how you had saved them like for HD videos, MOV, MP4; music, MP3, M4A; and image, TIFF, JPG including more others.
- This program enables you to detach audio on your anniversary video and carry out separate edits which include adjusting the volume to hear every word and add fade ins and fade outs.
- Advanced tools like Picture-in-Picture, Green screen, replicate your plain anniversary video into a striking Hollywood like.
- With this software and your well curated anniversary video, you can turn into a global sensation by directly sharing into social media, save it on your mobile device or computer in any format you prefer.
Steps to Make Anniversary Video for Facebook, Instagram, YouTube
Step 1. Import Anniversary Files
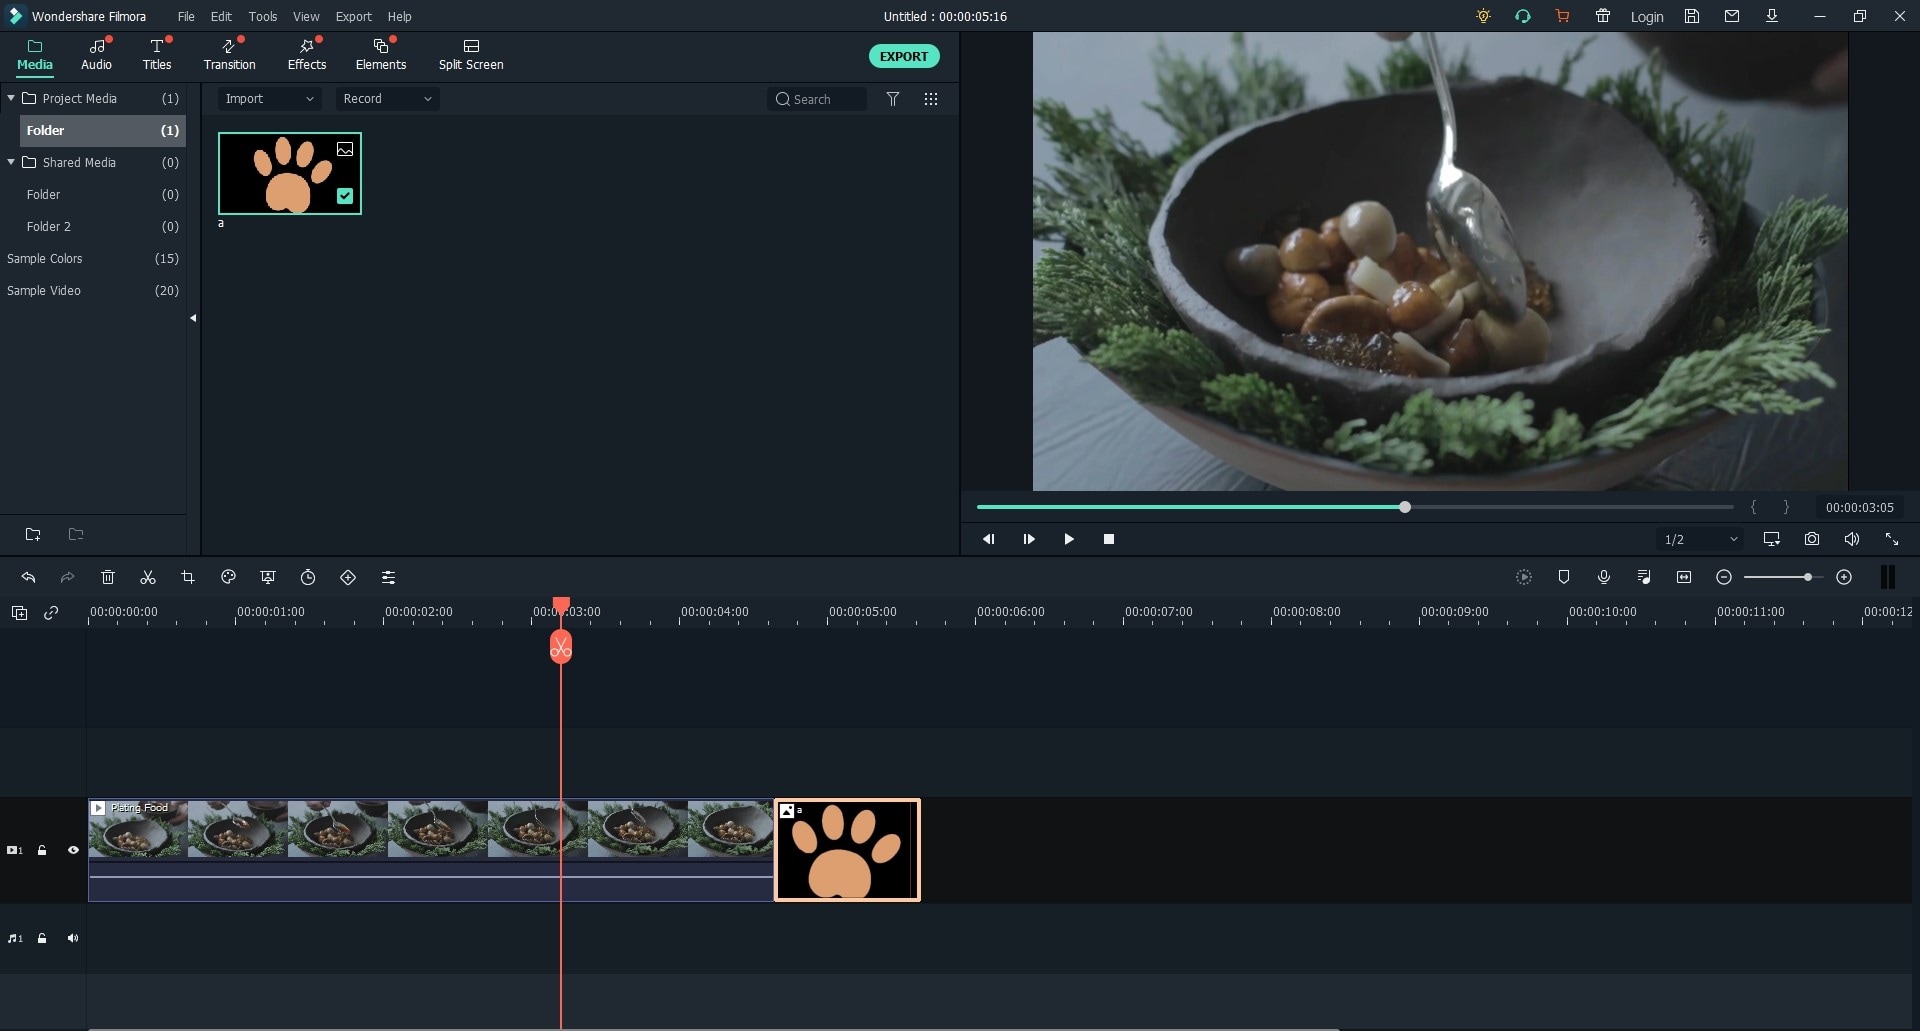
Launch Filmora Video Editor on your computer. On the main interface, click on the "Import media files here". Keep track of the on-screen guide and add to User's Album your targeted anniversary files. Contrary to this option, you can take the simpler one which is to drag the files and drop on the software. To start editing, drag and drop this file on editing timeline.

Step 2. Create the Anniversary Video
Simplest way on how to make anniversary video is to combine photos and videos. To meet this desire is to simply drag this file in order from the User's Album to video timeline. When you export them, it will be one great anniversary video.
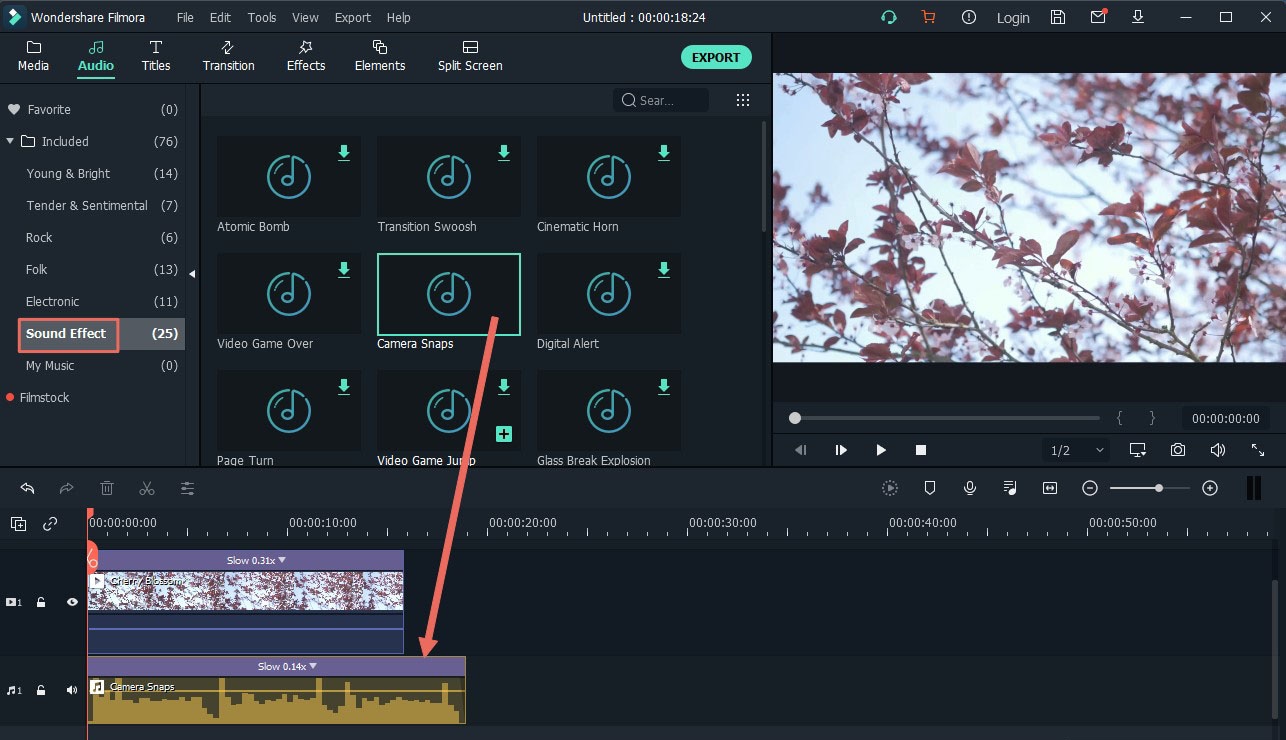
How to make anniversary video on Facebook / Instagram / YouTube spectacular is to add music. Click the "Music" icon just above the timeline and select a song from the music library. Drag and drop it on the audio track timeline. Alternatively, you can import songs to the music library and add it to anniversary video.
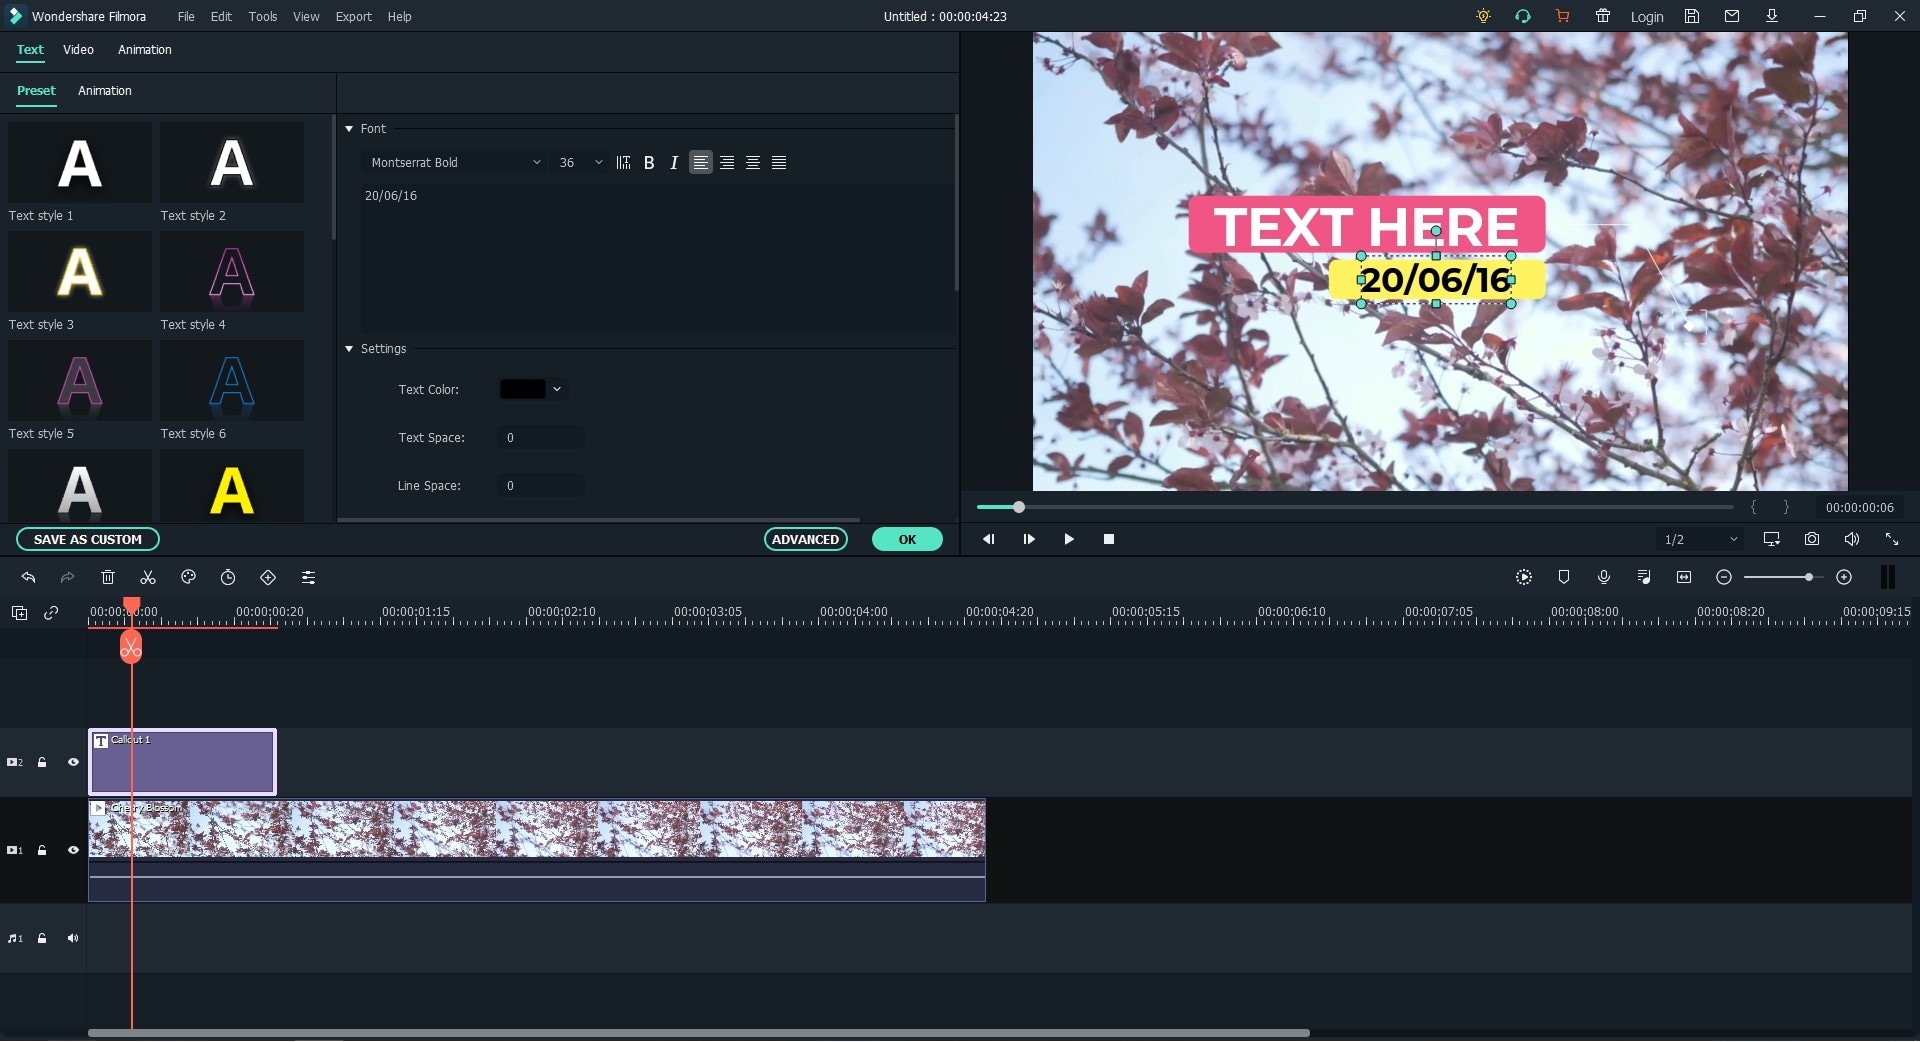
To add text is a way of how to make anniversary video express the right opinion ad feeling. Tap "T (TEXT|CREADIT)" tab just above the timeline and select appealing one and drag and drop to the timeline. Then you can adjust the size and edit texts as you want.
Step 3. Export Anniversary Videos
After completing edits on your anniversary video, click on the "Export" button. A pop-up export window will be displayed, are prompted select export format, give it a name and save path. Alternatively, you can directly upload to social media platforms or send to a device.

Part 2. Make an Anniversary Video Slideshow Using iSkysoft Slideshow Maker
iSkysoft Slideshow Maker for Mac is the highly recommended tool that can do everything you need to make slideshow. It will allow you gather photos and other memorabilia and produce an anniversary video slideshow that will tell the story of your experience at the wedding. You can add music, themes, graphics, and most of it will be done with just a few clicks. If it is your wedding, you will have something you can be proud of. You can share it on YouTube, or other places or on any device that is capable of showing videos. Your Mac can be an instrument that you can use to produce wonderful remembrances of your wedding. With the right software, you can produce an anniversary video, which will be the envy of those around you, and one you will be proud of for years to come.
How to Create Anniversary Slideshow with iSkysoft Slideshow Maker
Step 1. Launch the Anniversary Slide Maker for Mac
Download anniversary video maker and install it on your Mac. Run this program, and you'll see the program interface shown as below.

Step 2. Load Anniversary Media Files to the Program
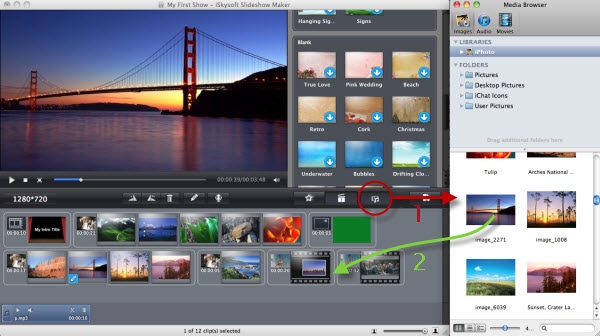
This anniversary video maker provides "Media Browser" icon allowing you to easily import videos, images and audio to your project. Click the Media Browser icon to show media selection window and drag the video, photo or audio you want to the storyboard, after that, click it again to close the window. After adding the media to the storyboard, drag specific slide to the media and arrange it. If you don't want the media, you can directly drag it out of the anniversary video maker to remove it.
Click the "Edit" button, you can easily access to editing tools like trim, rotate and delete. Besides, right click a video or photo, select "Edit", you can get editing tools as well.
Note: Before going on to next step, set suitable size for your slide. If you want to watch the show on mobile devices, the size should be changed when export. You can set 1280*720 or 1920*1080 for HD shows.
Step 3. Set Styles
When you import videos and photos to the project, you will get random themes on them. If you like, keep them or change them at anytime you want. This anniversary video maker provides more than 30 themes. To add a style to video slide(s)or photo, simply drag your desired style to the existing one for replacement. You are free to change style from one to another. You also can increase clips number in a style. Move mouse to a video or photo, you will get a gear icon. Click it to go to "Style Properties" window and set clips number on it.
If necessary, you can change the background style and the duration of clips as well. Right click a slide and select Style Properties to bring up a menu. Set individual duration by Duration option. Or click the option "Apply to all clips" to set all clips with the same duration. Also note that only 3D and General styles allow you to change the background to a local image or pre-design paper on Mac.
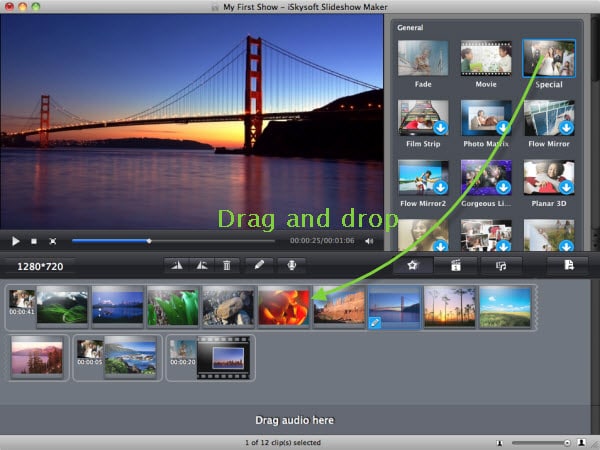
Note: If you want to download themes, please make sure your network connection is active. Click the big download arrow to start downloading. Here is the theme package that contains extra Intro/Credit slides and many types of themes.
Step 4. Preview and Share
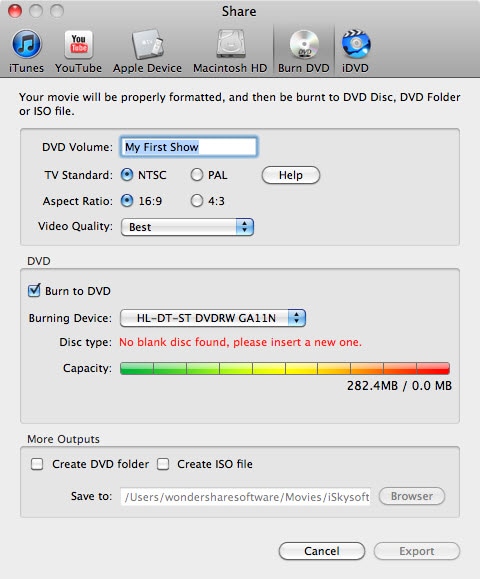
Finally, preview your anniversary slideshow from the beginning to the end. If you satisfy with it, mouse over "Share" icon on top, and click to select the option you like to share with your friends or others. You can directly upload your anniversary video to YouTube (simultaneously on Facebook if necessary), export to Apple devices or iTunes, burn DVD.
Tips:
• If you would like to share it on Apple Device, the default dimensions are well. The best optimized parameters and dimensions would have been used.
• Or you are able to save the anniversary video for later editing. To do so, go to File and click Save or Save As option.

DVD Creator
- Burn any format videos to DVD, including MP4, MTS, MOV, WMV, etc.
- Burn your homemade movies and the videos created by phones and camcorder to DVD.
- Enable various video editing tools allowing you to edit the video before burning.
- You can apply free DVD menu to the video or download free DVD menu to fit your theme.
Part 3. [Tips] How to Add Life Events on Facebook
Facebook being one of the widely used social media platform around the world, sharing your life event like anniversary on it is a prudent decision. To accomplish this is a straightforward task. Follow the following detailed guide to know how to make anniversary video on Facebook.
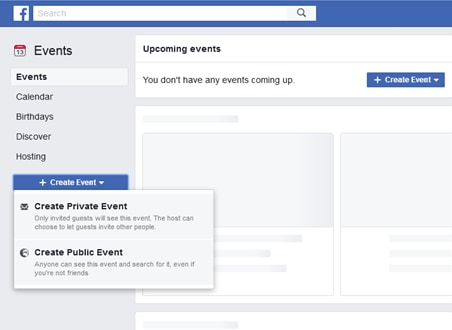
Step 1. Sign in to your Facebook account using any convenient browser. Click on "Events" icon on the left column of the main interface and respectively on "Create event" button. Select either create Private Event or Create Public Event.
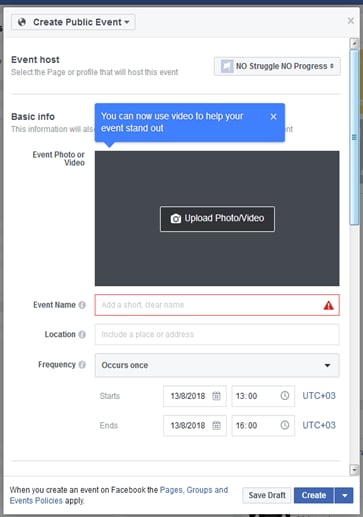
Step 2. Regardless of the option you choose on how to create anniversary video on Facebook, on the pop-up window, click on the "Upload Photo/Video" button and select anniversary video you intend to upload from the location you had chosen to save it. Key in all the required information by following on screen instructions and finally click "Create" button.
Conclusion
The process of how to create anniversary video or how to create anniversary video on Facebook is absolutely exciting. Filmora Video Editor is always the top choice to execute editing of any files. Always perform this as a routine to keep each anniversary fresh during any time you revisit these precious anniversary videos.


