“I have got my Mac updated to the latest OS X Mavericks. Can anyone tell me how can I move all my music from my iPhone to my Mac Mavericks?”-Mike
Normally, we use iTunes to manage our iDevice media files, especially for transferring files from Mac or iTunes library to iDevice. However, if you want to do the opposite, you will find that iTunes is helpless. You can apply some third-party application to do iPhone music to Mac transfer, but not all of them let you transfer music from iPhone to Mavericks. Don’t worry. Here is the solution for you.
In this article, I would like to highly recommend you to use iSkysoft iTrasnfer for Mac (for Windows) to copy music from iPhone to Mavericks. It can work more than iTunes can and allows you to export all your iPhone (iPhone 8 and iPhone X included) music, playlists with rating and play counts to your Mac Mavericks in very simple steps. If you have moved to a new Mac, you can use this application to transfer your media files from old computer to the new one. Even if you want to share your iPhone music with your friends, dr.fone can be the best choice for you to copy your music to your friends Mac or iTunes library. See from the below detailed guide, you can learn how to process iPhone to Mavericks transfer.
How to Transfer iPhone Music to Mavericks
Step 1. Download and install dr.fone
After you download the program, the installation can be very easy with the help of the built-in installation wizard. When you’re done, drag the program icon to the Applications folder and save the program on your Mac hard drive. Open the program.

Step 2: Tranfer music to your Mac Mavericks
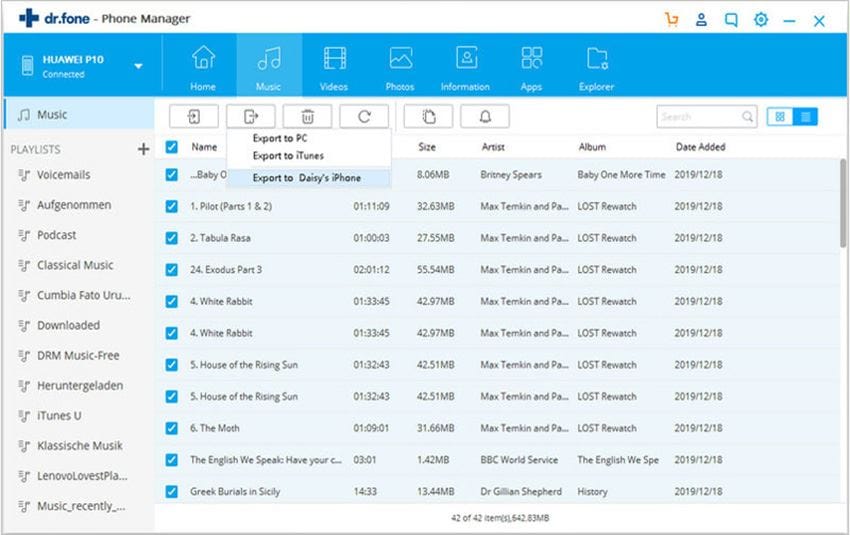
Launch the program, and you can connect your iPhone to your Mac with USB cable. dr.fone will detect your iPhone and show your device information as the below image. At this step, you can directly click the "Music" tab at the top of the main interface.
Select the music files you want and click the Export to Mac button to start transferring music from iPhone to Mavericks.


