A watermark in a video is often in the form of an image, logo or text. It is usually used to clearly identify the creator of the video or the brand that owns the content. Video watermarks can appear from the beginning to the end of a video or repeatedly at random parts.
Then, you might wondering why watermark videos, right?
Well, a watermark is generally intended to protect the video content from illegal use and distribution. Although the watermark cannot stop others from copying and distributing the video, it makes it easier for you, your viewers or the authorities to recognize unlawful use of your content.
What's more, watermarking your videos can have significant advantages:
Content promotion: By designing your watermark creatively you can use it to promote your brand, channel or products. Think of it as a business card. Watermarks have the potential to draw more followers, viewers or buyers to you and inform them of other things you have to offer.
Increased brand/channel awareness: By using a well-designed watermarked, more people will know about your company or social media channel. If the content is good, they will remember your brand/channel name and next time they are in the mood to watch interesting videos they will come straight to your channel or recommend you to friends.
Discourage plagiarizers: Watermarked videos are less stolen. It is common sense that someone who wants to steal your video for their YouTube channel is much more likely to steal an unwatermarked video.
Copyright protection...
Now, you've known what the watermark means for a video, then, the problem is coming - how to put watermark on video?
How to Add A Video Watermark using A Professional Video Editor?
Background introduction:
Filmora Video Editor is loved by millions of users for its ease-of-use, well-designed UI and high-quality results. With this program, you can not only add watermarks, but also edit and enhance videos by using its tools to trim, cut, crop, join videos, add filters and apply more than 500+ stunning video effects.
Now, let's check the main functions as below:

Key Features
- Full range of video editing tools including video splitting, merging, sound effect editing, color tuning, audio mixing, video transitions, add text/subtitles, etc.
- Easily create and add beat markers to audio clip, make personalized sound effect or video effect as you like.
- Free video special effects to enhance your video performance, such as audio, transitions, filters, titles, and so on.
- Import and export videos in various formats, like MP4, WMV, AVI, MOV, etc.
- ...
Step-by-step Guide: How to Watermark Videos with Filmora Video Editor?
Step 1. Launch and Import Video File
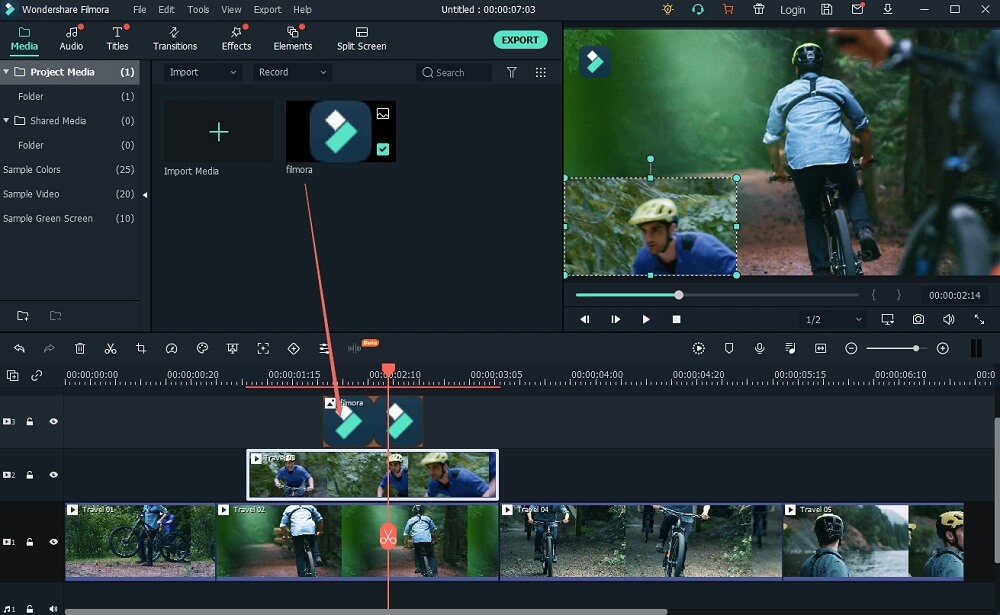
Run Filmora Video Editor on your computer, and click "Import Media Files Here" to load the video clip you wish to add a watermark into the program. Then, drag and drop the video into the timeline for editing.

Step 2. Import A Image or Logo You as Watermark
Using the same process as above to import your watermark image or icon. This program support image file in JPG, JPEG, BMP, PNG, etc. formats. Then, drag the icon to the timeline for further editing.
Note: Please put the image icon to a new track, so that the editing process will not damage the image file.

Step 3. Pre-edit your video
You have a chance to enhance your video before you add the watermark. Here, you can use the functions like trim, crop, append clips, add intro/outro, mute background music and import a new one, or use the editing panel to adjust the video brightness, contrast, saturation, etc. as you like.

Step 4. Add the Watermark
Now, it's time to add the watermark. Here, you have 3 ways to deal with the watermark. Let's check them one by one:
#1. Image Watermark
First, you need to extend the duration of the watermark image to be as long as the video or appear or edit it to appear in intervals as the video plays. To do it, you can hover your mouse near the end of the watermark clip and then click and hold to set its length.
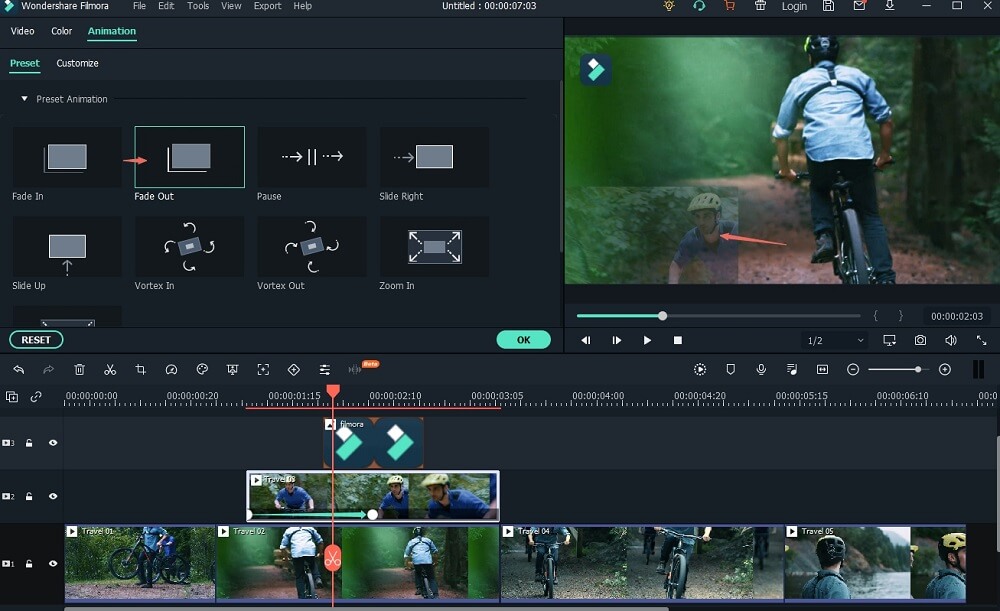
Then, Filmora offers various tools to enable users to enhance a watermark.
You can edit your watermark to choose a location, add transformation, motion and shape effects, or even add a border or apply a shadow, as well as set transparency.

Also Read: How to Overlay Videos (PIP) with Few Steps
#2. Text Watermark
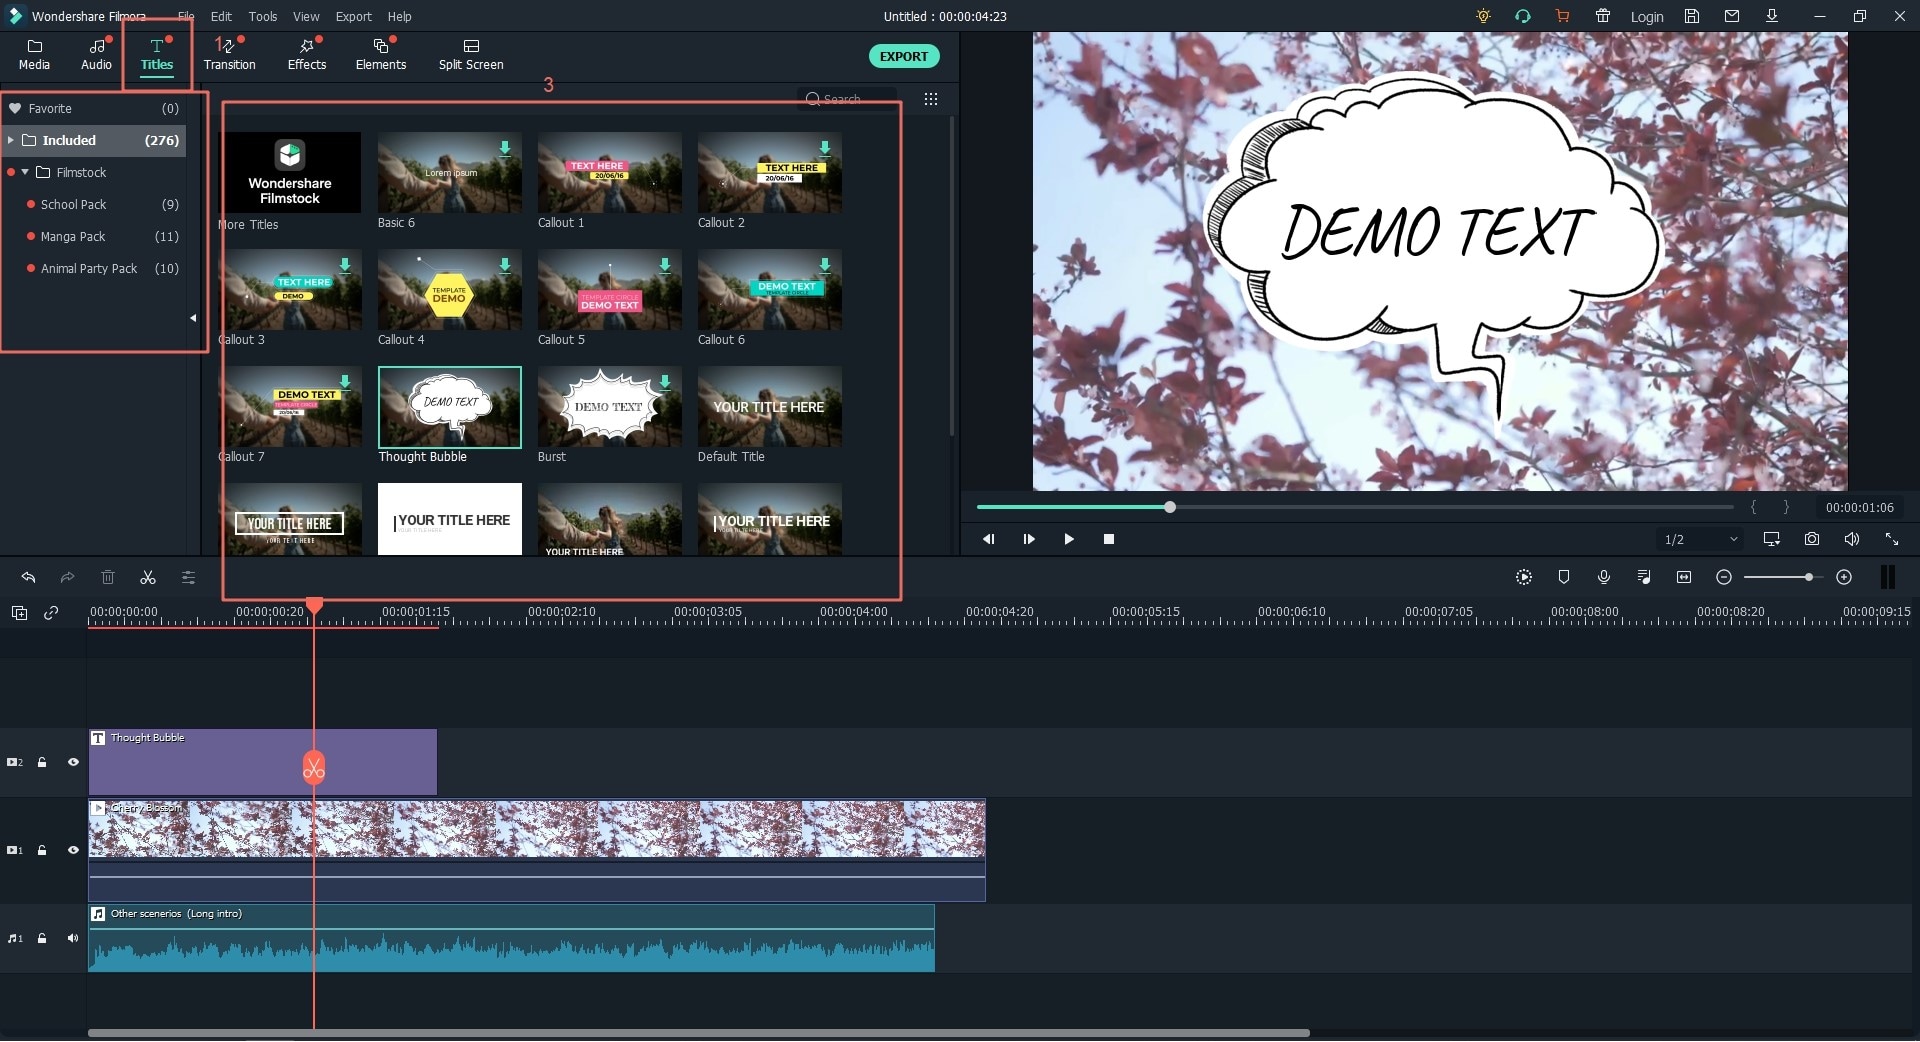
In addition to image icon, you can also set a simple watermark on your video by adding a text. To do it, you only need to click "Text" and type the words you want and then position it.

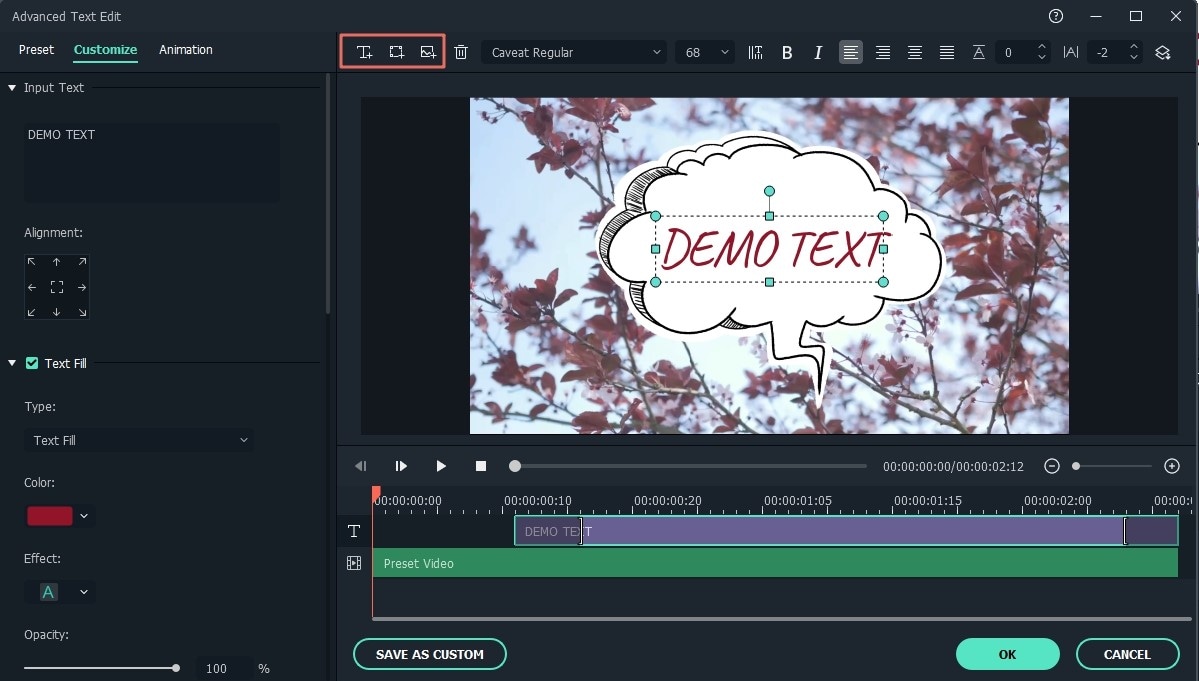
Filmora offers over 200+ text effects. You can preview different text options by double clicking the text presets. On the text track in the timeline, drag its edge to set the watermark to the desired length. Here you can further customize your text watermark by adding overlays and changing font, text color and size.

*TIP: Feel free to creatively use both image and text watermarks on one video. An example is where you want to alternate between your logo and YouTube channel name.
Step 4. Save Your Video and Publish Online
Preview and make sure the watermark appears in the video as you want. Then, you can click "Export" button to save your video in formats or upload to the Internet as you like.

Write in the End
With today's online trends of reposting and sharing of content, it's important to watermark videos so that anyone watching will know the original creator or owner of the content.
With Filmora Video Editor,
You can add watermark to YouTube video, Vimeo video or videos that you're planning to share on the Interenet without any restrictions. And you can apply the basic and advanced editing tools to enhance your video performance.
Now, just click the below icon to get this powerful video editing software and try to add watermark to video by yourself.
If you wanna to remove the watermark in video, here also some solutions for your reference.


