Can Adobe Premiere Pro work on Windows 10? Adobe Premiere Pro is a well-known tool and can help users to edit videos. However, there might be times you find Adobe Premiere Pro not working issues, especially that Adobe Premiere Pro not working on Windows 10 problems occur frequently. Luckily, here we will share tips for you to fix such Adobe Premiere Pro problems.
- Part 1. Best Adobe Premiere Pro Alternative for Windows 10
- Part 2. Tips about Adobe Premiere Pro?
- Part 3. Troubleshoot on Using Premiere Pro on Windows 10
Part 1. Best Adobe Premiere Pro Alternative for Windows 10
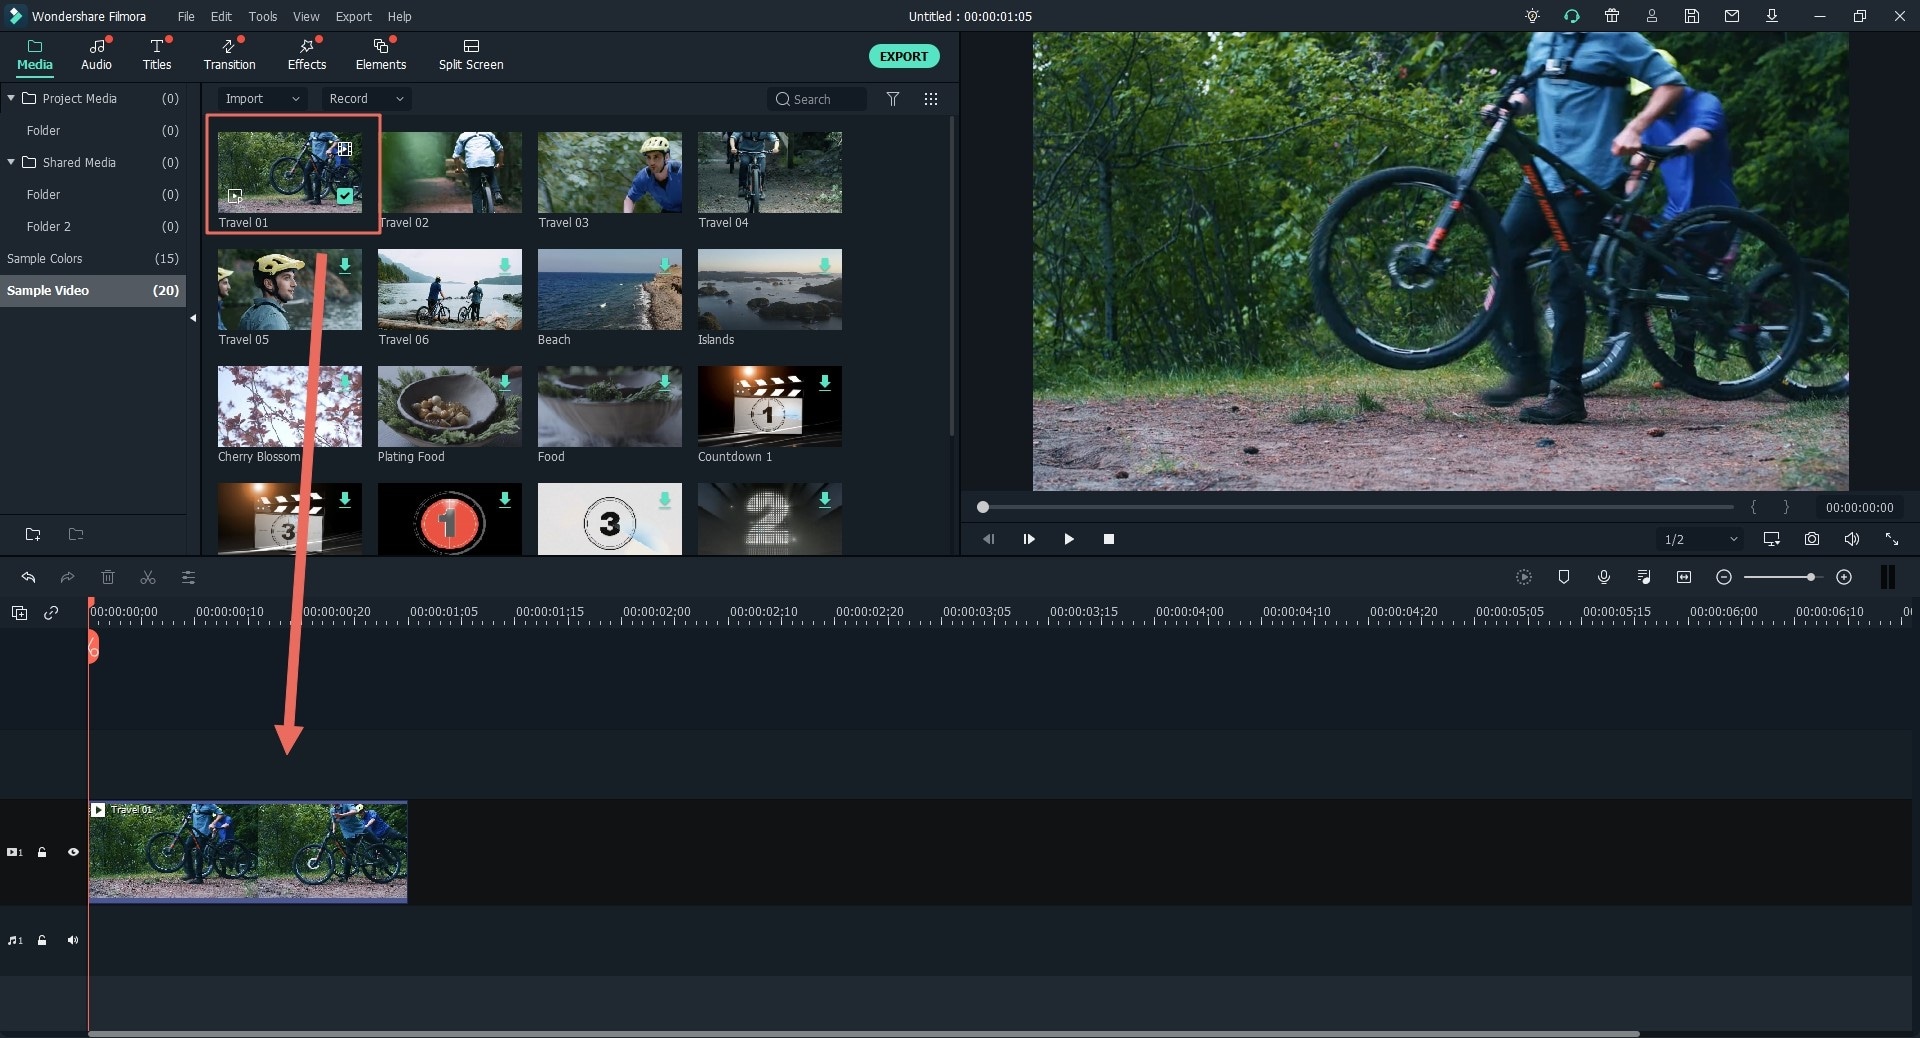
Filmora Video Editor & Filmora Video Editor for Mac can be the best Adobe Premiere Pro alternative for Windows 10. It is easy to use yet comes with multiple advanced video editing features. And you can apply wonderful effects to your video to make it special.
Why Choose Filmora Video Editor
- You can edit video in easy mode and full feature mode per your need.
- You will have easy-to-ues edit tool to trim, rotate, crop, split and join video.
- It is easy to add title, text, transitions, filter and more effects to the video.
- And you can edit video with PIP, green screen, split screen features.
- You can directly share video to YouTube, devices and other platforms.
How to Use the Best Alternative to Adobe Premiere Pro for Windows 10
Are looking for a guide on how to use the best alternative to Adobe Premiere Pro for Windows 10? Using Filmora Video Editor Software to edit videos is quite simple. Just follow the steps below.
Step 1. Import Media Files
Click on the “File” button and browse down to “Import Media” button, choose your files from their save location and finally click “Open” button. Alternatively, you can hit “Import” button located just above the User’s Album and follow antecedent instructions or opt for a simple option to drag the files and drop on the Users Album. Other available options for you to add files to the program is to download from social media sites which include Facebook and Instagram, or record with the option you are comfortable with provided by this editing software.

Step 2. Add Media Files to Timeline
Click on “+” sign on the file or just drag and drop to timeline. However, you can remove a file from the timeline by right clicking and select delete, select and tap on delete button in the menu section.

Step 3. Edit Video
To split your file, just move the play-head to the intended point, right click and select “Split”.

To merge several clips into one video, simply drag them into the timeline in sequential order you intend them to appear and then hit the “Export” button.
Perform other editing options like crop, add texts and overlays, and split screen among others by simply tapping their respective icons and the subsequent on-screen instructions.

Step 4. Export Edited Media File
After you have satisfactorily accomplished your editing tasks, click on “Export” button in the menu bar to display export window. You are obliged to select export format, designate a name to your video and choose the right save directory then hit on “Export” button in the bottom left corner of the latter window. Nevertheless, you can alternative choose to export file directly to your device, upload to YouTube, burn to DVD drive or share to Facebook.

Part 2. Tips about Adobe Premiere Pro for Windows 10

Adobe Premiere Pro for Windows 10 is a video editing software program. It is the successor of Adobe Premiere. It is a piece of great software for its simple and advanced video editing tasks. Video editing is very important today. This is because people are becoming more and more selective of the videos that they can watch. Most people hate watching poor quality videos. Research has shown that many people will stop watching a video the moment they discover that it is of poor quality. That is why there is an increasing demand for video editing software.
Adobe Premiere Pro can do more than just enhance videos. This software allows you to convert your videos from one format to another. You can work with multiple video files when you are using this software. It is even capable of opening adobe Photoshop files. Since its release, Adobe has been working hard to ensure that it becomes the best video editing software in the market. Several improvements have been made in attempt to make it the video editor of choice.
Part 3. Troubleshooting on Using Adobe Premiere Pro on Windows 10
When using Adobe Premiere Pro, you may run into some issues from time to time. Most of the problems that you might come across can easily be solved through simple troubleshooting steps.
One of the major issue stat you might run to when using this video editing software is crashing. If your Adobe Premiere Pro crashes, the first thing that you should do is to check whether Adobe Premiere Pro.exe is running. If it’s still running, you have to stop it. Crashing was a major problem with previous version of the software. The most recent version of Adobe Premiere Pro rarely has crashing issues.
When Adobe Premiere Pro crashes, it may be impossible to open it again the usual way no matter how hard you try. If it’s impossible for you to open it despite clicking on its shortcut icon several times, the best solution will be restarting your computer. Everything will go back to normal when your machine restarts. However, the process of restarting your machine every time your video editor crashes will waste a lot of time. This can be very annoying especially if you are working against strict deadlines.
If you don’t want to lose time by restarting your computer, there is an easier way to deal with crushing problems when you are using this software on Windows 10. This is done by starting the Windows task manager. Locate the process “Adobe Premiere Pro.exe” and click on the “End process” button. Close the task manager and click on Adobe Premiere Pro shortcut icon to open the program.
By the way, if you want to get more video editing software for Windows 10, please check this page to learn more.


