Have you seen experts edit clips using After Effects and you wonder how they are being able to do it without stress or worries? Would you like to operate as a professional After Effects user? Pay attention to what you will be learning soon because this article is about to demystify what might have looked haphazard in your video editing experience. You will have a stress-free and smooth experience using After Effects to cut clips
After Effects is an extremely flexible software program. You are going to be learning the basics of After Effects, how to cut and trim clips in After Effects, what it is used for, why you should split a clip, and many more. We'll look at various approaches to clip cutting and some helpful shortcuts to create a simple workflow
Basic understanding of After Effects
Before going into the steps of splitting a clip, we need to have a background understanding of the uses of After Effects. After Effects is a versatile software that can perform so many functions as much as you want, few of them are listed below:
Features of After Effects
- For 2D illustration and Animation – You can create a 2D animation using Illustrator and After Effects together, utilizing Illustrator’s illustration power with After Effects’ animation tools.
- For motion tracking – Video producers might benefit from motion tracking for a number of reasons. Perhaps you want to make someone's face in a video blurry. Even when the camera position changes or the subject moves, motion tracking enables the blur to cover the face.
- Simulation effects – If you have a video that was shot in the sun but the scene calls for rain, After Effects can help you make that happen. With the use of Simulation Effects from After Effects, you can design your desired outcome while post-processing.
- 3D Animation – Using After Effects’ 3D Camera, you can animate from the perspective of any camera angle. This allows you to add depth while working on any X, Y, or Z axis.
How to Cut a Clip in After Effects
Firstly, if you want to cut a section of your clip in any other editing software, you would most likely use a blade-like tool to cut out the section and delete it. But with After Effects, there are a couple more steps. Follow the steps below and successfully cut your clip.
A Comprehensive Guide to Cut a Clip in After Effects
- Launch After Effects and import your video – The first step is to import your video into a new project that has been opened. Choose a new composition from the main menu to start. It then displays the composition menu, allowing you to select the resolution and other options before starting to create your composition.
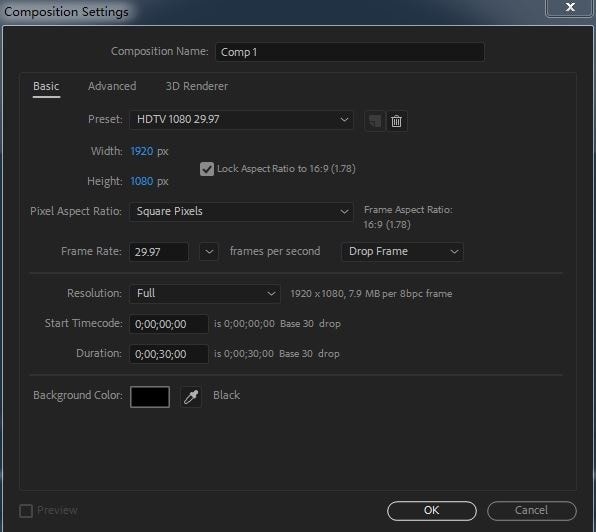
Now you are set to import your video. This is achieved through the file/import menu as we see below:
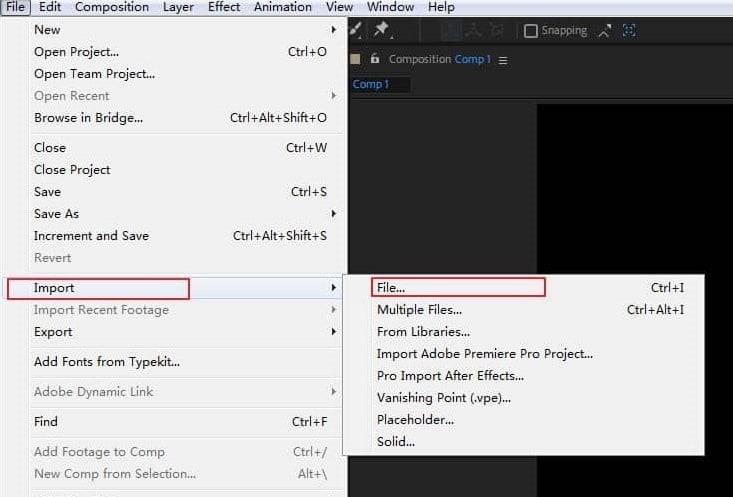
When your video is ready, drag it into the timeline.
- Editing the video – You can now start cutting the video track into the desired sections. It's quite simple to do this. Just choose the video track in the timeline, move the playhead to the precise location where you want to split the track, then either use the edit menu's split layer option or the keyboard shortcut Control+Shift+D.
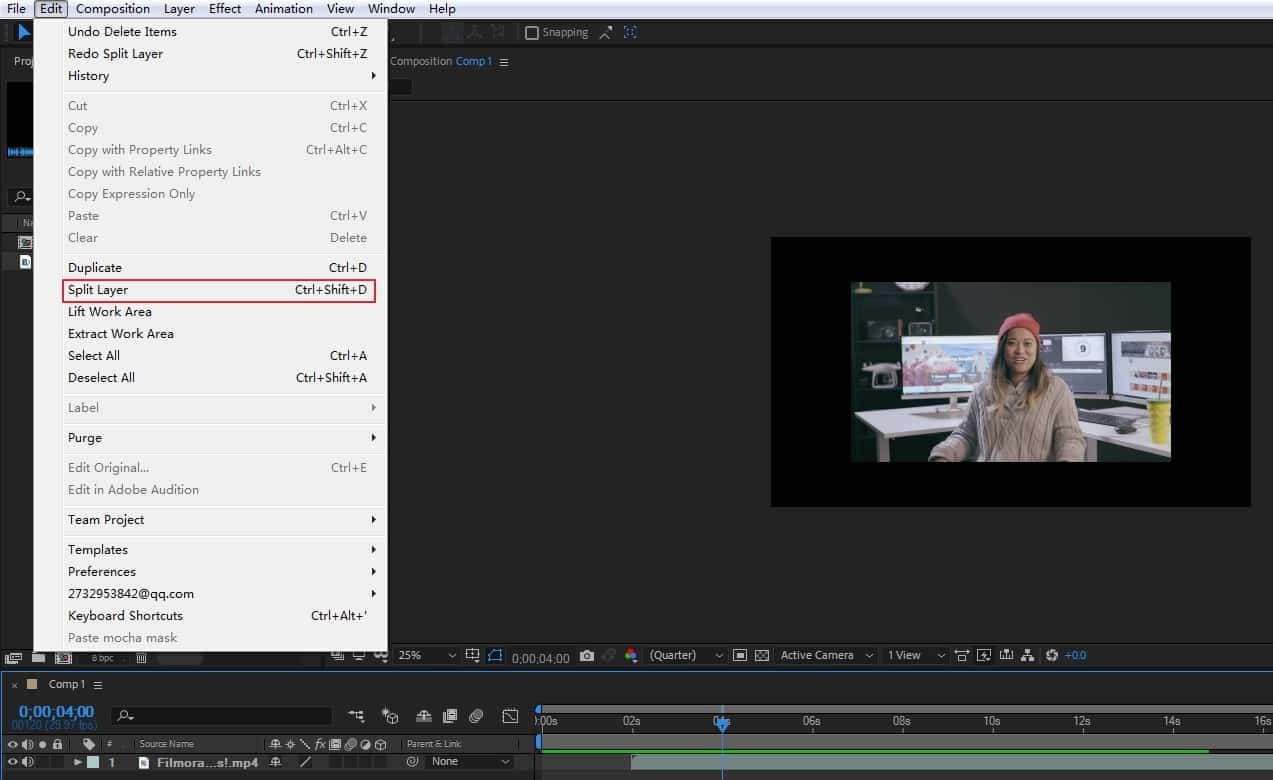
Any way you do it, you end up with a split video track that allows you to apply transition effects and other effects as you see fit. The second half is also moved off into a separate layer. Of course, you are not limited to just one cut; you are free to produce as many as you like and rearrange them however you like.

- Additional tools – Cutting in this way has a number of benefits, including the possibility of applying complex effects and processing to each segment of the video separately and the ease with which they can be rearranged.
The video will now play in a completely different order, as we can see here. Once you have this, adding transition effects is one of the things you can accomplish very easily. All you have to do is highlight the point on the timeline where the transition should start and select an effect from the menu.
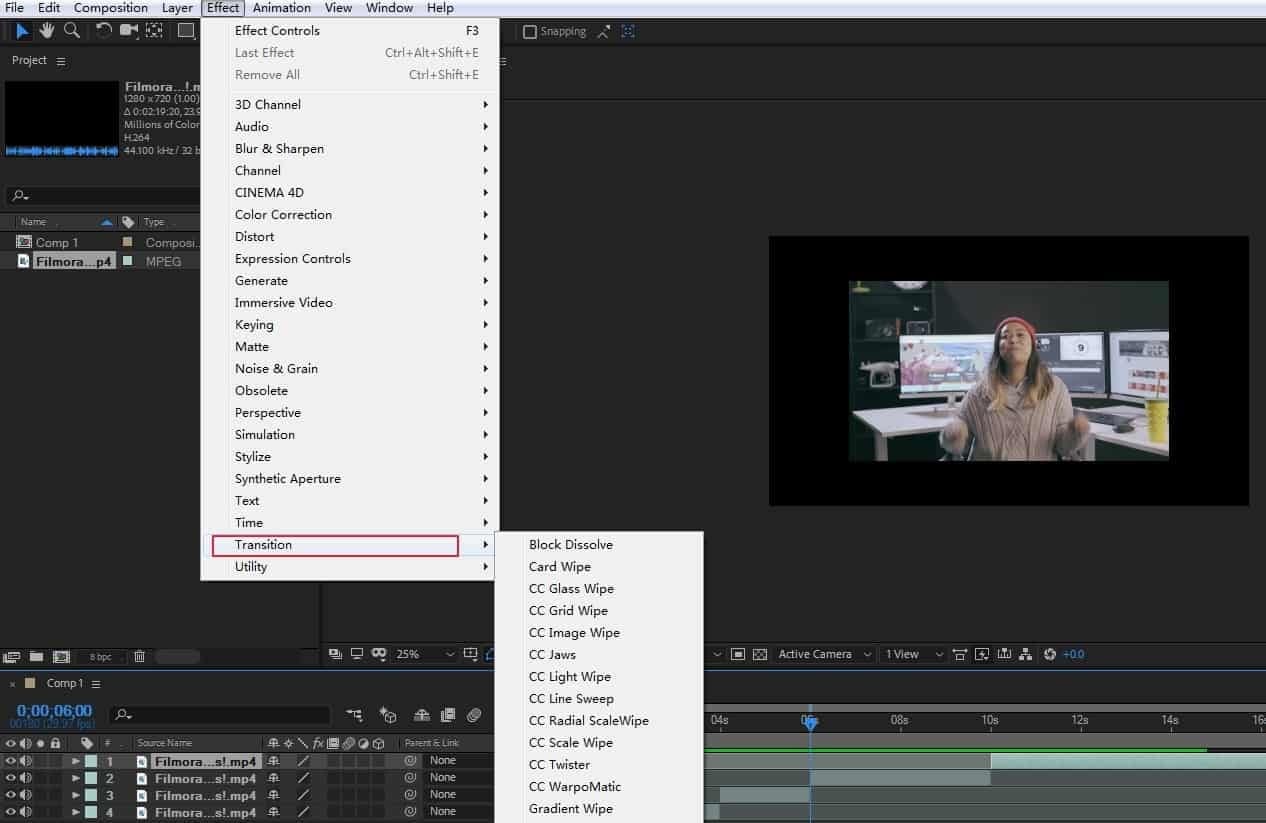
Once added you can adjust the time taken and so on to get the precise effect you want. You can of course delete any clip you do not want by simply deleting the layer.
- File exporting – Once you are satisfied, use the file>export menu to export the finished document. When you select "add to render queue," the render menu appears, allowing you to customize the settings, filename, and final output location as needed.

Two Easier Ways to Cut a Clip in After Effects
There are some much quicker methods for trimming clips in After Effects in addition to the conventional one.
- Create a duplicate layer – Duplicate your layer—Ctrl + D on PC or Command + D on Mac. Then, grab one end of your layer and trim the clip to the exact frame you want it
Simply hold down the shift while dragging the ends of the clip to trim it to the position of your playhead. By doing this, you may avoid the tedious task of having to match up your layer frame by frame and have it automatically snap to the playhead position.
- Use shortcuts along with the playhead – First, position the playhead at the exact frame you want to cut. Then use the shortcut “Alt + [” on PC or “Option + [” on Mac to trim a clip from the beginning. If you want to trim the clip from the end, use the shortcut “Alt + ] ” on PC or “Option + ] ” on Mac. Both of these shortcuts will trim the clip to wherever your playhead is positioned.
Bonus Three Tips for Cutting a Clip in After Effects
There are useful tips you should know in addition to knowing how to cut clips in After Effects. The top three tips for cutting a clip are:
- Use Premiere Pro Dynamic Linking – If you are working with a lot of videos that need editing before applying effects or animation, it is advisable best to start in Premiere Pro. After Effects and Premiere Pro work hand in hand using a dynamic linking system. You can edit your clips in Premiere and use them in After Effects without the need for exporting.
- Use Layer Locks and Compound Clips - One problem with editing clips in After Effects is that you can easily mess up your composition by selecting or moving the wrong layer. While naming your layers can help avoid these issues, locking them can freeze your clips and sequences in position
- Naming layer – Although it may seem like a simple process, editors frequently skip it because they want to get started working right away. The organization of your project can benefit from properly labeled layers because you'll identify and work with the right layers more quickly and can change many layers at once.
Filmora – A More Easy-to-Use Way to Edit Clips
As a newbie, you may find the editing/cutting process on After Effects difficult for you to understand and use, even the concise breakdown on how to cut/edit clips on After Effects might still look complicated. Nevertheless, we recommend that you use Filmora. It is an Easier-to-use way to edit/cut Clips. You can edit videos quickly with Wondershare Filmora. Moreover, both the Mac and Windows operating systems support downloading and installing the software.
Moreover, due to its great features and slick functionality, this video editing program has quickly become a favorite among professionals.

Recommendation: Filmora Video Editor
- Best video editing software for beginner and semi-professional, that comes with powerful editing skills like trimming, splitting, rotating, editing, etc.
- Advanced video effects like green screen, PIP, audio mixer, etc. can also be found and applied to your video within few clicks.
- 500+ free special video effects to customize and create an awesome movie by yourself.
- 1000+ standalone effects downloading resources to make videos in all kinds of styles.
- Export videos to Chromebooks compatible format with 1 simple click.
How to cut a Clip in Filmora
In addition to the standard method of cutting clips in After Effects, as well as the quick method, Filmora will help you in achieving the same result without stress. Follow these steps:
- Import your clip - For that, you need to click on the “Movie Clap” icon and choose the video you want to cut using Filmora (shown in a red box in the image below)
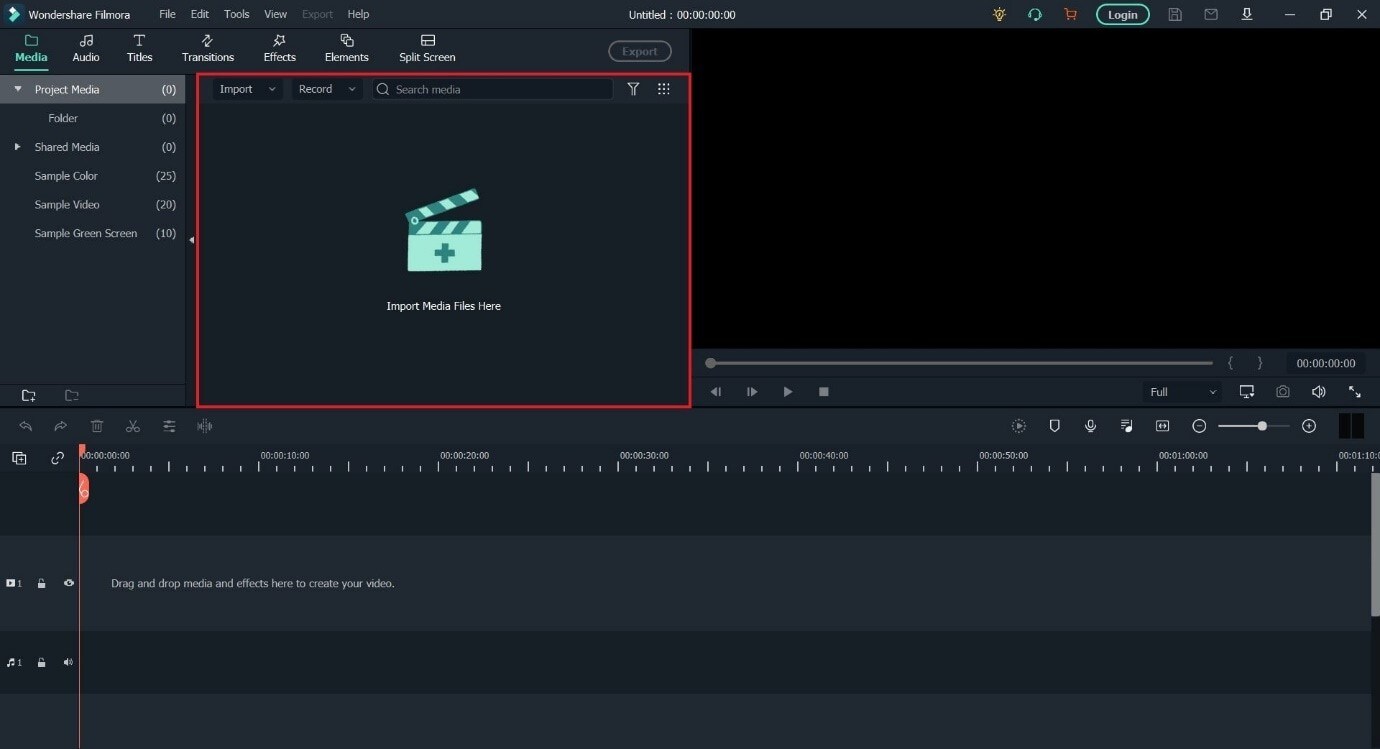
- Move video to timeline – move the video to the timeline and keep the project settings to “Match to Media.”
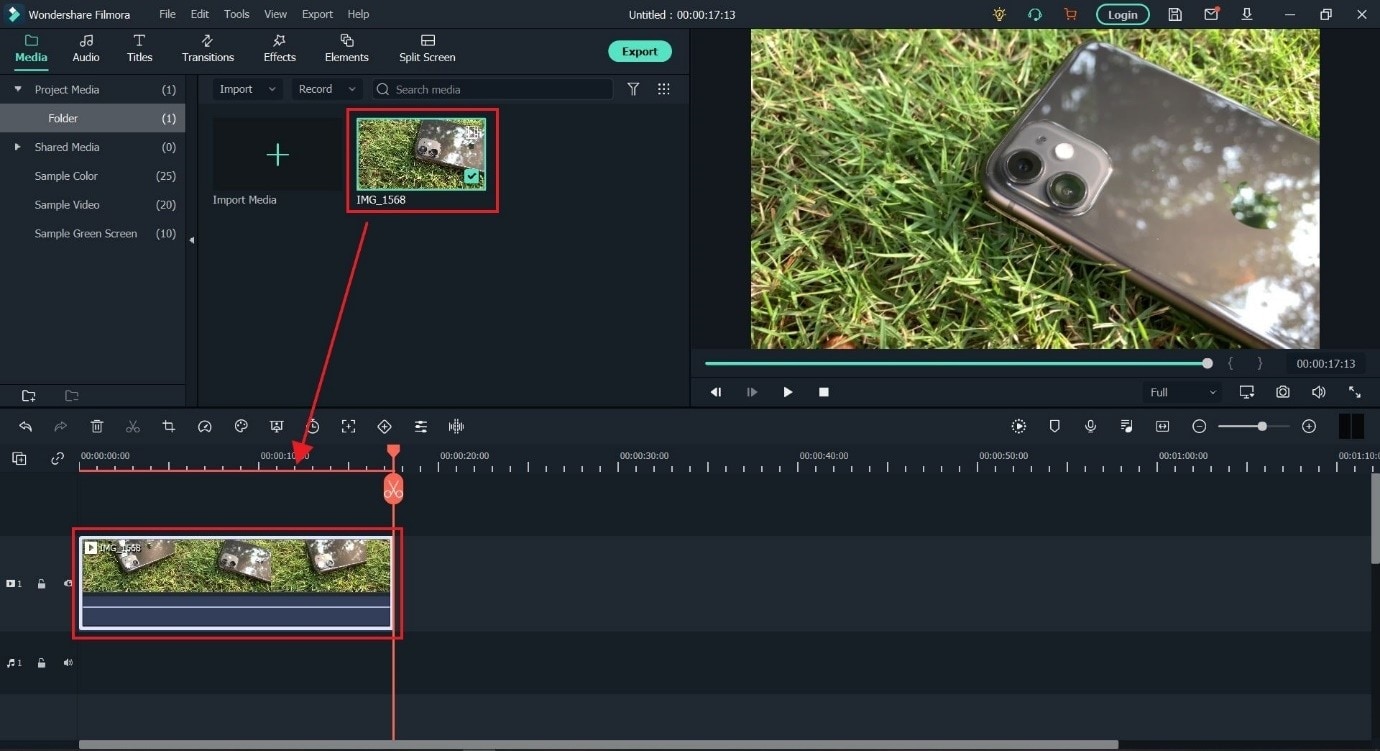
- Select the video part you want to cut – There’s a red pointer on the timeline called “Playhead.”
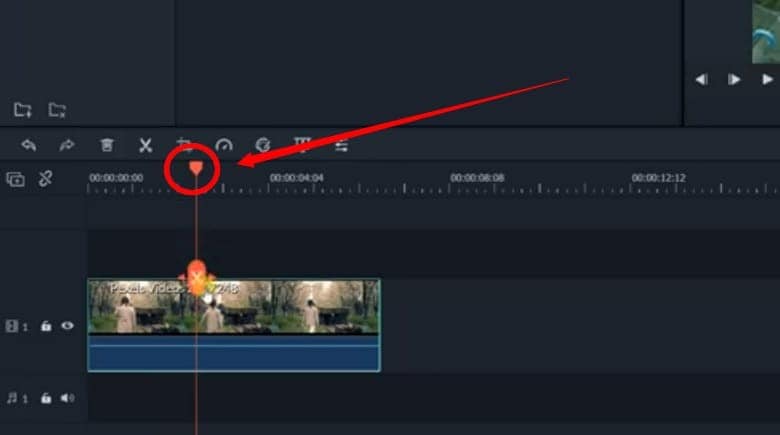
- Underneath the straight line of the Playhead, you will see a “Scissor” icon.

- Now, use your mouse to place the Playhead on the starting point of the video part that needs to be cut, and then click on the “Scissor” icon.
Next, move the Playhead to the video's end and mark it by using the "Scissors" button.
- Now, right-click on the marked part, and select the “Delete” button.

- By doing this, the particular section of the video will be removed from the main clip.
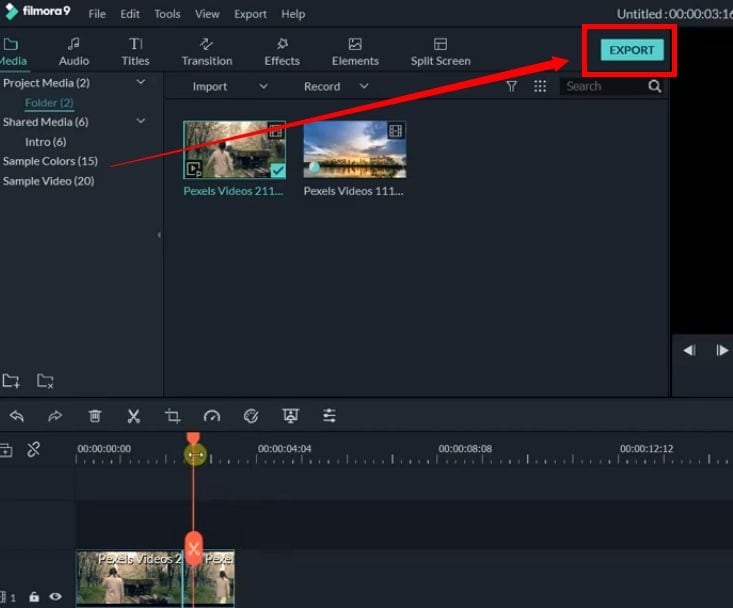
- Export your work – Finally, click on the “Export” button to save the new clip on your computer.
Conclusion
After learning so much about how to cut a clip in After Effects, give it a trial and see how much you can do with it. If you are still struggling with the fragmented video clips, start with Filmora and you will get a lightning-speed experience.


