There are plenty of reasons for why making a Christmas video, making a Christmas video greetings to send your love, storing the memories that family members and friends being together, and sharing your Christmas online with friends worldwide. A perfect professional and cheerful Christmas video needs perfect recording and editing to make it stand out. Below are some tips for you to make an impressive Christmas video.
- Part 1. Choose the Right Tools to Shoot Christmas Videos
- Part 2. Edit Christmas Videos: Add Christmas Motion Graphics/Music/Titles/Overlays
Part 1. Choose the right tools to shoot Christmas videos
There are basically three different types of devices that can be used to record Christmas videos such as Smartphones, Video Camera (Camcorder) and Webcam. Every tool has its pros and cons. For example: Webcams for computer doesn’t provide the high quality videos but they are the cheapest solution to shoot Christmas videos. As they are still or embedded on your laptop, so the output videos will be stable as compared to the cameras of your smartphone or camcorders. The second choice is shooting videos using the camera of your smartphone, it is still a cheaper solution and output quality of the resultant videos is moderate. Some new smartphones such as iPhone 6S and One plus 2 comes with an amazing built-in camera. You can’t only record the 720p or 1080p quality videos, but they will also let you record the videos in 4K. However, while recording a Christmas video, you should always use a tripod stand or a selfie stick, as it will remove the flicker making videos more stable.

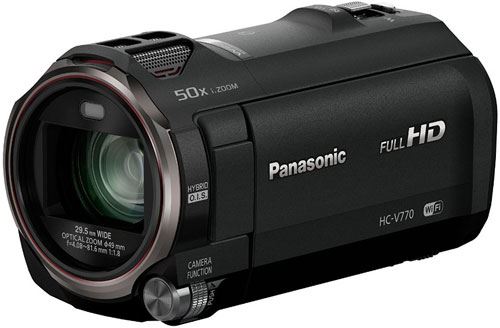
If you want the perfect quality and price is not an issue, you should get a Camcorder to record the Christmas videos. You can buy a good Camcorder from $500-1000 which is approximately equal to the price of a new smartphone but the amazing features on Camcorders will simply kick cameras on quality. The final video will not be laggy or unstable on Camcorder. After deciding a good device for video shooting, you should always look for the perfect place and scenario for the Christmas videos. The best way is to make a list of different things that you need to take in account while recording the Christmas videos.
Part 2. Edit Christmas Videos: Add Christmas Motion Graphics/Music/Titles/Overlays
A piece of original footage is not enough. After shooting the Christmas video(s), you’re supposed to do the basic editing: trimming, cropping, merging, splitting, etc. and most important of all, add Christmas elements: motion graphics (Christmas tree, bell), Christmas songs, titles, and so on. If you’re not professional to do video editing, I’d like to suggest you try Filmora Video Editor, a great video editing tool for non-professional to create professional-looking videos.

- Great basic video tool to change the basic aspects of your videos such as cropping it, trimming, rotating or changing its speed;
- Beautiful transitions to join two or more videos or photos together to get one perfect video.
- Stylish filters and overlays will change the overlook of your final Christmas video;
- Preset text style with editable style, size, alignment and color.
- More than 200 types of motion graphics, allowing to add Christmas trees, bells, and other decorations;
- Allow to import Christmas songs from iTunes music library or folder for adding to videos.
Steps to Make Professional-looking Cheerful Christmas Video
Step 1. Download and install latest version of Filmora Video Editor for your Windows or Mac. Import the media to the program. You can import different images, videos and even audio files to the software. Now, move these files to the timeline. Click on the little plus sign to add the files to project or simple drag and drop the files to the timeline area as shown in the screenshot below.

Step 2. You can perform different editing functions on your video, Right click on a video to reveal the basic editing features. Here you can select and use different tools depending upon your needs. Double clicking on the video will let you change the direction or speed of your video.

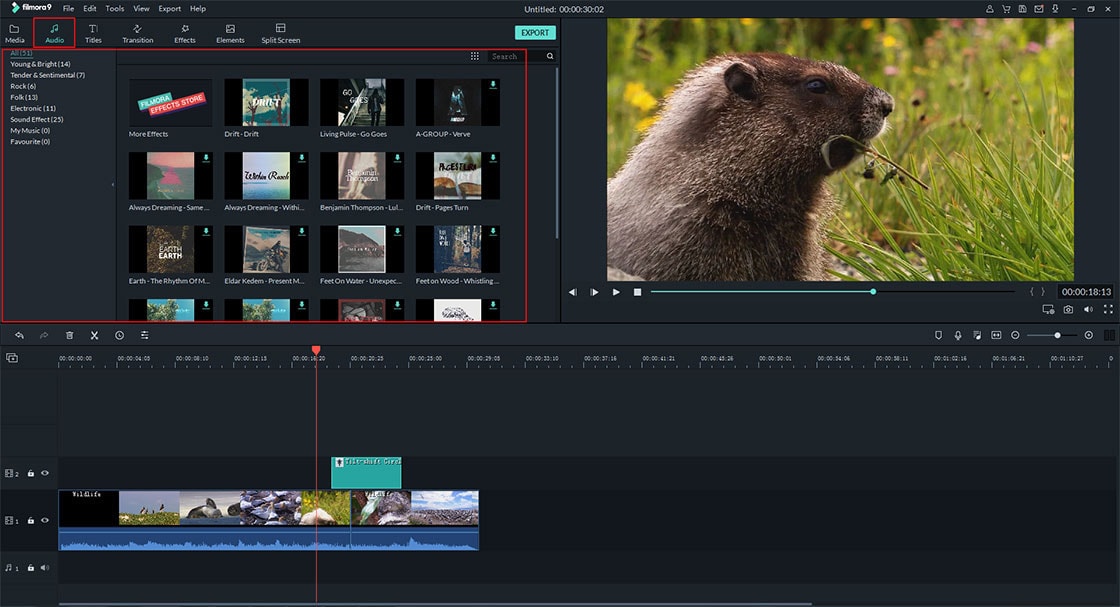
Step 3. Click on the Music to reveal the music library in the Filmora Video Editor, most of the music is already present in the library. If you can’t find a song you like in the music library, you can import songs by clicking the import media icon on the top of Timline. To add music from your computer, drag the audio track from media library to the timeline just below the video.

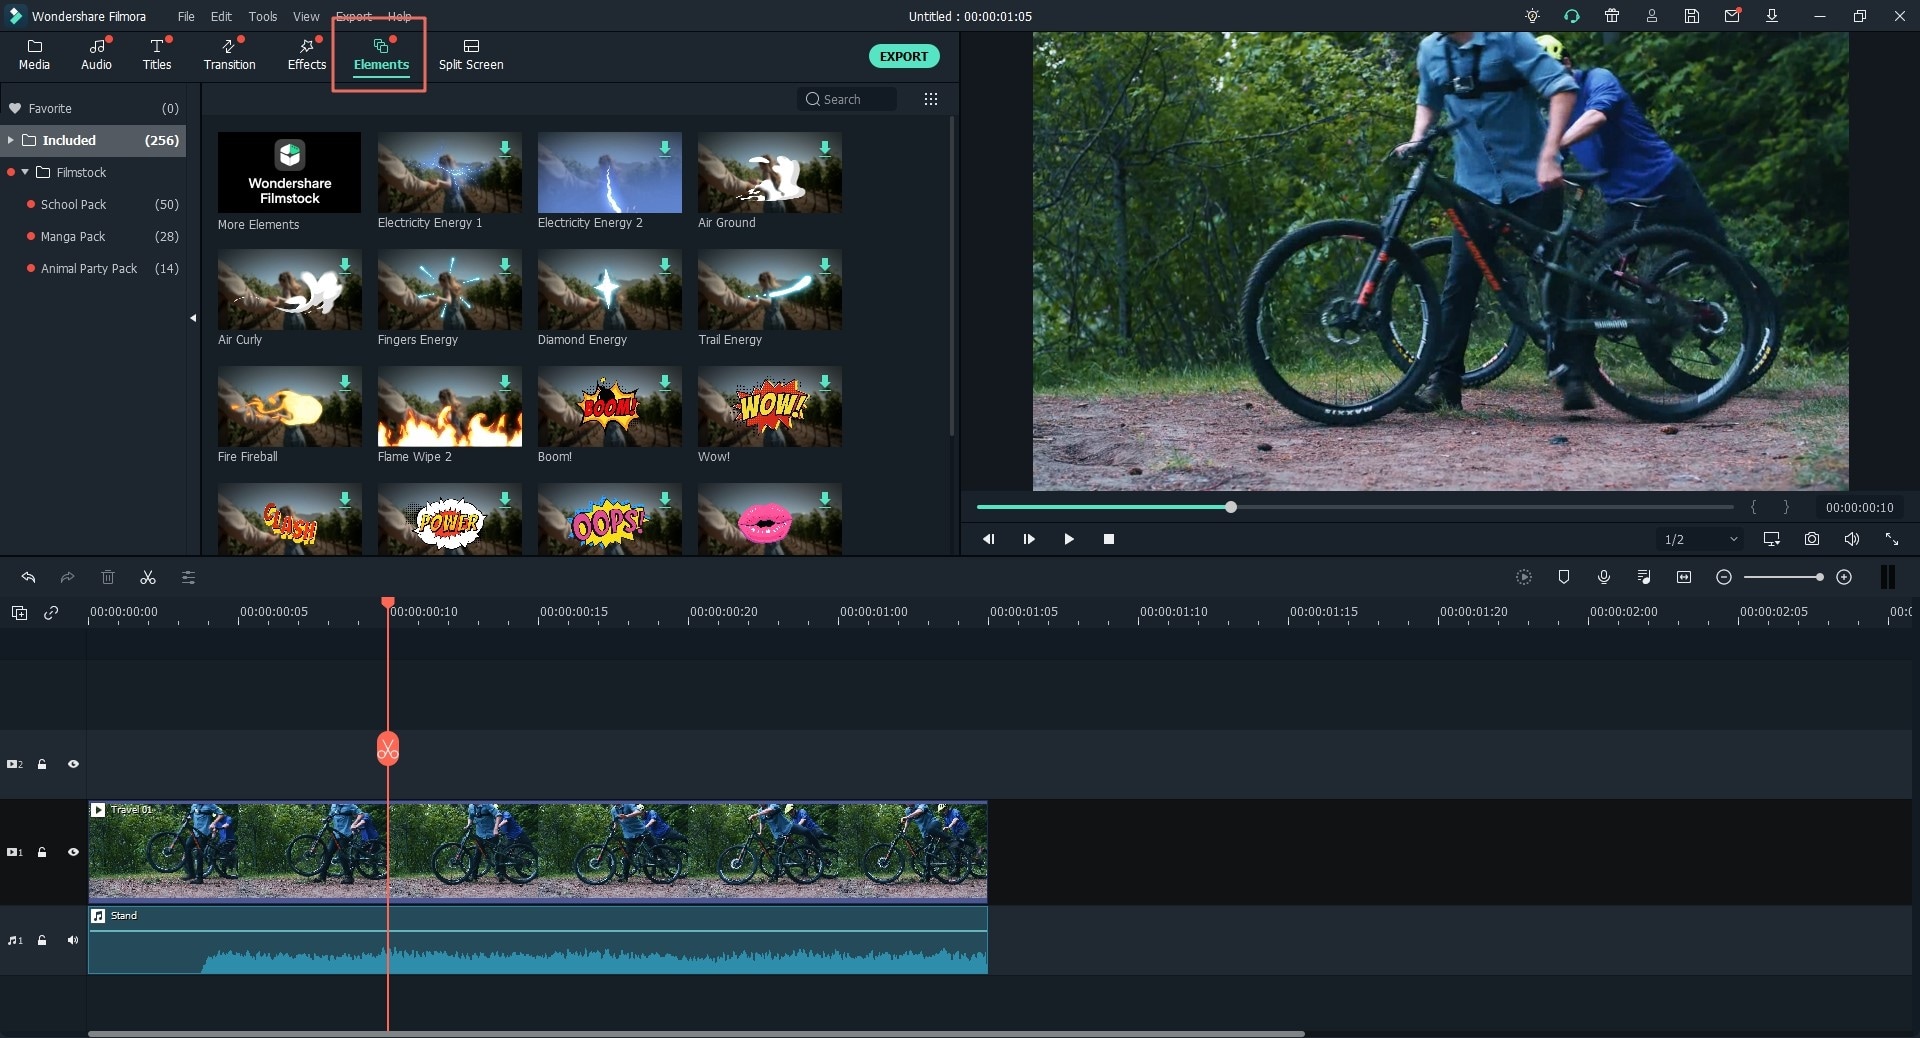
Step 4. Click on the “Elements” to add beautiful motion elements on your videos. You can click on all and scroll down to find different elements specifically related to the Christmas. Simply drag and drop an element on the timeline to apply it on a video.

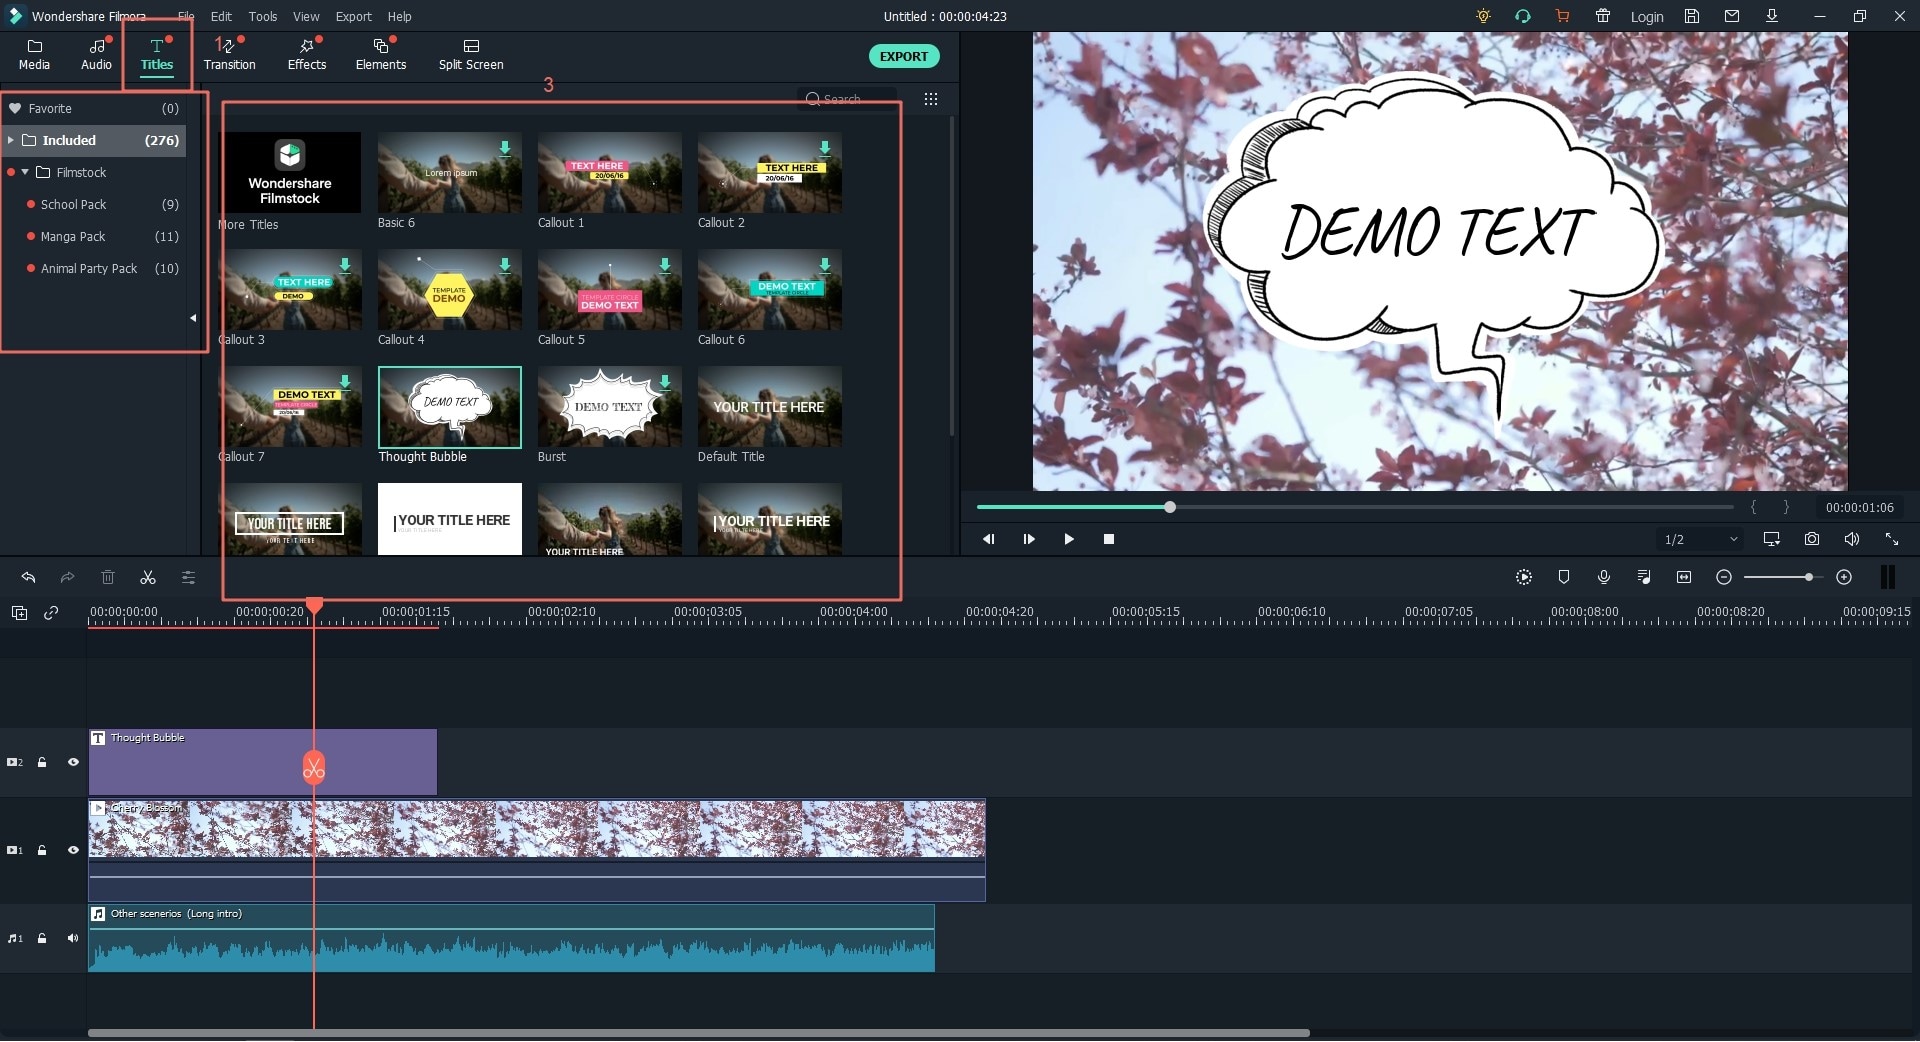
Step 5. Click on the “Text” to see different text style, select a style and move it to your video. After doing that, you can double tap in the preview window to change each aspect of your style, from changing color of outline to size, style and font of text.

Step 6. Once the editing process is completed, click on the Export button. You can select the appropriate settings, device or can directly upload videos to the social networking websites.


