You should never worry again about cropping videos that are in the WMV format. To crop WMV video will leave you with exceptional benefits. The main reason why you ought to crop a video is to get rid of any unnecessary parts that may compromise the quality of your video.
If you feel that you are not comfortable with the length bit of your video, then cropping it will be the best way to get rid of unwanted parts. By doing do, you will be able to put your focus on what you want to be seeing.
Part 1. The Best WMV Video Cropper
Filmora Video Editor can be used to edit various types of formats of videos including the WMV video format. Filmora video editors is easy to use even to users who do not have much experience in editing WMV files.

- Easy Cropping And Trimming Filmora have seamless crop, trim as well as combine your WMV video files.
- PersonalizationMake your videos by interesting by adding transition effects, and gives a sense of personalization to your WMV videos.
- Add Effects Apply to effects to your WMV video files in Filmora video editor. Side effects include tilt-shift, jump cut, face-off and more.
- Filters And Overlays Enables you to transform your video into a very professional one using a variety of graphic overlays and filters.
- Pan And Zoom Make your video more interesting by adding zooming and panning movements.
How to Crop WMV Videos
It is easy to edit and crop videos using Filmora video editor. It supports various formats of the videos including a WMV video file. Below we are going to look at how all you can crop WMV video using Filmora Video Editor.
Step 1: Download and install the WMV cropper
This is the very first step, to download one of the most reputable WMV cropping software. What you need to do is to click the "Download" button above. After the download is successful, install the software to your system using the given installation instructions. Once it's done, launch the program and move on to the next step.

Step 2: Import WMV video to the program
The easiest way to achieve this is to drag and drop all WMV files you will be working on to the video editor. You can also use the “+” - add files option and select the files. Both methods are effective.

Step 3: Crop Video
Highlight the video you wish to crop, right click and then select crop option. Mark out all the unnecessary parts.

Step 4: Save or Export video
Once you are fully satisfied with the cropped video, it is now time to save your video. Click on save changes and that’s all! You will have fully cropped. There is also an option, ‘Devices’ that you can use to save the video in the format compatible with various types of devices.

Part 2. How to Crop WMV Video in Windows Movie Maker

Many people usually ask whether it is possible to crop WMV video in Windows Movie Maker. This is as the results of features such as flipping and rotating not working.
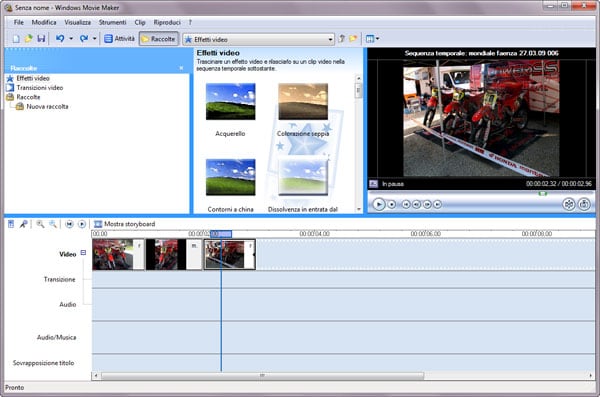
You can use another program along windows movie maker to crop MWV videos such as Filmora Video Editor. The following are steps to crop video in Windows Movie Maker.
Step 1: Ensure That the Program Is Installed Most of the time, you will find that the software is already installed on your PC. Launch the program to start cropping your video.
Step 2: Import Video to Windows Media Player You will then need to import your video to the editing timeline. To do so, use the ‘Import Video’ button on the editor.
Step 3: Crop Video On the filter menu you will find the cropping button which you have to click on. This button will become usable when you have added the filters and then open them. There will appear 4 controls on the cropping window. These options will be used along the X and Y axes to cut the video shape to the preferred shape.
Step 4: Save and Export Video Once you have attained the desired shape, of your video, click on the OK button to finalize the process. Make sure that you have saved the changes so that you don’t lose the work. Lastly export your cropped video or use the Window Movie Maker to view the video.


