Is it possible to edit MP3 in Windows Movie Maker?
Although Microsoft ceased to support windows movie maker back in January 2017, the program remains functional and there are quite a number of users across the globe. Of importance to note is that the software is no longer available for download and any site offering free downloads be sure is a fake program with virus, malware, and some hidden costs. However, if you have the real version you can easily edit your MP3 and other audio formats with ease.
- Part 1: Detailed Guide to Edit MP3 in Windows Movie Maker
- Part 2: How to Edit MP3 in Filmora Video Editor
Part 1: Detailed Guide to Edit MP3 in Windows Movie Maker
Step 1. Launch the Windows Movie Maker.
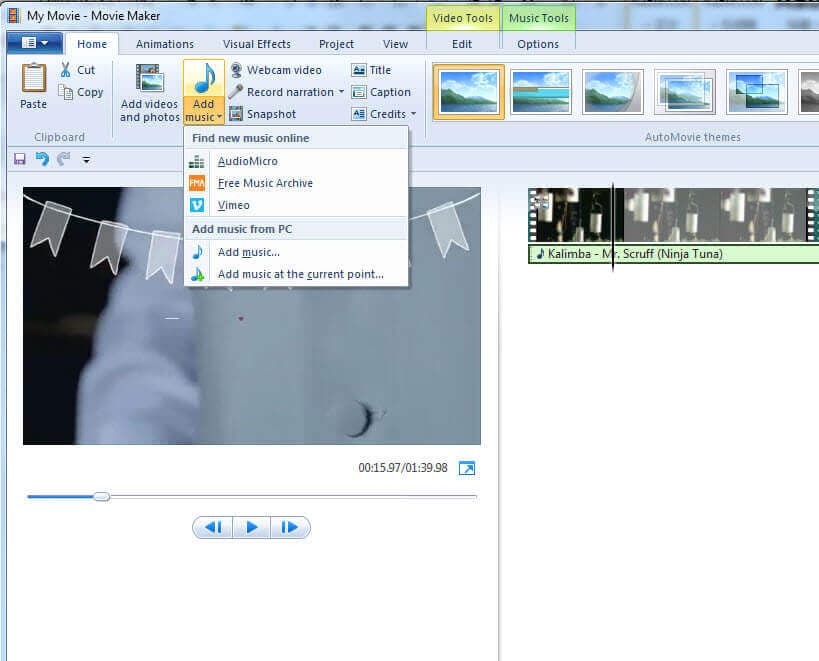
Open the windows movie maker by either navigating to Start > All Programs > Windows Movie Maker or just type the command movie.exe and run. Go to the task pane and click “Add Music” then choose the location of your MP3 file. You can import the file from your PC, Vimeo, Free Music Archive as well as audio micro. Remember you can only add the music once you have added the music clip.

Step 2. Edit your MP3 File
Once imported, right click on the respective file in the collection pane and choose “add to Timeline”. You can also drag the file to the timeline or just press the Ctrl+D.

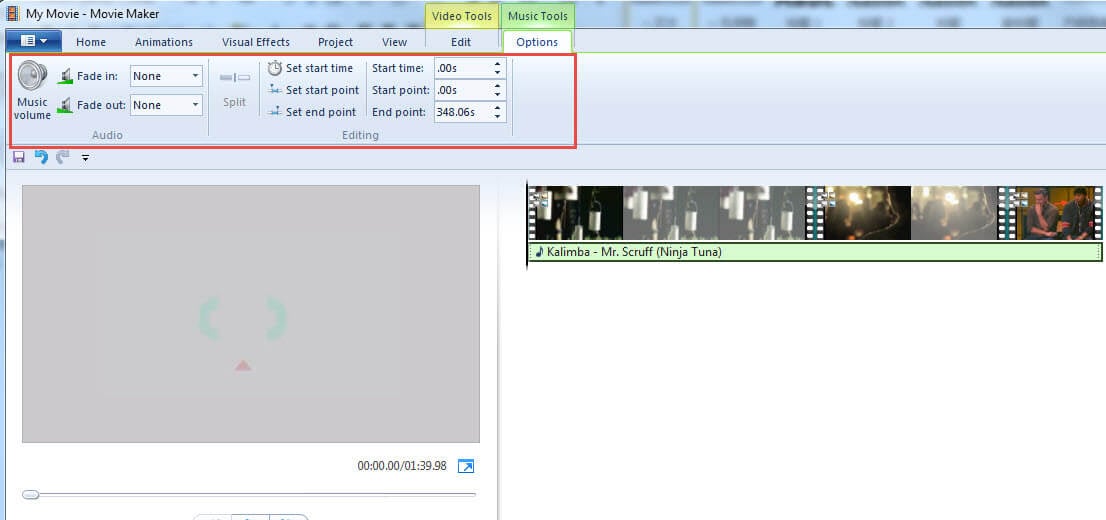
Double-click on the music file you would like to edit. Here you will be provided with several options such as adjusting the volume, split your audio file, fade in and fade out options, set the start and end points of your file, and many more effects.
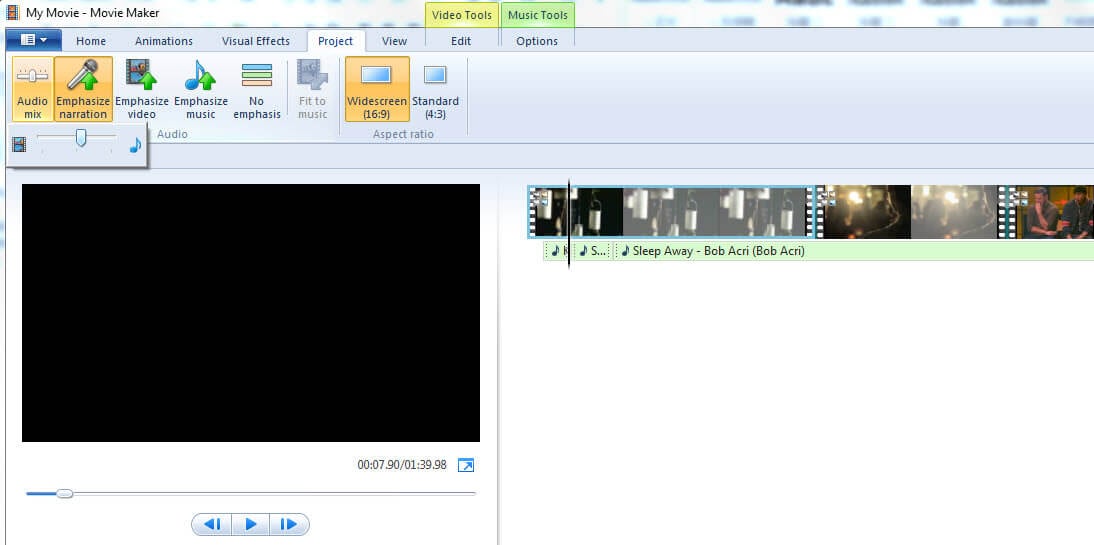
To adjust the volume for instance, you have to simply drag the toolbar of the audio mix.

To trim the audio file, just position the cursor over the beginning to the end of the mp3 clip until a double arrow appears. Drag this arrow so as to adjust the duration of your clip.
To split the audio, just place the play head where you wish to split the clip, hit the split button, select Clip and then Split option.
Step 3. Save Your Edited File
When you have done all the necessary edits, make sure you save your file in the convenient location. Otherwise, you will not be able to recover the file.
Part 2: How to Edit MP3 in Filmora Video Editor
Filmora Video Editor is a top-notch smashing audio editor best suited for all categories of users. The tool is enriched with numerous outstanding capabilities that makes it worth a perfect tinker tool. Indeed, Filmora Video Editor offers what was primarily only available for professional film makers. With the simple, straightforward and intuitive user interface, users can hardly experience navigation issues. Millions of users across the globe have given this tool a trust and has not failed them at all, so cease the doubts and give it a try to experience the best mp3 editing services.

- Modern and simple interface - Filmora video editor is a well-designed intuitive and total no-brainer tool which any user can easily become a great video editor within no time.
- Creative Features - This program features several creative features that helps to make your audio file quite outstanding. They are indeed over 300 stylish features including Text and Styles, Overlays and Filters, Music Library, and Transitions and Elements just to mention but a few.
- Effects - With this program, you can access an unlimited list of super awesome audio effects with the new collections simply added every month.
- Advanced Features - This program offers an unending list of useful advanced features that greatly help to enhance your video appearance and quality. These features include split screen, 3D Lut, screen recording, video stabilizer, scene detection, audio separation, PIP, advanced text editing, and audio mixer among others.
- Several editing features - Filmora Video editor lets users perform various edits like crop, cut, paste, copy, record, and addition of other effects including pitch, amplification, and fade adjustments among others.
How to Edit MP3 using Filmora Video Editor
Step 1: Import the MP3 Files
Open the Filmora Video Editor on your computer to display the primary window. Within this window, navigate to “Import” tab at import MP3 files from your local save location to the User’s Album within the program. Another option is to drag these files directly from your computer to the same User’s Album”. When this is done, drag these files for editing from the Users Album to the Timeline situated at the bottom of the screen. If you want to merge several files, just drag them together. Doing one on another would sonly split them.

Step 2: Edit your file
On the Timeline, choose the audio file to be edited and hit the “Edit” menu to open the editing panel. This panel would enable you to adjust the speed, volume, pitch, and add effects like fade in and fade out based on your need.

For audio trimming, click the respective file and move the cursor over the left and right edges until the double arrow appears. Drag this arrow until you reach the length you desire.

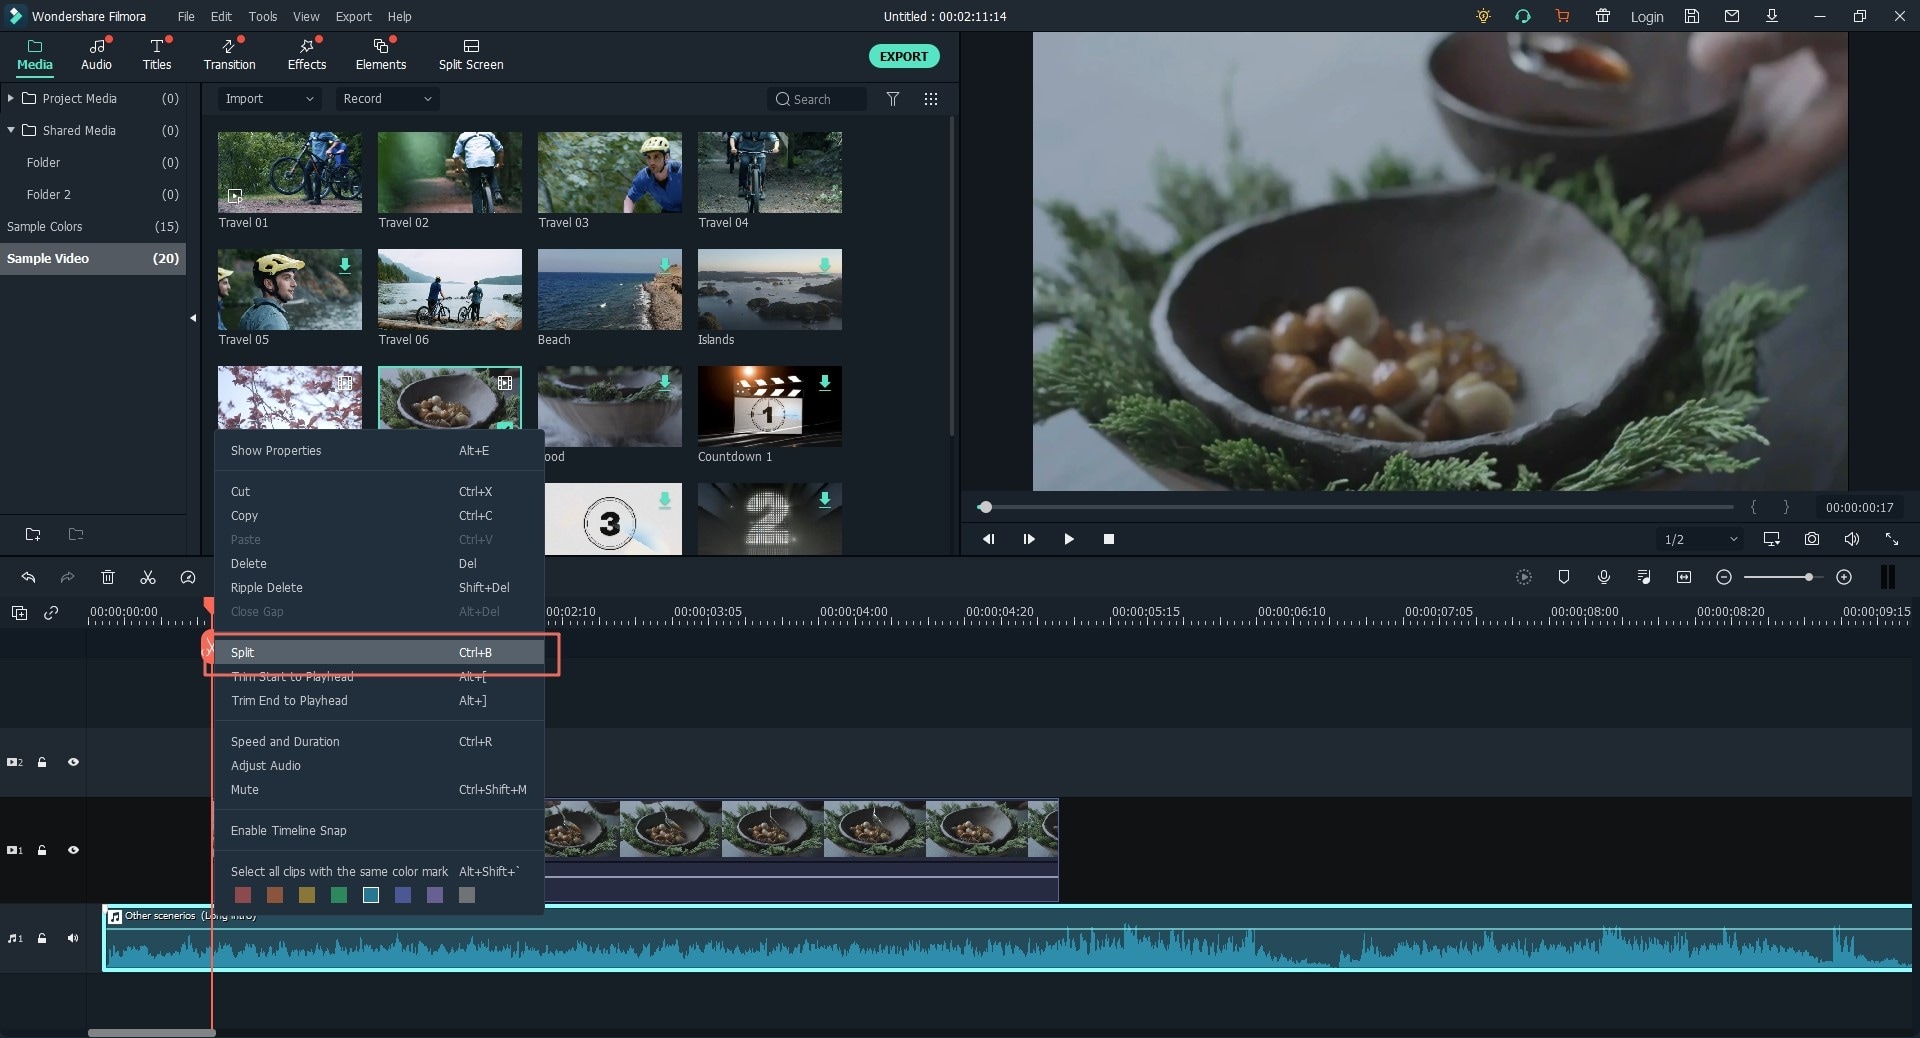
To split the audio file, select the file then subsequently drag the top of the red Time Indicator to the desired location and click the scissor button.

To get rid of the unwanted part, just right click on the MP3 track and select the “Delete” option. You can then hit the “Play” button in the Preview window to confirm whether the edits made are satisfactory.
Step 3. Export the New File
If satisfied, just click the “Export” button, select the output format and save your edited MP3 file. You can export online, to device or burn it.


