- How do I edit MP3 music on Windows Media Player?
- How to trim an MP3 file?
As it is known to all that Windows Media Player cannot allow users to edit their audio files directly. However, there is some way users can maneuver through this hurdle by using a Windows Media Player plugin called SolveigMM WMP Trimmer.
In this post, you'll learn how to trim MP3 in Windows Media Player and how to edit it step by step.
This post also takes another two practical ways to help you trim and edit MP3 files easily - one is using the professional video editing software Filmora Video Editor, another is trying the Windows Movie Maker software.
Which one will be best? Let's have a look at these ultimate solutions as follows:
- Part 1: How to Edit MP3 in Windows Media Player
- Part 2: How to Trim MP3 in Filmora Video Editor
- Part 3: How to Trim MP3 in Windows Movie Maker
Part 1. How to Edit (Trim) MP3 in Windows Media Player?
As it's mentioned above, you can easily trim mp3 in Windows Media Player with a lightweight plugin tool called SolveigMM WMP Trimmer Plugin 3. It is a tool that allows transforming Windows Media Player into a full-fledged Media Editor. WMP Trimmer plugin allows editing parts of multimedia files directly from Windows Media Player while maintaining intact quality and being lossless in synchronization. By downloading the software, you can create webinars, remove TV ads, censor content for children, create ringtones for mobile phones and many other editing actions for video and audio.
Now, let's learn how to trim mp3 file with SolveigMM WMP Trimmer Plugin 3.
Step 1. Download the SolveigMM WMP Trimmer PluginPlugin windows media player plugin on your computer. Open the Windows Media Player program the usual way and navigate to the main menu, then "Tools- > PluginsPlugins- > SolveigMM WMP Trimmer Plugin" to activate the plugin.

Step 2. Go to the "Open Media File" button of WMP Trimmer Plugin or open the individual MP3 file via window media players. Hit the "Edit File" button to view the expanded view of the plugin.
Step 3. Move the slider to your desired start position and hit the "Add marker" button. Perform the same to select the end position.
Alternatively, you can play the file to be edited and subsequently, move the slider to the desired section and click the "Start" button. Manually enter the start time's value in the Start box if you want to change the start time, then hit the "End" button to set the stop time. Hit the "In" button to trim the selected fragment. You can then rename the file and save it in your desired location.

- Edit MP3 Files in Windows Media Player
Step 1. Open Windows Media Player on your computer. If you don't have it, you can download and install it.
Step 2. Now Open the Windows Media Player and open the MP3 file with Windows Media Player.

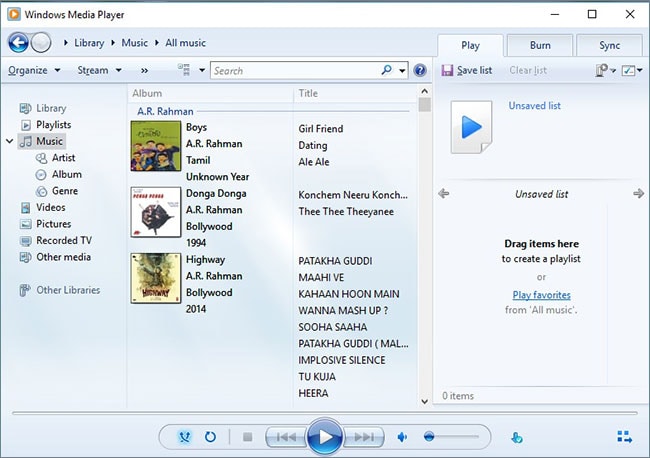
Step 3. Go to the left panel and click on "Music" under the "Library" icon to view the window's MP3 file.
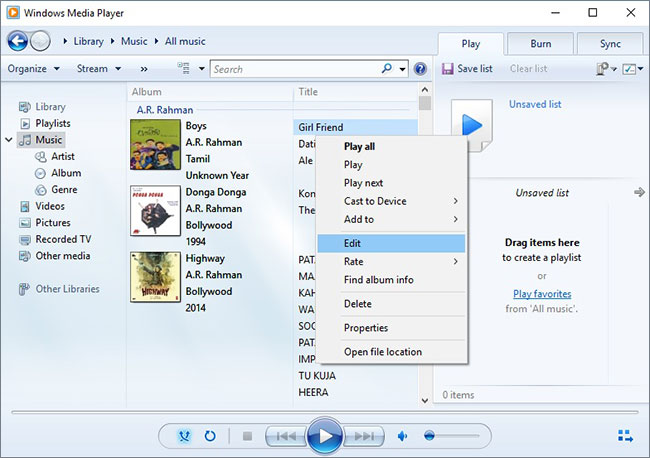
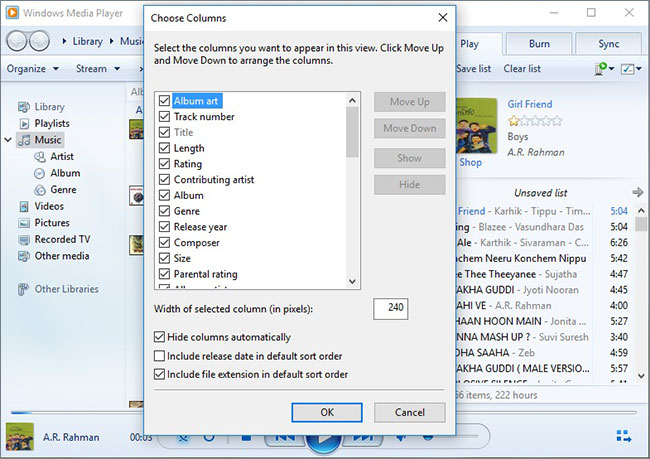
Step 4. Now, right-click on the MP3 file and then click on the "Edit" button. From there, you can edit the MP3 title of your song and the artist's name.

Complete your editing by saving the changes.

[Bonus] If you're running on a Mac computer, you can try to edit MP3 files in iTunes directly.
Part 2. Filmora Video Editor - Professional Video Editor to Trim or Edit MP3 Files
If you use Windows Movie Player a lot, and need to trim or edit audio/video files in WMP frequently, the plugin tool is your best choice because it can save and edit any video or audio loaded in WMP, and provides lossless experience, intact quality. But if you are a video creator who are in need of an easy-to-use video editor, Filmora might be better for you. Simply put, Filmora ($39.99/year) is more cost effective compared to SolveigMM WMP Trimmer ($34.95) for providing a great more editing functions, from basic editing features including trimming/cutting/adding music, effect, element, to advanced editing functions including motion tracking, audio ducking, keyframe, and more!
Filmora Video Editor is that you can think of an all-in-one, powerful, and functional MP3 trimmer tool. The program is equipped with several unique capabilities, which turns your experience quite exciting. There are millions of users across the globe who are not wrong and can attest to this top-notch's effectiveness and reliability. This program allows you to trim an MP3 file by dragging operation and enables you to edit the MP3 song as easy as 1-2-3. With its advanced video editing feature, you'll be feel empowered in your video creating journey (even becoming a YouTuber)!

Key Features of Filmora Video Editor:
- The software supports almost all available videos, images, and video formats. Besides, it also supports GIF files and 4K resolution videos.
- Allows to import images and clips from Facebook, Twitter, and other social media channels.
- The app also provides advanced functions, such as the audio mixer and picture-in-picture support, and basic functions.
A Complete Guide on How to Trim MP3 in Filmora Video Editor?
Step 1. Import the MP3 files
Launch Filmora Video Editor to display the main window. Once the main interface is displayed, you will need to import the files you would like to trim. Just navigate to the "Import" button and click it to import the individual file from your computer's save location to this program. Alternatively, you can drag these files to the User's Album icon located within the main interface.

Step 2. Trim MP3
Once the files' upload is successful, again drag these files now from the User's Album to the Timeline panel, which is located just at the bottom of the program's window.
When you have dragged your files to the Timeline, you can now trim them to your desired length. To do so, click the audio clip to select and mouser over the clip's right or left edge until you see a double arrow indicator. Upon the appearance of this arrow, drag it to the length of your interest, of course, based on your need, and then trim it.

Step 3. Export the Trimmed File
Once you have completed trimming the MP3 file to your desired length, click on the "Export" button. An output pop-up window would be displayed from where you can choose the MP3 output format under the "Format" tab. This would ensure that you accurately get the trimmed segment of your MP3 file. When the conversion is complete, locate the MP3 file by navigating to "Open Folder" at the bottom and identify the trimmed file.

[Bonus]
Want to know more editing tips with Filmora Video Editor? Using 2 minutes to review the video tutorial quickly:
Everything covered in the above video, but in case you have some specific needs, I also picked up some tutorials for your reference:
Part 3. How to Trim MP3 in Windows Movie Maker?
Also, you can trim mp3 file in Windows Movie Maker, let's find out how:
Step 1. Launch the Windows Movie Maker
Launch the windows movie maker program and click "Add Music" on the task pane. Select the save location of your MP3 file as either your PC, Vimeo, Free Music Archive, or audio micro and import it.
Step 2. Trim MP3 File
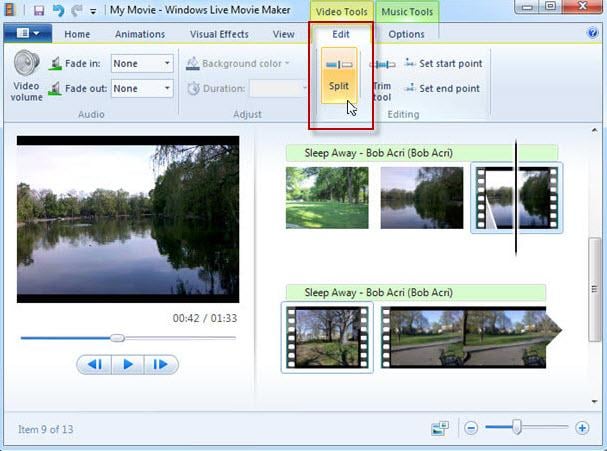
When the file has been imported, right-click on the file of interest and select add to Timeline. Alternatively, you can drag the file to the Timeline or press the Ctrl+D. Move the cursor over the beginning or end of your MP3 clip until a double arrow is displayed. Drag this arrow to the length of your choice.
Step 3. Save Your Trimmed File
When you are satisfied with the trimming, save your file in a convenient location for easy access. If you don’t, you will not recover your file.

Conclusion
Now, you've seen 3 different ways to trim MP3 audio files, which one are you ready to try?
If you're using Windows Media Player to trim or edit your MP3 file, the above tutorial can guide you to do it.
But, if you want to make more editings on audio or video files, then Filmora Video Editor could be the best choice for you.
Feel hard to make a decision? Don't worry, the free trial version of Filmora Video Editor is standing now.


