Watching Magic, Jordan, Shaq, Kobe or Lebron playing basketball is mesmerizing. These NBA legends were and still are forces of nature. Their vicious slam dunks, game-winning three-pointers, and no look passes went down in history as the most memorable moments in basketball history.
Today, just a few months after the Splash Brothers have rightfully taken their third ring, watching the footage of the last season's highlights is the closest we can get to the real NBA action. So let's have a look at how you can edit and share NBA game highlights on YouTube using Filmora Video Editor.
Part 1. How to Edit Cool NBA Game Highlights to YouTube
Putting together the most important moments of an NBA game requires you to have a video editor that offers a rich selection of video editing tools. Filmora Video Editor for Windows (or Filmora Video Editor for Mac) grants you access to a wide range of professional video editing options that are usually associated with pricy video editing suits such as Final Cut or Adobe Premiere Pro while keeping things simple, so even a rookie in the world of video editing can easily learn how to use them.
Putting together an NBA game highlight video is a relatively simple task in Filmora and we are going to take you through each step of the process. Before you start editing you first need to make sure that you have all the footage you need to create a cool YouTube video.
Easy Steps to Create A Cool NBA Game Highlights Video
Step 1. Import the NBA Game Video Clips
After installing Filmora Video Editor on your computer, you should double click on its desktop icon to launch the software. The welcome window will offer you to set the aspect ratio for your new project so you can choose between 16:9, 4:3, 1:1 or 9:16 aspect ratios. If you want to post your video on YouTube, it is best to select the 16:9 aspect ratio.
The welcome window also lets you choose between Action Cam, Instant Cutter Easy, and Full Feature modes. Choose the "Full Feature Mode" to start a new video editing session. Click on the Import drop-down menu once you enter the Full Feature Mode and select the "Import Media File"s option. Locate the video clips you would like edit and click Open.

Step 2. Make A NBA Game Highlights Video
Cutting and Trimming Videos:
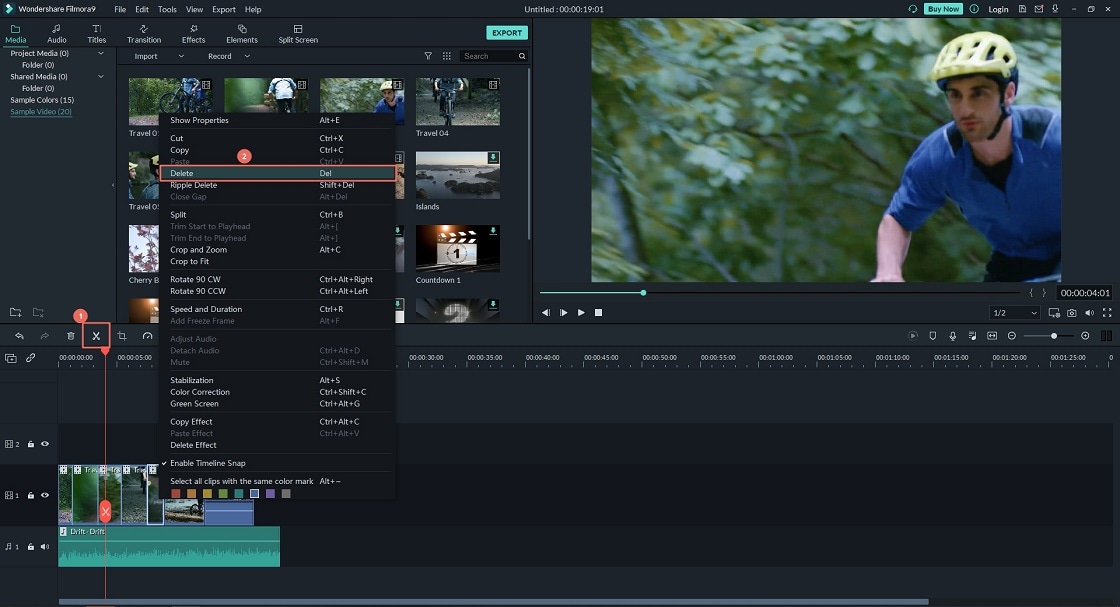
All video clips you import into the Filmora Video Editor are going to be displayed in the software's Media Bin. You can simply drag and drop them to the timeline or arrange the way in which they are organized.
If you would like to remove parts of the video, you should place the playhead at the exact moment in the video where you want to make a cut and click on the Split icon, that looks like a pair of scissors. You can also trim a video clip by dragging one of its ends left or right if you would like to remove just a few seconds of the footage.

Adding Transitions:
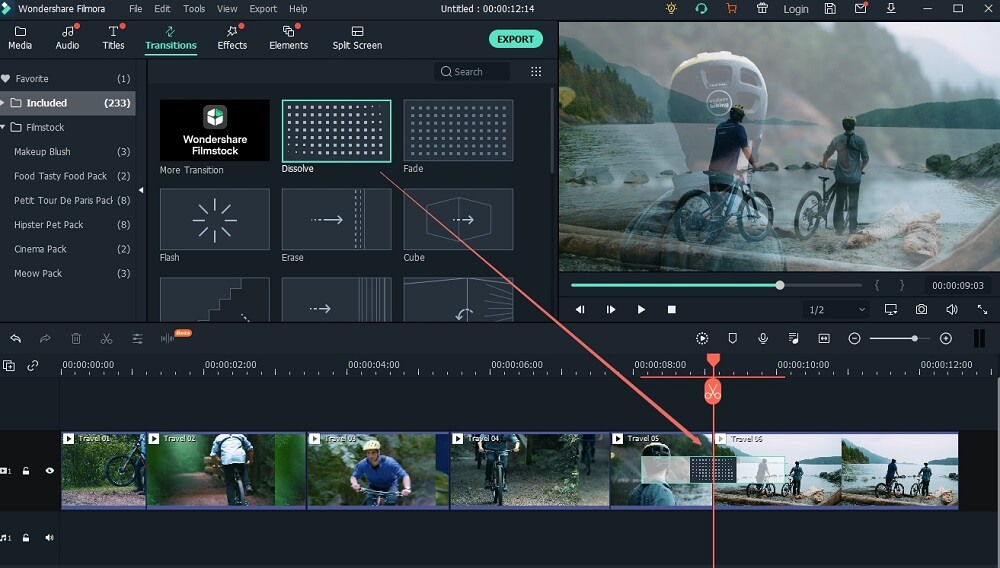
Cutting your NBA Game Highlights video can potentially create jumps between shots that may be unpleasant for the viewer. Filmora Video Editor offers hundreds of transitions so your videos can always look cool and smooth.
Click on the "Transitions" icon, located in the editor's toolbar and choose a transition you like the most. You can either drag and drop the transition to the desired location on the timeline or you can click on the plus icon that is displayed over each transition. Just keep in mind that before you click on the plus icon you'll have to place the playhead at the exact spot in the video where you want to insert the transition . You can set the duration of a transition, by simply dragging one of its ends.

Adding Text Overlays:
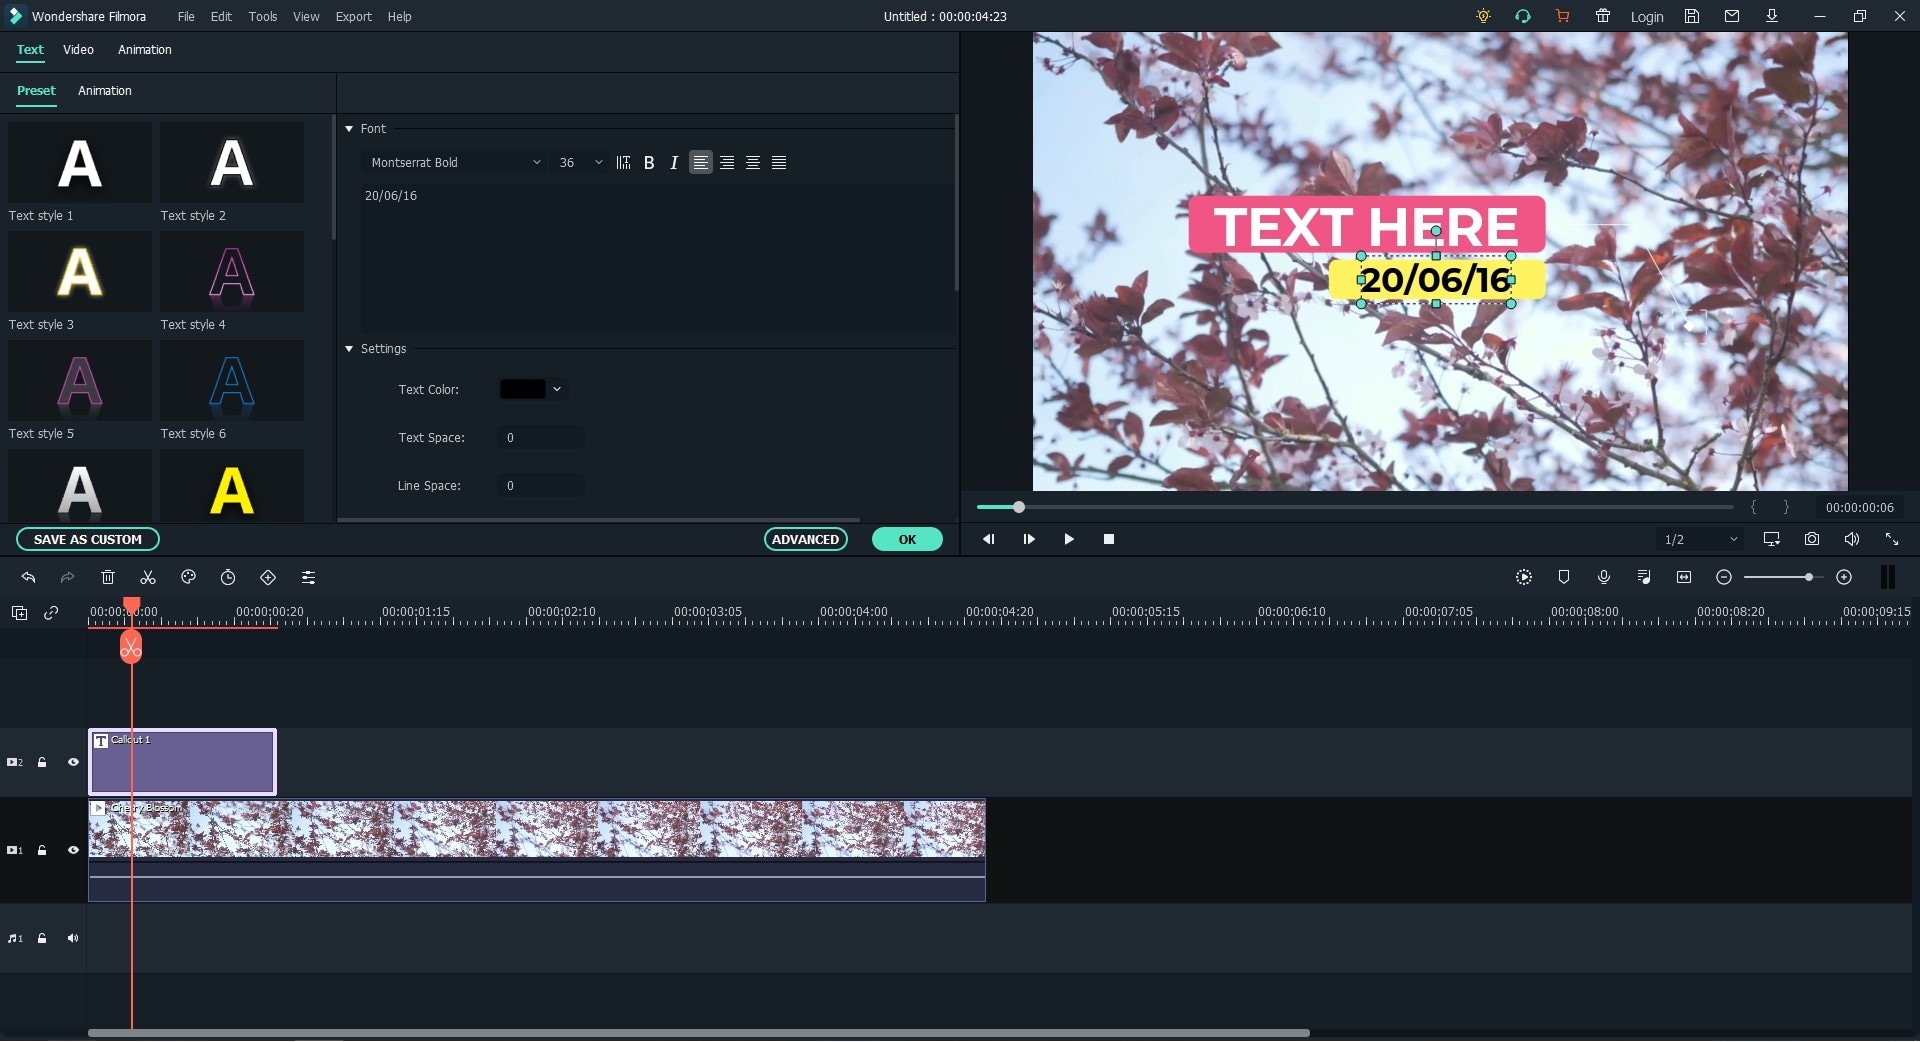
In the toolbar next to the Transitions icon, you can find the "Text/Credit" icon. Clicking on it will enable you to start browsing through the software's rich collection of text overlays or opening and end credits.
Place the playhead at a location on the timeline where you want to add text and click on the plus icon and the effect you've selected will be added to the Text track on the timeline. Double click on it to enter the text and to select the font, size or the alignment. Filmora also lets you animate the text you're using in your videos.

Adding Music:
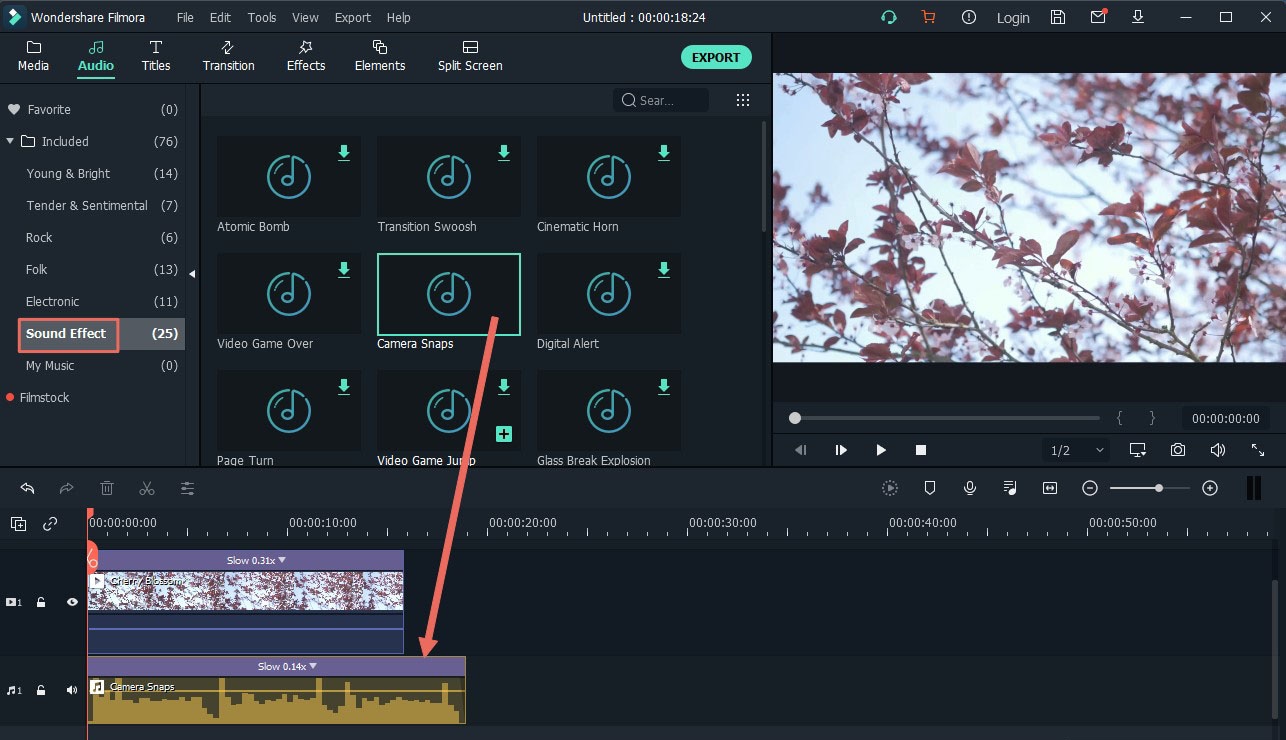
Even though NBA Game Highlights videos don't offer much room for music, you can use its rich royalty free music library to create engaging opening and closing scenes. Click on the "Music" icon in the editor's toolbar and drag and drop the song you want to use in your video to the Music track on the timeline.
You can use the Split tool to remove all unwanted parts of the song, while you can easily trim the sound file by dragging one of the ends of the file left or right. Filmora Video Editor lets you have complete control over the sound file of the original video so you can remove background noises or create a fade in or fade out effect.

Step 3. Export the NBA Game Highlights Video
Once you've completed the video editing process, you should click on the "Export" button. Filmora enables you to export your videos directly to YouTube, and it lets you choose the size of the video you're exporting.

Tips: Click on the YouTube icon in the software's Export window and proceed to give your video a title, select the quality of the video and add a description. You can also add tags or set the Privacy to public or private. Hit the Export button when ready and wait for your NBA highlight or replay to be uploaded to your YouTube channel.


