Do you want to crop videos or pictures in Final Cut Pro? If so, you have come to the right place. In this article, you will get detailed tutorial on how to crop in Final Cut Pro as well as its alternative.
- Part 1. How to Crop Video/Image with Final Cut Pro Alternative
- Part 2. How to Crop Video and Picture in Final Cut Pro
Part 1: How to Crop Video/Image with Final Cut Pro Alternative
In the process Filmora Video Editor for Windows (or Filmora Video Editor for Mac) is a super easy to use video editor. Users can freely import video, audio and image files for editing as this program fully supports almost all the common media formats. And it provides lots of editing tools to rotate, trim, cut, join or crop video and image files.
Key Features of Filmora Video Editor:
- This video editor is super easy to use as it has a user friendly interface.
- Full of video editing tools that will help in cropping, merging, splitting, trimming and rotating your media file.
- Various special effects can be freely applied to make your video more attractive and outstanding.
- Has an instant preview windows where you can check the edited video any time you want.
User Guide to Crop Video/Picture with Filmora Video Editor for Mac
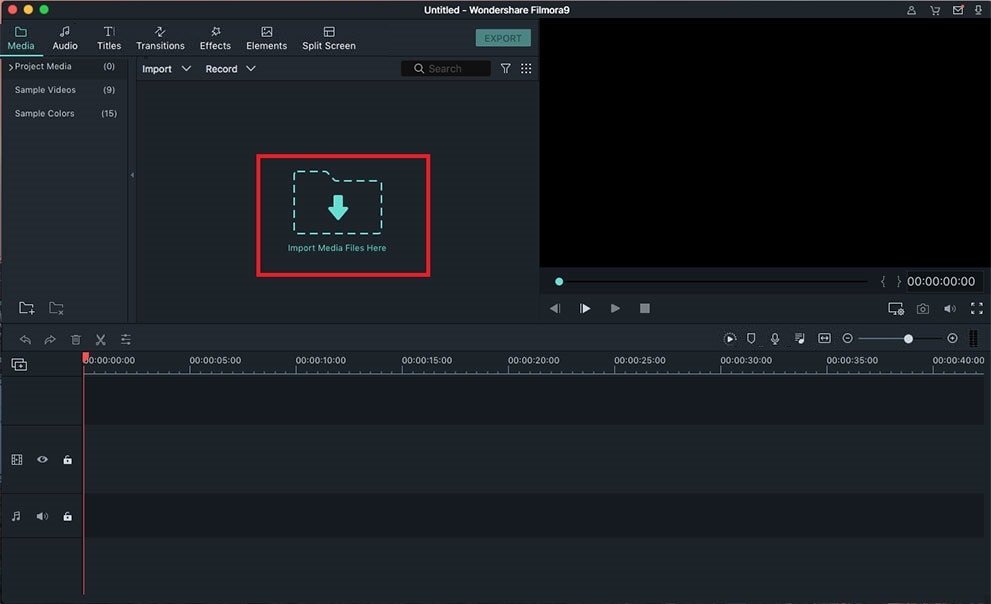
Step 1. Add files to the project window through dragging and dropping or even click on "import" tab of the menu bar and browse for the files from the computer.
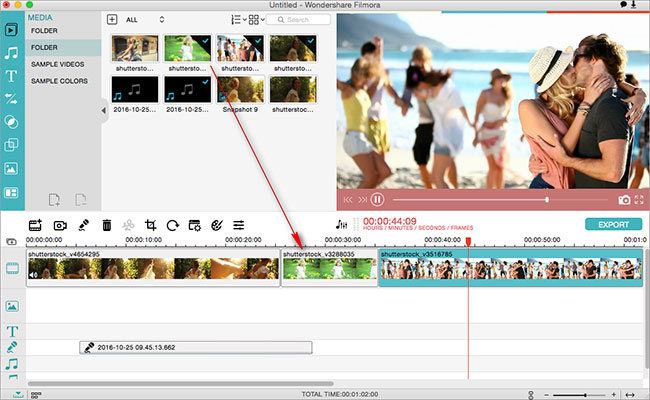
Step 2. The next step will be adding the imported files to the timeline where actual editing takes place. Make sure they have been properly arranged.
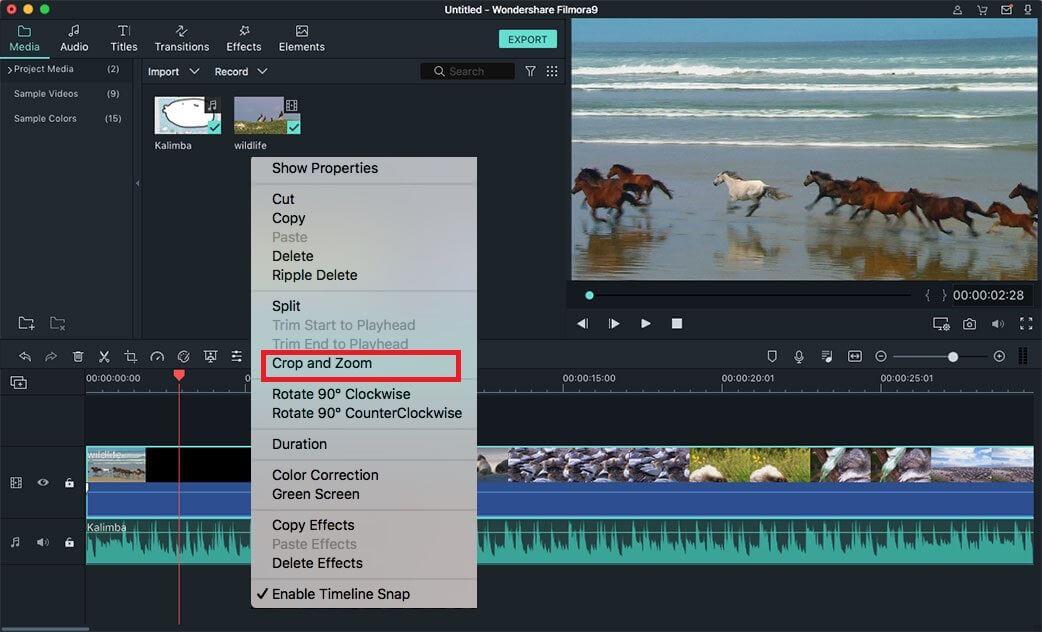
Step 3. To crop, double-click on the file before proceeding to the tab named "crop" from the editing window.
Step 4. Now you can drag the crop rectangle appropriately.

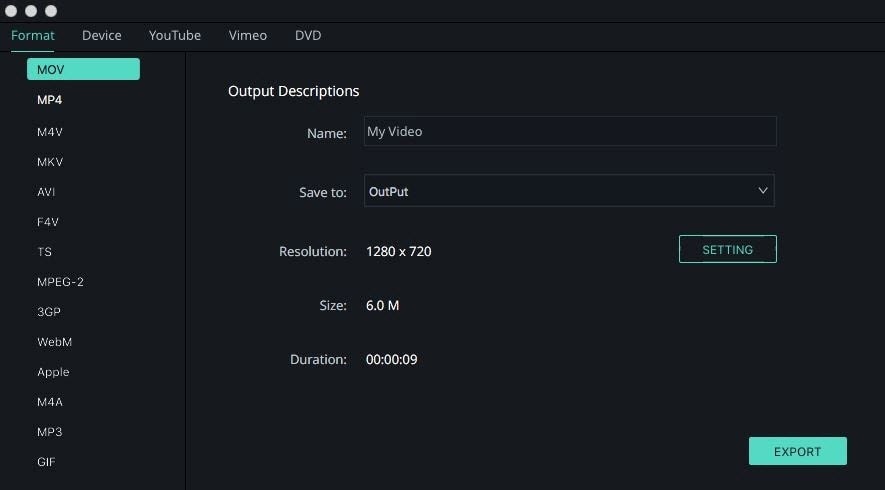
Step 5. Finally, you can save all changes to your video or picture, and then click the "Export" button to save them.
Part 2: How to Crop Video and Picture in Final Cut Pro
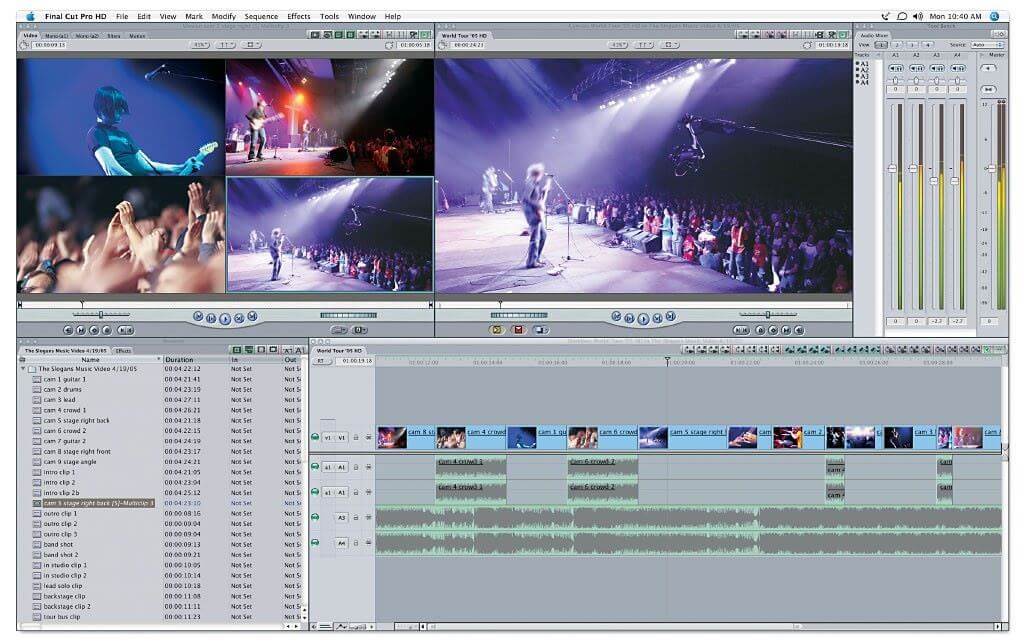
The following are the main tutorials for cropping video and pictures on Final Cut Pro. Make sure you have strictly followed the given instructions.
Crop Picture in Final Cut Pro - importing pictures to the program timeline will be the initial thing to do when cropping with Final Cut Pro. After that, select the main picture that you will crop and click on it for the handles to pop up. Use the handles to make adjustments to the picture while the one at the center will help to move the image. If you want to distort the image, use handles on the corners. To crop, you will have to use the crop handles and correcting any cropping done by mistake you will click on "edit" then "undo".
Crop Video in Final Cut Pro - once you have added the clip to the timeline of your program, select it and then seek access to the crop controls. On the lower side of the Viewer, you will see the "crop" button which you should click. You can adjust effect of the video using onscreen controls or individually using the crop controls. Once through, click "done" and all the changes will be applied to the video.


