We need to rotate videos when those aren’t properly oriented. If a video isn’t properly oriented, then it’s a matter of irritation when we wanna watch it. So, the rotation of the video is mandatory. Many people use Google Photos to rotate videos, but Google rotate video may not work, sometimes. The most common problem using Google Photos to rotate a video is the crashing. Yes, the tool crashes a lot and thus, your video rotation might be postponed because of this. So, it’s a wise decision to use a better alternative. This post is dedicated to introducing the best alternative to Google rotate video and showing how the tool works.
- Part 1: Top 10 Apps to Edit GoPro Videos on iPhone/iPad/Android Phones
- Part 2: How to Rotate Video in Google Photo
Part 1. Rotate Video with Google Photos Alternative
There are many tools available to rotate videos, but not all the tools are decent enough to be used. Here, we’re gonna introduce a nice tool that can be a great alternative to Google at the time of rotating videos. Filmora Video Editor for Windows (or Filmora Video Editor for Mac) which is a reliable savior to many oddly oriented videos. This video editing product is amazingly smart to offer a ton of great video editing features.

- It’s very easy to use with a wide range of video editing features.
- You can import media files and videos shot by phones and cameras.
- It provides 300+ new stunning effects to personlize your video.
- You can export video to specified formats or share to Facebook.
Tutorial on How to rotate videos using Google Rotate Video Alternative - Filmora Video Editor
Step 1. Launch the Program
Download the latest version of Filmora Video Editor from their official website and install the software successfully on your PC (by following the instruction for installation). Next, launch the software and select "FULL FEATURE MODE" to enter the interface for video editing.

Step 2. Import Videos to Program
After that, you’ll need to import the video to Filmora. Click on the “IMPORT MEDIA” tab to import your required video to the software. And then, drag and drop the video that you want to rotate to the timeline below.

Step 3. Rotate the Videos 90/180 Degrees
Now, to rotate the video, you’ll have to launch the “Video Inspector” pop-up window which can be opened by tapping the “Rotate” icon. Then, rotate the video as per your wish. After completing the rotation, click the “OK” button.

Step 4. Export the Video
In the end, you can save or export the video to your preferred destination in your preferred format. To do this, you have to click the “Export” tab. This will open the “Export” window where from you can choose different options for exporting the video.
You can see that there are different options in the left-hand column of the Export window. You can choose the format of the video from the first option. Also, you can select a device for exporting the video, or share it to YouTube, Facebook and Vimeo.

Part 2. How to Rotate Video in Google Photo
Do you know that you can rotate a video on Google Photos without having to use a video editor? You could be that person who loves to backup your Android media on Google photos and you would want to rotate the videos that could be tilted angle. This is possible with Google photos provided you have the video on Google photos drive. If you do not have it there you can still upload and rotate it as described in the steps below.
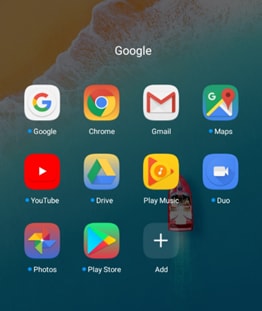
Step 1. On your Android phone, you can launch the Google photos app and log in using your email address that you use as media backup.

Step 2. Once you are logged you will see a list of several images and videos arranged according to date uploaded. To locate videos only, click on “Album” menu at the bottom side of the screen and click on “Videos” menu.

Step 3. Next, browse through the videos on Google photos videos to locate the video that you want to rotate.
Step 4. Once you have identified the video to rotate, click on and then click on the edit icon.
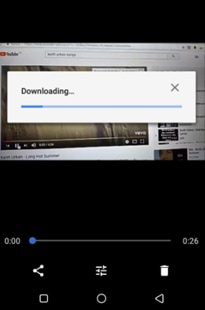
Step 5. Google Photos will start downloading your video reading for editing. So be patient for since it might take a little bit long of your video is large.

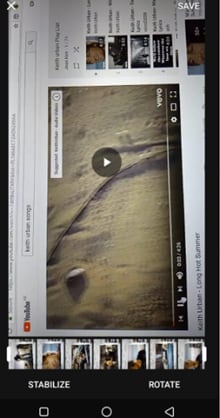
Step 6. Once the video is downloaded, again click on the edit button and you will see the “Rotate” option. Click on it and you will be able to rotate the video. There is also an extra edit option that allows you to stabilize videos.

Step 7. Once you are done rotating video on Google Photos, click on “Save” at the upper right to save the changes.
Next time do not worry about rotating videos on Google Photos, just follow the above steps and you will rotate videos easily.


