Sometimes you may download from the Internet an MOV movie that is split into several switches and the jump from one to the next may not be swift. It’s not only tedious but also annoying when you have to keep on halting a movie so that you can start a new part. These constant interruptions may eventually make you lose the interest to watch them. You may also have used your camera to shoot several MOV files and want to merge MOV files into a large one. Windows users may be pleased to learn that they can have an easy time doing. Yes, you can merge MOV files with ease by just following through with the following steps.
- Part 1. How to Combine MOV Files with Filmora Video Editor
- Part 2. Other 5 Ways to Merge MOV Files for Free
Part 1. Easilest Way to Combine MOV Files with Filmora Video Editor
The Filmora Video Editor has been tested over the years and proven to be the best solution when you want to merge MOV files online. Its effectiveness and reputation makes it your number one solution if you are looking for how to merge MOV files. Nothing can ever go wrong with this tool because it has the simplest steps any video editor can ever have. The following is a step by step guide on how to combine MOV files on Windows using the Filmora Video Editor.
Step 1: Download and install Filmora Video Editor
To begin with, download the Filmora Video Editor from the button above. It only takes a couple of seconds to complete the process. When the download and installation is done, launch the program, enter "Full Feature Mode".

Step 2: Import videos to the program
The next step is to click “Import Media Files Here” to start importing the MOV files that you want to combine. Alternatively, you may simply drag and drop the media files into the Filmora media library.

Step 3: Join MOV files
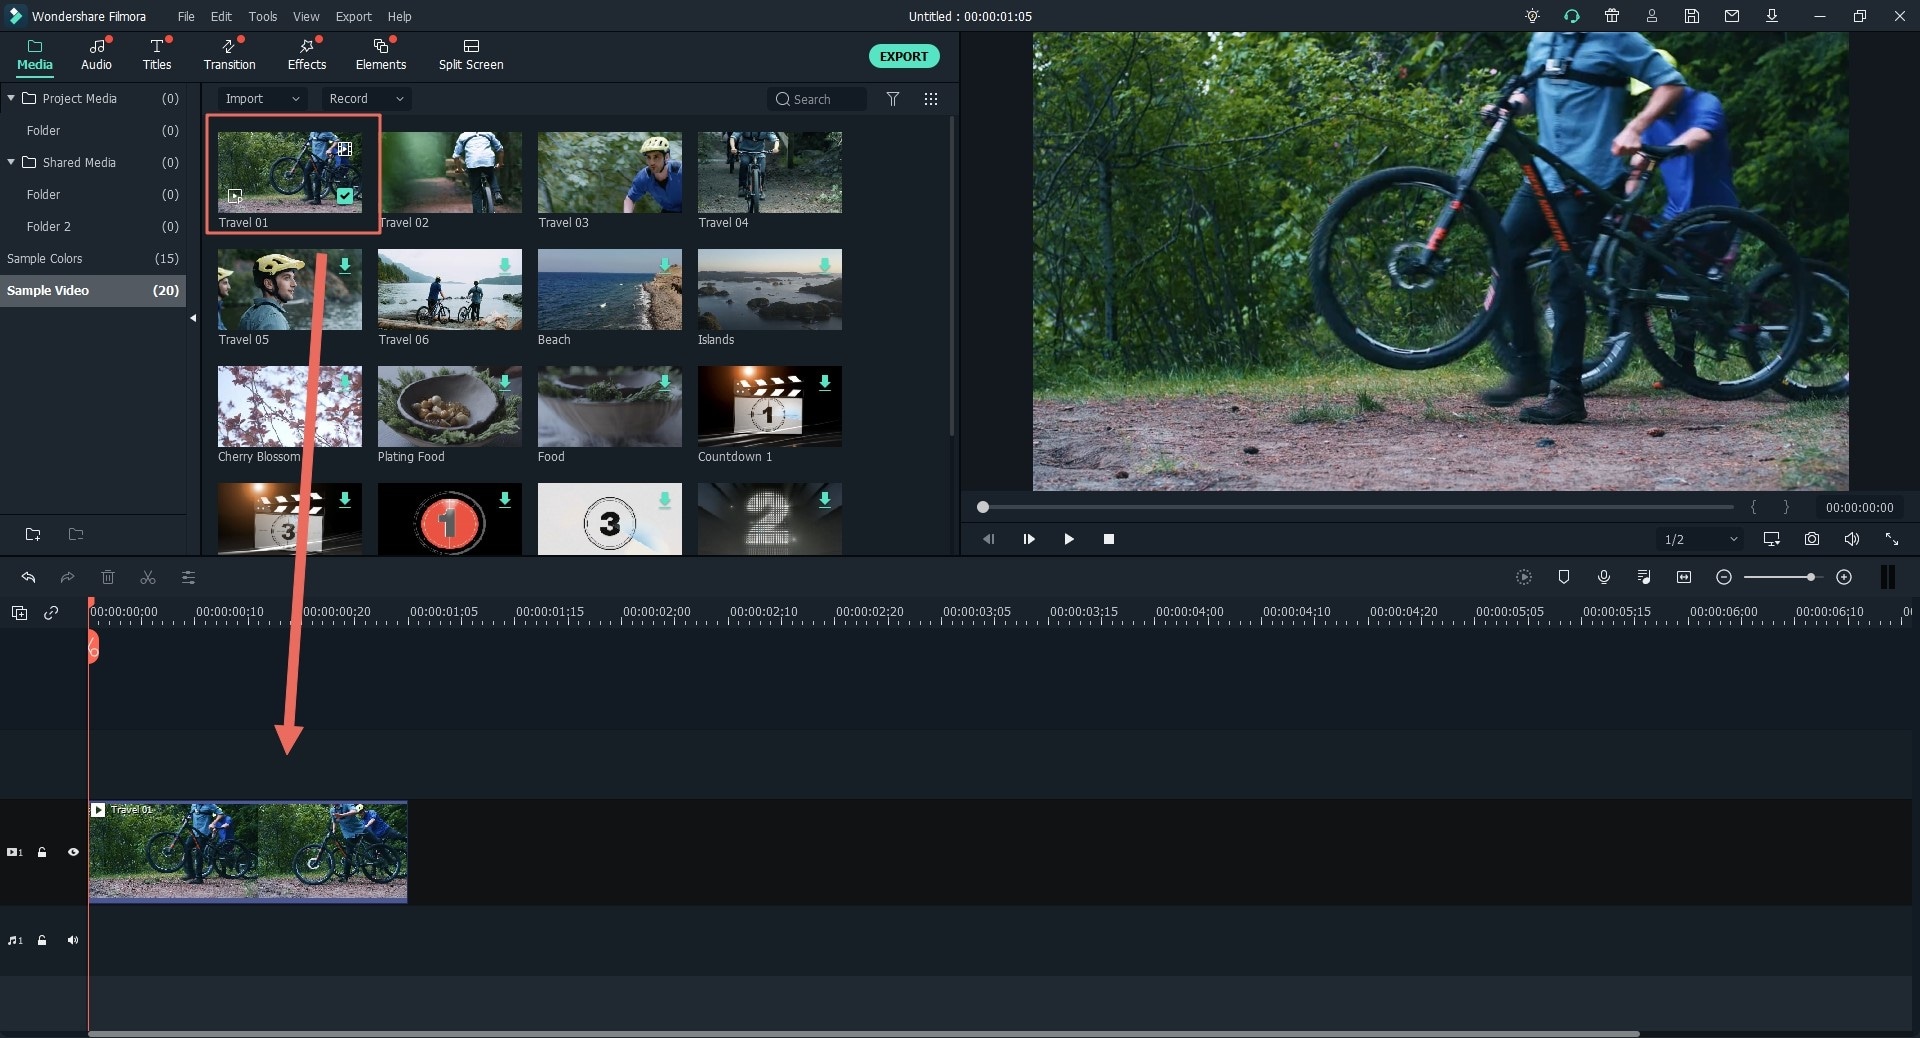
The process of joining MOV files is simple; simply drag the MOV videos to the video track on Timeline. They will be combined together into a single file once you save and export the project. If you want to add some transitions between these video clips, follow through to the next step.
Step 4: Add transitions between MOV videos
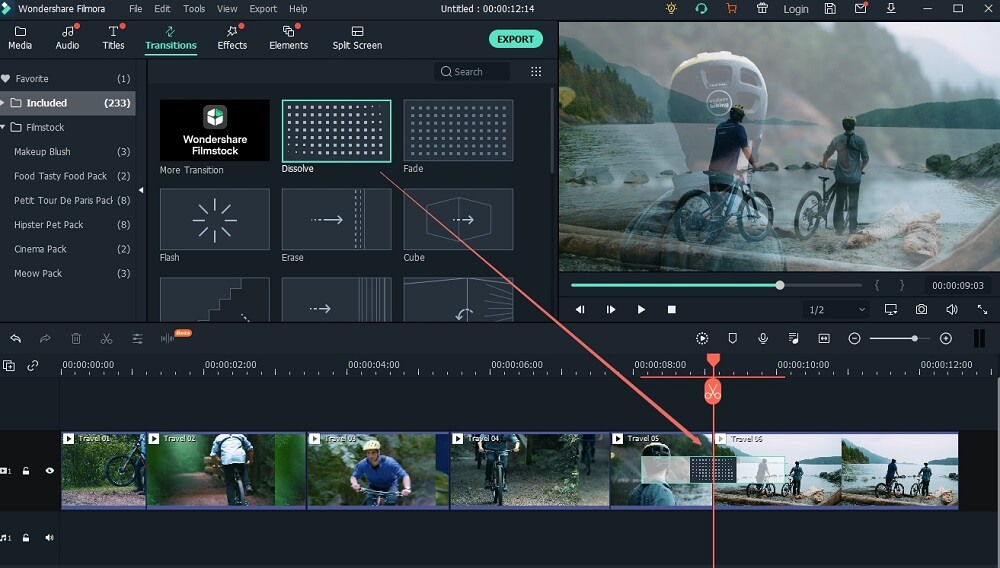
Go to "Transition" tab and pull the transition that you wish to the joining point between two MOV clips. The program also allows you to right click any transition and apply it to all or apply randomly.
Step 5: Save or export video
To save the video, simply hit the “Export” button. Use the Format tab to select any format of your liking. Choose ‘Device’ to play the video on your Mac. The final output can also be burned on DVD discs to play on TV or uploaded directly to YouTube, Vimeo or Facebook.

Why Choose Filmora Video Editor to Combine MOV Videos

Filmora Video Editor comes with an array of features. It has a clean interface that displays all the necessary tools on the main interface for easier working. Learning how to use it doesn’t involve much. A couple of minutes are enough to get you going with your ambitions to merge MOV files free.
- Effects and transition: You have hundreds of effects and editing options aimed at making your videos look as professional as possible.
- Multiple file support: You have the liberty to import any type of video to this tool. This aimed at shielding you from the trouble of having to jump from one tool to the other.
- Share videos: Use the tool’s powerful video sharing tool across all social media platforms and let your friends know about your creative work.
- Export files: This MOV joiner allows you to export the final output to any device of your choice. You can also save in any format on the available device.
Part 2. Other 5 Ways to Merge MOV Files for Free
#1: How to Combine MOV Files with Brorsoft Video Converter
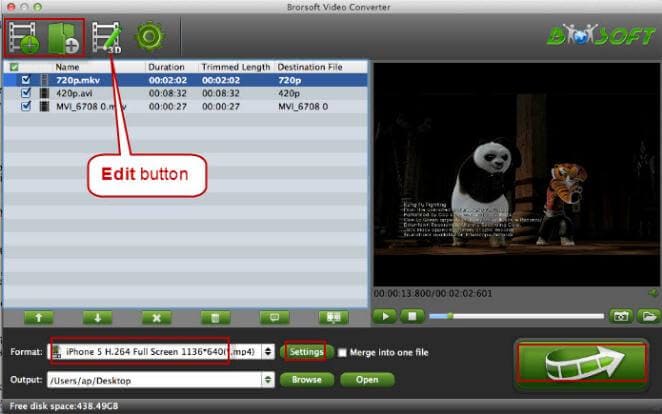
The Brorsoft Video Converter is a program designed to merge different file formats including MOV. You can use it to merge a bunch of clips into a single file without compromising on the quality. Feel free to load as many clips as you want. Additionally, you have some effects to choose from such as adding transitions.
Step 1: Import videos to the program by clicking on the “add” button.
Step 2: Once your files are imported, click on the “Convert” button to get a continuous movie.
Step 3: Get more edit options by clicking on the Edit button. Some options available are crop, trim, subtitles and special effects
Step 4: When all is done, hit the big Convert button to have the MOVs merged into a large file. When all is done, follow the “Open” button to gain access to your creation.
#2: How to Combine MOV Files with Aimersoft Video Editor
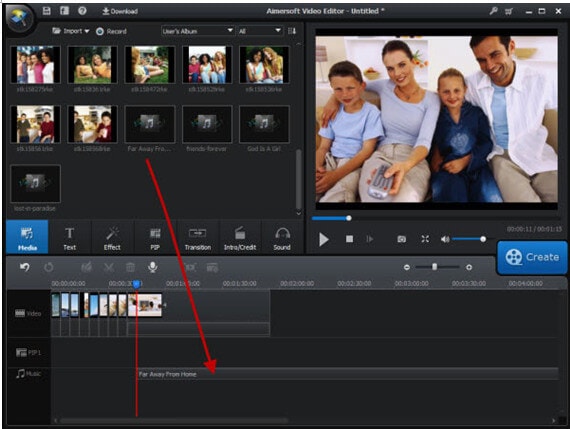
Aimersoft Video Editor is available both for Mac and Windows. It is an all-in-one tool that you can use to do basically anything you want. Utilize the stunning effects and filters, even as you save on your disk space.
Step 1: Add MOV files to the program by hitting the Import button.
Step 2: Individually drag the imported files to the Timeline panel. Make sure these are added in the right order since the MOV joiner merges them automatically.
Step 3: Double click on any target video and edit it from the pop-up edit box.
Step 4: When you are done with the editing, hit the Create button to get to the Output window. Some options available include save the file, and share the video through Facebook or YouTube.
#3: How to Merge MOV Files with iMovie

It’s possible to quickly and easily merge different clips into a large movie using the iMovie application. Once the merging has been finalized, the resulting video can be copied to the camera roll or photo library. The video can further be opened with relevant iOS apps such as video editors, players, and even published on other websites or shared on social media and YouTube.
Step 1: Launch the application and then click on “File” to create “New Project”. Name the video to be created.
Step 2: Import different video clips into the application: “File” >> “Import”>> “Movies”.
Step 3: You can easily Merge all selected video clips. From selected file drug those video clips. After that, drop them into the project window. Then arrange them according to your need. By this process, you merge all video clips and get them together during you play it. Then you show a single video which is made of all separate video clips.
Step 4: For exporting a new clip, go to the "share" option. Many options are included here. Among them "Export Movie" and "Export using Quick time" is very common. You can go the first option of creating a new clip.
#4: How to Combine MOV Movies in Quicktime

If you’ve been researching on how to combine QuickTime movies, then you may as well find QuickTime useful. It is free-to-use, produces videos of superb quality and very easy to operate. The following steps will guide you on how to merge quicktime movies.
Step 1: Visit the “Application” folder on your Mac to launch the QuickTime Player.
Step 2: Use this program to open the first video clip. This will also open a QuickTime player window.
Step 3:Multi-select all the other videos and drag and drop them to the open window.
Step 4:All the imported video clips will be arranged at the bottom of the program. Re-arrange them in the order of your liking.
Step 5:When you are pleased with what you see, save the many clips as a single file by selecting “File” >> “Export”.
#5: How to Combine MOV Files with Idoo Video Joiner
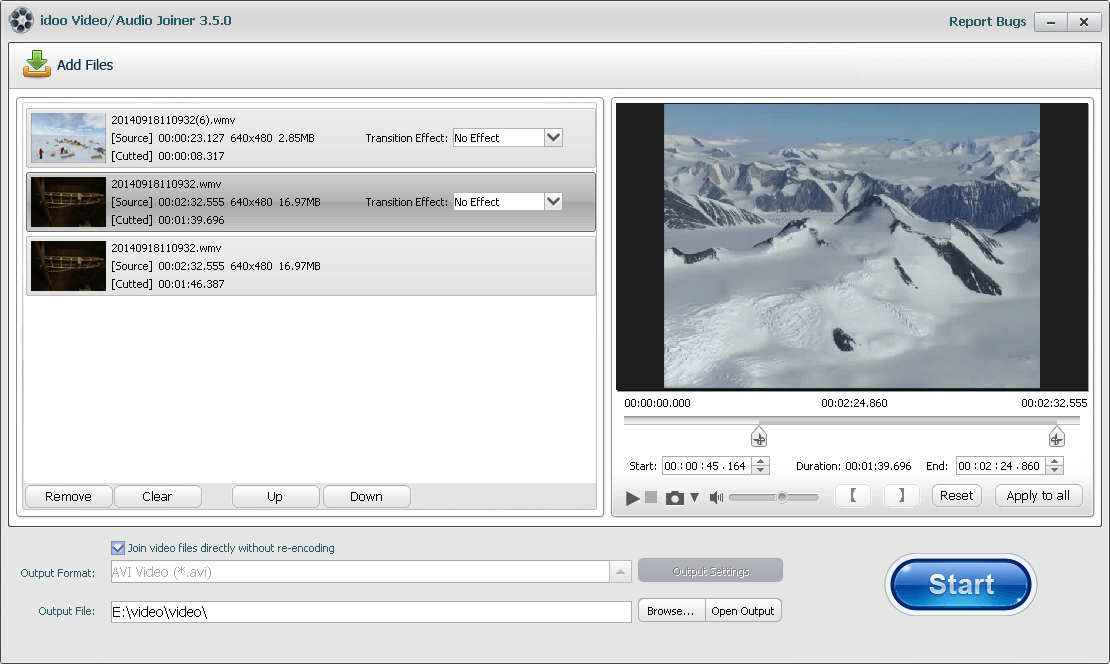
Idoo Video Joiner is an effective program to join your videos without quality loss, ensuring that you can still enjoy the original quality video. Add any number of video files simultaneously.
Step 1:Click on “Add file” to import the videos you want to combine.
Step 2:When they’ve been added, edit them by clicking on a single video file.
Step 3:Get to advanced configuration settings by clicking on “Output settings”.
Step 4:When all is done, save the final video into a folder of your choice.


