How long does it take to edit a travel video?
Well, that largely depends on the video editing software you are using. If you want to get the most out of your travel footage, a professional video editor is essential. While a good camera might also come in handy when documenting the travel experience, good video editing software will give users the ability to transform footage from even a basic camera into an impressive travel video.
Good travel videos are all about telling a story and taking viewers on a visual journey. The way you piece together your raw footage, images and sound together will play a huge part in the final look of your video.
So, in this article, you'll learn how to edit a travel video with a professional video edtiing software.
The best part?
5 advanced editing tips tell you how to organize, select video clips and edit them with simple words. And I hope you'll create a wonderful travel video after reading this post.
Now, let's get started...
Filmora Video Editor - The Ultimate Travel Video Editing Software
You don't need expensive video editing programs to produce amazing travel videos. A Video Editor that is easy to use, inexpensive and packed with tons of tools and features could be a nice choice. One of the best video editing software available today in this regard is Filmora Video Editor for Windows or Filmora Video Editor for Mac.
- Powerful video editing features such as trimming, cropping, rotating, merging/splitting videos and adding subtitles.
- 500+ built-in free eye-catching video effects, transitions, titles, filters, overlays, etc. for your reference.
- Advanced video editing skills like split-screen, green screen, PIP, color correction, etc. help to make an awesome travel video as easy as 1-2-3.
- Edit video from any camera, any device, any format easily and export video to various video formats as you like.
- ...
Tutorial: How to Edit Your Travel Video with Filmora Video Editor Software?
Preparation: Be sure the travel video editing software has been downloaded and installed on your computer, then launch it. After that, click "New Project" buttton to open the video editing panel.

Step 1. Organize Your Footage
Before you begin your travel video project, it is always a good idea to organize all the footage files in chronological order so you can build your travel story right. Here, you can remove the extraneous or unwanted clips.
Step 2. Import Video Clips to Timeline
To import your footage either drag-and-drop video files from your storage device, or click the "Import Media Files Here" option. After that, simply drag and drop these clips into the timeline for editing.

Step 3: Edit Travel Video with Transitions, Filters, Music, etc.
It is necessary to make a rough cut by using the tools like splitting, cropping, rotating, etc. In this way, you can remove unwanted clips and only leave files you need. ( Click here to learn how to make a rough cut quickly >> )
Or view the below video tutorial to learn how to cut, split, combine or trim video easily.
After that, follow the below steps to add effects to your video to enhance the video performance.
- Add Filters and Special Effects
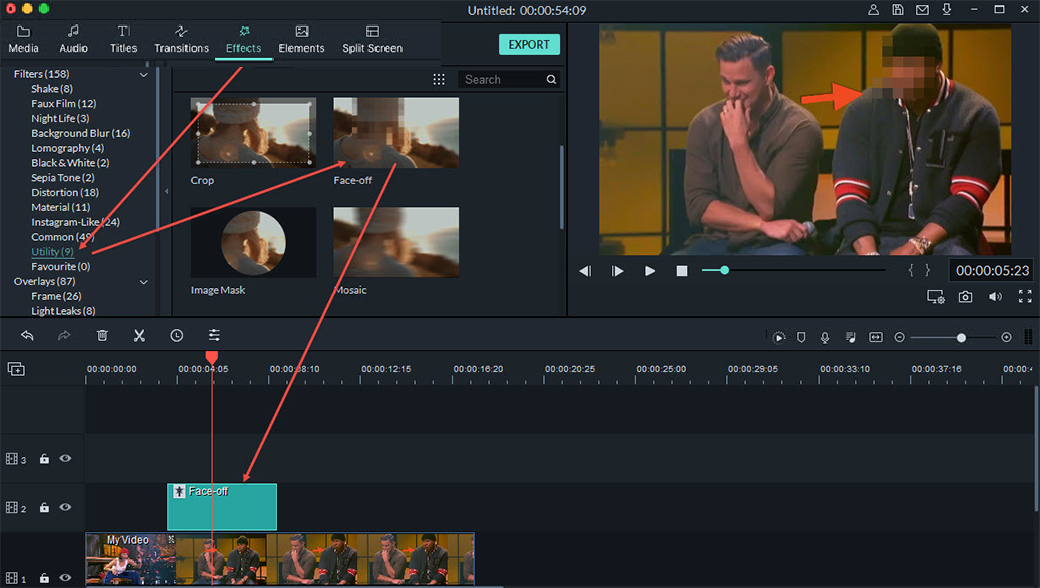
To do this, you first need to switch to the Effects tab which will give you access to 300+ exciting filters, effects, and overlays. You will now be able to apply filters such as blur, distort and pixelate to your video.
Learn how to put filters to video in details >>

- Add Transitions
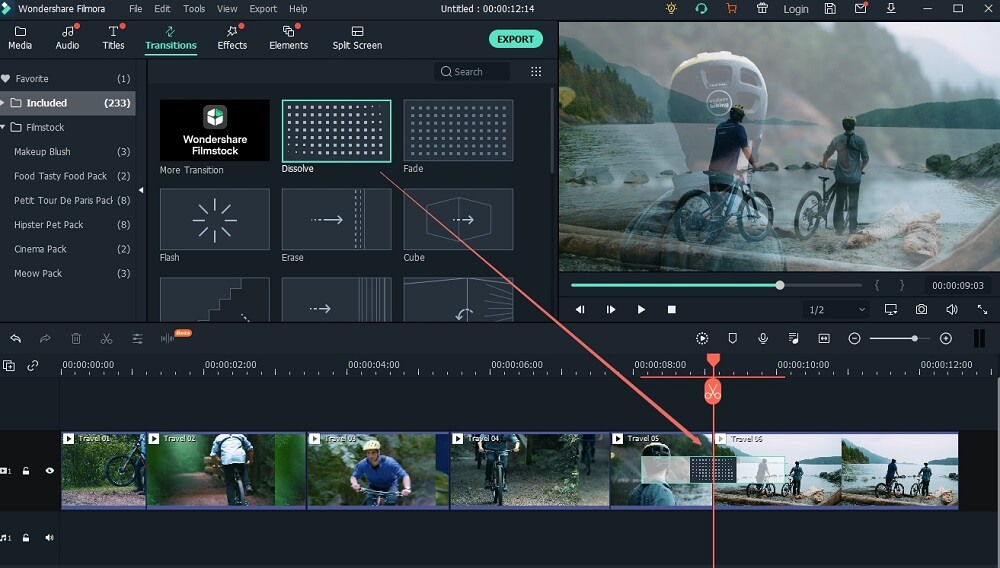
Your video clips in the timeline will play successively without a gap. To create smooth changeovers from one clip to the next you will need to add transitions. Switch to the Transition tab and drag any transition between any two clips to apply an effect. Filmora Video Editor has over 200+ cool & free transitions effects to choose from.

- Add Audio Effects (Background Music)
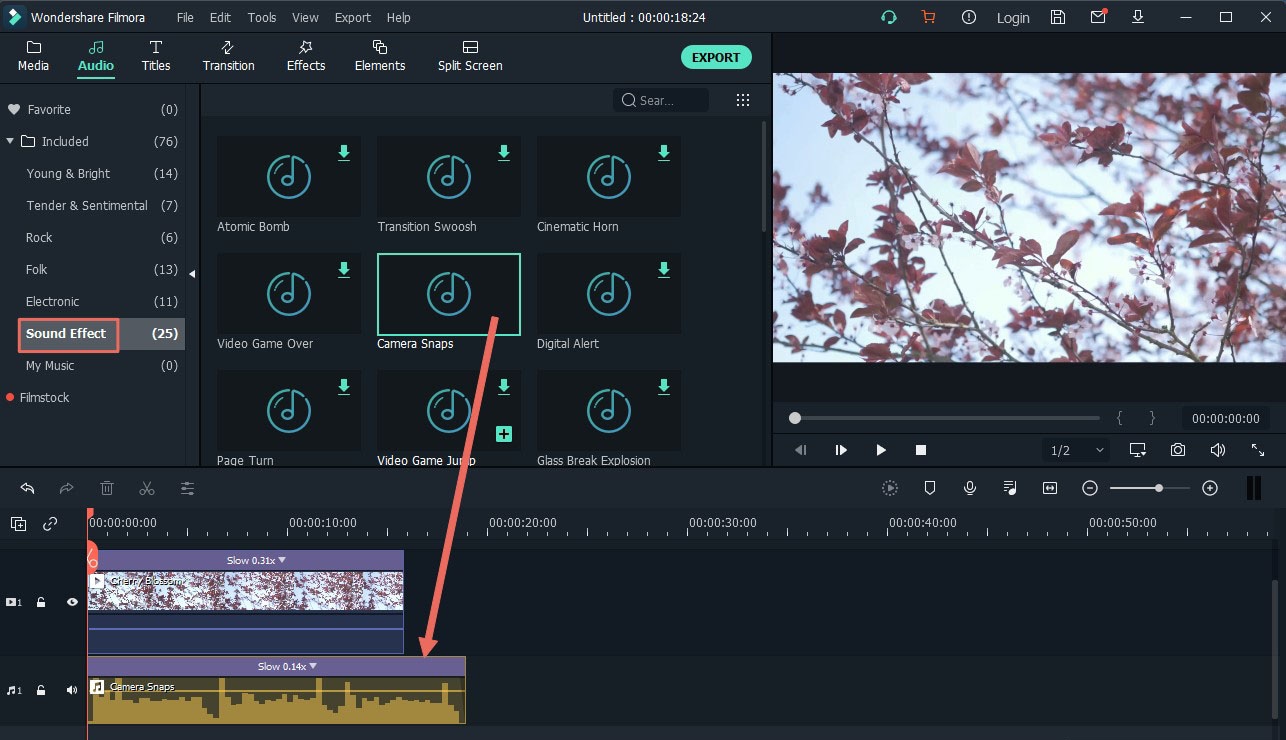
Music and sound effects help to add emotion and enhance scenes in a travel video. To add a sound effect, click on the Audio tab and choose any of the desired audio effects from Filmora's huge sound library. Drag-and-drop your sound effect onto your audio track to apply.
[Attention] Here, you can also import local music or songs as the background music according to your own needs.

Step 4: Save and Export
When you feel your project is finished, the last step is to save your finished travel video in any format you want. To export your video to your computer, navigate to "Export" and choose a way to output the edited travel video.
Tip: If you wish to share the travel video on YouTube or Vimeo, you can directly choose "YouTube" or "Vimeo" as the output format.

[Attention]
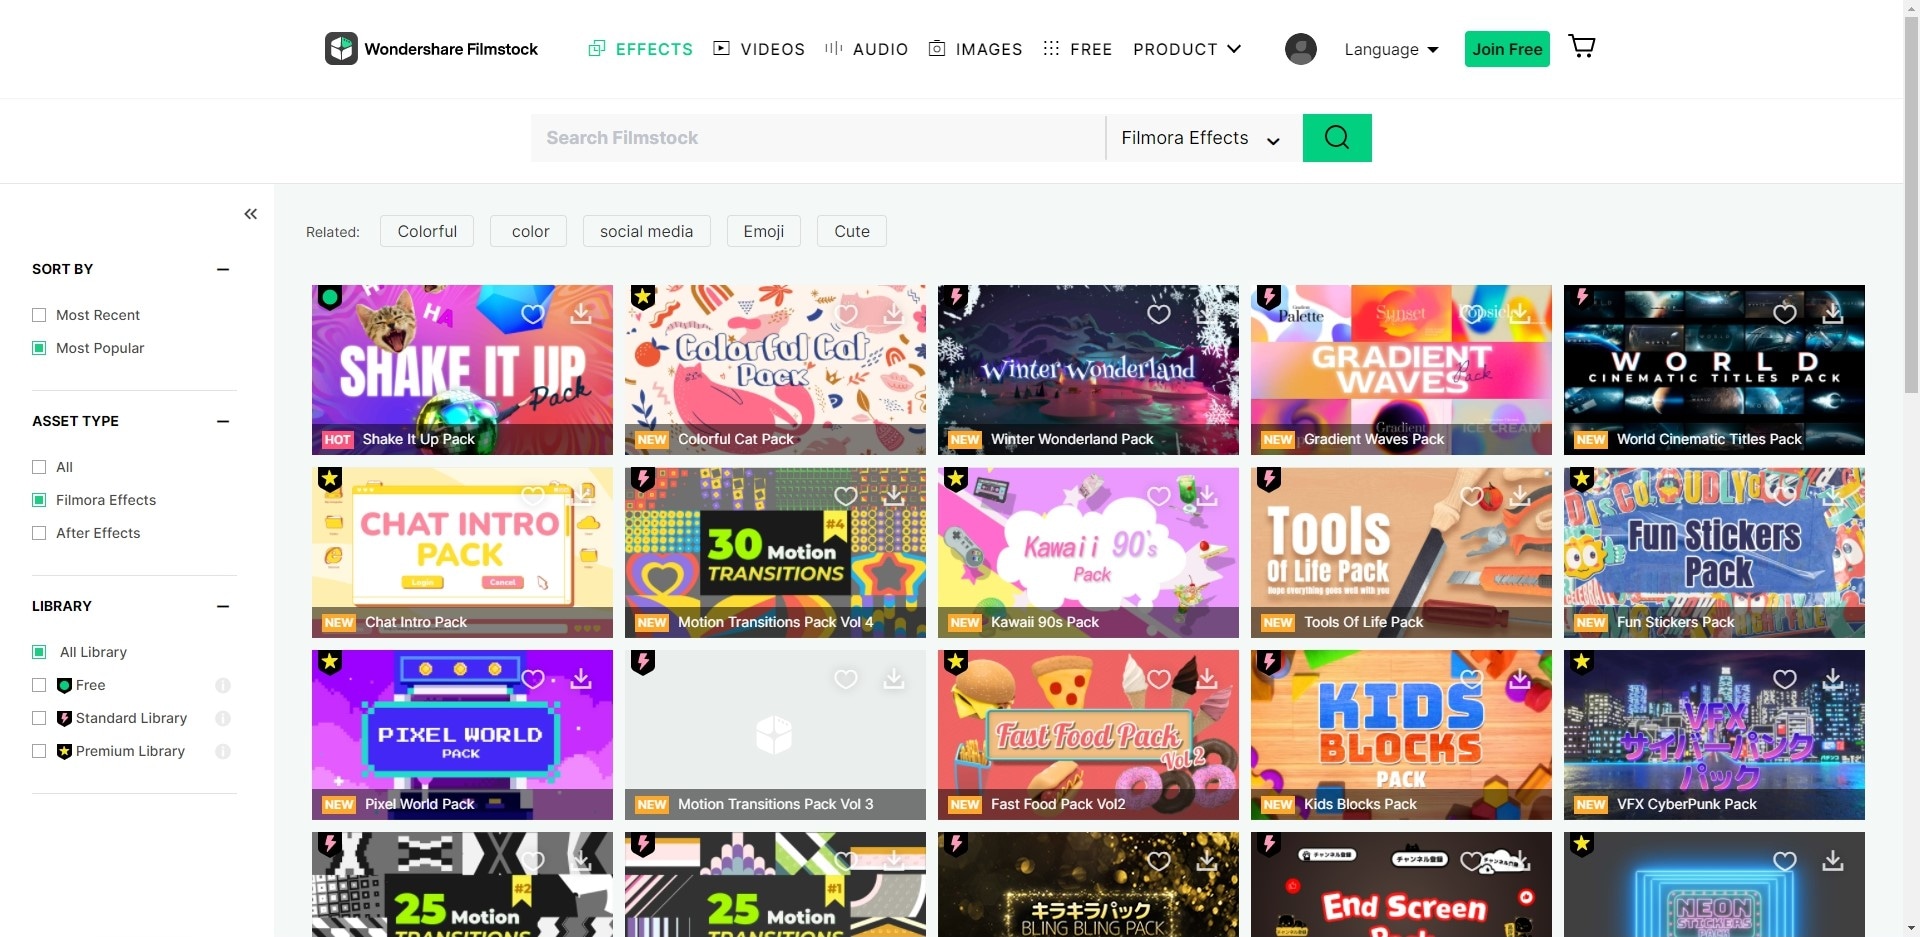
As you can see from the above, Filmora Video Editor comes with hundreds of free effects for your reference, including transitions, sound effects, filters, overlay, elements, etc. But sometimes, you might want to create an unique travel video under specific themes like Paris, New York, etc., then, you can enrich your effects library from the site called "Filmstock" (All video footages, effects, photos, etc. from this site is royalty-free, and fully compatible with Filmora Video Editor).

[Bonus] 5 Best Tips for Making Adventure Travel Videos
#1. Choose your clips wisely
Think about the story you want to tell and the tone of your travel video. If you want to create an exciting, adventurous travel video, choose to use footage that is bright and busy with fun activities. Just because you recorded great footage of a rainy forest doesn’t mean you should include it in your video.
#2. Mix up your shots
Creatively combining long, medium and close up shots keeps your travel video interesting and helps to hold the attention of the viewer. With so many travel videos available today, most people have very short attention spans so you need to try and keep changing your shots frequently. Lengthy studio monologues followed by drawn-out shots of you performing an activity is not as interesting as you talking as you perform and experience the activity in real-time.
#3. Keep it short and sweet
As mentioned above, most people simply don't have the patience to sit and watch a 40-minute travel video. Create short videos that can be easily digested and shared. 3-5 minutes is ideal. If your travel story requires a much longer video, consider splitting your content into several shorter videos.
#4. Narration
Not everyone has the skill of narrating their experiences on the fly. If talking while shooting video is not your thing, consider recording voice-overs later over the footage. You could also add cool text graphics to explain scenes.
#5. Add good sound
The right sound or audio effects can make the difference between a boring and interesting travel video. Sound sets the pace for videos and also adds mood and momentum. Take time to find the right sound for each scene or part. If you intend to share your video on social platforms, make sure to only use free use or royalty-free sound.
Final Thought
Now, do you know how to edit a travel video or start a Vlog?
Generally speaking,
I hope this article will help you to simplified the video editing or creating process. And help you to make more and more awesome videos in the future.
Then, what're you waiting for? Just click the below icon to take a free trial on the best travel video editing software right now.


