iMovie is Apple’s official video editing software designed to help users instantly edit videos on their Macbook and iPhone. If you’re looking for a simple yet feature-rich video editing solution to edit videos on a macOS, iMovie is the right answer.
It has an intuitive interface and various editing tools that’ll help you unleash your creativity and create different movies in no time. You can use iMovie to edit short films, movie trailers, or even a quick compilation of all the special moments with your friends and family members. Read this guide to understand how to make a movie on iMovie without any effort.
- Part 1: How to Make a Movie in iMovie >
- Part 2: Using Filmora Video Editor for Mac to Make a Movie [Recommend] >
Part 1: How to Make a Movie in iMovie
Since it has a user-friendly interface, iMovie is the perfect choice for beginners who want to improve their video editor skills. It has all the necessary tools to perform basic editing operations such as trim, split, crop, merge, etc., on different video clips and compile them together to create a full-length movie. Even if you have never worked on any editing software in the past, you'll be able to use iMovie without any hassle.
Let us quickly introduce you to some of iMovie's features that make it one of the best video editing tools for macOS and iPhone.
- User-Friendly and Easily Navigable Interface.
- Built-in templates to add different elements such as credits, logos, and cast names.
- Add special effects and transitions to make the movies visually appealing.
- Stabilize video clips to fix jerky footage.
So, here’s the step-by-step process on how to make a movie with iMovie on Mac.
Step 1 - Go to Applications and launch iMovie. On its home screen, click Create New and select Movie to set up a new project.

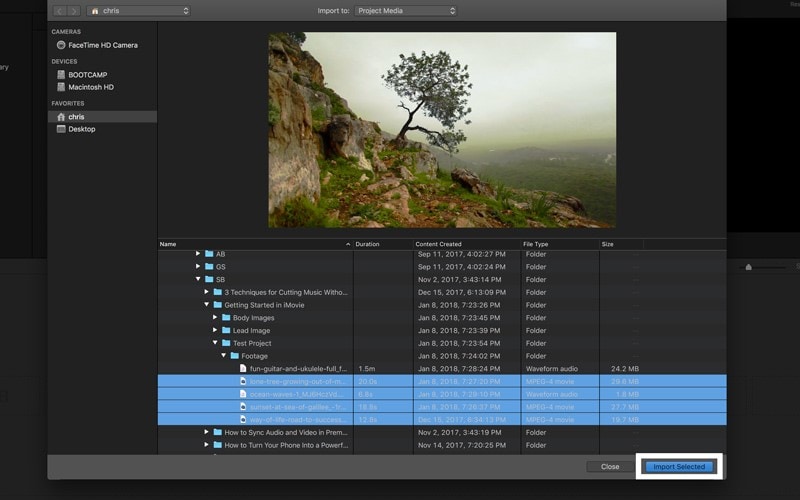
Step 2 - You’ll see a complete editing panel on your screen with a dedicated timeline, preview window, and toolbar. Tap the Import button or press Command+I to add media files to your project.

Step 3 - Once the videos are successfully imported, you can initiate the editing process. To do this, first, drag & drop the desired clips to your timeline.
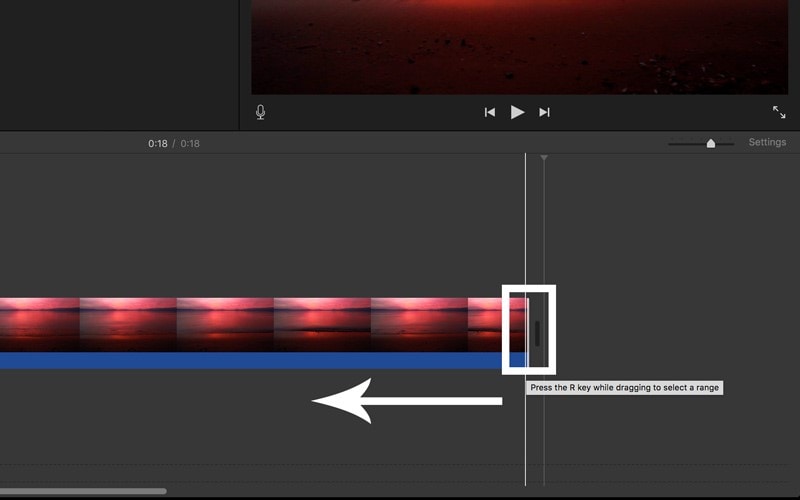
Step 4 - If you want to trim a video clip, place the pointer to either beginning or the end and then drag its edger to remove the unwanted part.

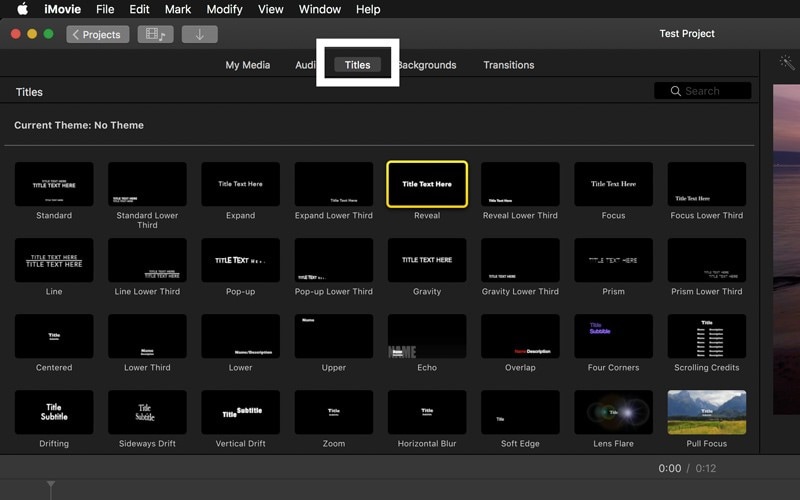
Step 5 – To add titles to your movie, select the Title tab and choose any of the built-in templates. Once you've found the right template, drag it to the timeline and customize it to add a new title.

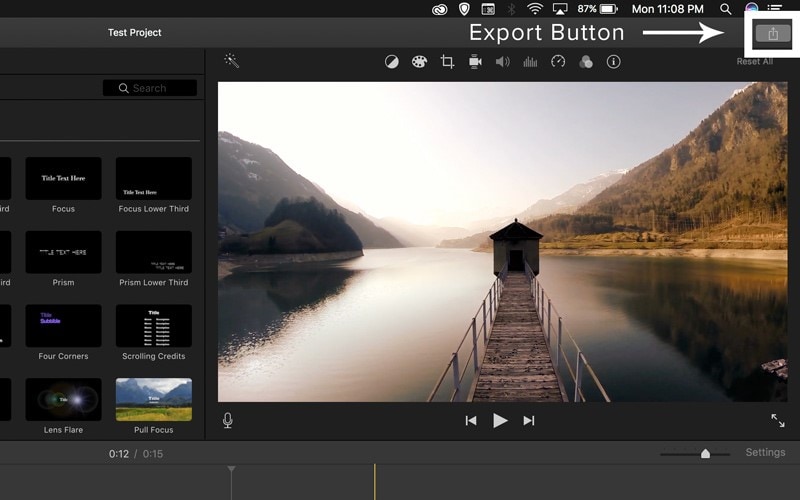
Step 6 - After you’ve completed the editing process, tap the Export button in the top-right corner to save the file on your PC. You can also directly share the movie on your social media handles.

Part 2: Using Filmora Video Editor for Mac to Make a Movie [Recommend]
Even though iMovie is an excellent tool for daily video editing, it won't be a suitable option for users who want to create highly cinematic movies. Why? Because it lacks the advanced functionality of a full-featured video editing tool. So, suppose you're looking to step-up your video editing game. In that case, we recommend using Filmora Video Editor & Filmora Video Editor for Mac. It's an advanced video editor for macOS and Windows that'll help create high-quality videos by customizing different elements.

Filmora Video Editor – Best Movie Maker
- Offer video keyframing to integrate different parameters to a clip.
- Customize the speed of a video to deliver your storyline more effectively.
- Choose from hundreds of built-in effects and transitions to make your movie more cinematic.
- Add different audio effects and voice-overs without any hassle.
Steps to edit a video using Filmora Video Editor
Step 1 - Install and launch Filmora X on your Macbook and tap the Import button to add media files you want to use in the movie.
Step 2 - Now, drag the media files to your timeline and start with the editing process.
1. Split a Video
To split a video into two different parts, drag the cursor to the specific point where you want to separate the clip and press the Split icon in the menu bar.

2. Trim Video
To remove unnecessary footage from a video clip, place the cursor at either end of the video. A pointer will appear on your screen. Now, drag this pointer left or right to trim the unnecessary part from the video.

3. Add Special Effects
Filmora X comes with a wide range of built-in effects and transitions that you can apply to your movie to make it more cinematic. Go to the Effects or Transitions tab and then choose the desired effect/transition you want to add to your movie.

Along with these pre-installed templates, you can also get access to thousands of special effects and transitions in Filmstock. It’s an online media library that provides royalty-free content for all creative video editors.

This means you’ll be able to get copyright-free music, video clips, audio effects, images, etc., for your movie in one place. Filmstock is a wise investment for anyone who’s pursuing video editing as a professional and often requires visually appealing elements for their projects.
Conclusion
We hope this guide helped you understand how to make movies with iMovie. Both iMovie and Filmora Video Editor & Filmora Video Editor for Mac are reliable video editing tools for anyone who wants to tap into their creative side. However, as compared to iMovie, Filmora X has better features that'll help you enhance your movie's overall quality and make it more appealing to the audience.


