- How do you make a cinematic video?
- How do you make your film look professional?
A cinematic video looks amazing and cool. However, to get a cinematic video, the video footages must undergo editing and thus requires an up to par cinematic video editor.
How to make cinematic video was a tiresome task in the past which also required that you fork out a chunk of cash. However, the surge of cinematic video editor have reduced both the time requirement and expenses. These programs are characterized by low costs and intuitive interfaces which do not require expertise.
Well, this post will let you get an appropriate cinematic video editor and play with the cinematic effects. Let's strat.
Filmora Video Editor - Cinematic Video Editor
Filmora Video Editor (or Filmora Video Editor for Mac)is undoubtedly an unmatchable cinematic video editor you can think of. The program features a collection of excellent cinematic effects ranging from video stabilization, cinema crop bars, add texts, adjust speed of video, color correction, and filters among others. This program for sure is a complete cinematic video editor package. Just download Filmora Video Editor for your OS and install by simply following the basic on-screen instructions.
Features of Filmora Video Editor:
- This Cinematic Video Maker supports quality editing of video of up to 4K resolution.
- Filmora Video Editor offers plenty of amazing effects that greatly enhance the visual appearance of your video.
- This tool offers both basic and advanced editing that give the video an excellent cinematic view. They include crop bars, subtitle templates, video stabilization, speed adjustment, and color correction among others.
- Allows you to record your desktop screen, webcam and record audio.
- You can download files from Flickr, YouTube and Instagram.
Tips to Make Your Video Look Cinematic with Filmora Video Editor
#1. Stabilization Video
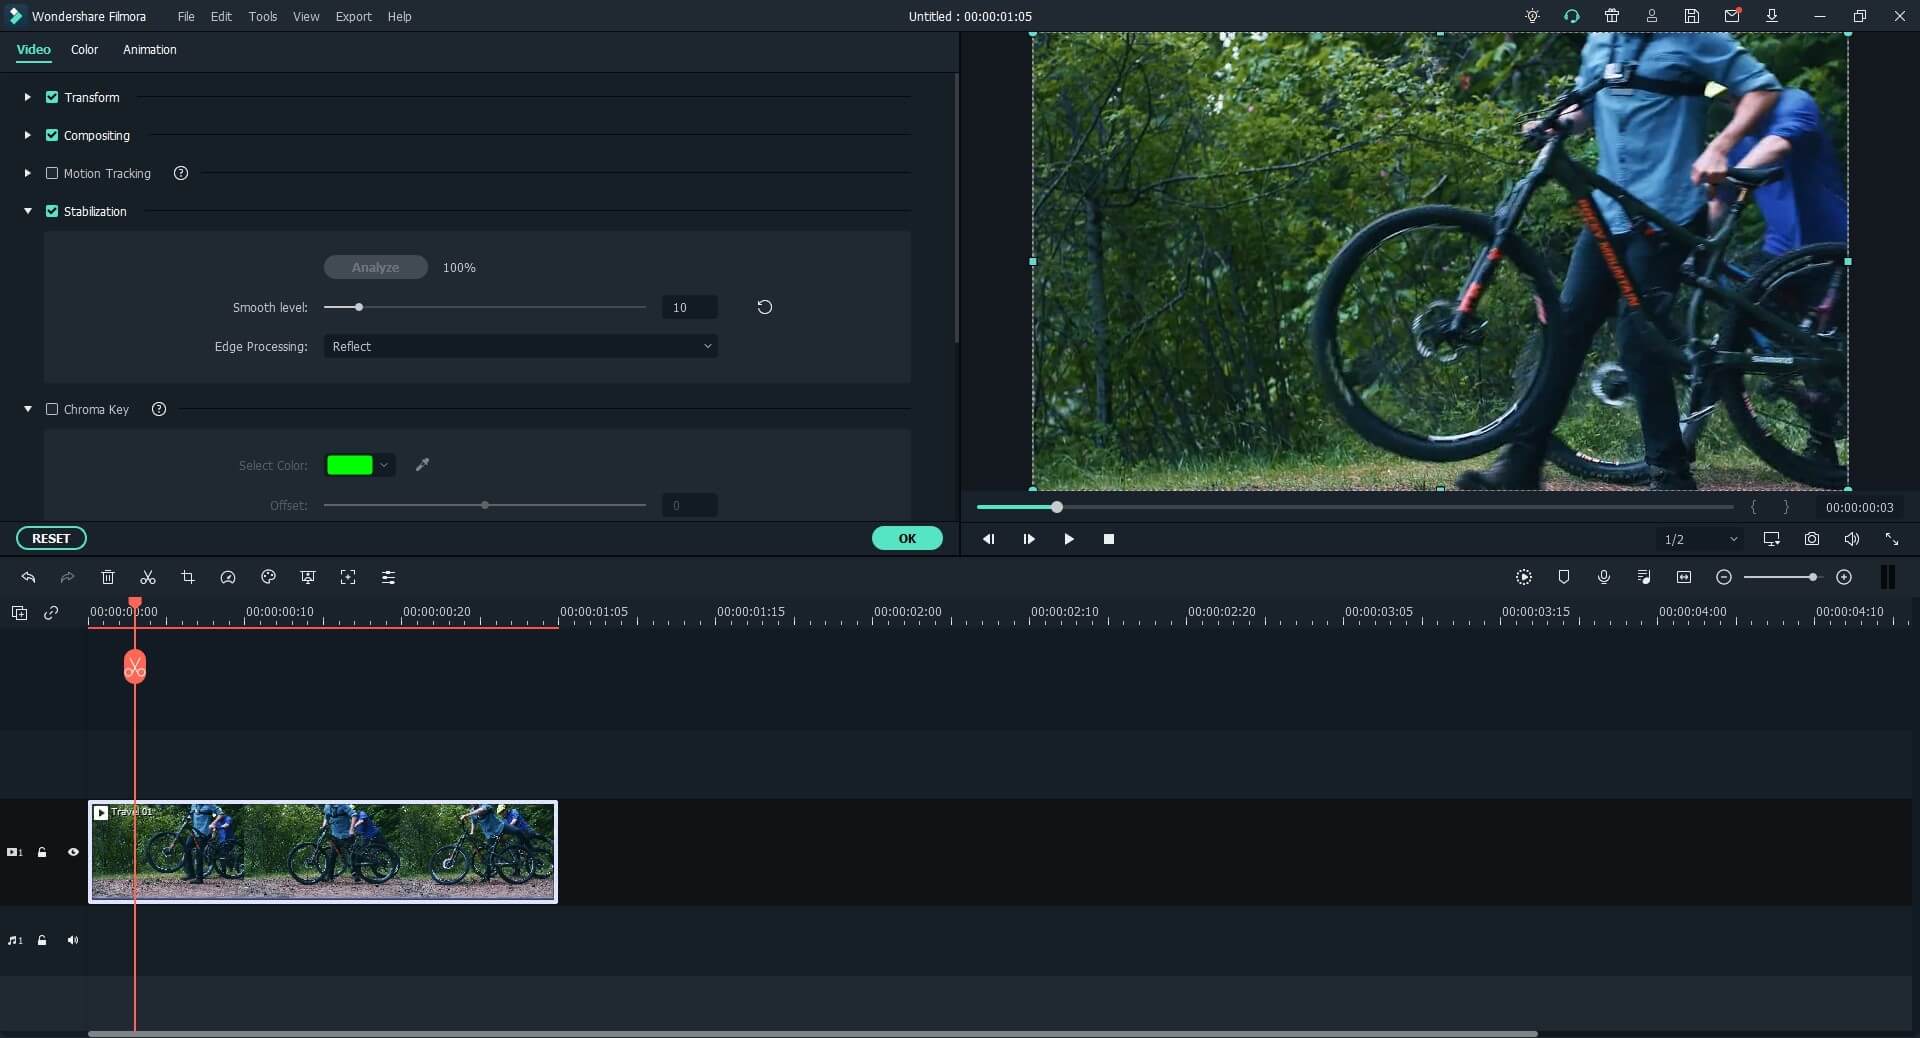
Stabilization of video helps to improve the quality of your video file by streamlining the sections that appear to have noise. This process is quite easy as outlined below.
Step 1. Upload the respective video file to the Media Library then drag and drop on the program`s timeline.

Step2. Select the video section you wish to stabilize by right-clicking at that particular section. Select "Stabilization" or the "Show Properties" option to access the editing panel.

Step 3. Now move the slider to the desired position on your video and check on the preview window whether the stabilization is satisfactory. Hit "OK" to save the changes you have made. Remember the program will automatically add a copy of your video on the Media Library. The new copy is your latest video file which you can edit further
#2. Add Cinematic Crop "Cine Bars"
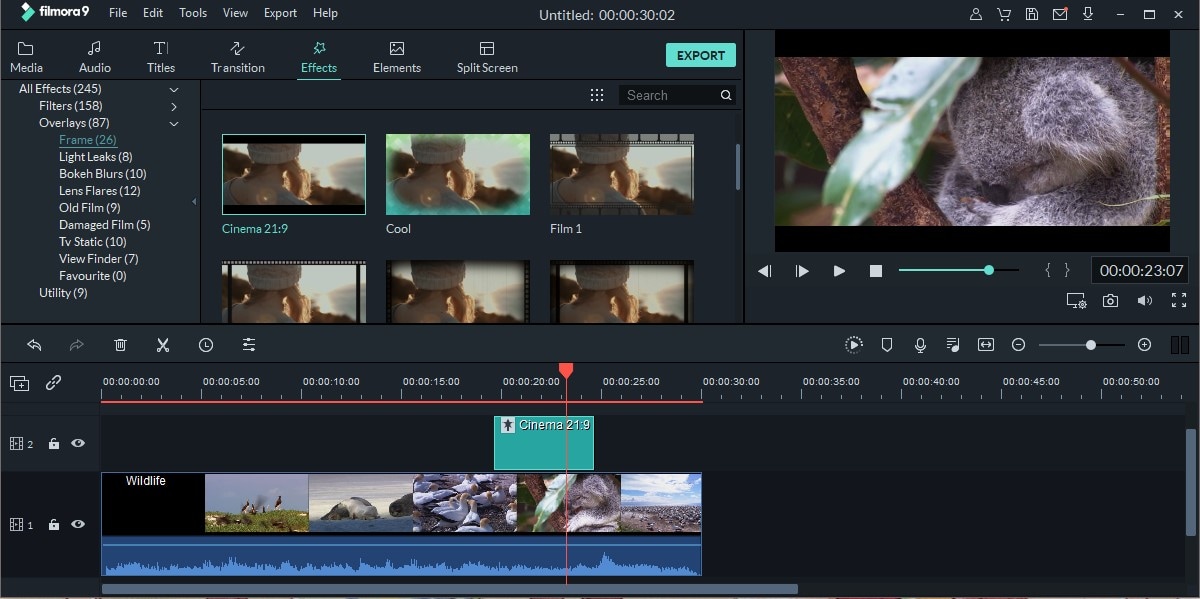
You must have seen two black blocks appearing on top and bottom of a video, especially when you watch a movie. This is a cinematic video effect and can easily added to your video. To add the cinematic bars, just follow the steps below.
Step 1. Navigate to the Effects tab and select "Overlays".

Step 2. Now select Cinema 21:9 and apply it to your video clip.
#3. Add Background Music/Sound Effect
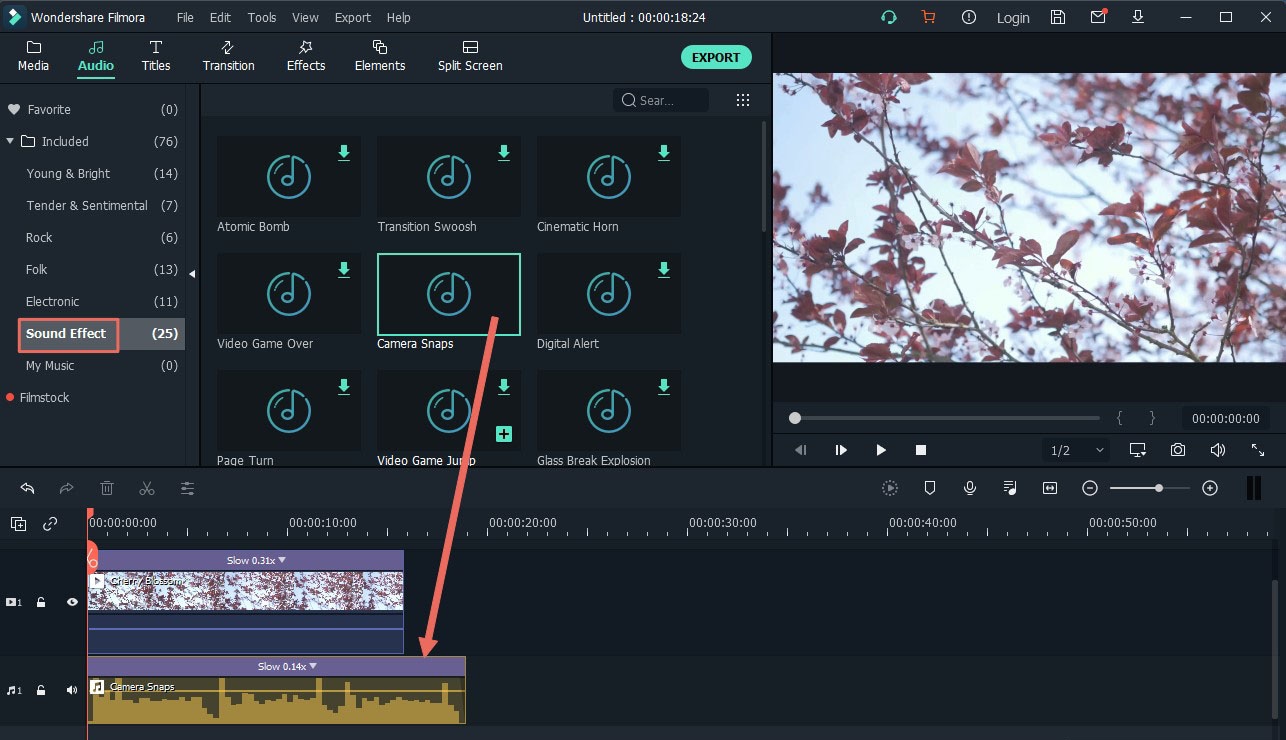
Background music is the track that plays alongside the video on the background. This music makes your video more interesting. This Program offers two options for adding background music. You can import the music from the computer or simply use the in-built music from the program.
To import from the local computer, just click the Import tab and browse for the target music file. Click Open to upload it to the Media Library and then drag to the Filmora Timeline for editing.
For the built-in music option, hit the "Audio" tab located at the top of the menu and choose a suitable sound effect. Now drag the selected cinematic sound effect to the sound track on the program timeline.
#4. Speed up/Slow down Video
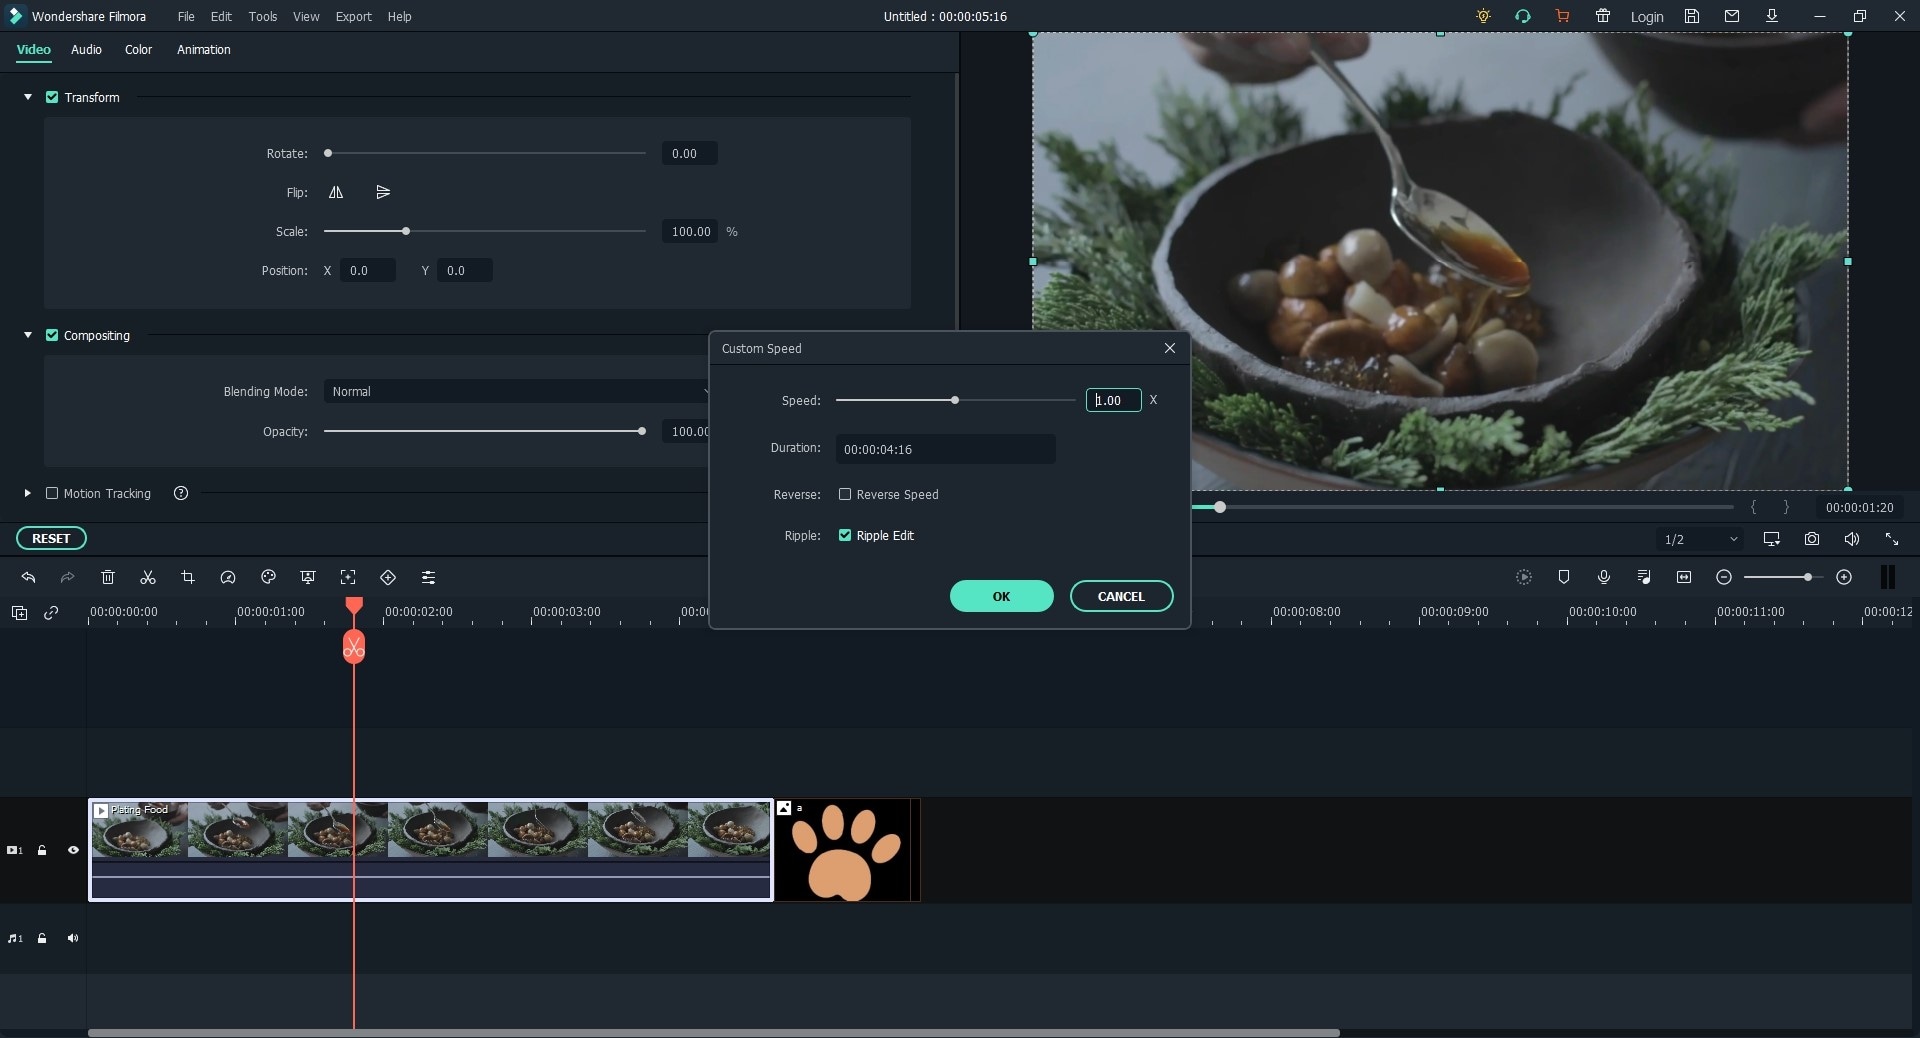
This feature specifically alters the pace at which your video plays. It can either decrease or increase the speed as per your choice. To apply this effect, follow the guidelines below.
Step 1. Upload the video you would like to edit to the Media Library then drag and drop in the Filmora timeline.
Step 2. Right-click on the video clip and choose the Edit option to display the video editing window. Locate the Speed option and slide to adjust the speed of your video. You can choose to increase or decrease to speed up or slow it respectively.
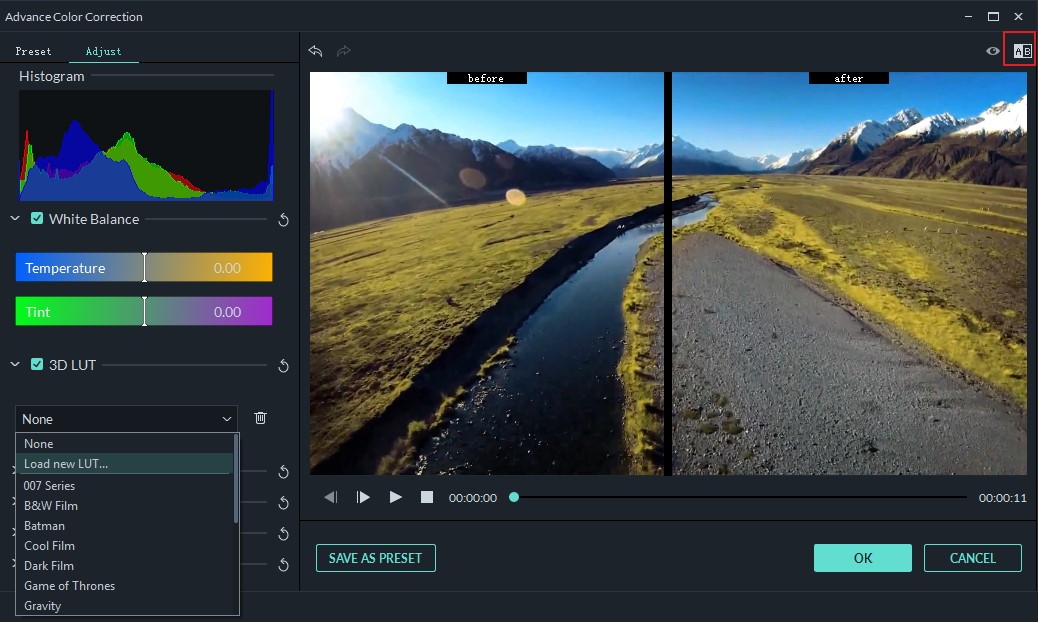
#4. Color Correction (Add 3D LUT)
3D LUT is a great feature that gives your video amazing cinematic effect through the array of presets like classic movie titles. Using 3D LUT is super easy, just hit the Advanced Tuning Option located above the video track. Now click 3D LUT and select your desired preset from the drop-down menu.
#5. Add Cinematic Filter or Video Effect
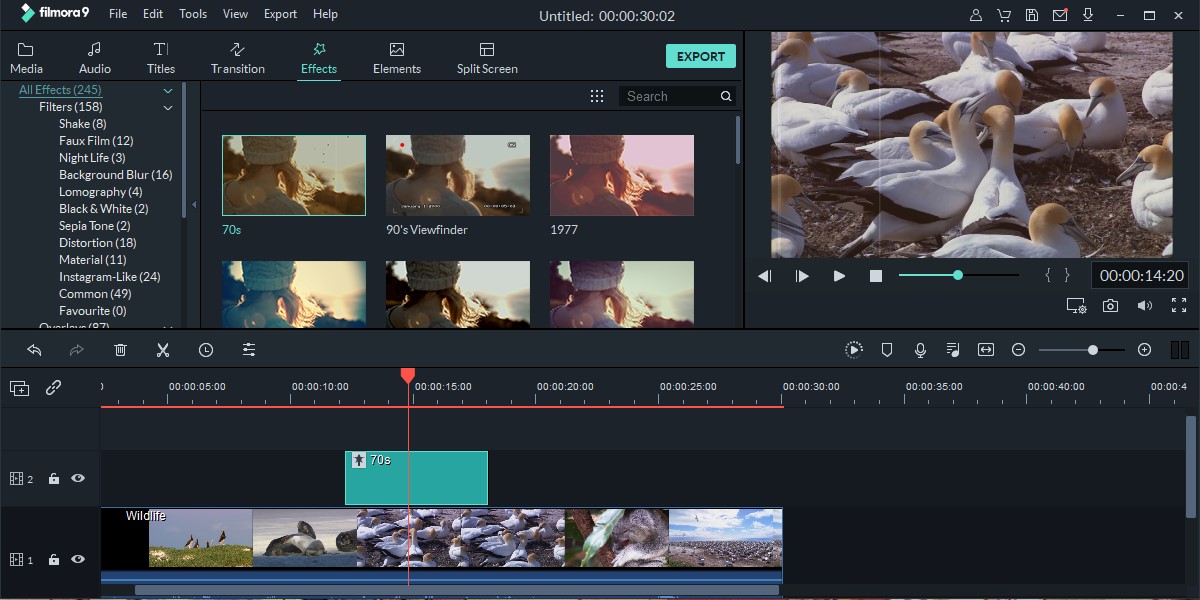
Step 1. Navigate to the media library and select the "Effects" option. Click the Filters or Overlays tabs at the top of the program timeline.
Step 2. Choose the filter or overlay that you desire to add to your video. If satisfied, click the "+" icon or simply drag and drop the respective effect to the timeline. These cinematic video effects will automatically be applied to your video.
#6. Add Subtitle
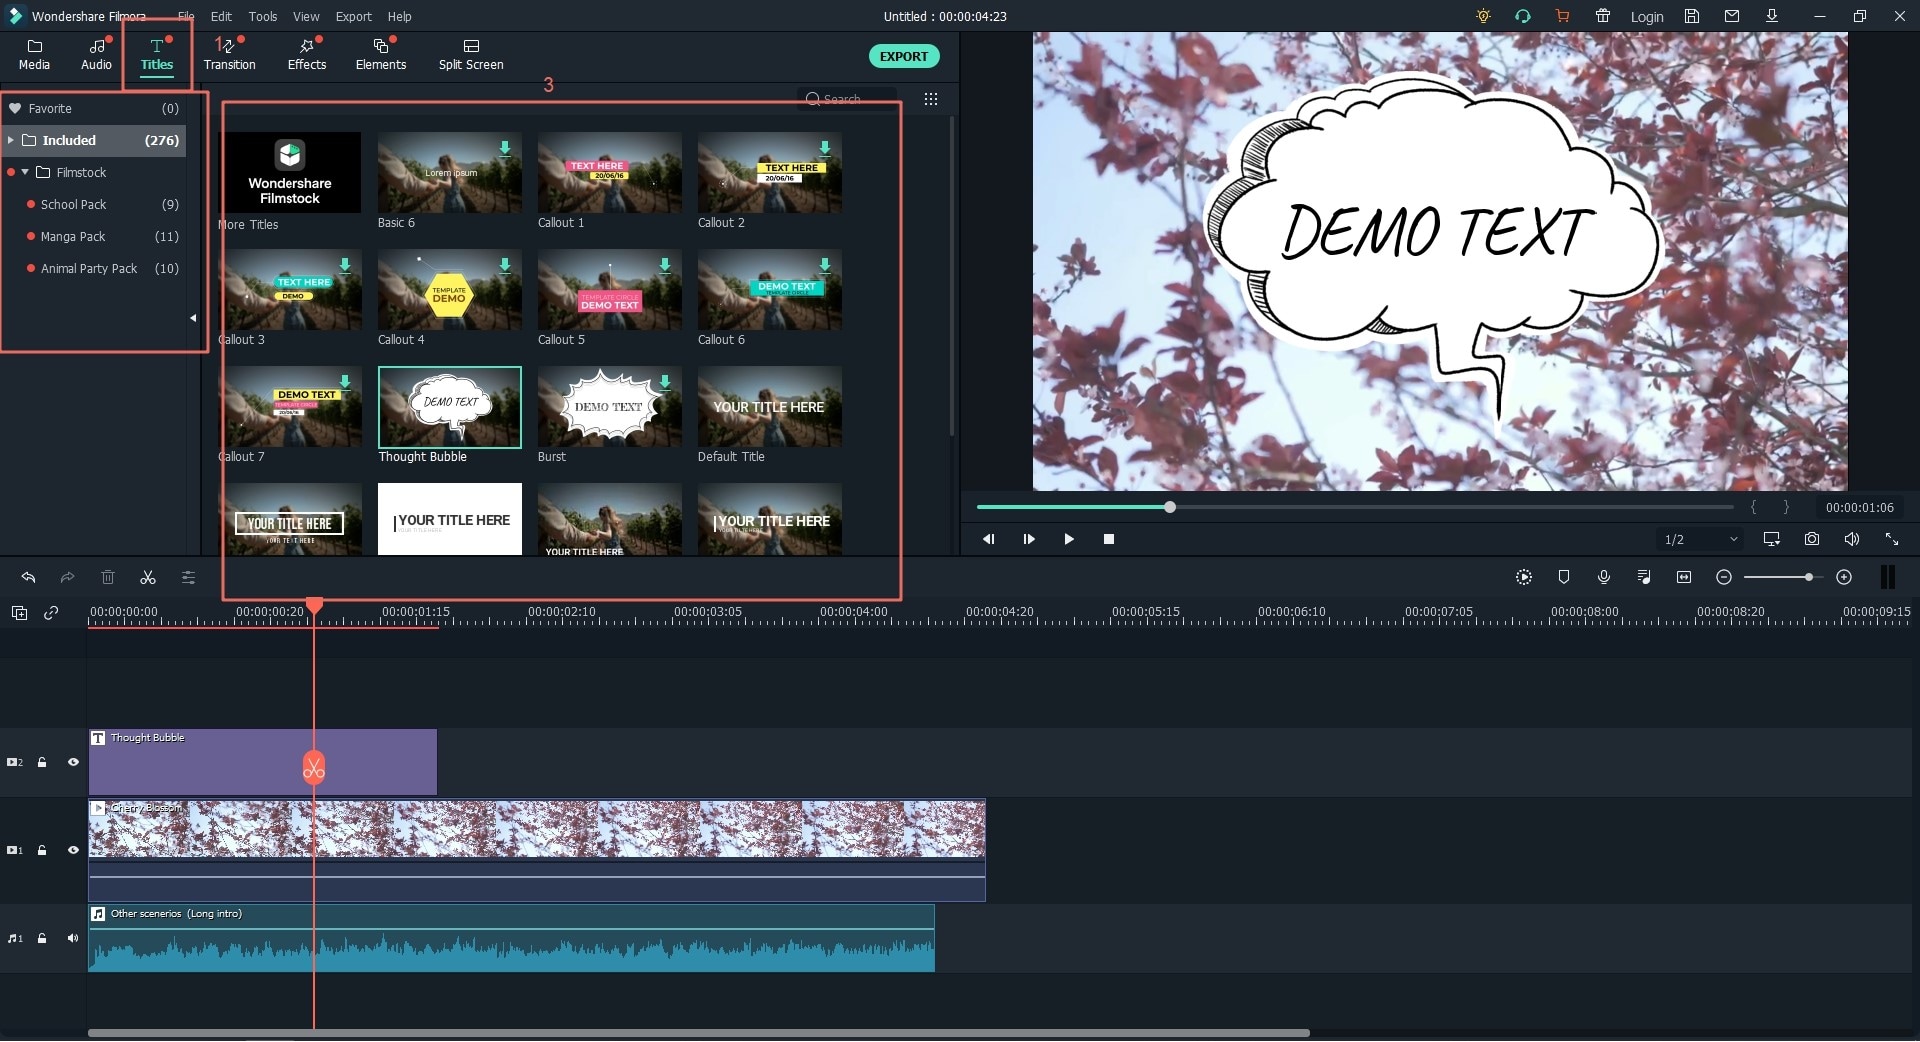
Adding a subtitle to a text is another excellent cinematic video effect that improves aesthetics of your video. Just hit the T (Titles) icon located above the sub-menu and select the Subtitle option on the left pane. Select the subtitle template of your choice from the subsequent list. After settling on the subtitle template, drag it and drop on the program template.
Conclusion
Without the help of a powerful software, how to make cinematic video is a plain sailing task. Isn't it?
Thus I recommend you use Filmora Video editor and add cinematic effect to video with ease and in no time. Pull a trigger today and enjoy cinematic video editing every day!


