A channel trailer is a short video clip that introduces your Youtube Channel to new viewers. When potential subscribers see your fantastic-looking channel trailer, they will be tempted to subscribe and follow you. They want to know what kind of videos are on the channel so they can decide if it's worth their time.
As a creator, having a channel trailer on Youtube allows you to put more effort behind your branding and present yourself as an expert in your niche in a well-organized manner.
Let's have a look at why you should have a Channel Trailer!
It Helps To Drive More Subscribers: Although many creators use the sneak peek feature on their video thumbnails, this doesn't always work because there can be other Youtubers with similar content. Creating a channel trailer gives Youtubers another way to publicize their work and can help them gain more subscribers.
Its A Great Way to Promote the Content on Your Channel: While sneak is up to 5 seconds long, a channel trailer allows Youtubers to add in much more information about the video they have just uploaded or will be uploading soon.
It Helps To Boost Engagement With The Audience: Since a channel trailer is the first thing viewers will see when they land on your channel, it's important that it has an engaging video to keep them hooked.
As a result, channel trailers are extremely important, and as a Youtuber, you simply cannot overlook them! Continue reading if you want to learn how to effortlessly create high-quality channel trailers.
- Part 1. Make your Channel Trailers Right with These Tips
- Part 2. How to Make a YouTube Channel Trailer with Filmora: A Step-By-Step Guide
- Part 3. Best 5 Channel Trailer Makers for Youtubers
- Part 4. Frequently Asked Questions
Part 1. Make your Channel Trailers Right with These Tips
When creating a channel trailer, you should let your subscribers know what kind of videos they can expect to see when they click on the subscribe button. You want to paint a picture for them with words and pictures; show them that you are entertaining or informative.
Here are some things to keep in mind while making your channel trailer:
1. Keep it short and sweet! Most viewers don't have a lot of time to spare, so your trailer should be anywhere from 10 - 15 seconds.
2. Make sure you have a catchy opening frame. This frame has to get the viewer's attention right from the start, so make sure it doesn't come off as cheesy or inappropriate.
3. Make a unique and relevant thumbnail. This is the picture that people will see under your video on their feed, so it should stand out from all of the other thumbnails.
4. Include your face - have someone record you while you introduce yourself to get viewers invested in who they are watching. Also, try to use custom graphics or text effects to get your message across.
5. Include a call to action - tell viewers what they should do next. Do you want them to click on the video link or subscribe? Make sure that there is no confusion here!
Some good examples of channel trailers are Will Smith, Cinemonika!
Part 2. How to Make a YouTube Channel Trailer with Filmora: A Step-By-Step Guide
Now that you have a baseline of what to do and what not to do and what to keep in mind when making a YouTube Channel Trailer, it’s time to get going. Filmora’s new update has so many new features, and it’s super easy to use as well! All those ideas in your head coming up? Can’t wait to make that trailer a reality but don’t know where to start? Don’t worry; we have it all covered!
First, determine the needs and wants of your content addressing your audience and your unique solution or approach. What is that your content provides that your audience should view your channel or even subscribe? Are you targeting a specific audience? Are you providing a solution to a problem or giving general guidelines? There are particular questions that you can address your audience the answers with. Don’t worry; we have prepared a step-by-step guide for you to make it even easier!

Key Features
- Best video editing software for beginner and semi-professional, that comes with powerful editing skills like trimming, splitting, rotating, editing, etc.
- 500+ free special video effects to customize and create an awesome movie by yourself.
- 1000+ standalone effects downloading resources to make videos in all kinds of styles.
- Record voice in real-time: you can have you voices recorded in realtime and instantly add them to the video files.
Step 1: Import Media
First, select the best shots you have in your videos! Get voiceovers recorded and choose the best of everything for your channel trailer, for you have less than one minute to get your point across. You’re showcasing to give your viewers a taste of what they can expect from subscribing to your YouTube Channel.
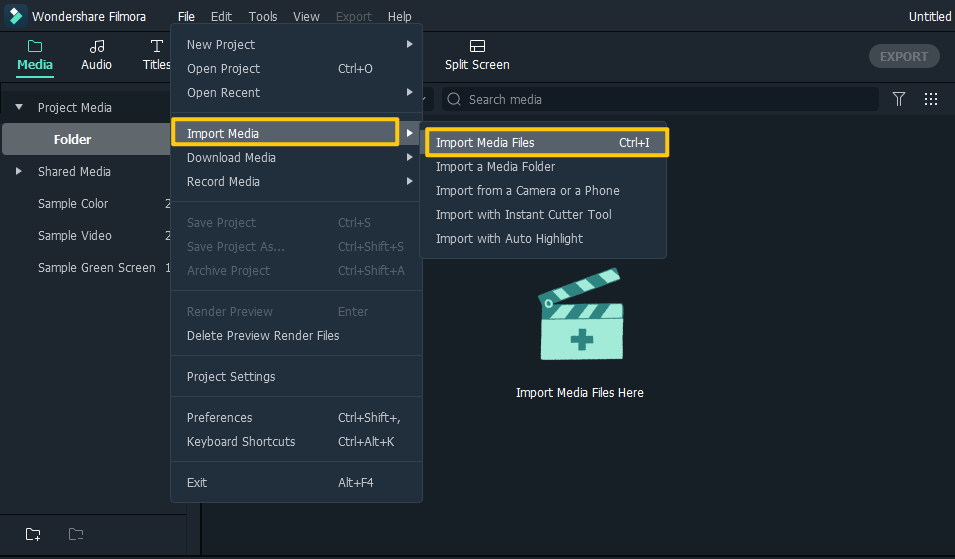
Import media by clicking on the import media tab and selecting the files such as images, videos, etc., and click on open. Or you can drag the media onto the media library and drag the required clips in order onto the timeline.
Step 2: Use cut, trim, tools
The next step is to drag media into the timeline. Now it's time for the central part. Cut, crop, trim any wanted or unwanted segments of audio/video. Edit chunks of your videos, first go with the clips you want to use, cut them and discard the rest. The clips can readily be cut from any part by clicking on the scissor icon above the timeline.
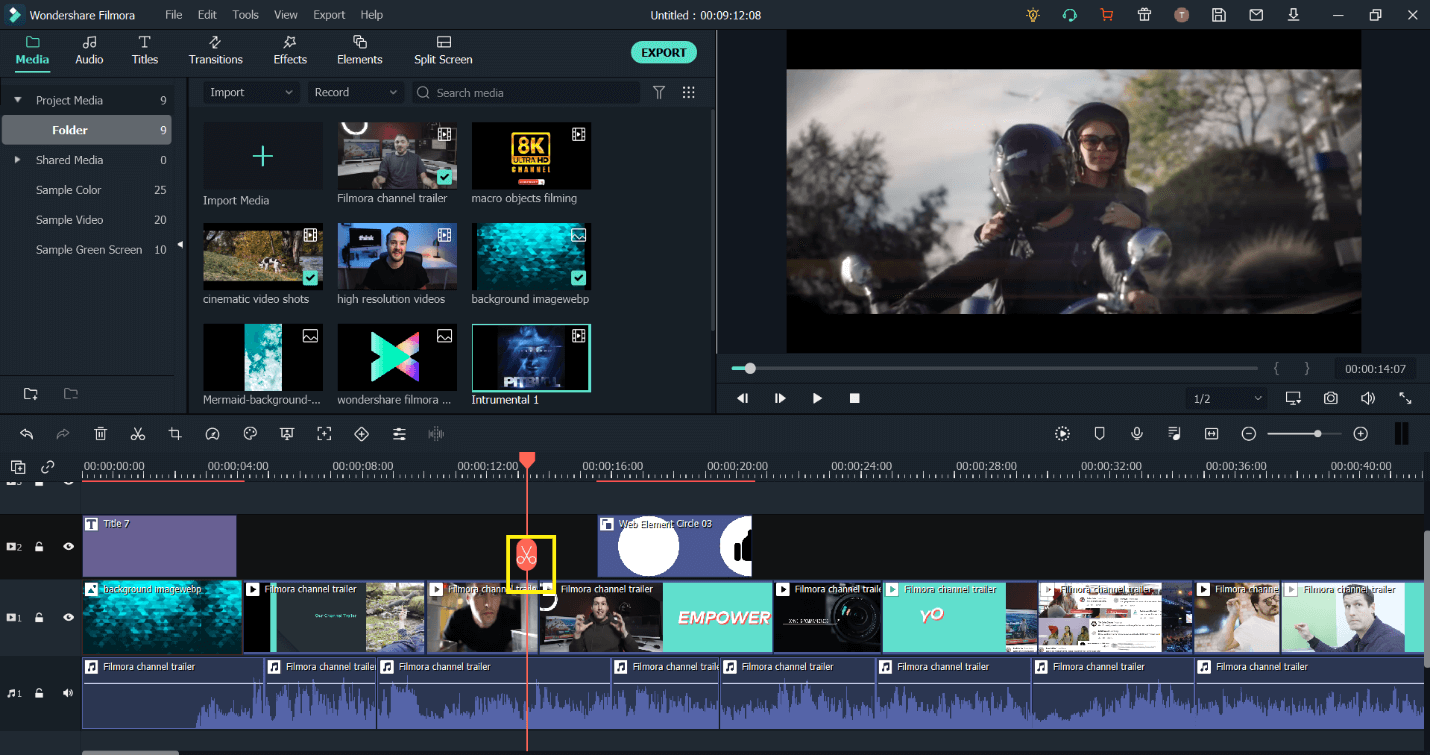
Step 3: Add Titles, Texts, Elements, Transitions, and Music etc.
It’s time to add a lot of fun to your YouTube channel trailer! Add your tagline in a cool format and apply transitions to make it look even cooler. The channel name doesn’t necessarily have to be at the beginning of the trailer. It can be in the middle or even at the end as well!
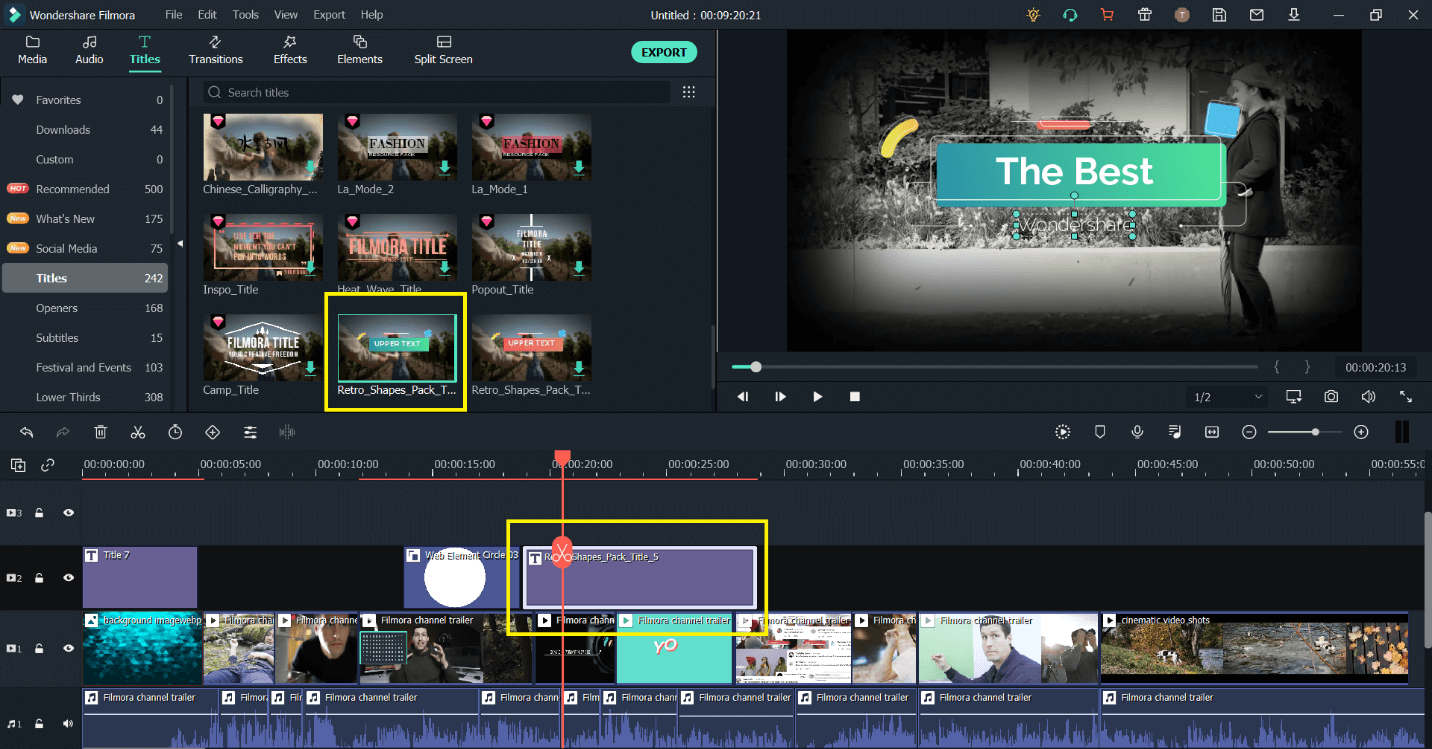
Remember to keep it under 1 minute; your channel trailer gives your viewers a sneak peek into what your channel is all about. It must be attractive and catchy to keep the viewers engaged till the end.
Use different transitions to make the look even smoother!
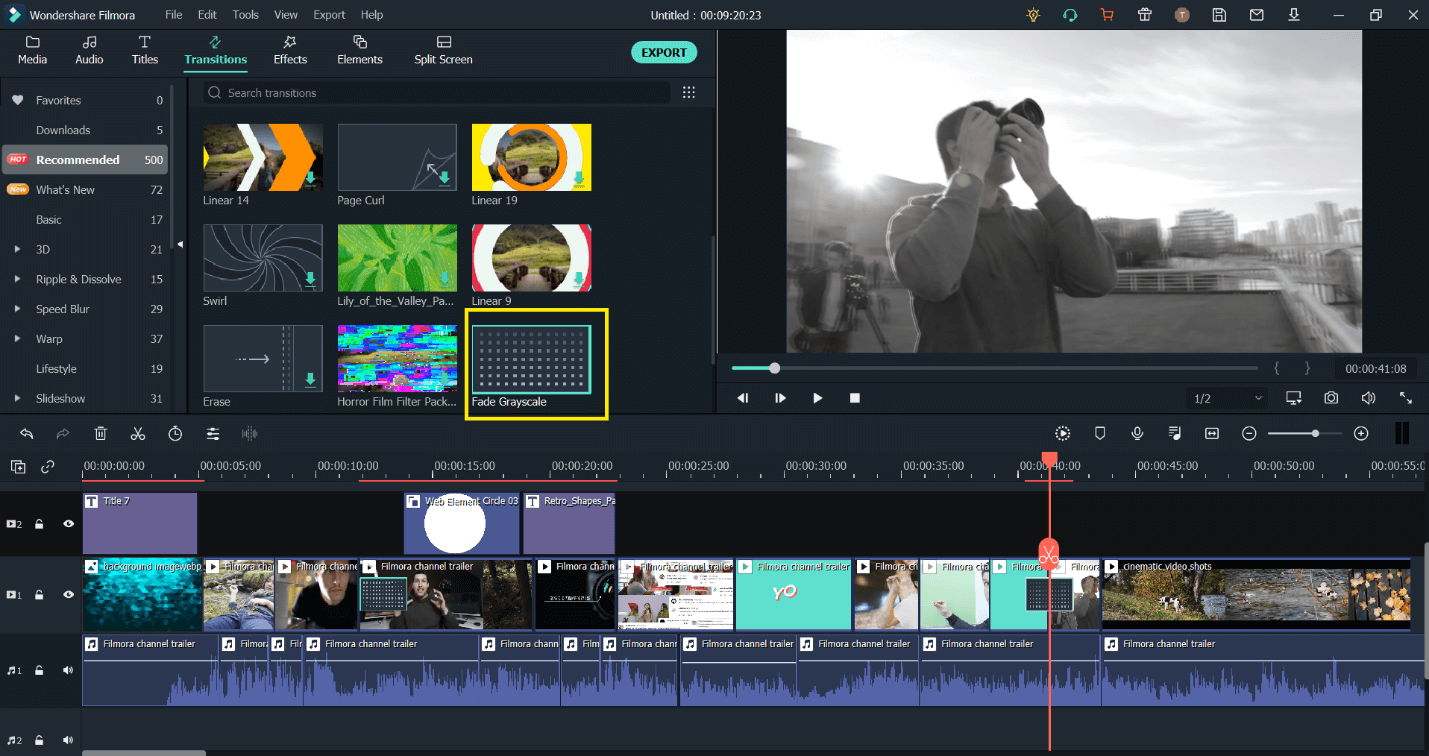
Add different sorts of music, and add it to other clips where you think it would fit good, add elements, texts, etc., from the oh so numerous available in Filmora.
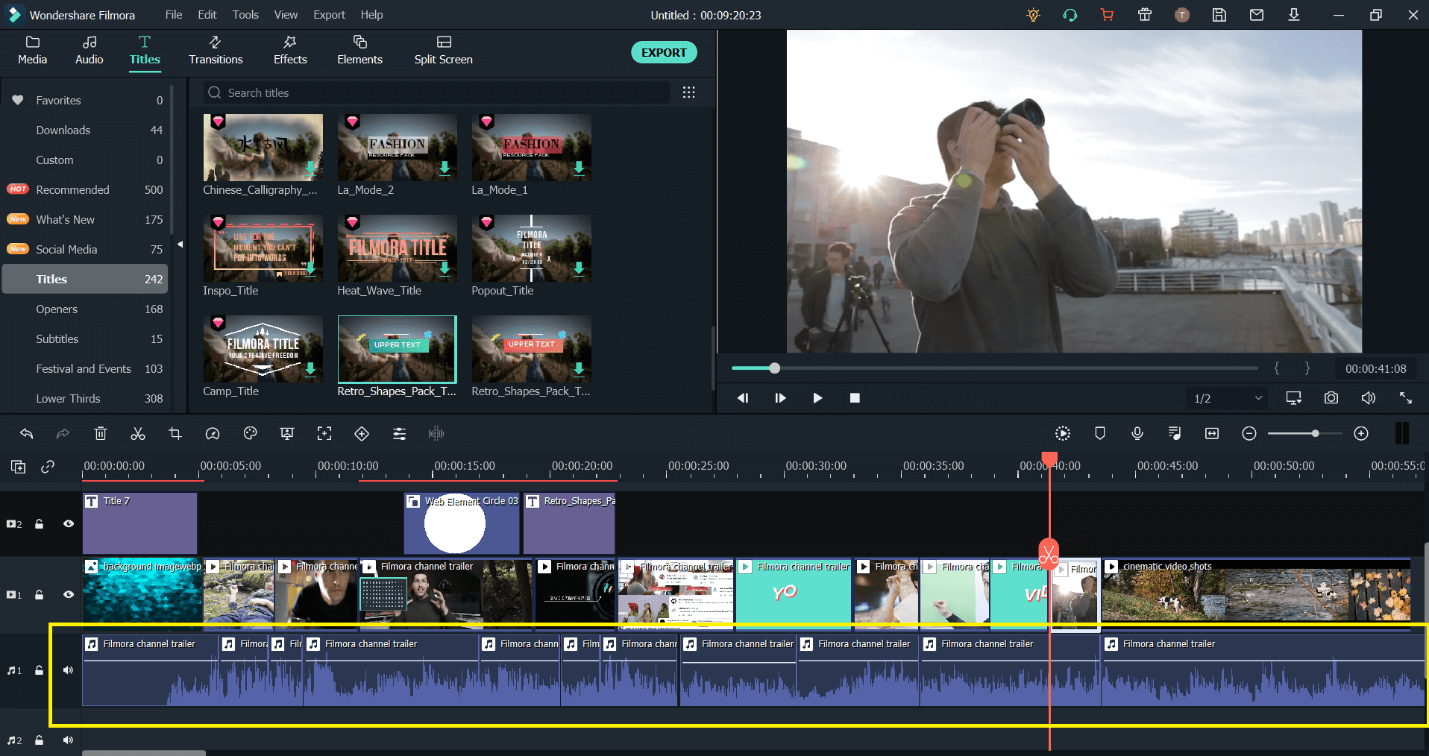
Step 3: Align Everything and Sync with Music and Voiceover
Next, align everything how you want it to be, make sure the music syncs with the clip running at a specific time, choose slow parts and fast parts in your music, and add the voiceovers at different timestamps in your video refine it. Remember you’re working under 1 minute, so that you might have 2 3 short clips or images running in one second, so make sure to sync everything with the beat of the music. The goal is for the viewer to get a glimpse of what you’re presenting and how good you are at explaining it, i.e., within a second span.
The first 10 seconds of your channel trailer must be catchy enough for the viewer to get hooked to the screen!
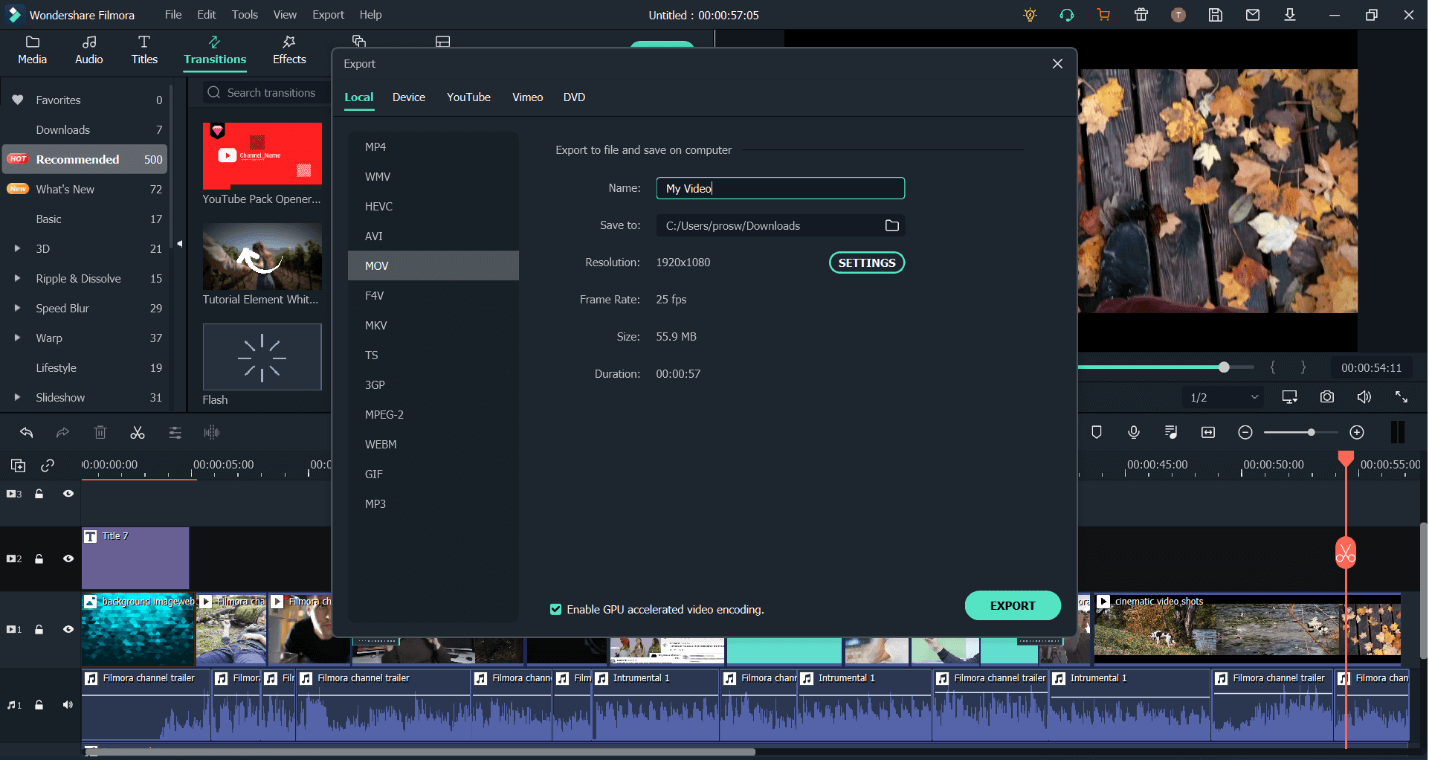
Step 4: Export the channel trailer or directly upload it to YouTube
Finally, preview that amazing trailer and export it by clicking on export, choosing your desired settings, and finally uploading it to YouTube!
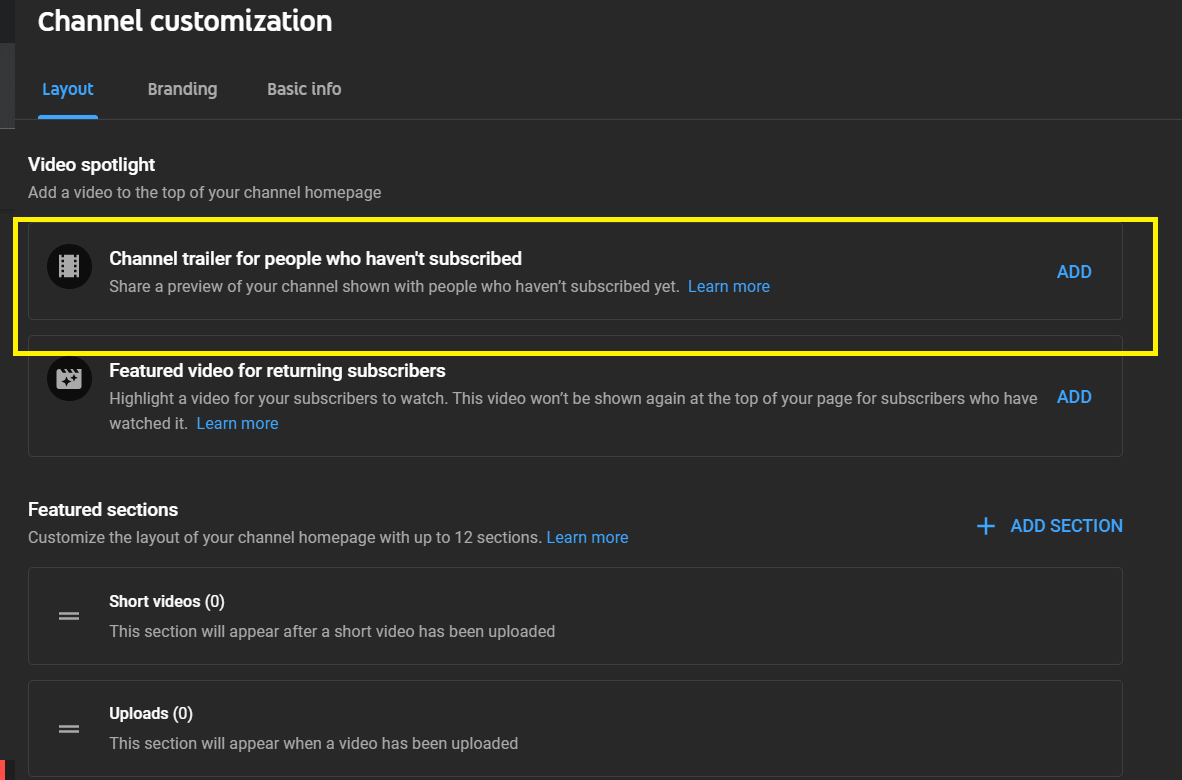
How to upload it on YouTube? That’s pretty simple as well! First, upload the video on your channel trip, next click customize channel and then layout tab, click on channel trailer, select your YouTube Channel Trailer on it, and you’re all done!!
Part 3. Best 5 Channel Trailer Makers for Youtubers
Youtuber trailer makers can be simple and cheap - or very effective and expensive. It all depends on the tool you buy and how often you plan to use it. So why not check out some of these Youtuber trailer makers below!
1. Animoto
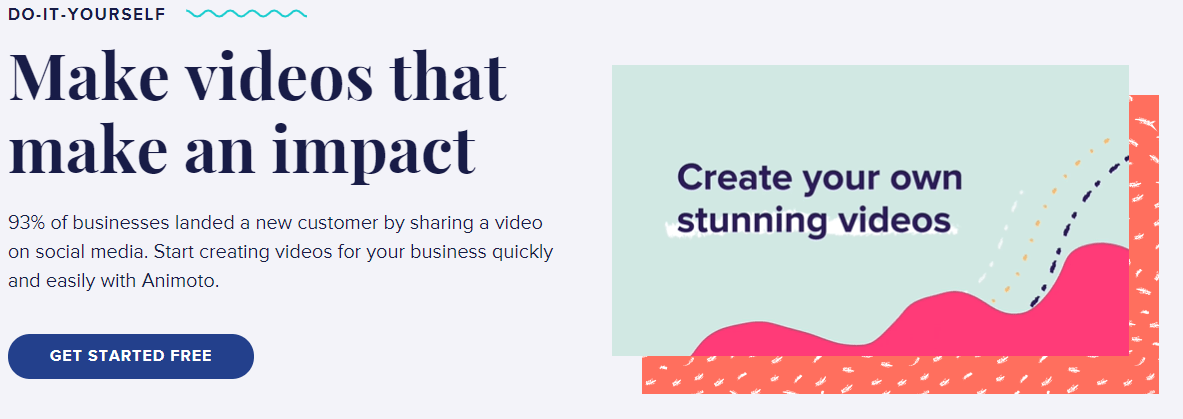
Animoto is a cheap and easy-to-use tool that comes with hundreds of preloaded, pre-edited photo and video clips, which you can add to your custom-made title cards for YouTube trailers. It is the perfect tool for beginners who want to create simple videos on a budget.
Pros:
Wide Variety of Templates: One significant aspect of animoto.com is the wide variety of templates available in their "design your story" section. New templates are added every week, and users can like them to vote on their favorites.
Music Library: Another feature about animoto.com is its music library, which houses millions of songs that users can choose from to create a compelling soundtrack for their video. The songs are categorized by genre and type.
Con:
Unavailable in Some CountriesUnfortunately, Animoto is not available in all countries. This can be an issue if one needs to create a video for their business or company with locations outside of the United States.
Pricing: The basic plan costs $8 per month, while the professional option costs $15.
2. Biteable
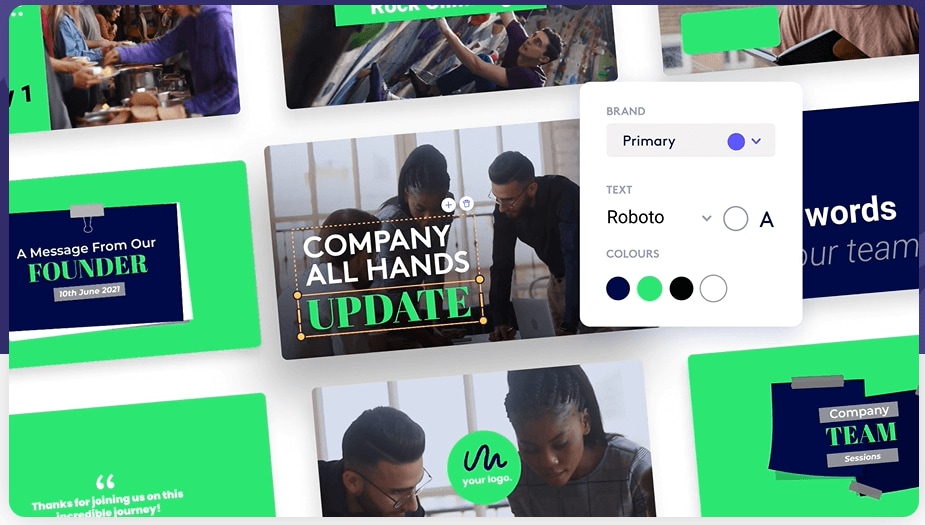
Next, we have Biteable. It is video editing software that is easy to use and enables users to create short videos for their social media accounts. Apart from social media, you can use it to create stunning Youtube trailers. Biteable offers a variety of features, effects, filters, and everything needed to make a video complete and perfect!
Pros:
- Biteable has an extensive library of videos available for licensing.
- Biteable is available in 40 languages, so your content can be shown all over the world.
- Customers can watch bite-sized videos on demand, saving them time and giving them the ability to learn something new at their own pace.
Cons:
- Biteable is not natively integrated into social media sites like Facebook and Twitter.
- Biteable has no face-to-face communication features. There is also a lack of community features, so a smaller customer base may be available for you to target.
Pricing: $19/month
3. Wideo
Wideo is another Youtuber Trailer maker that's widely known in the Youtube community. It is an online video editor with which you can create custom animated videos very easily. You can even choose one of their ready-made templates or start from scratch by uploading your photos and audio tracks. However, if you're looking to upload your new trailer directly on YouTube, you will have to pay extra for this privilege.

Pros:
- Customer support is quick to respond and very helpful.
- The features are fantastic, and they are constantly growing and updating.
- It offers valuable tools, filters, and effects that can be applied to any video to make it more appealing and gorgeous!
Cons:
- While exporting the movie, the free version may have a watermark!
- For video editing, it makes use of an insecure and soon-to-be-obsolete flash player.
Pricing: Basic package is $59 per month, and the pro plan is $99 per month!
4. PowToon
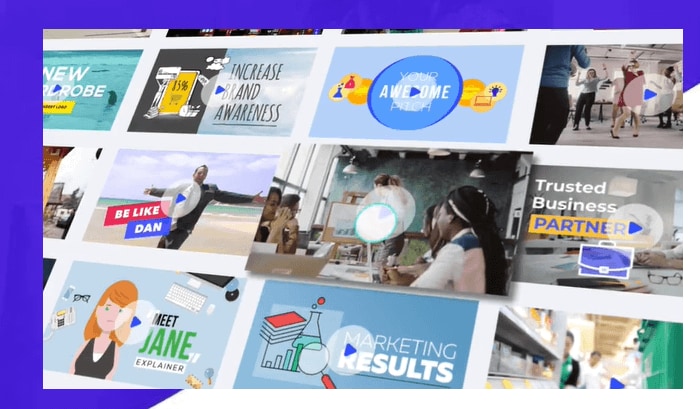
PowToon is an online video maker that lets you develop cool animated videos! It offers an easy-to-use mode for creating both visual and audio content for Youtube trailer videos. You can easily upload custom images and videos from YouTube or Flickr, combine them with a ready-to-use template to create an animation using PowToon's drawing tools. Add audio files to it, and share them with your friends by publishing them on social networks.
Pros:
- Visuals that are engaging and animations that are out of the norm.
- Powtoon designs can easily incorporate recorded video from other software.
- A large and diverse library of background music for various video formats.
- For various sorts of videos, there is a variety of design and theme possibilities.
Cons:
The imported video has a 90-second time limit, and there are more sound effect possibilities for individual animations.
Pricing: $19/mo
5. iMovie
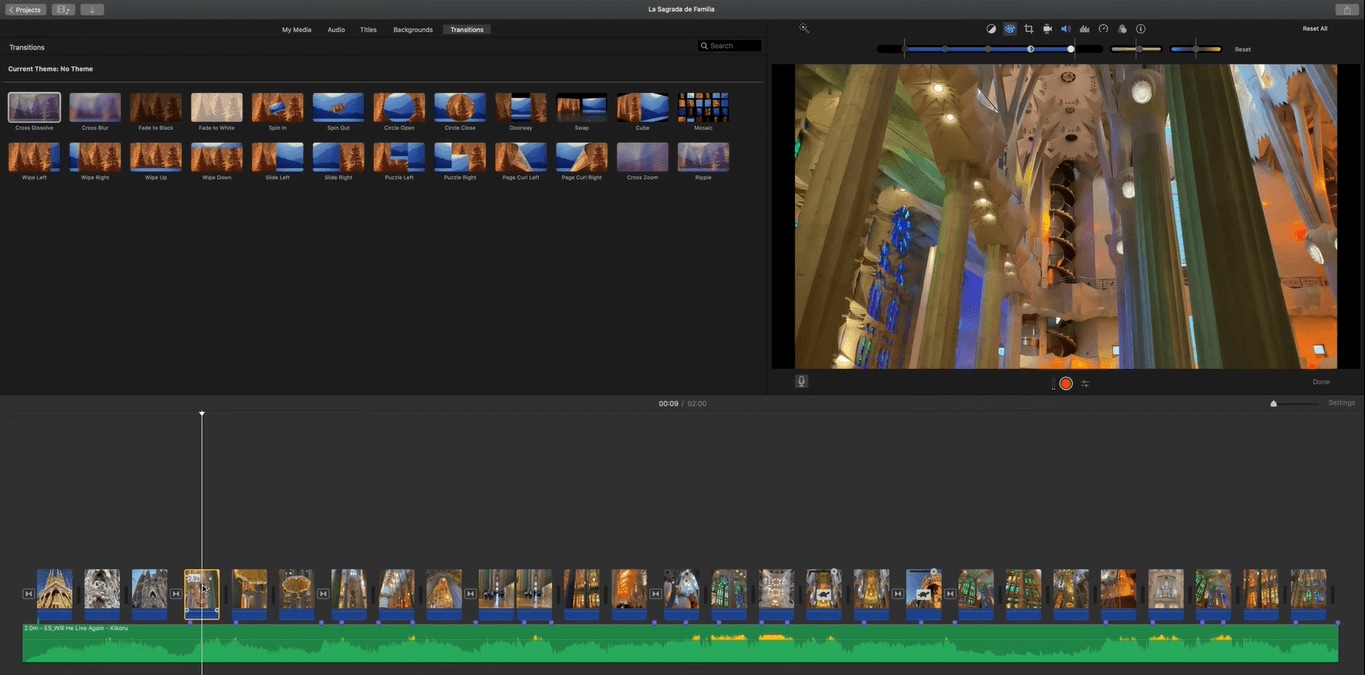
iMovie is Apple's video editing software for Macs. One of the best things about iMovie is how simple it is to use. Its drag-and-drop interface allows you to add, delete and rearrange clips with ease. There are plenty of effects and themes included in the software to add flair to your videos. You can add titles, music, and sound effects to your projects and you can even record a voice-over.
Pros:
- The application of titles is simple.
- It's simple to remove undesired recordings.
- Quick tweaks to make raw video look presentable in a hurry.
Cons:
- The app consumes a lot of resources.
- Adding music to a video is not intuitive.
Pricing: Mac users can use iMovie for free. If you wish to use premium features, you must pay a fee, depending on the feature.
Part 4. Frequently Asked Questions
How to change my Youtube channel trailer?
Trying to figure out how to change your YouTube channel trailer? Look no further. Below is a list of steps you can perform to update the content on your YouTube channel page.
1. Log into your YouTube Account
2. Click Your Channel Tab
3. Select Channel Icon & Header Image (For more information on editing the channel icon, click here)
4. Click Channel Trailer (Located on the right side of your page)
5. Once you're viewing your channel trailer section, you will see a video entitled "your channel trailer." Click Edit
6. Now that you're in editing mode, make any desired changes to the trailer, and then click save when you're finished.


