Almost everyone knows how to take screenshots, but have you tried recording your screen as a video? Some users often find that recording video on a Windows PC is more difficult than capturing a simple screenshot, but that doesn't mean it's impossible.
Then, how to record video on PC?
Recording your desktop screen on PC has become much easier since Windows 10 is released. Because Windows 10 provides its own rudimentary screen capture but if this is not enough, there are also very good programs to record your screen.
In this article, you're going to learn how to record video on Windows 10 and other Windows operating system like Windows 8/7/Vista/XP with detailed tutorial.
You can follow it to record screen video easily and quickly. Now, let's check the solutions one by one.
How to Record Video on Windows 10 with Game Bar?
If your computer is running on a Windows 10 system, then, you can use the Windows 10 integrated screen capture tool to record the screen as you like. This function is called "Game Bar" and below is the detailed instructions:
1. Press the "Windows Key + G" to start the screen capture, a prompt will appear asking if it is a game. That should be answered in the affirmative. This query appears only once per application.

2. The screen capture tool shows a small menu, via which the recording can be started directly. In addition, you can access additional settings by clicking on the gear icon. You can also configure settings for Game DVR. For example, you can set it to record the last 30 seconds. To save these 30 seconds, use the shortcut: Windows key + Alt + G.
3. Advanced settings for Game DVR can be accessed through the Xbox app for Windows 10. Here, the keyboard shortcuts can be customized, save folders for screen captures can be changed, automatic recording time can be adjusted, recording quality for video and audio can be set and background recording options can be adjusted.
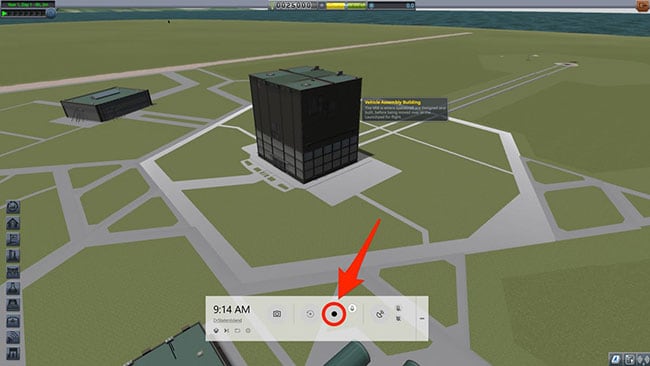
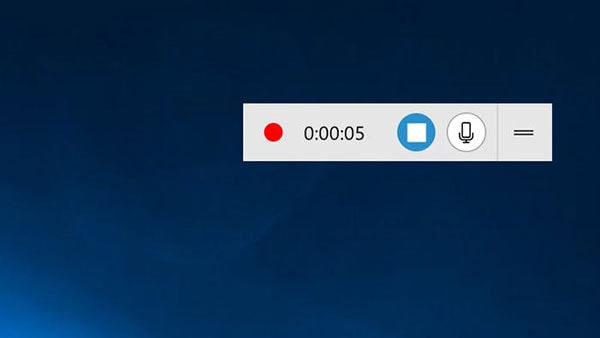
4. To stop recording your screen, simply press "Windows key + G" again. When the Game Bar pops up press the "Stop" button.
Can't Find Game Bar on Your Windows PC? Let's Try Filmora Video Editor!
If you don't have the Game Bar feature on your PC, you will need to download and install additional software. This is not necessarily a bad thing as a third-party software is not only able to create a higher quality screen recording but will also have powerful video editing tools to help you produce professional-looking screencast videos.
Filmora Video Editor and Filmora Video Editor for Mac comes with a special feature that allows users to record their entire screen or a defined area of the screen in any format. With this software, you can record webinars, conferences, record video calls, movies, tv shows and more through its intuitive and easy-to-use UI.
Key Features:
- Recording your computer screen, videos, or TV shows according to your own needs in different screen mode.
- Full range of powerful video editing tools including color tuning, audio mixing, video transitions, add text/subtitles, etc.
- A large amount of special effects to help you customize the output video.
- Support to export recorded video to specific format, device or burn to DVD directly.
- ...
Step-by-step Guide: Recording Screen on PC with Filmora Video Recorder Software
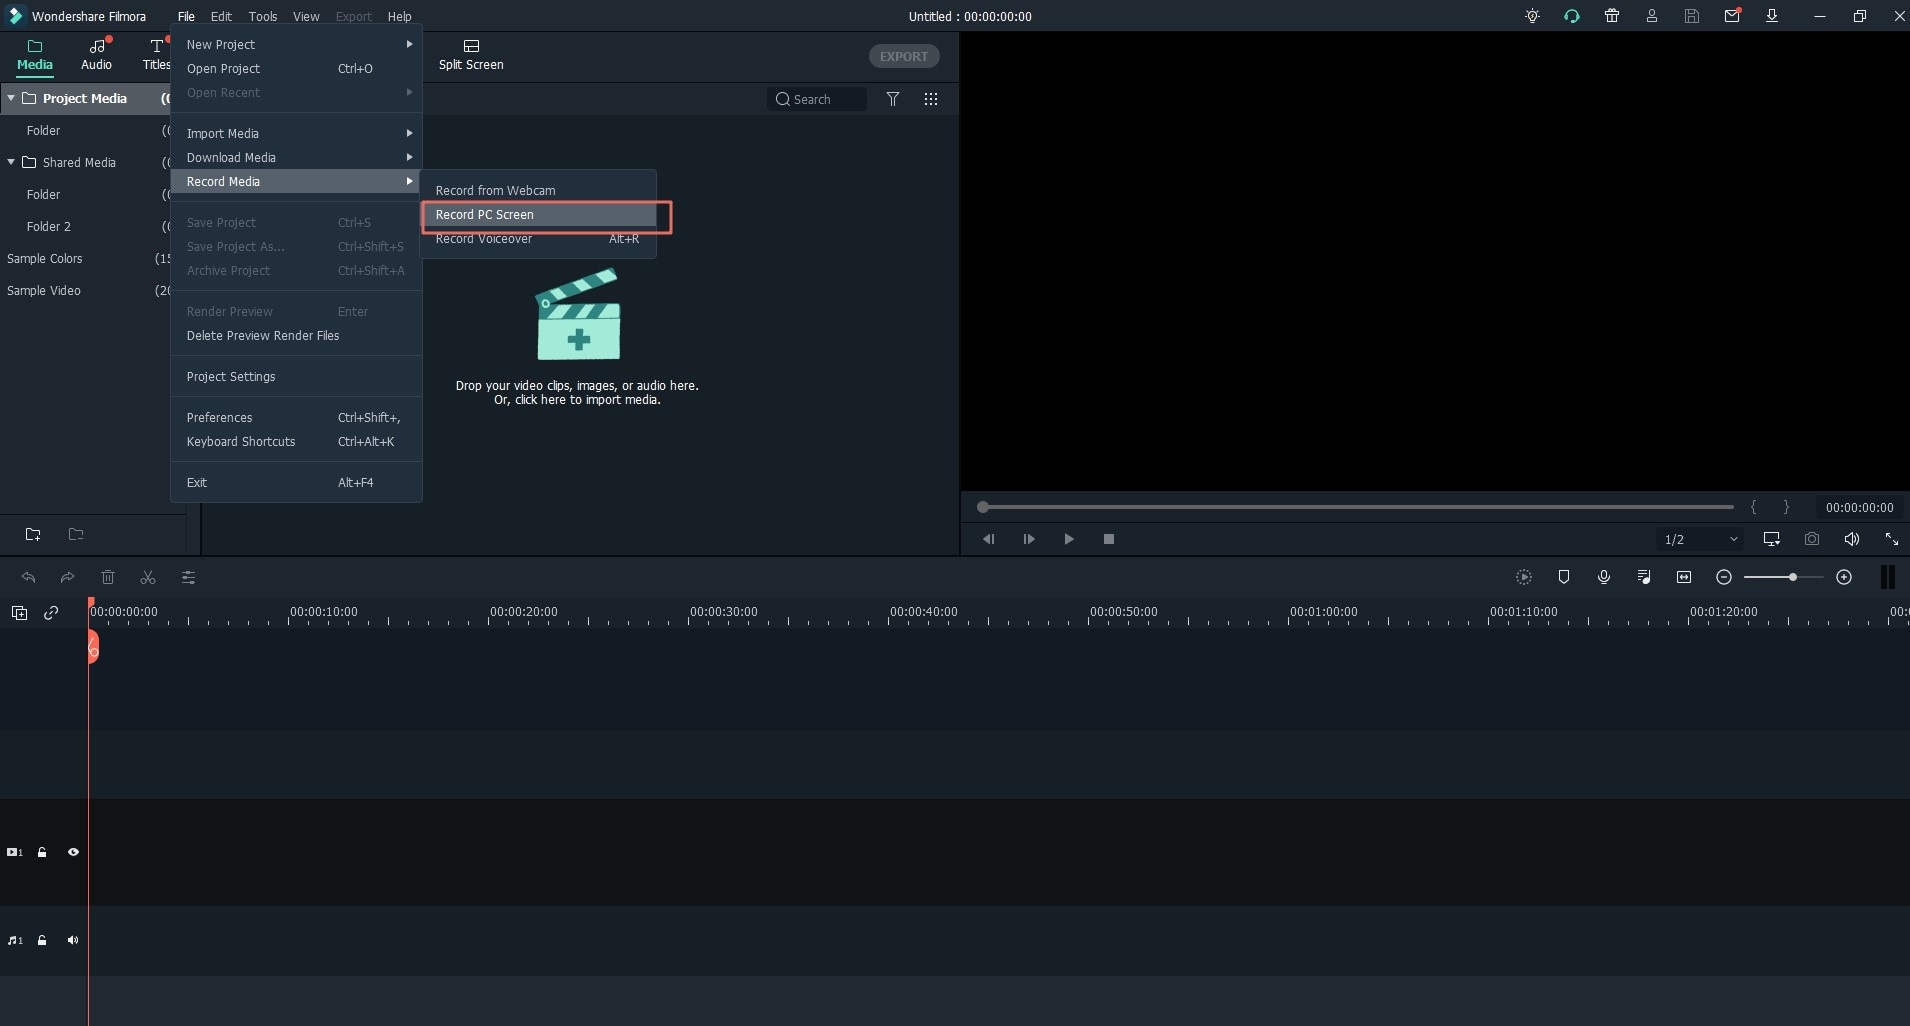
Step 1. Directly launch the Filmora Video Editor after the installation, then choose "New Project" to open the video editing panel. Then, you'll see an interface like below. Hit "Record > Record PC Screen" to activate the recording window.

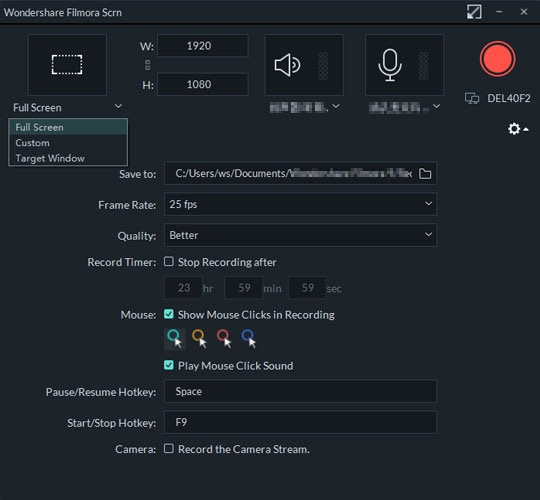
Step 2. Adjust your record settings, when you are ready, click "REC" to start the screen capture process. The screen capture will now begin. Minimize the Filmora Video Editor to continue recording.
Step 3. After finishing the recording, you can use the program to split, crop, edit, add transitions, filters, etc. to your target video.
You might also interested in:
- How to edit a video from a beginner to professional
- How to Make An Awesome Video Intro for YouTube

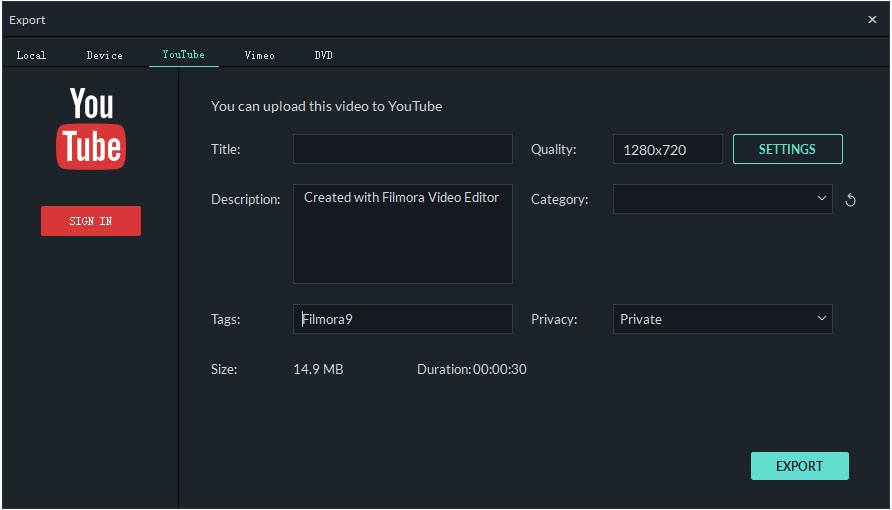
Step 4. When all settings have done, you can click "Export" button to save the recorded and edited video on your computer for further shaing.
Knowledge: Screenshot vs Screen Capture, Why Screen Capture is More Popular in Rencent Years?
The difference between a screenshot and a screen capture is clear:
- Screenshots record a static image of your desktop while a screen capture (or screencast) records activities or operations on your desktop screen as a video clip.
- Screen captures offer a practical advantage over screenshots. They provide a visual and sequential presentation of a particular process, rather than a lengthy explanation or description that must accompany a screenshot.
- Screen captures also allow users to record audio through an internal or external microphone as you record the desktop. It's also possible to record system audio (that's the audio you hear from the speakers).
- With a screen recording, complex facts and procedures can be relayed very easily and quickly. This visual delivery is often easier to understand and can lead to a better understanding.
A common example scenario of when you’d need to screen capture says when you want to explain the process of signing up for an online account. The screen capture will let you record the process from start to finish, documenting the URL, mouse movements, and even the mouse clicks. You may also need to record your screen when illustrating to a software tech what exactly you did before a crash. The recorded video will help tremendously with troubleshooting and diagnosing.
So...
...there are so many advantages and reasons to explain why users like to capture screen and record screen video than simply take screenshot. And now, do you know how to record videos on PC by yourself? Game Bar and Filmora Video Editor, which method is the ideal solution in your mind?
In fact,
No matter what is your final decision, I hope this article is useful to you. And you're welcomed to leave a quick comment in the below section to discuss with us.


