Especially for Youtubers, uploading a finished video project directly to YouTube is usually the next step after the whole video editing process (upload a video from iMovie to YouTube, for instance). Some video editing processes can be painstaking—a push of a button to upload such video directly from the editing software to YouTube or other video services wouldn’t be bad at all. Right?
So, you’re looking for ways to upload a video from iMovie to YouTube, isn't it? Let’s find out if that's possible and how it’s done below:

How to Upload a Video from iMovie to YouTube
Many authors have wondered how to go about this—exactly how to upload iMovie to YouTube. Well, iMovie supports and provides pretty decent video editing features but plainly lags behind when it comes to advanced video sharing options. If iMovie doesn’t support uploading video directly to YouTube, you’ll need to export/save your video normally (on your device) before logging in and uploading it to YouTube—unless you use alternative software, of course.
Please use the steps below to upload your video from iMovie to YouTube:
Step 1: Export the iMovie video.
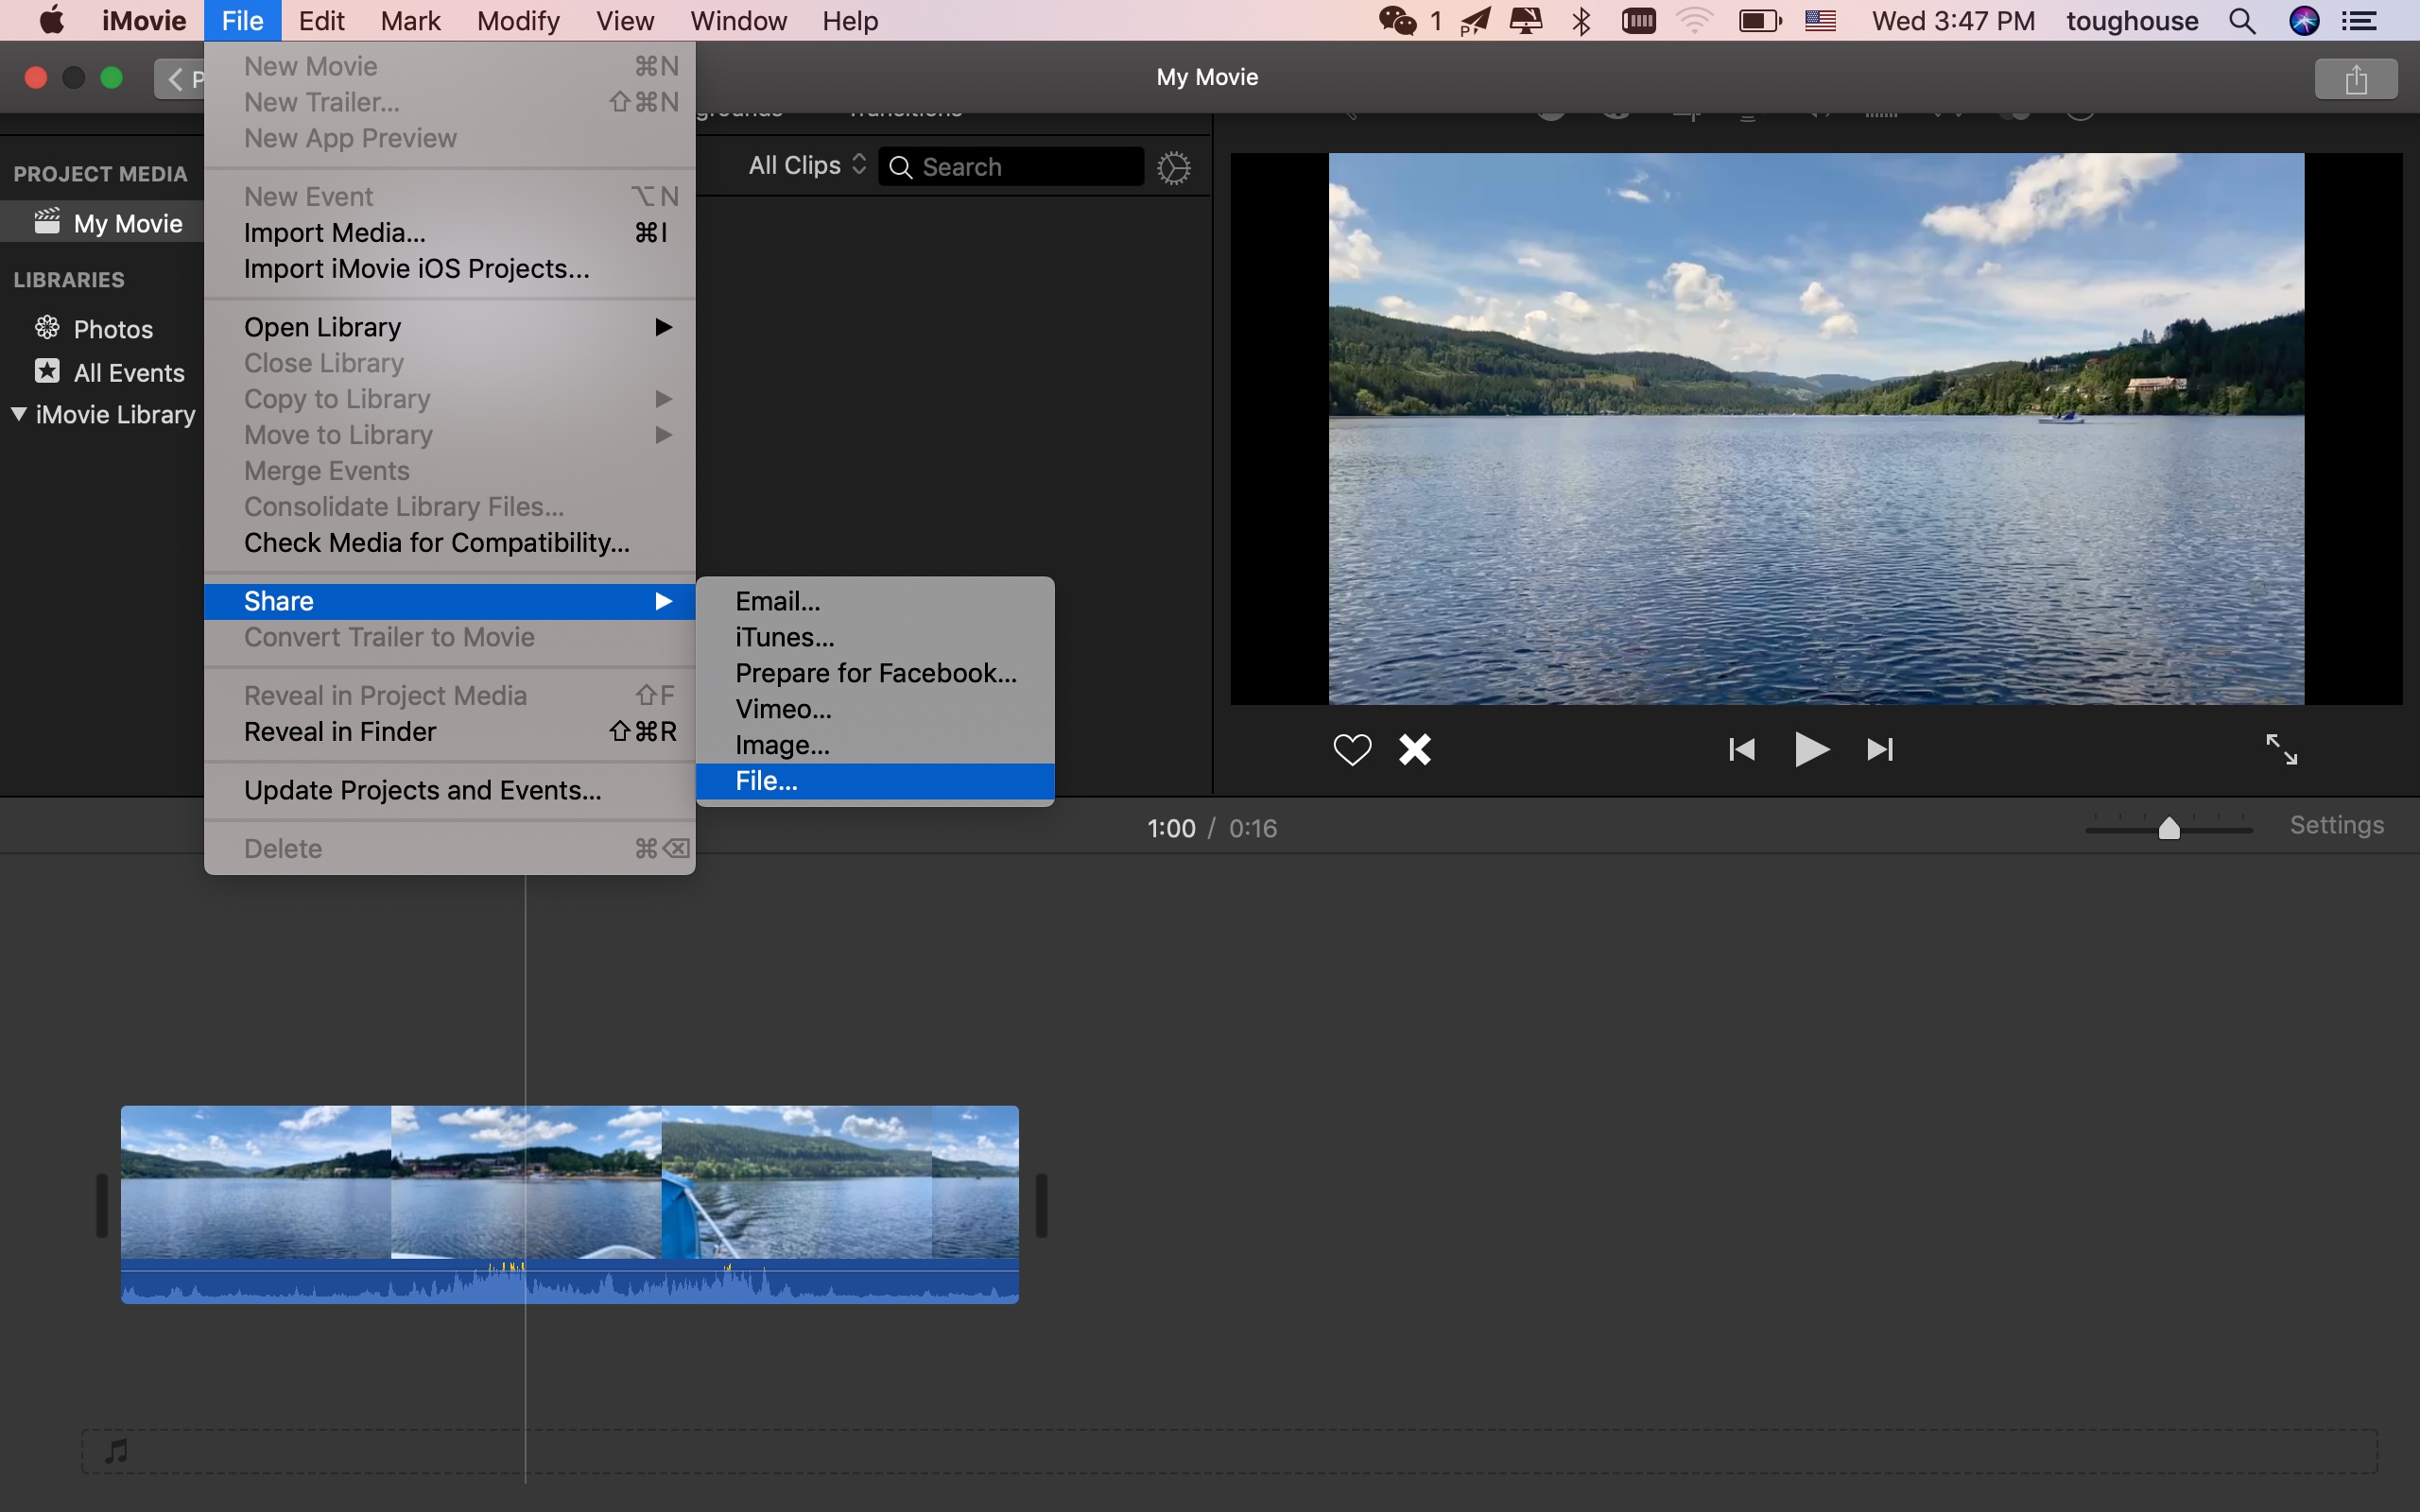
1. Click the File link from the very top of iMovie.
2. A list of options appears on the menu, find and click Share to display more options.
3. Choose File from share options.
4. Click File from the newer, smaller menu to open the Export dialogue which looks like the image below.
5. Modify your video as desired. You could do stuff like changing the quality of your video, extracting/exporting only the soundtrack of the video or adding tags to it.
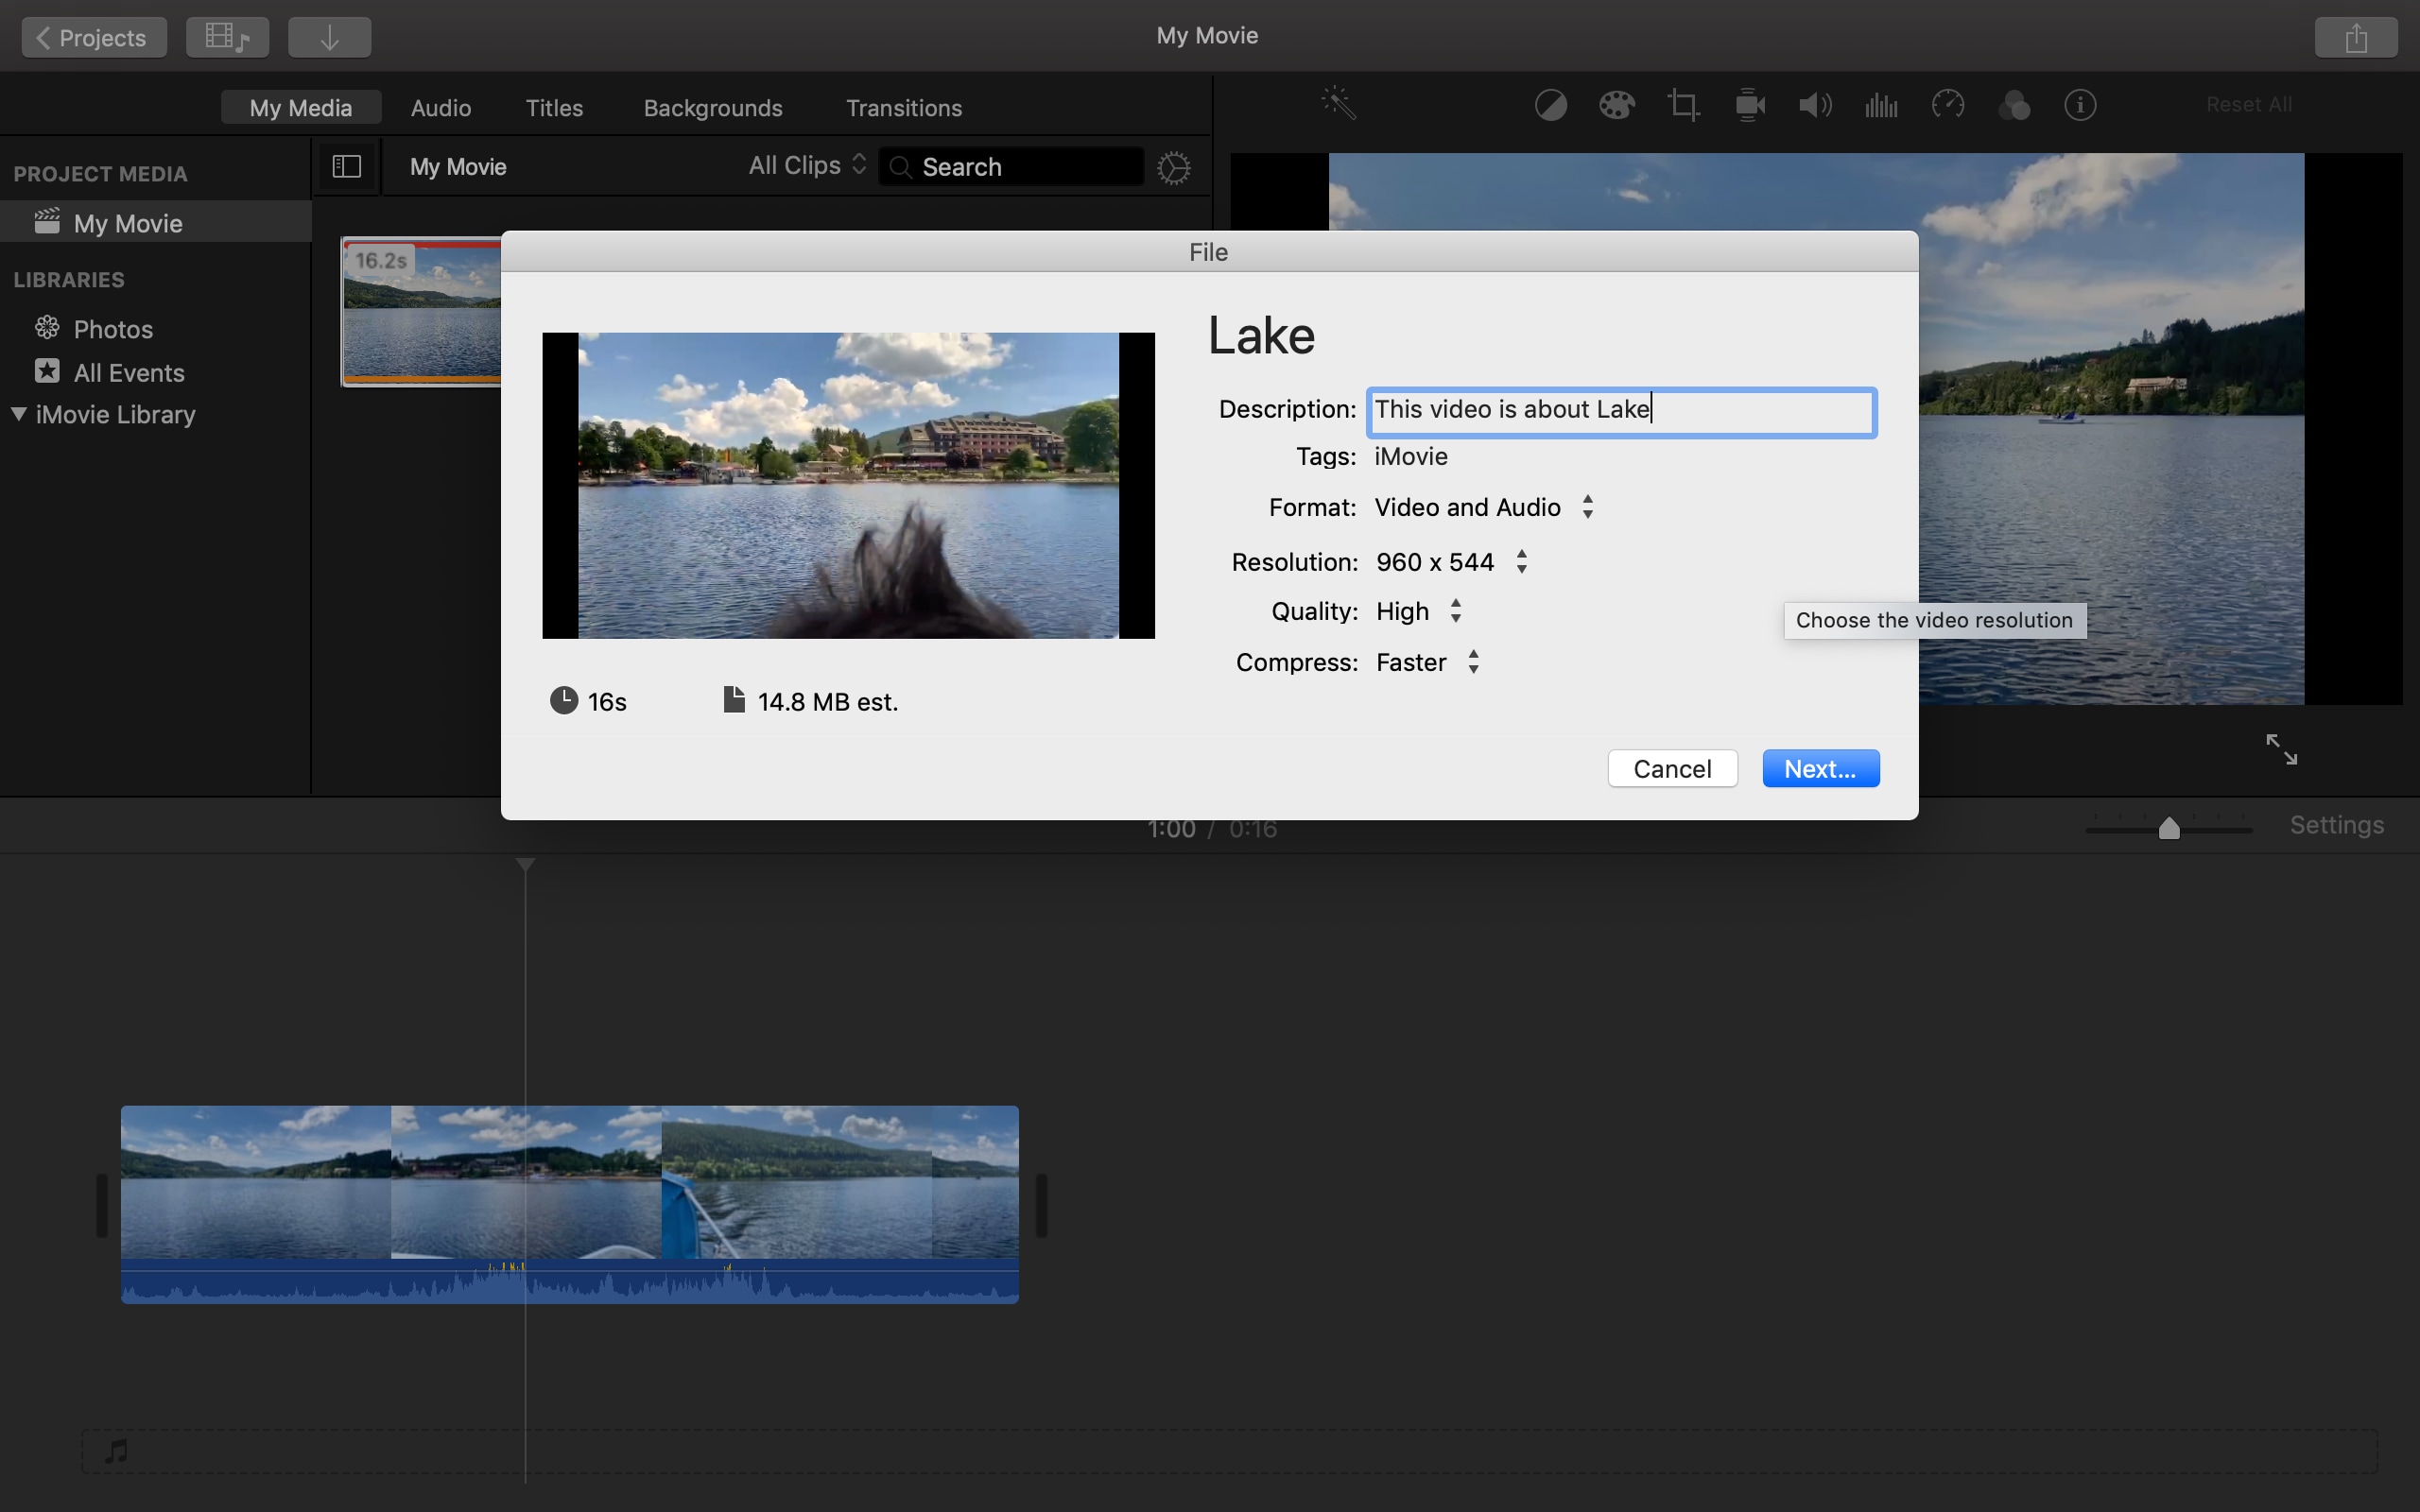
6. Click the Next button.
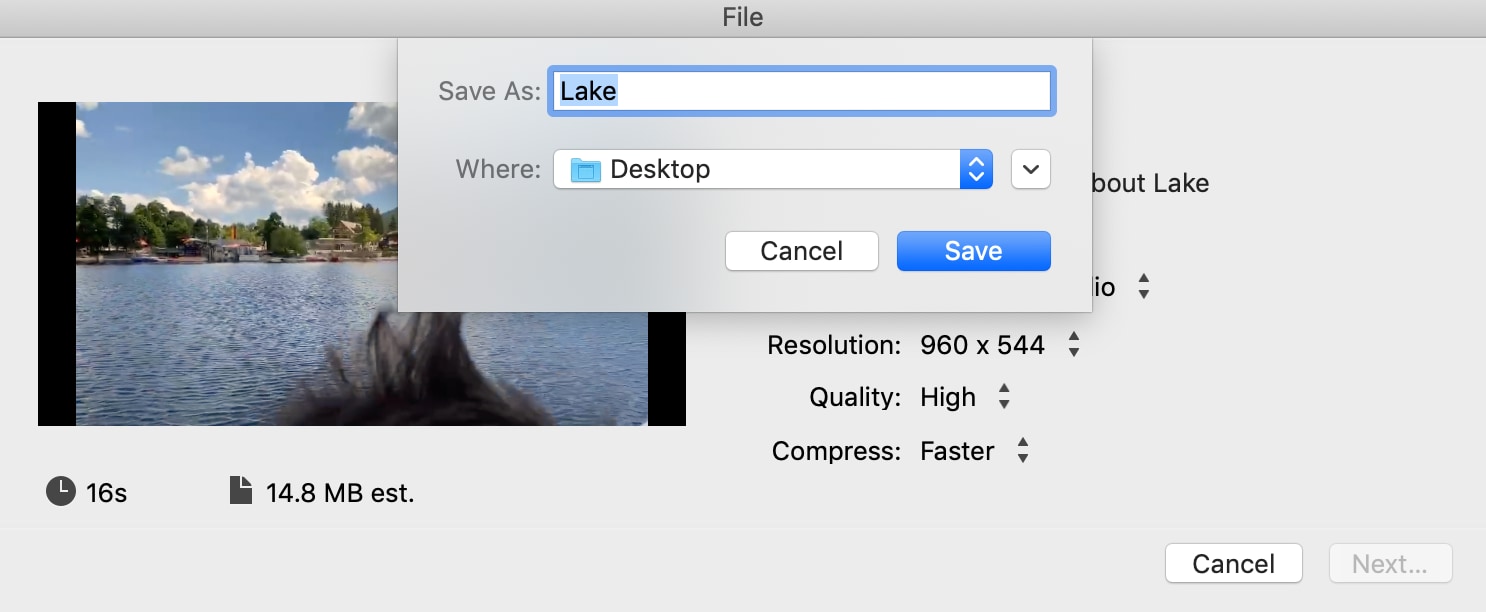
7. Click the menu box beside Save as in the next window and select Desktop from the list of items.
8. The circular blue progress icon is how much time left to be exported. The video will be saved thereafter.
Step 2: Upload iMovie to YouTube.
Once your video is successfully saved on your desktop, you can proceed with the following steps.
1. Log on to YouTube.
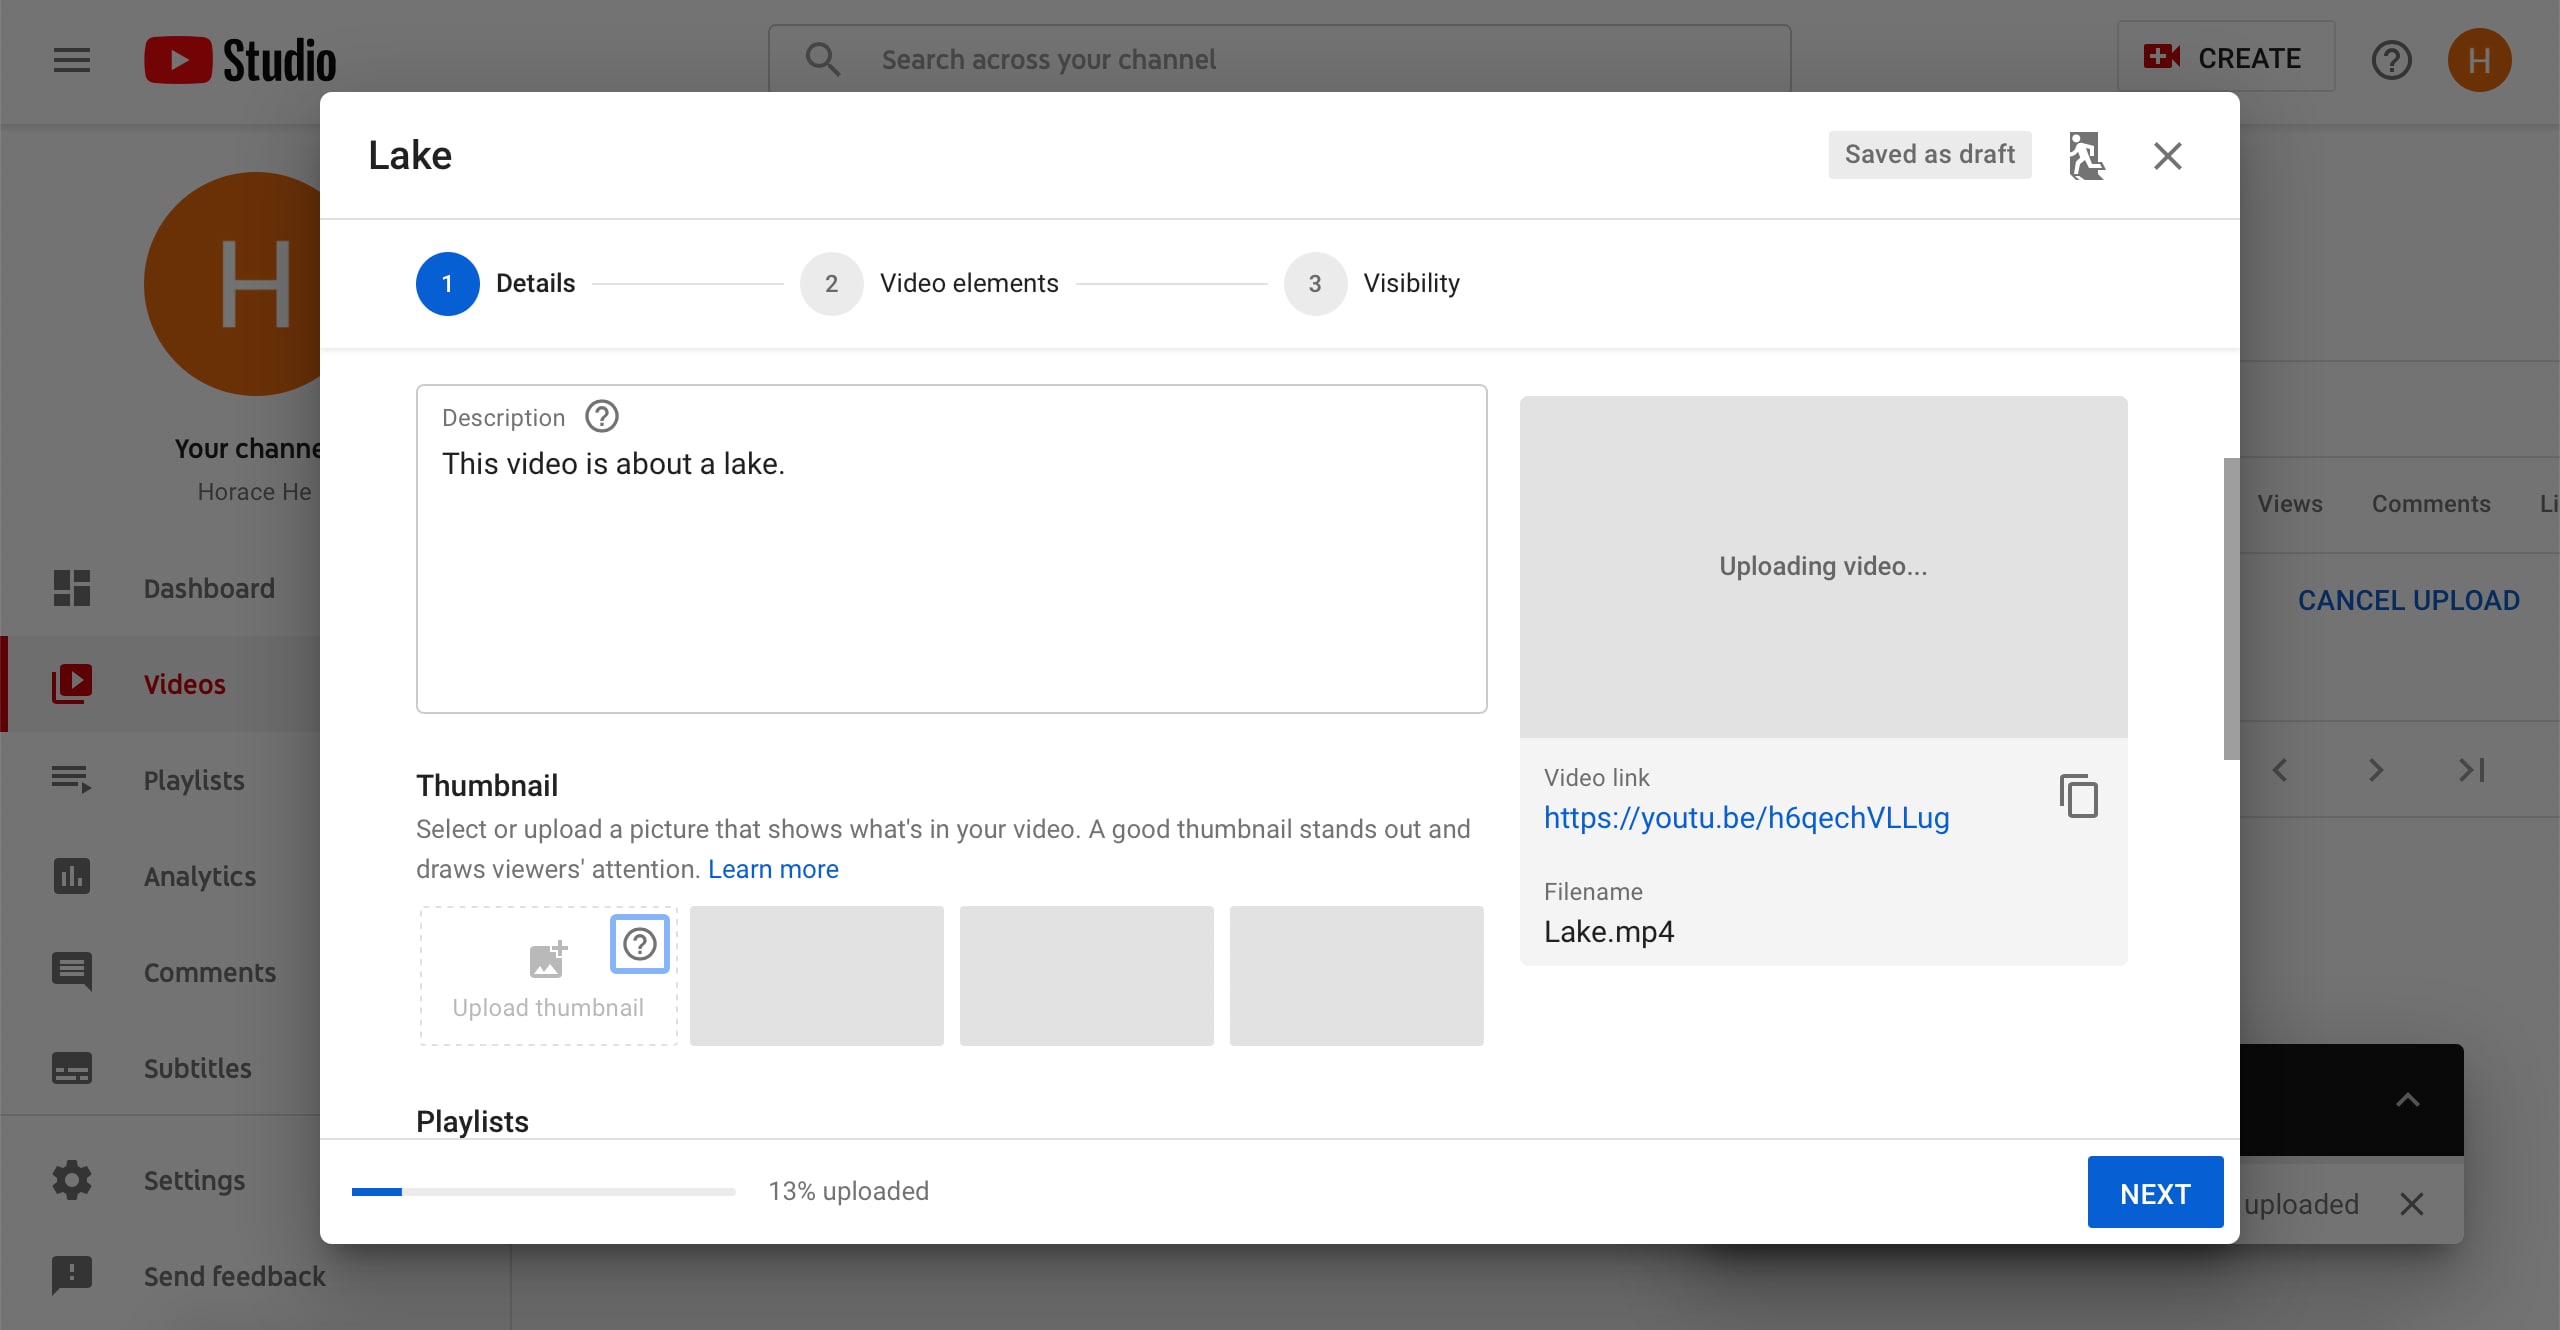
2. Create a video or post by clicking the add video icon from the top right corner of YouTube.
3. Select your newly exported video from your file explorer.
4. Add basic video info. You can add a thumbnail (the picture your viewers see before playing the video—be creative), modify the title of your video, add a description, add to an existing or new playlist, etc.
5. Preview and publish your video—and that all!
Tips: The iMovie video file is too large? Want to compress or convert mov. to Mp4 or other formats and then upload it to Youtube? A performant video converter can be all-in-one solution.
Alternative Solution: Upload Video directly to YouTube using Filmora
What’s better than being able to actually send your finished video directly to YouTube (including the tiny details like title, category, description, privacy, etc.) within the same software used in editing the video?
Filmora Video Editor is one of the best video editors currently available on the Internet—and favoured by many. Youtubers especially. Both amateur and professional video producers use various versions of the software. Filmora Video Editor supports uploading your finished video directly to YouTube—thereby merging the many steps used above in this tutorial (uploading a video from iMovie to YouTube).
Available on Mac and Windows, Filmora has been doing a wonderful job as far as video editing goes. Here are some of the features of Filmora you might be interested in:
• Upload video directly to YouTube and Vimeo.
• Loads of visual and sound effects.
• Advanced video editing tools for creating a youtube video.
• Add your logo/watermark to a video of your YouTube channel...etc.
Let's check how to upload a video from Filmora to YouTube:
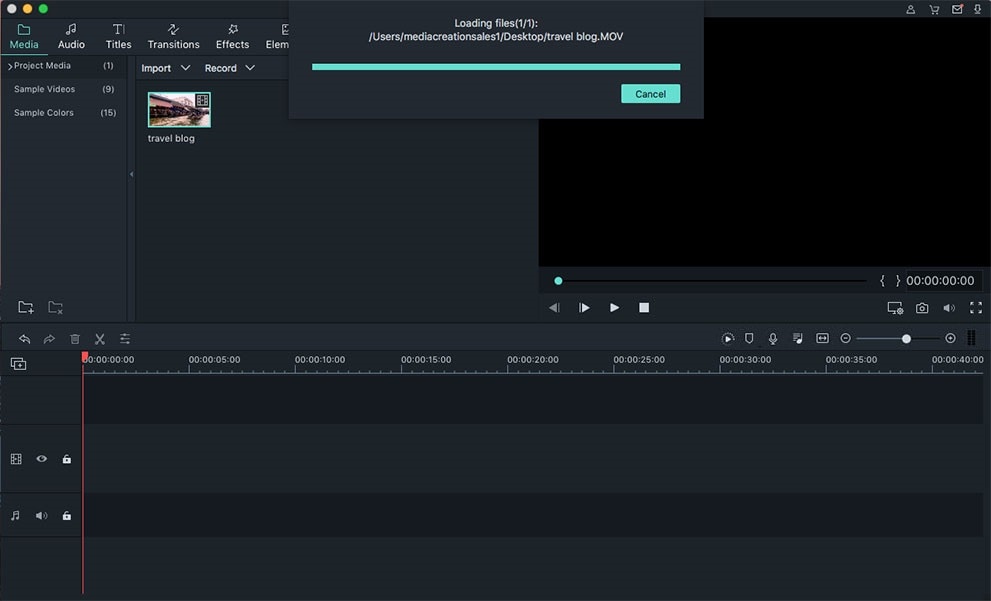
Step 1: Import your video.
Either create a new project and import your video files or continue with an existing project.
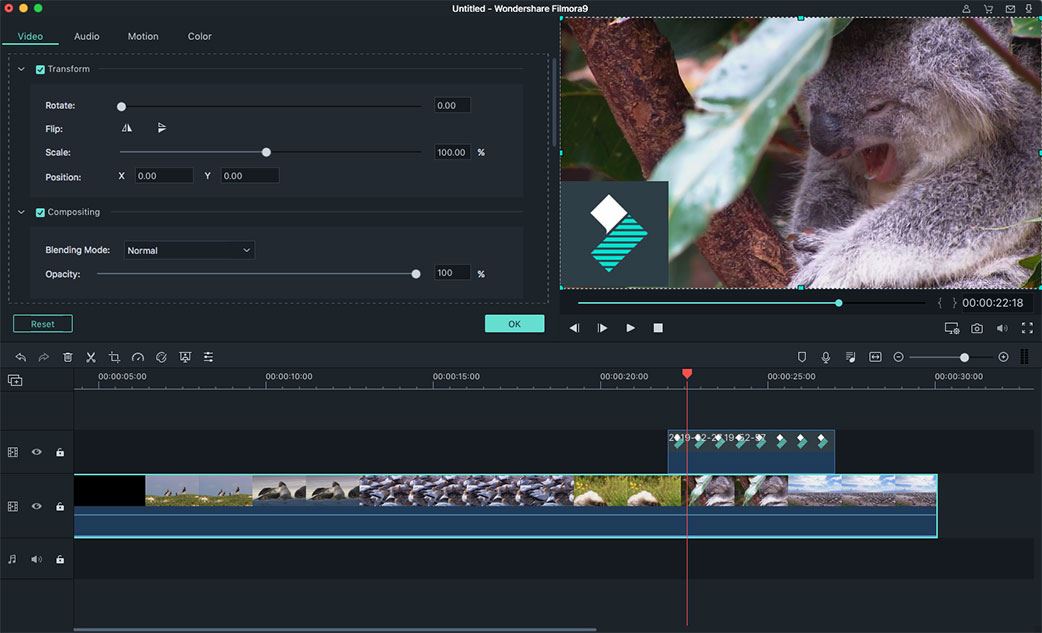
Step 2: Edit your video.
Drag and drop any video from the project files or your computer and drop them on the timeline to start editing, like adding logo to your video for YouTube channel.
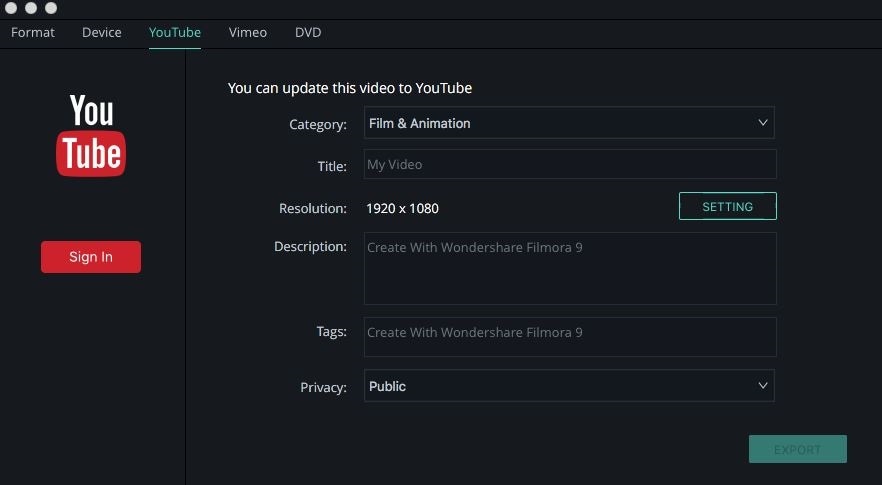
Step 3: Export your video and upload it to YouTube.
When you’re done editing your video, simply hit the Export button in the editing window and navigate to the YouTube tab. Make changes to the tiny details and hit Export at the bottom of the YouTube window and Voila!
Tips: If you want to become a successful youtuber, you should know everything from creating youtube channels, to making animated youtube videos. However, the most important thing is, you should get yourself an easy-to-use video editing software. Try Filmora for free now and start your journey of creating!
Wrapping Up
You could use the steps contained in Part 1 of this article to export, and thereafter, upload your iMovie video to YouTube.
However, the alternative software in Part 2 (Filmora Video Editor) has a built-in YouTube window for adding the little YouTube details to your video and actually uploading (directly) to YouTube using APIs within the software with just a push of a button. We hope this tutorial was helpful.


