How to add voiceover or remove voiceover is a question many people struggle to answer. Actually, adding a voiceover that illustrate the movie scenes to the video can make the video content clearer. You can use iMovie to add voiceover to the video in an easy way. In this article, you can learn how to record a voiceover in iMovie and how to add a voiceover to video using iMovie.
- Part 1. Add Voiceover to Video with iMovie Alternative
- Part 2. How to Record and Add Voiceover to Video in iMovie
Part 1. Add Voiceover to Video with iMovie Alternative - Filmora Video Editor
Filmora Video Editor is the best alternative to iMovie to add voiceover to video on Mac (macOS 10.13 High Sierra included) and Windows. It should be your choice record voiceover and add the voiceover to video. And you can detach the voiceover from video and change or remove the voiceover. It has some outstanding features that make Filmora Video Editor a force to reckon with in the industry. There are assorted editing tools to use, it performs color correction through adjusting contrast and brightness and there are animated templates as well as faceoff which are good for making green screen without hassle.
Key Features of Filmora Video Editor:
- Can record voiceover and PC screen with the program and add them to the video.
- Can preview the video any time with full screen during the process of the editing.
- There are a large range of special effects to make your videos more interesting.
- Beside the editing tools for video format, you can also edit image and audio track files.
How to add voice over to video using iMovie alternative
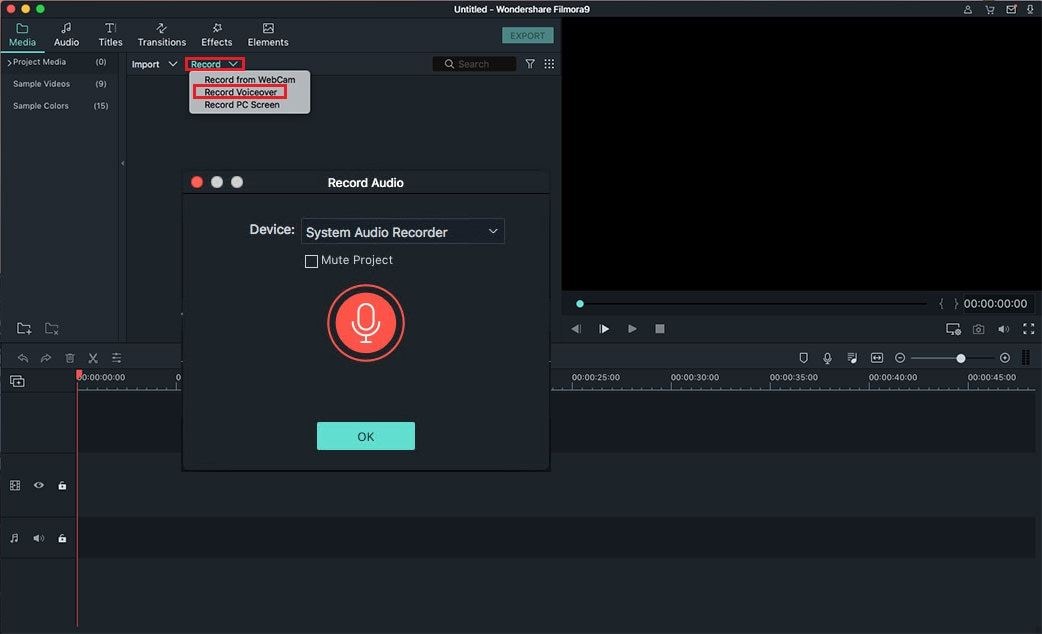
Adding a voice over to video is one of the regular editing tasks accomplished by Filmora Video Editor. Look for the “Voiceover” button on the program and click which will open the leeway for adding a voice over. The red button of Filmora Video Editor for Mac will be used to start recording as well as finish recording of the voice over. After the recording is successfully completed, you can click on the “done” icon to finish.

Part 2. How to Record and Add Voiceover to Video in iMovie
When you have the privilege of adding voiceover to video in iMovie, make sure you have used this tutorial and it will be helpful. By adding narrations and other effects to your movie in iMovie, it will be a good way of sprucing it up as this step-by-step guide will show. It all starts with importing clips to the iMovie and come up with a new project to work on.
Regardless of the number of clips that you intend to add voice over, you will add them through dragging and it will be easy. Choose any of the clip and click on it to mute. You can do that by going to the “clip” option and choosing “mute clip”.
See the detailed step-by-step guide on how to add voiceover to video in iMovie on Mac
Step 1. Avoid the voiceover from overriding with the original voice of the video
There must be a clear difference between the two. After that, proceed to the “ambience” folder which you will view from the browser. Drag “big waterfall” into the clip you have selected and it should be of equal length such that they start at the same time and end in unison. The voice over should cover the exact length of the video you have selected. If you want to reduce or increase the volume of your voiceover, it is done from the inspector and in most cases you will find it valuable reducing the volume than increasing.
Step 2. Using bridging sound effects
Consider using bridging sound effects which makes a seamless link from one clip to another. If you choose a professional and high quality effect, nobody will be able to notice that two clips have been joined together. Joining of clips will be necessitated by the fact that your voice over covers the length of two or three clips which is okay. If you will find it necessary using these effects, you are advised to go for that which will not create lots of irregularities as far as uniformity of the video clip and voice over is concerned. The iMovie program offers an option for blending clips together and you will be good to take it up when adding voice over to your video.
Step 3. Have all the clips to be blended selected and set the levels to their right parameters
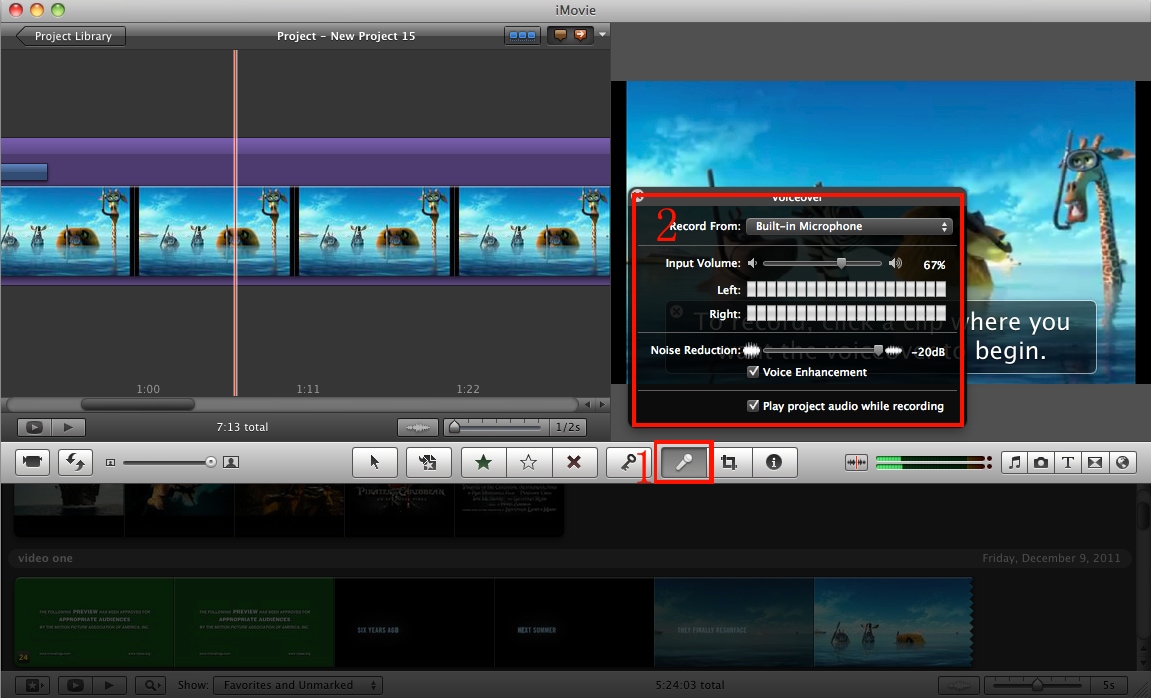
The reason for blending these clips is to ensure sounds of the voiceover and the video hit the highest point. You can then click on the “record a voice over” button to begin the countdown. Make sure the recording begins from the start of the clip otherwise recording midway will mean you have done nothing. You can pause or finish recording by tapping the space bar on the keyboard. When through with recording, take some time to preview what you have recorded and it will be good in helping note any errors for quick correction.
This is the right time to fine-tune your voice over and leave to it that it attains highest quality. Adding a voiceover to your video in iMovie is that simple once all the guidelines have been followed to the letter. Be sure not to skip any of the discussed steps because they are all important.

Video Tutorial: How to Add VoiceOver to Videos in iMovie
Here we would like to teach you about how to add voice over to video in iMovie for Mac OS X.


