- What effect and change can light leak and lens flare overlay bring to the video?
It is quite funny that for quite a long-time filmmaker thought for some reason light leak and lens flares were undesirable effects on image and video footages. Yes, it meant sense because the focus was on clarity of the footage and remained undebatable. In fact, light leaks and lens flare originate from lens flare effect, a condition where light leaks in between the camera sensor and the lens thus producing a dazzling image. Such a kind of image was deemed unclear and undesired. For a long time, this notion rocked the film industry and so light leaks and lens flares remained an irrelevant concept.
However, it seems someone just discovered flare effect actually captivate video footage and has since ragged like wildfire. I don’t know whether it is the nostalgia of the analog days or simply a creative work. Whichever it is, flare effect is useful and makes images and videos stunning. Think of having several clips and you desire a smooth transition between. By placing the light leaks at the intersection, you are certain to hide the possibility of irregular transition.
Sounds cool?
Well, this post will tell you 3 ways to add light leak or lens flare to your video.
Let's take a look!
- Part 1: Filmora Video Editor - Light Leak & Lens Flare Overlay Editor
- Part 2: How to Add Light Leak Overlay in Premiere Pro
- Part 3: How to Make Light Leaks & Lens Flare with Camera
Filmora Video Editor - Light Leak & Lens Flare Overlay Editor
Filmora Video Editor is a top pick video editor enriched with as many features a filmmaker would definitely need. Its prowess is exceptionally good with a modern intuitive interface that houses both experts and newbies without problems. There is an assortment of effects that gives an amazing visual to your video footage and be sure to get satisfactory editing. What about the amazing rainbow light leak overlay and lens flare? Inserting this to your video is quite seamless since the variety of overlays available makes this task plain sailing. There are also other editing features ranging from basic to advanced which when integrated can produce the ecstatic view. You can download a trial version if you wish to check the features of this editor. However, the trial version is limited and you will have to upgrade in order to enjoy unlimited service.
Key features of Filmora Video Editor:
- Offers plenty of effects including light leaks and lens flare which gives a great look to your videos. These effects can be downloaded directly from the program without the need for a browser or downloader.
- Supports a wide range of media file formats including new device specific formats.
- Allows you to add transitions, titles, music background, and elements.
- Enables you to export files online, to your computer, external devices or burn them to CDs
- Can download files from Instagram, Flickr, and Facebook for upload and editing on the program.
How to Add a Light Leak or Lens Flare Overlay to Video with Filmora Video Editor
Step 1. Upload your Video
Open Filmora Video Editor on your device to display the home page. Hit the "Import" tab and browse for the video footage you would like to add light leaks and lens flare. Now drag the footage from the Media Library to the program timeline for editing.

Step 2. Add light leak and lens flare
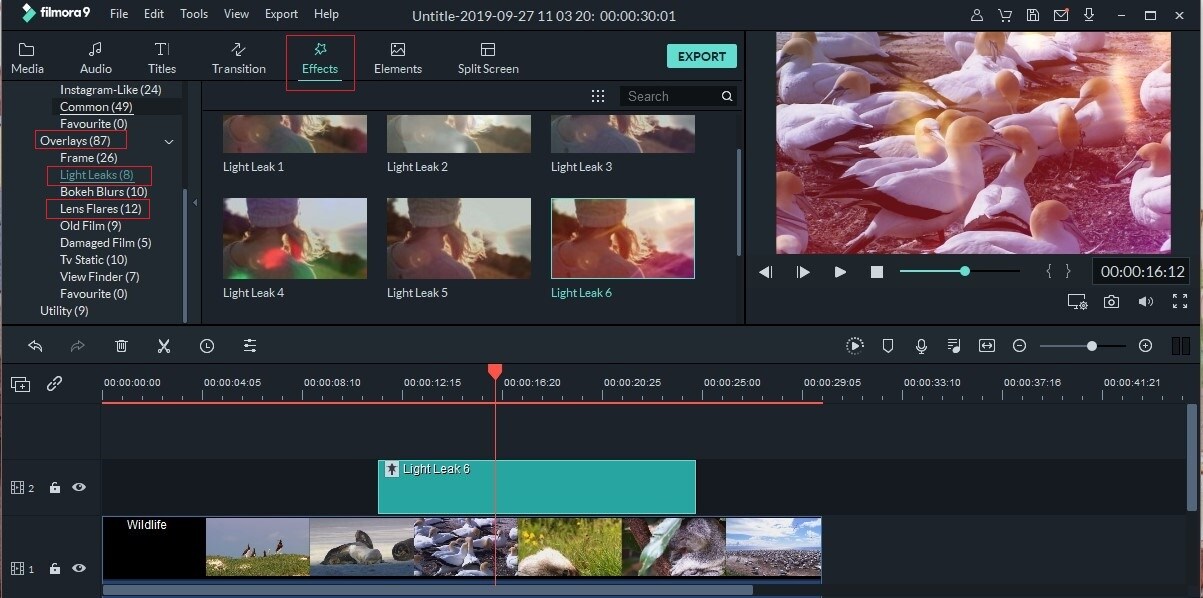
Click on the "Effects" icon and select "Overlays" to display a list of options on the left window pane. Select light leak and choose the desired rainbow light leak or lens flare amongst the several options displayed. Drag it to the video on the timeline and place it on the target section of the video. Remember light flicks and lens flares appear separately on the window pane. Choose them individually.

Step 3. Export Video
When you are satisfied with the applied light leaks and lens flares, just click the "Export" tab and choose a convenient save path in the subsequent output window. Also, choose the file format and name and click "Export" to finish.

Guide on How to Add Light Leak Overlay in Premiere Pro
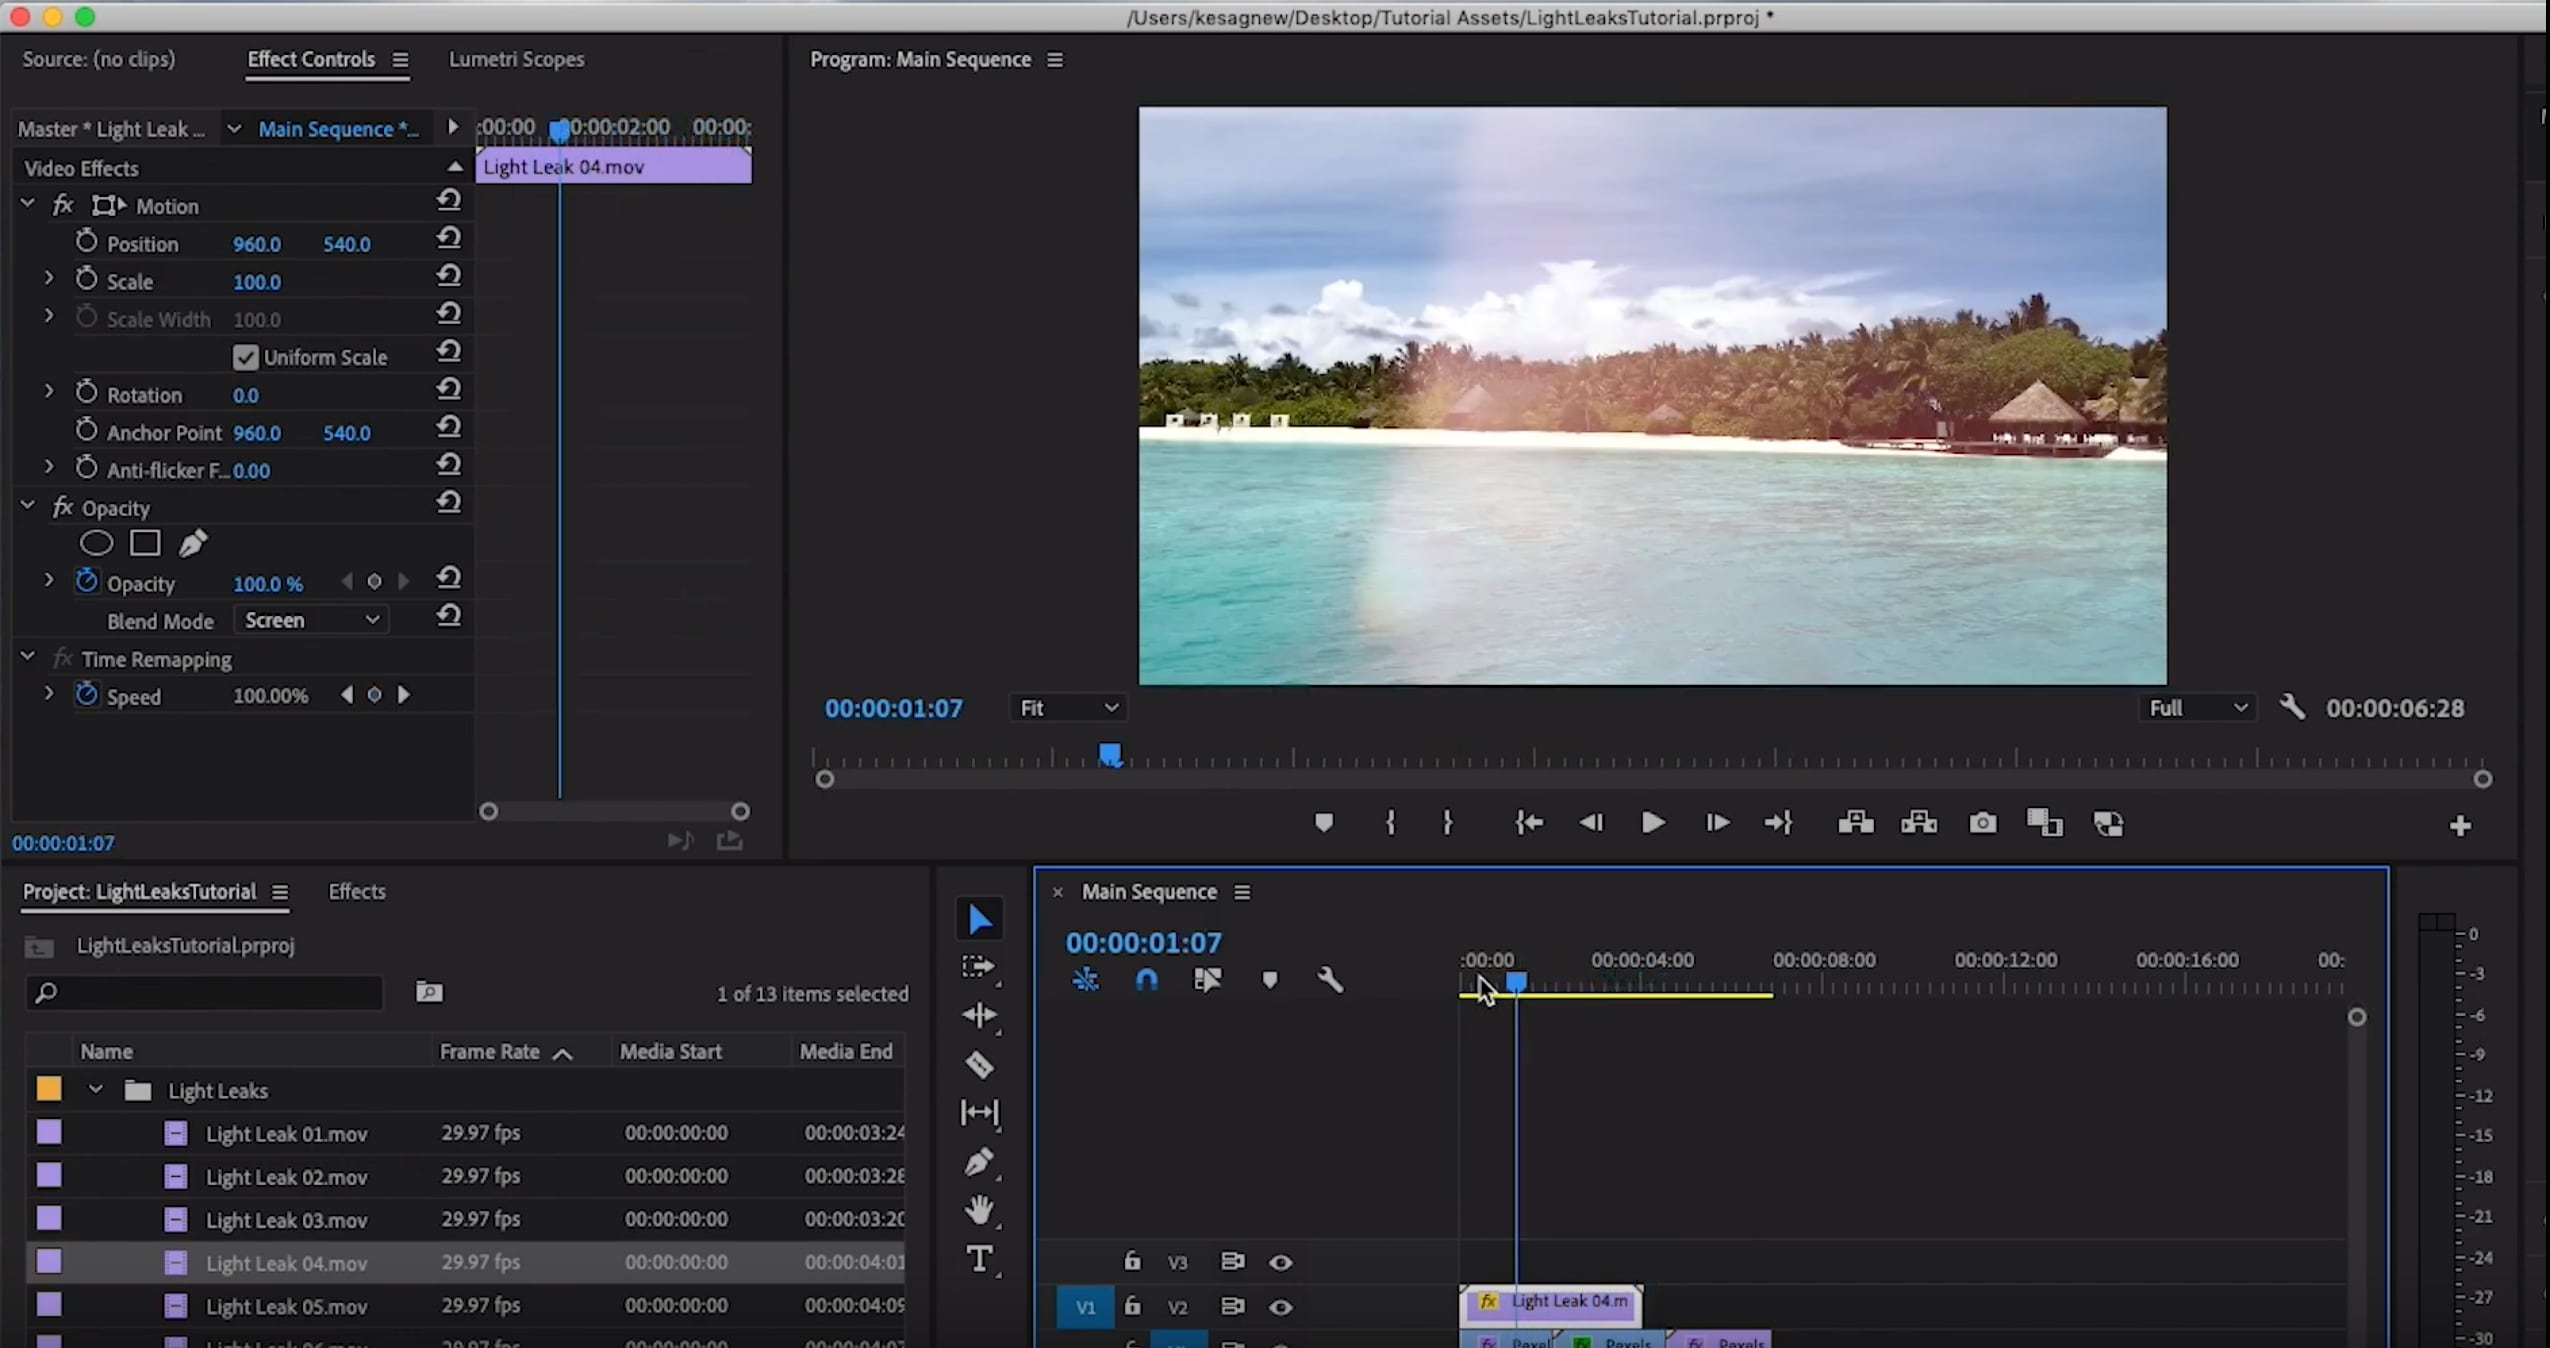
Step 1. Download the desired light leaks effect video files and upload them into the Premiere Pro. Also, upload the video file you wish to add the light leaks to the program interface.
Step 2. Select the light leak of interest and drag it from the project bin and into the timeline located at the bottom of the interface. Also, drag the video footages you would like to add the light leaks into the timeline.
Step 3. Identify the portion of the light leak that interests you and trim it down.
Step 4. Now position the trimmed portion of the light leak between your video clips.

Guide and Tips on How to Make Light Leaks & Lens Flare with Camera
Step 1. Take your shots normally and rewind it once the roll is finished.
Step 2. Now once you are halfway the roll, simply halt rewinding and then expose the back of your camera by opening then close it in quick succession. This way, you will have created either a red or orange light leaks effect since the film got exposed from the back.
Step 3. Again continue with the rewind of the roll till it reaches the end and now develop the footage.
It is important to note here that the kind of light leaks effects created here is quite unpredictable and you might lose some of the shots. However, this is what you trade-off to get light leaks. Make sure the back of the camera is not wide open, just do it slightly because a little is simply enough to burn your film.

Conclusion
It’s no secret that light leaks and lens flares are massively gaining attention and usage across the film industry. However, traditional ways like camera shot or use software with the unfriendly interface are not the best solution to creating light leaks and lens flares on footages.
There are generally several light leaks and lens flare effect available online or built in the software. You can just download the appropriate software to add them into your footages in a simple way.
Yes, an appropriate software like Filmora Video Editor. Download and install it on your system and experience the best way to add light leaks and lens flares on your videos and images.
If you are interested in video effects, you can also read:
- How to Create a Video with Video Shake Effect


