How do you make a glitch or distorted text?
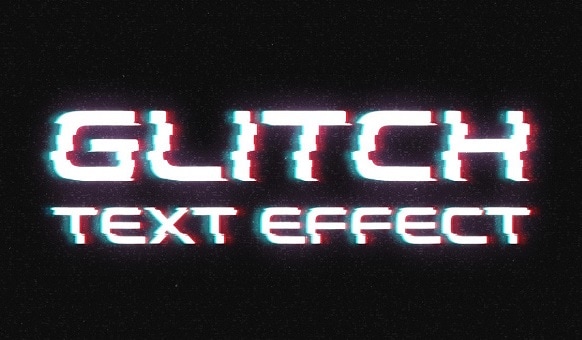
With the right glitch text generator or glitch text maker, creating a text glitch effect shouldn’t be difficult—contrary to what seeing the effect in action might suggest.
You’ll learn, shortly, how to add and customize text glitch effects. We’ll be using Filmora for the purpose of this tutorial.
How to Create a Glitch Text Effect using Filmora Video Editor
It’s done in 3 basic steps; add text layers, add effects, blend them and export. Let’s quickly go through the steps:
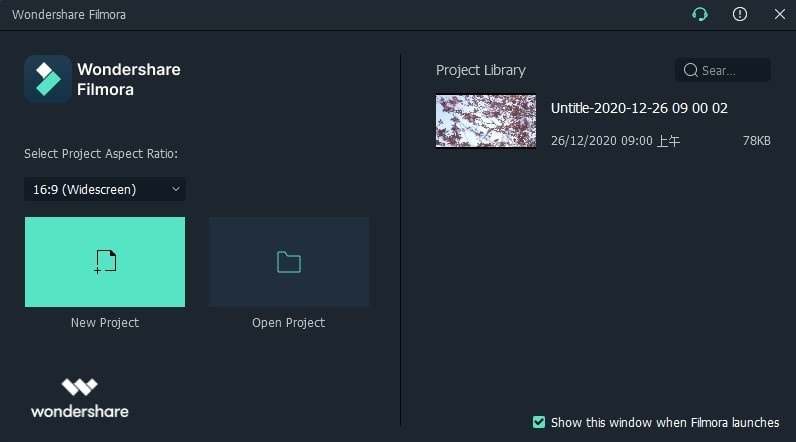
Step 1: Install and launch Filmora Video Editor, create a new project
As stated earlier, we’ll be using Filmora for adding the glitch effect so go on; click the bouton above to install the software if you do not have it installed already. Then open Filmora and click "New Project".
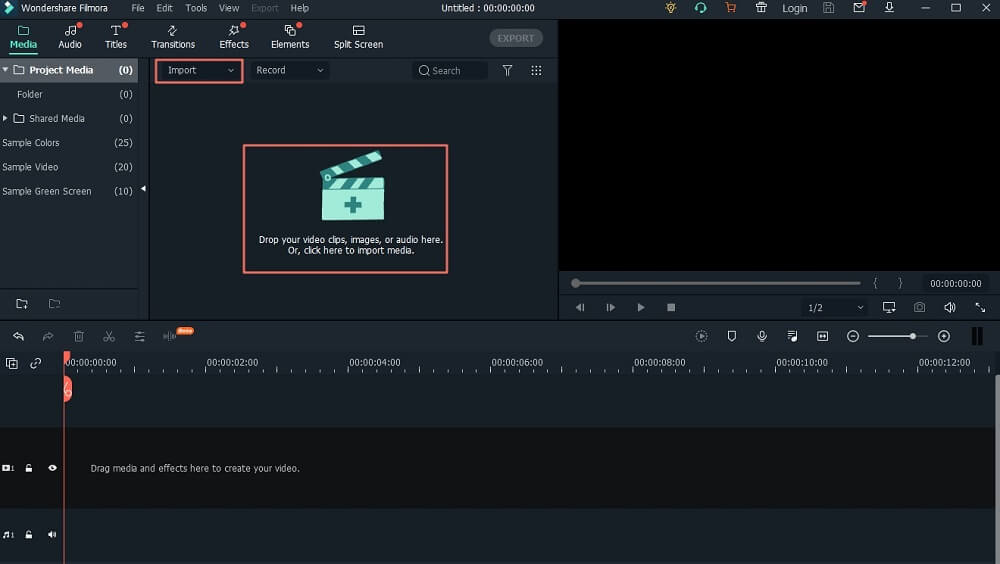
Step 2: Import your files
Import every extra file you’ll be needing into your project. E.g. videos and downloaded glitch sound effects.
Step 3: Create two text layers and export
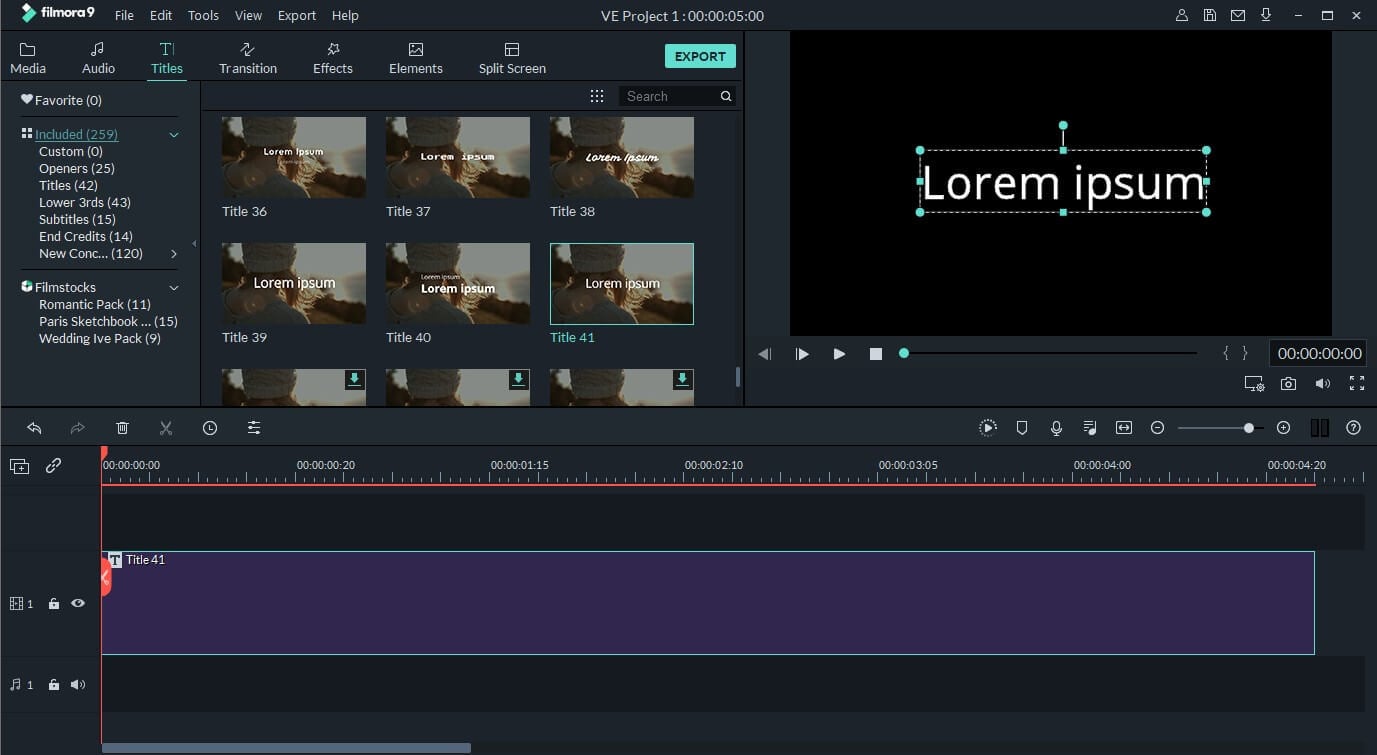
Look to the top layer of the software, after Media and Audio, you’ll find Titles. Click on it to display the available options.
1. Add text to timeline
Drag and drop any title of your choice to the timeline... let’s use title 41. Drag it to the timeline.
2. Adjust text duration and extend the timeline
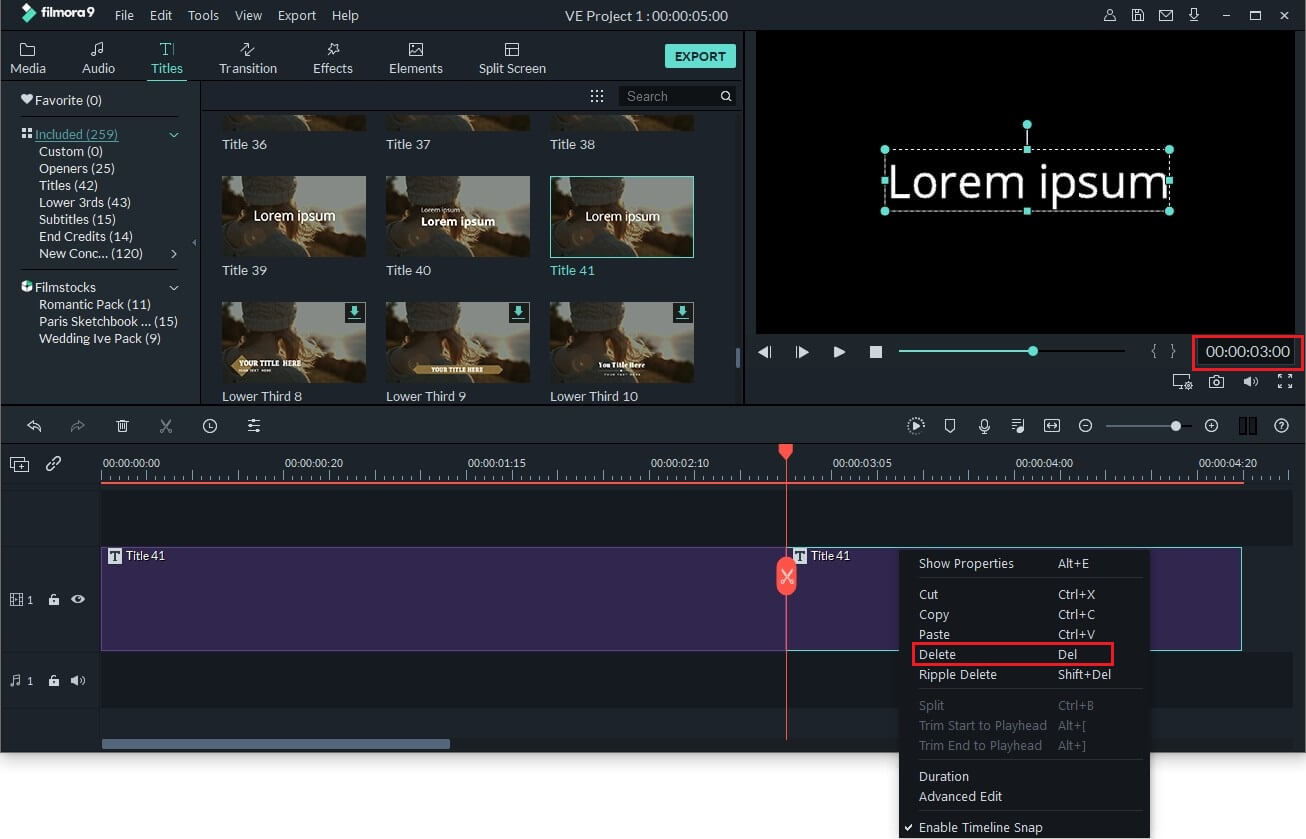
Click and hold the marker on the title placed on the timeline and drag it horizontally until it reaches 3 seconds. The red marker now splits the title into two; right-click on the left part of the title to display more options. Click Delete from the options menu to remove this part—leaving you with just 3 seconds of your initial title.
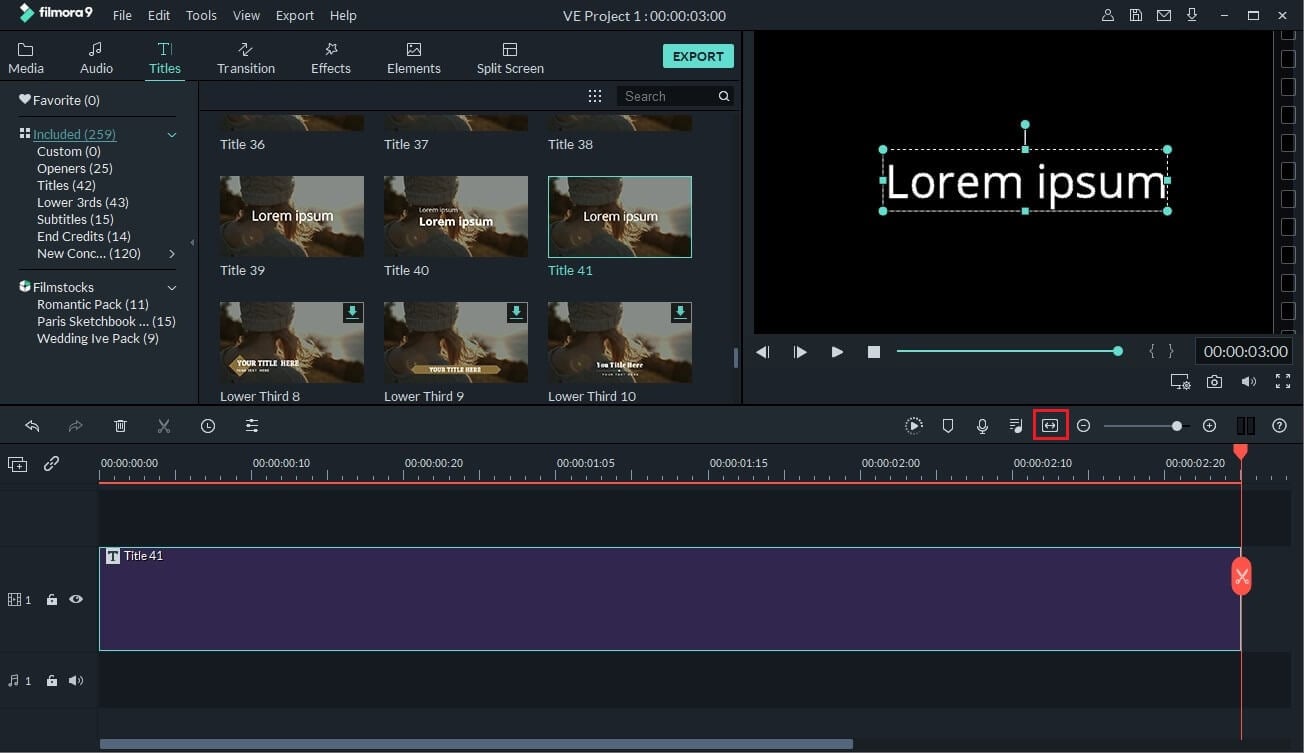
Next, you extend the timeline by clicking on the second little icon after the mic icon below the preview panel. It’s the little icon with two tiny arrows pointing to different directions.
3. Custom text
Double-click on your text in the timeline, and click on the Advanced button from the menu that pops up. You’ll find a text input field titled “Input Text” under the Customize tab which is in between the Preset and Animation tabs. Type in the text you want to apply the glitch effect to and choose any font style of your choice above the preview panel, Open Sans may be the default font—feel free to change it as desired—but use a style with big, bold letters; also select font size and change the value to at least 100. 105 isn’t bad.
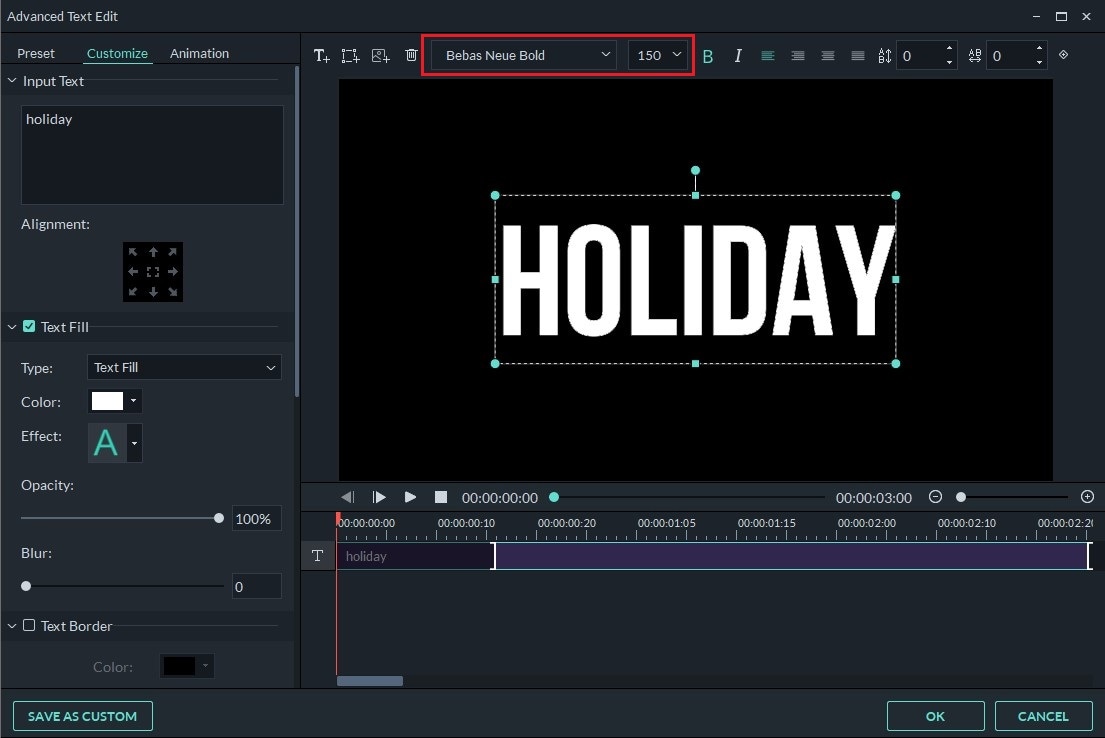
Step 4: Make glitch text effect
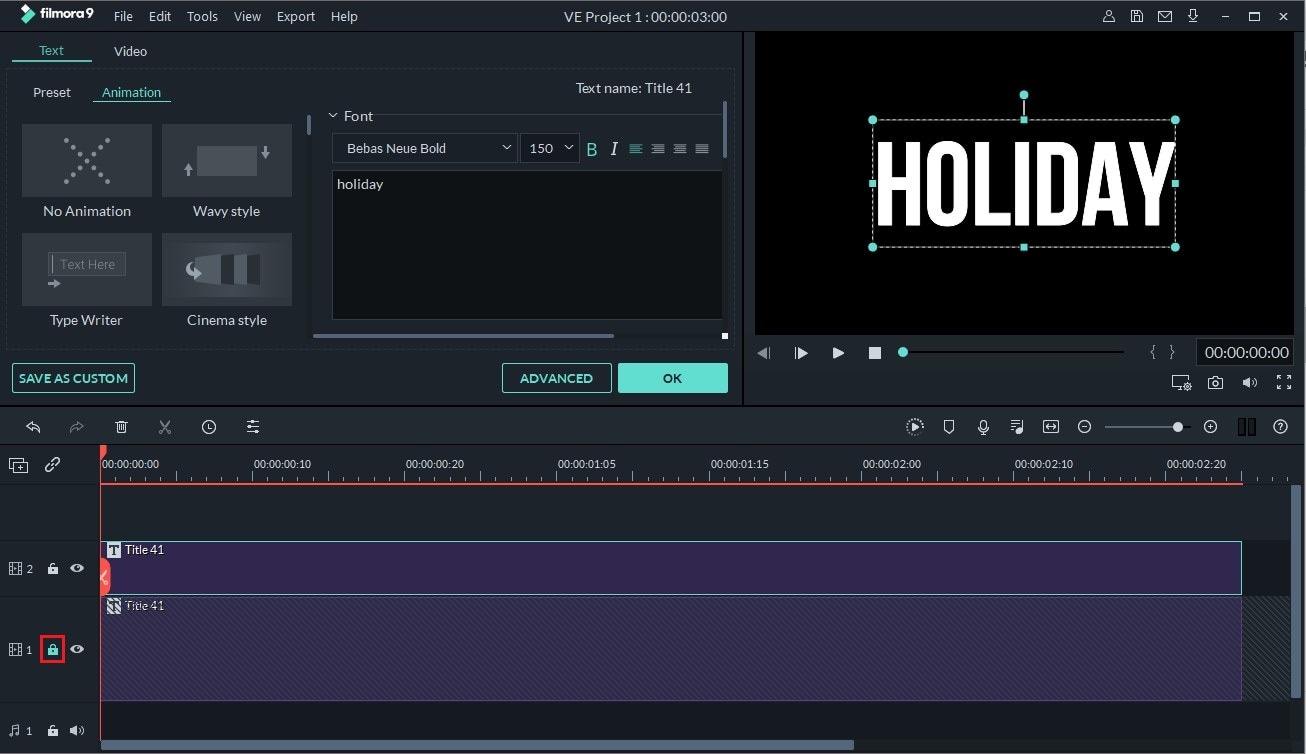
Switch to the Animation tab and select “No Animation”. Ensure that your text is aligned/placed in the middle then hit OK. Next, copy the text from the timeline (right-click to display options and copy). After copying, look to the panel beside the timeline and lock the text by clicking on the little lock icon beside the element you just copied and paste to the layer above the text on the timeline then unlock it.
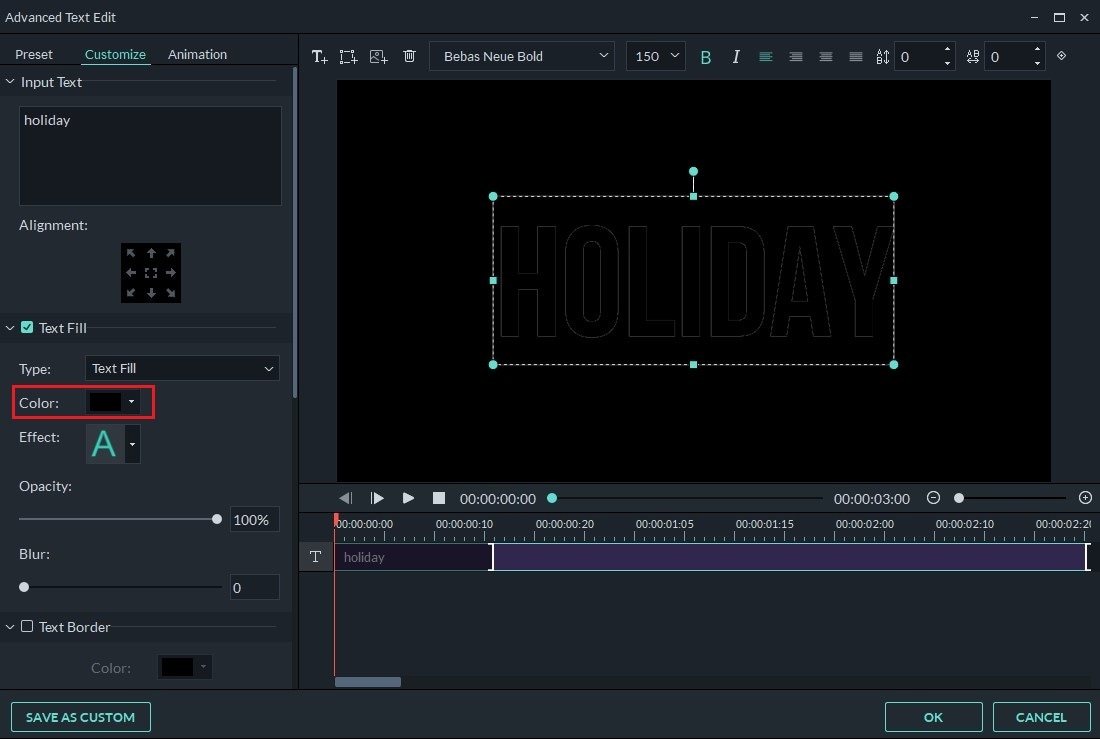
Click on that same layer after unlocking it and go to Advanced again. Below Text Fill in the advanced menu, you’ll find text style options, click on Color and pick black from the palette and click OK.
Now, cut the text at 2 seconds, for example. Place the marker at 00.00.02.00 and click the scissors icon above the timeline to the left to cut. Next, navigate to Transition found in between Title and Effects. Find Deposit Up among the effects (you can easily use the search tool in the Transition tab) and drag it to the top layer in your timeline.
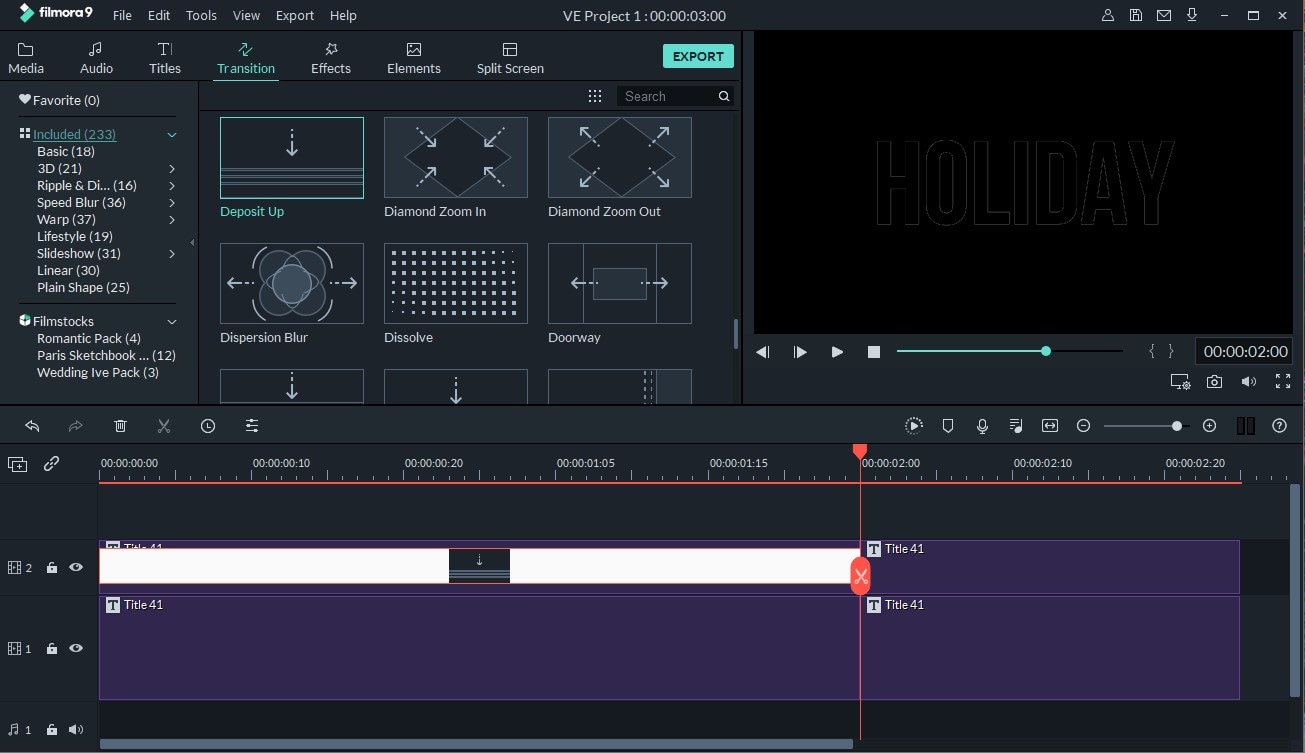
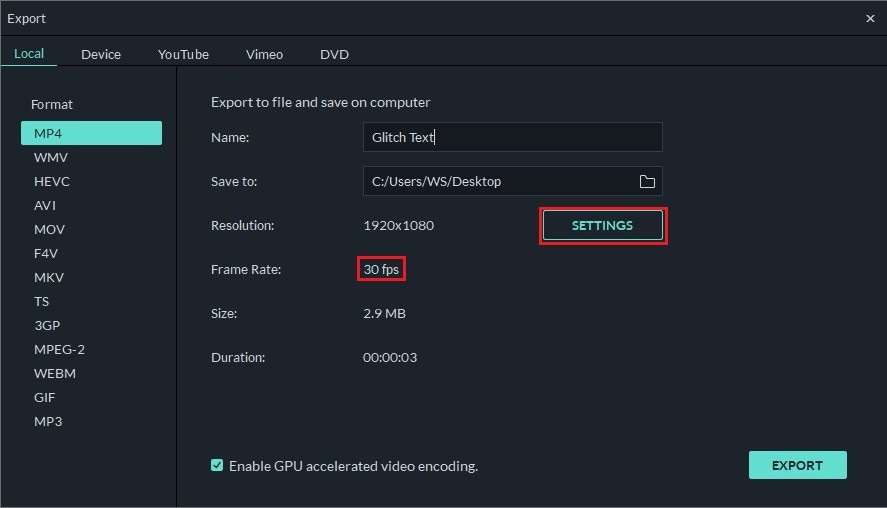
Previewing your work, you’ll see the glitch effect gradually coming to life—but patience, we’re not done yet—it gets much better. Next, simply export the video. Use any name of your choice then click the Settings button below export directory and modify Frame Rate to 30 frames per second. Save the file and delete everything from the timeline. The saved video should be added to your current project automatically.
1. Add video files to timeline
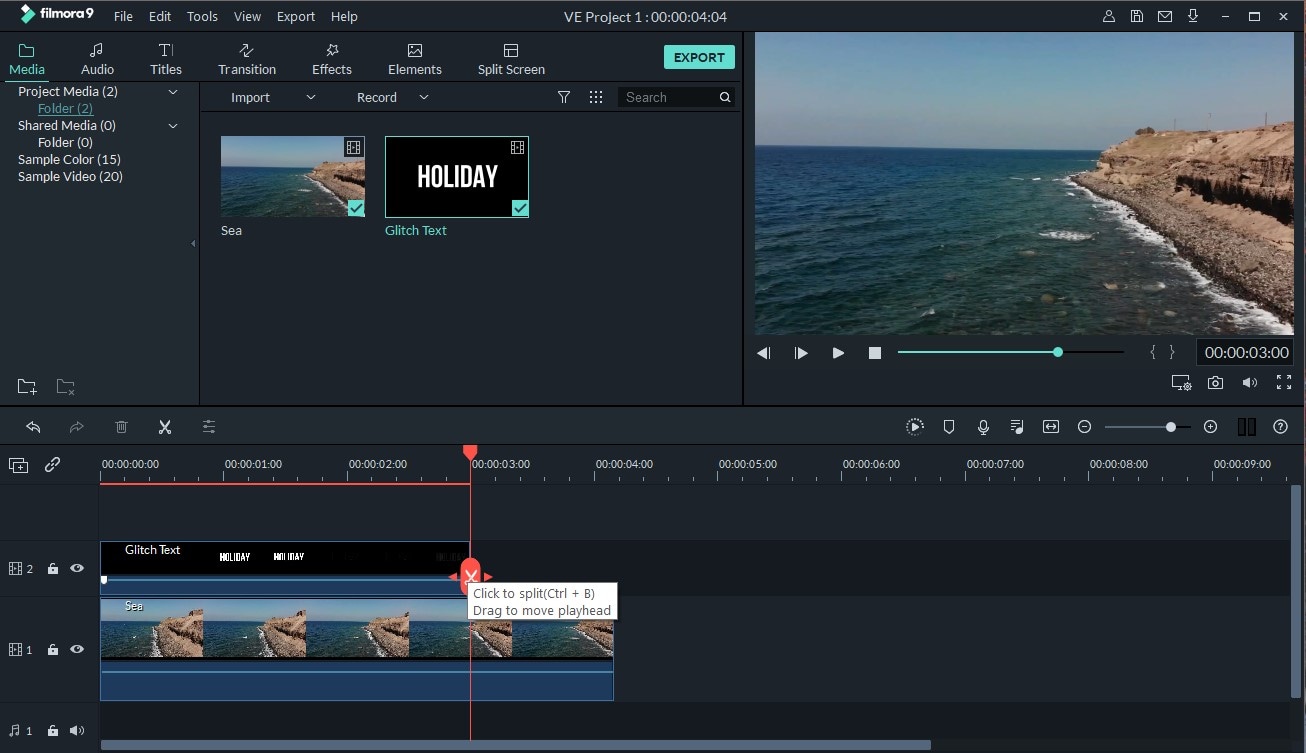
Drag and drop any video to the second layer of the timeline and select MATCH TO MEDIA. Next, you add the text (previously saved) to the first layer of the timeline (above the video). Place the marker at the end of the text video and remove the other part of the clip by deleting it from the options menu.
2. Adjust blending mode
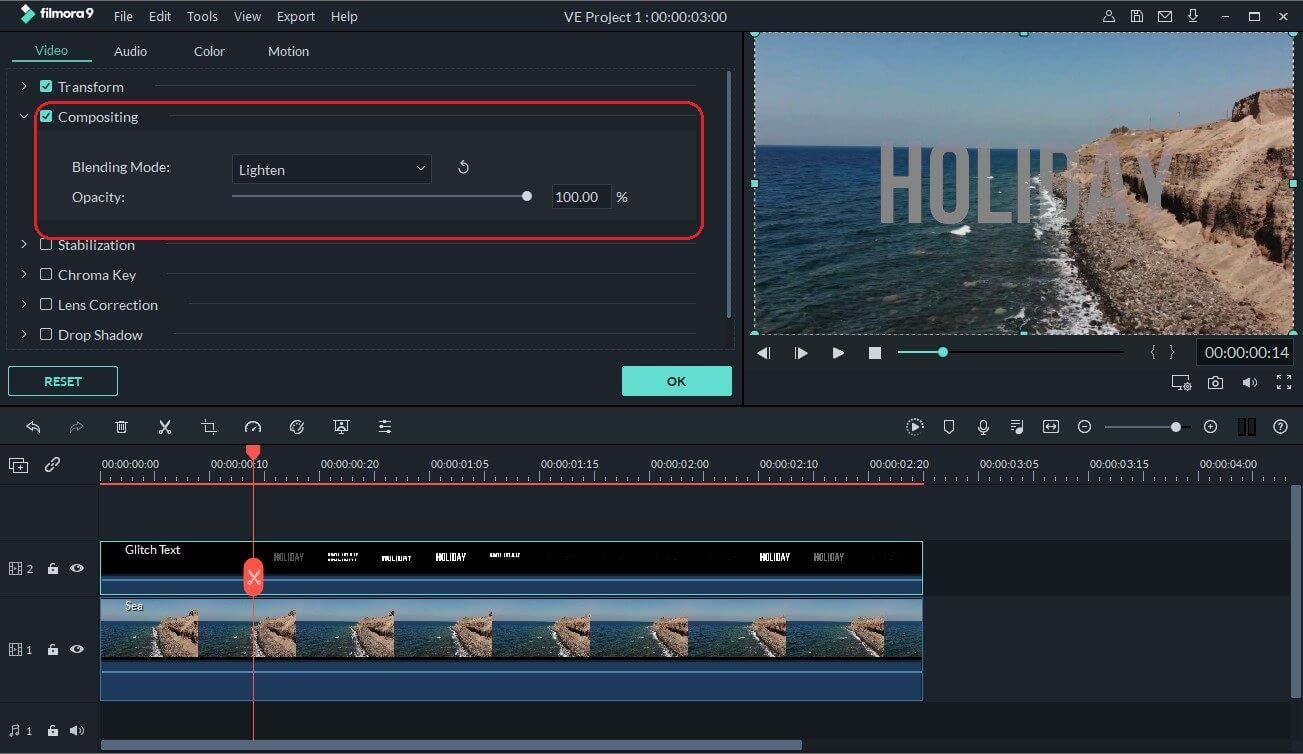
Click on the text layer in your timeline and go to Composting and change Blending Mode from Normal to Lighten.
3. Split and cut text video
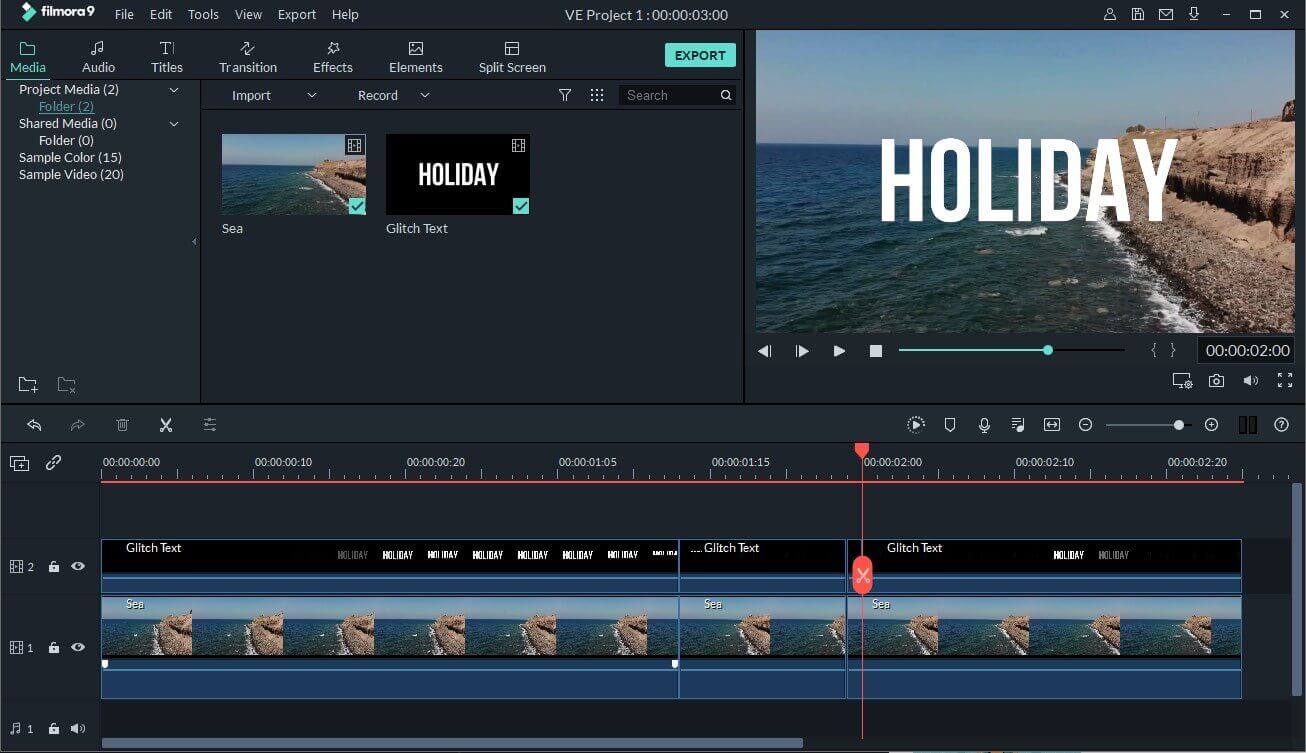
Cut 2 seconds from the timeline (i.e. at 00.00.02.00). Also cut at 00.00.01.13 and 00.00.01.24.
4. Apply effect
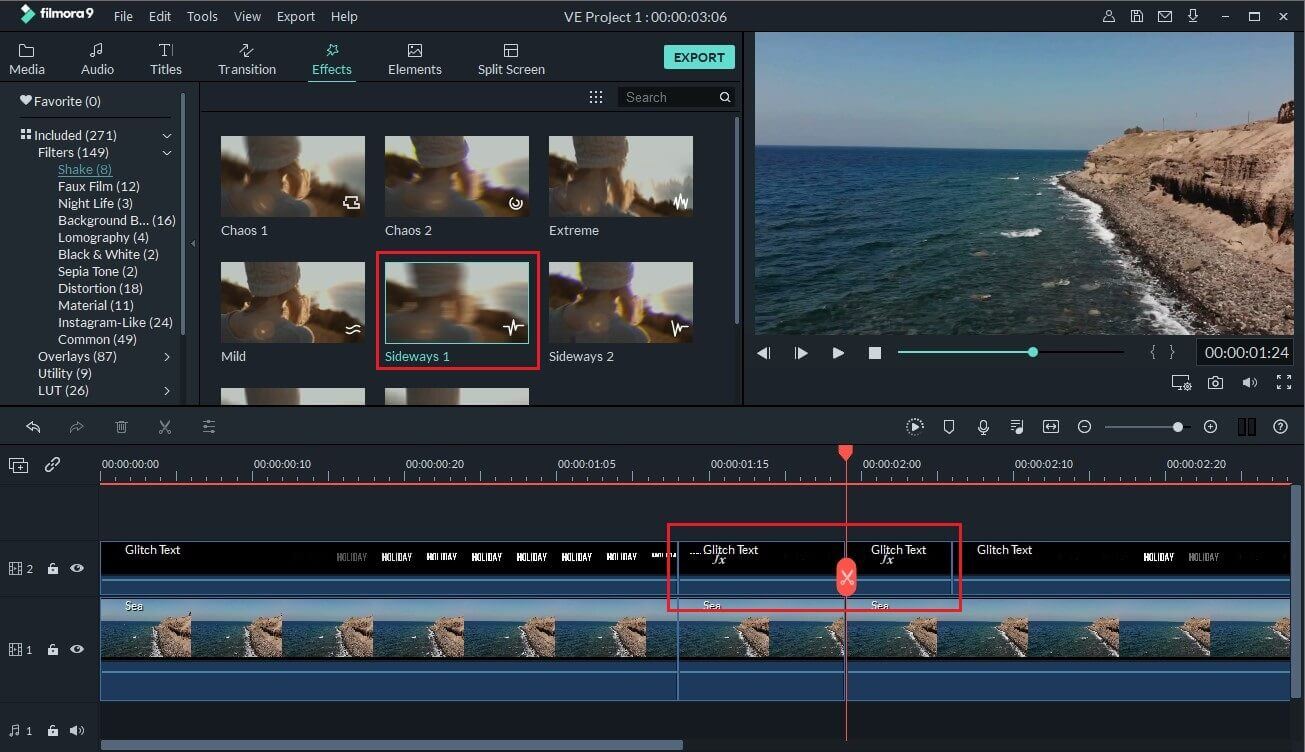
Next, go to effects and select Shake from the sidebar. Drag “Sideways 1” and paste between 00.00.00.00 and 00.00.01.13, also place on 00.0001.13 – 00.00.01.24 and 00.00.01.24 - 00.00.02.00. Don’t place after 2 seconds.
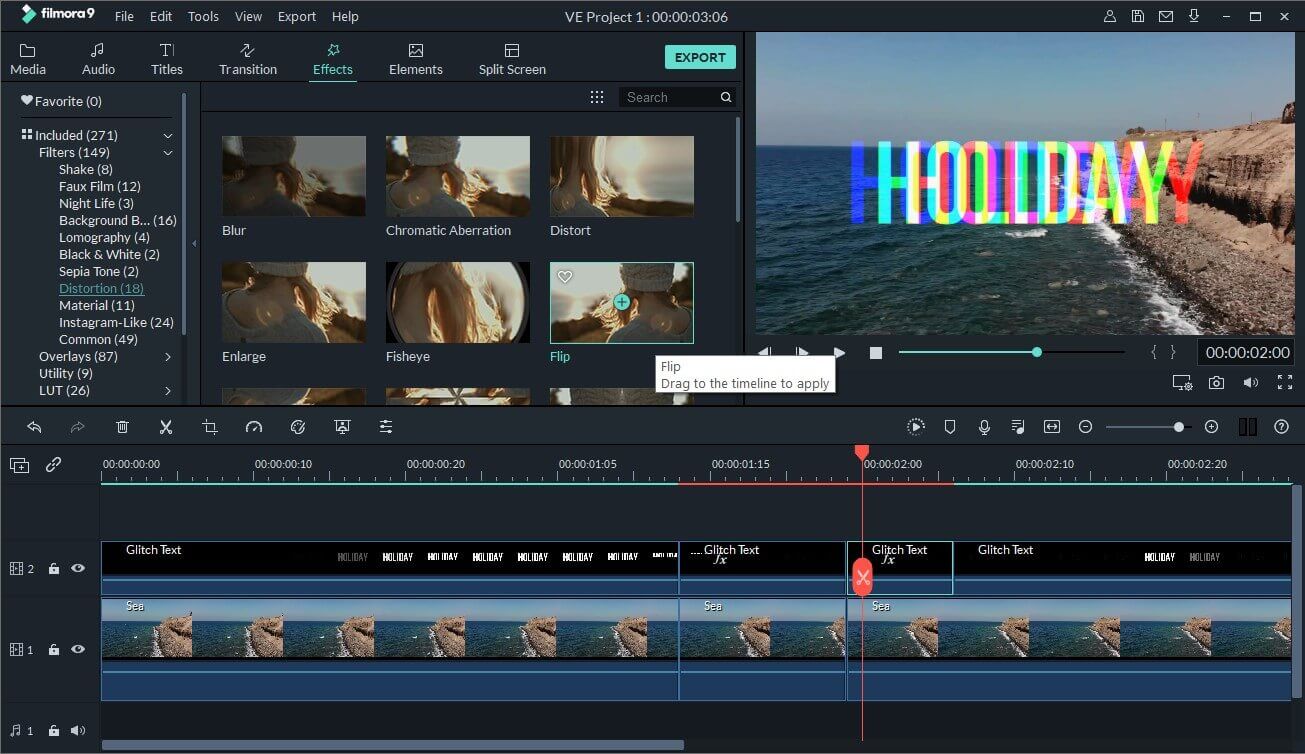
From the sidebar again, click Distortion and drag “Chromatic Aberration” onto 00.0001.13 – 00.00.01.24. Also, add “Flip” to the same part.
Now click on 00.0001.13 – 00.00.01.24 and scroll to the end of the Video tab and click video effects. Lower the Fade value under Chromatic Aberration to 0.30, click OK, go back to effect and drag “Chromatic Aberration” to 00.00.01.24 – 00.00.02.00. Well done, you’re almost there!
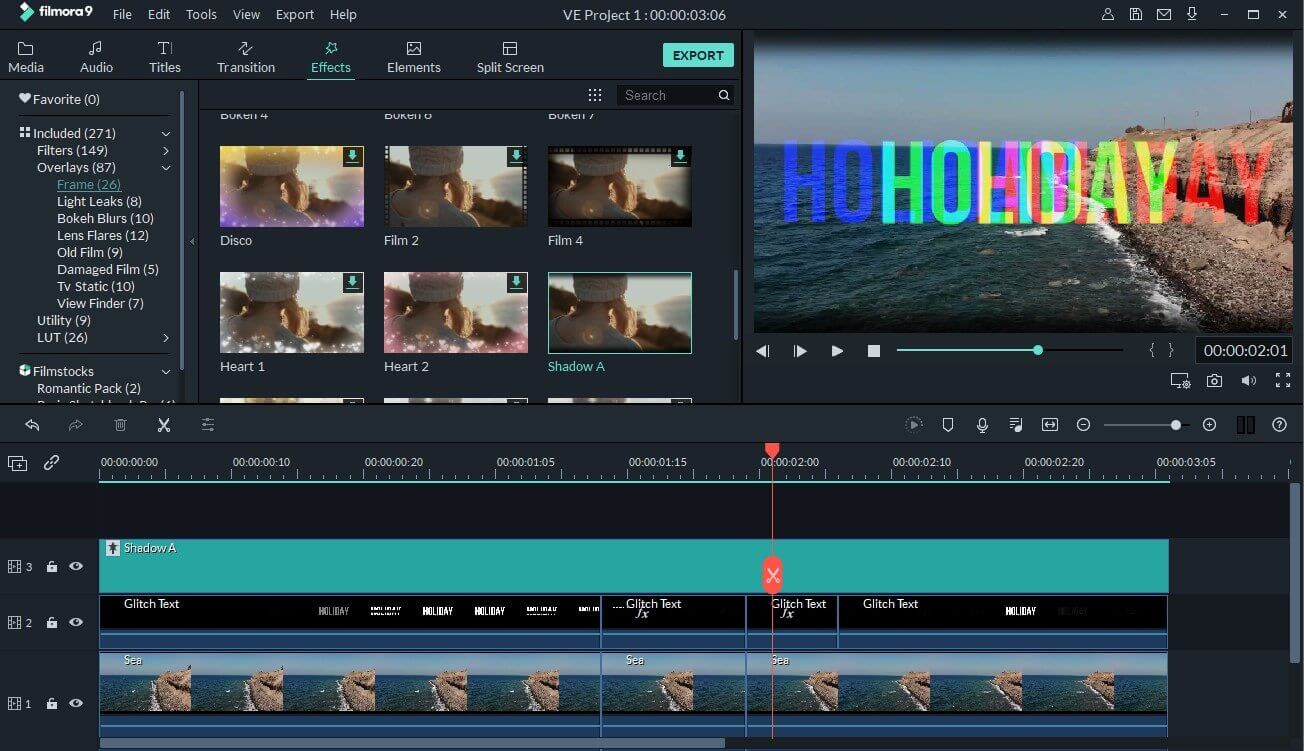
Simply go to Frame under Overlays from the sidebar and add a frame at the top of the timeline. Click on the video at the bottom of the timeline and select a preset. Finally, drop any glitch sound effect at the bottom of the timeline (if you’ve got any) and preview!
Step 5: Export video with glitch text
NEXT, you simply preview your work and click on the Export button to export your work.
Conlusion
Well done, I’m pretty sure your glitch effect looks good. In this tutorial, we used Filmora as a Glitch Text Maker to easily add Glitch effects to text and videos.
Be creative, free to explore the Effects provided by Filmora to create cooler glitches by yourself!


