Does Premiere Pro support adding title to video?
Yes, Premiere Pro has good support for adding titles to video which you should get the best out of. This is enabled by the title feature which is a flexible tool for creating titles as well as credits. It has panels that you can manipulate easily without affecting the performance of the title in any way. The good thing with this tool is that loading multiple titles at the same time is possible. If you want to see a specific title, you can make searches using its name.
- Part 1. How to Make a Title on Video using Premiere Pro
- Part 2. Quick Solution to Add Titles to Videos- Filmora Video Editor
Part 1: How to Make a Title on Video Using Premiere Pro
This video editing software program is timeline-based which the funniest part is. It has an intuitive interface that will make it easy to browse for videos. This is one of the few programs that have support for high resolution editing. Whether it is high or low resolution, your video will be edited professionally and quality retained intact once you choose to use this program. It has after effects and Photoshop among its key features.
Step 1. Go to "file" from the menu bar and then click "new" followed by "title".
Step 2. From that point, select a new title to add and ensure the file type has been duly chosen on the project panel.
Step 3. Make sure you have chosen a new name for your title before clicking on the "ok" button.
Step 4. You will have the flexibility of customizing the title using the tools for shape and text available.
Step 5. Once through, close down the titles and changes will be saved automatically to create the new title.
Part 2: Quick Solution to Add Titles to Videos - Filmora Video Editor
How to Add Text to Video with Filmora Video Editor for Mac
Step-by-step Guide to Add Titles to YouTube Video with Filmora Video Editor for Mac:
Before getting started, you should make sure Filmora Video Editor has been installed to your computer system. Some systems come pre-installed which would make this step inconsequential. Once you confirm the installation, launch the program and proceed to edit your video in the following simple steps:
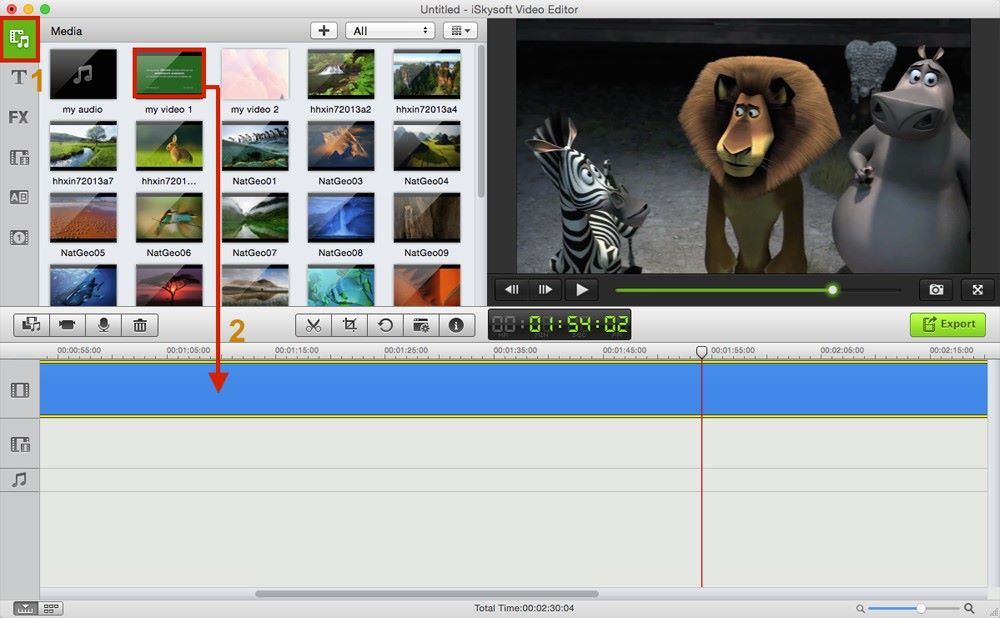
Step 1. Add files- through dragging and dropping or going to "+" then "add files" on the menu bar, you will have successfully imported all the files to work on.
Step 2. In this step, please drag and drop your video to the timeline first.
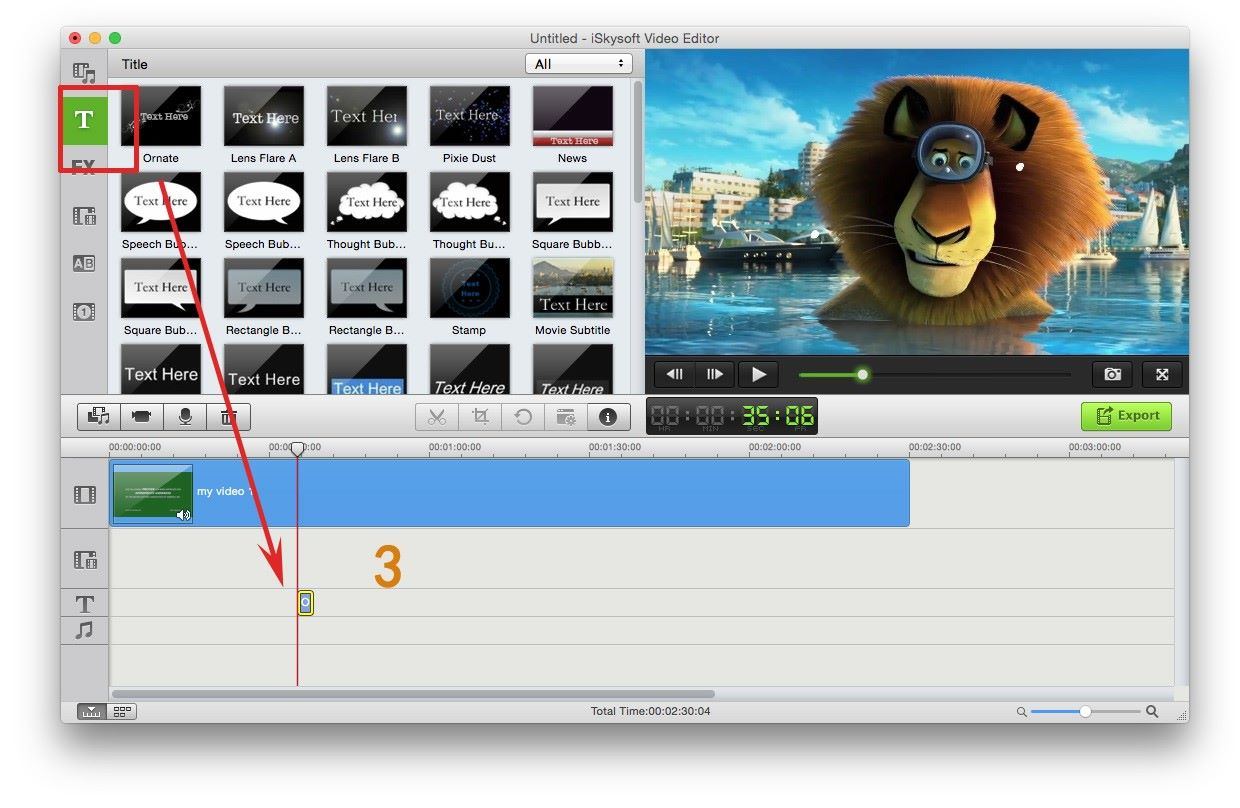
Step 3. There are several options on the tool bar, you should click the "T" icon and then view all text templates. Here you can select the right one and then add it to the timeline.
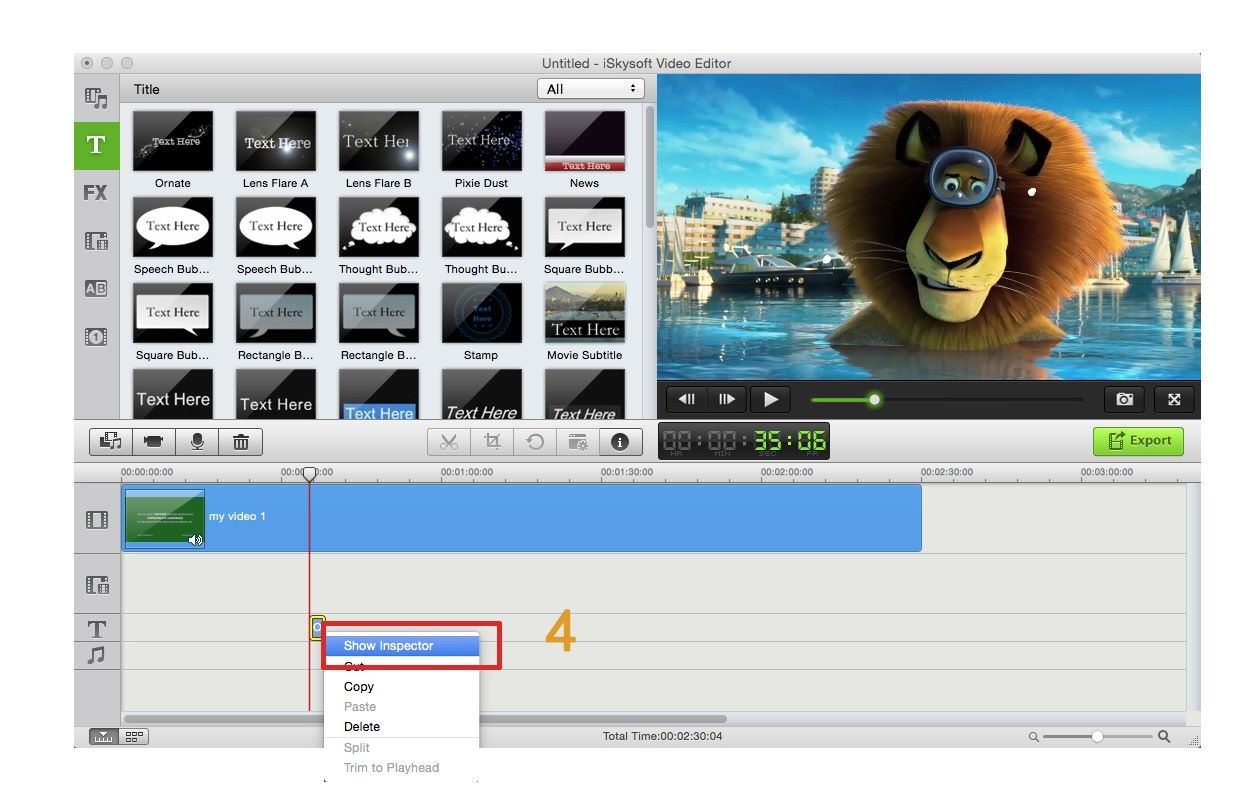
Step 4. Right-click on the text and several editing tools will show up. From the list, choose the one named "Show Inspector".
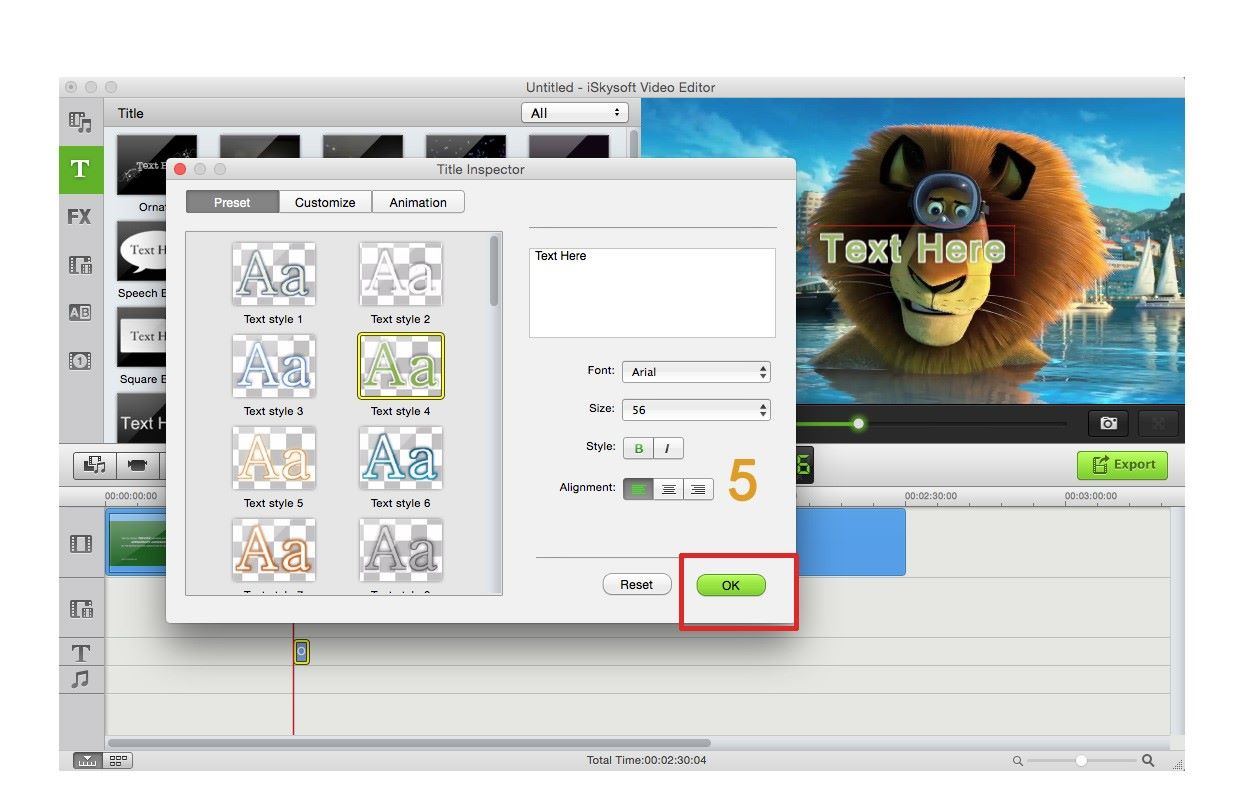
Step 5. Before clicking on that to formally apply, change its color, font, size and position appropriately. You can touch the "OK" button to complete this process.
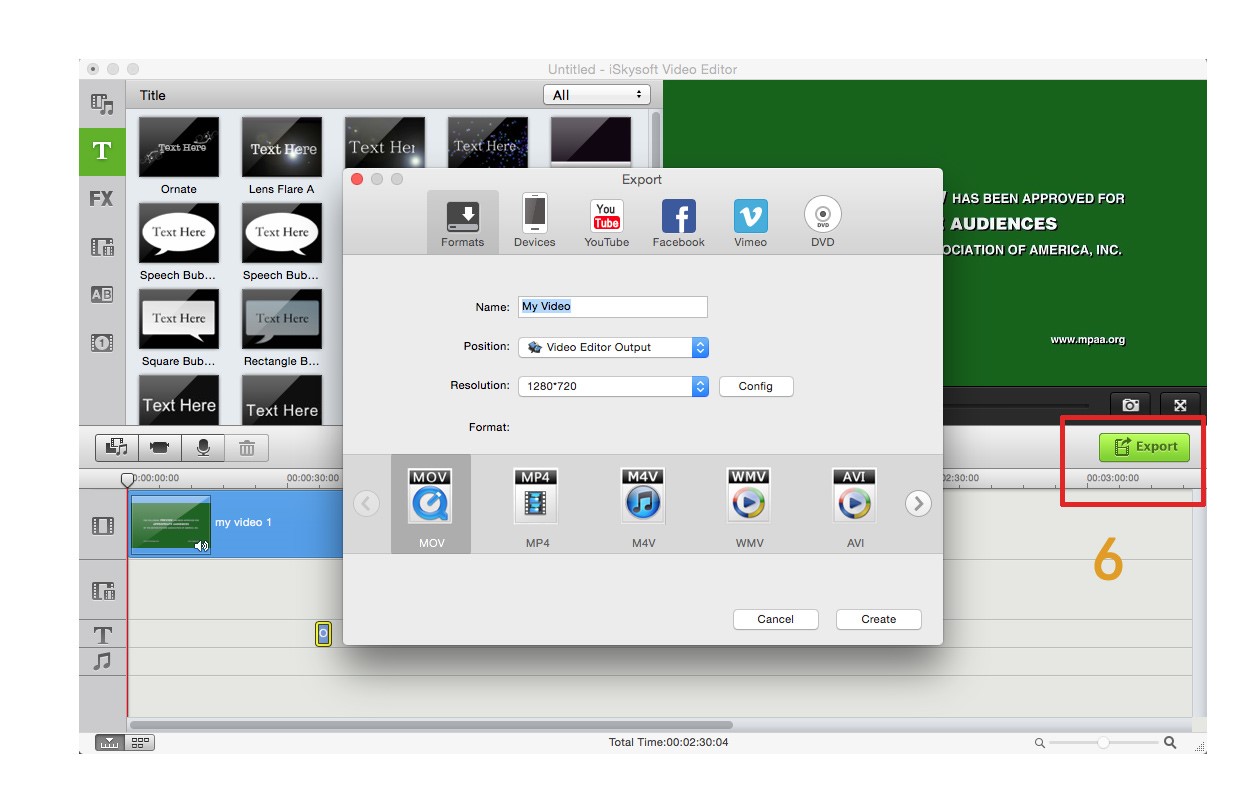
Step 6. Wrap up by saving changes you have made to the video. And click the "Export" button to save it.


