You have completed creating a presentation with nice animations and the new slide transitions in PowerPoint 16 and now want to share them with others. But which PowerPoint version do the recipients have?
If the recipients can access PowerPoint for the web, or have the PowerPoint mobile app, they will be able to experience the images, video, and audio you have prepared. But if not, viewing your presentation will be a problem.
So, is it possible to ensure the PowerPoint presentation can be viewed by anyone without upgrading or installing MS PowerPoint?
The answer is absolutely YES.
Saving or recording PowerPoint as video format could be a good idea to solve this problem, but how? Well, this article is going to explore two ways of saving your PowerPoint presentation in video format.
You can go through them and pick up one to record PowerPoint as video easily.
Benefits of Sharing A PowerPoint Presentation as A Video
Before getting started, let's have a brief look on the reasons why you're recommended to saving PPT as video format for better sharing:
- You will be able to show your presentation to more people by sharing it with websites and social media platforms. This is especially beneficial to businesses looking to boost their marketing efforts.
- You eliminate the need to have PowerPoint installed on your recipients’ computers. The lack of software or technical skill will no longer hinder the spread of your content.
- A video makes it possible to create CDs and DVDs and distribute to your target audience. This again helps to make your content more widely accessible.
- Even when your audience has PowerPoint, some elements may be lost or altered when using different versions of the software. A video ensures your audience will experience your presentation exactly as you prepared it.
How to Convert a PPT Presentation to Video in PowerPoint?
After you've finished preparing your presentation in PowerPoint and added all elements you need to get your message across, you can choose to save your presentation as a video within PowerPoint itself.
Below are the detailed steps:
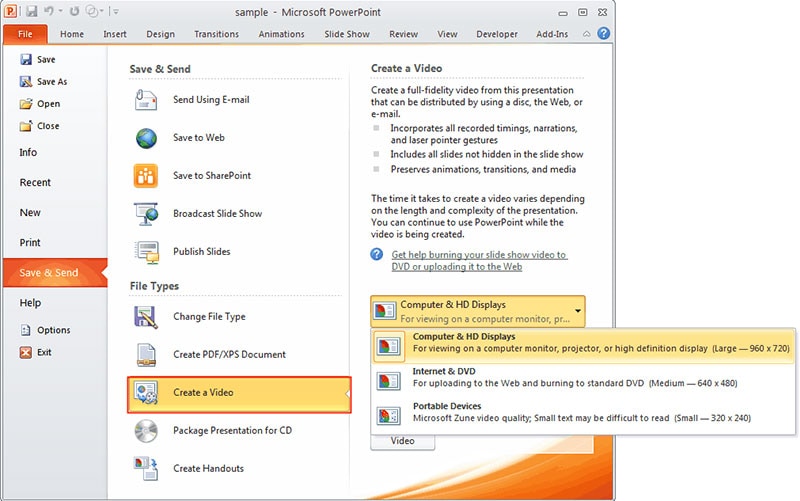
Step 1. From the top menu, navigate to File > Export > Create Video. PowerPoint is now ready to start converting your presentation to video.
Step 2. Select a suitable resolution for the video from the drop-down list. The options include: Ultra HD (4K), Full HD (1080p), HD (720p) and Standard (480p). The higher the resolution, the bigger the video file will be.

Step 3. In a second drop-down list, choose whether you want comments and timelines included in the video. Then, set the duration of each slide. The default duration is 5 seconds. Use the up or down arrow to increase or decrease the length of each slide.
Step 4. Click "Create Video" to convert your PPT presentation to video.
NOTE: The length of time it takes to convert your presentation will depend on the contents of your presentation. Presentations with lots of elements such as comments, animations, transitions, pointer movements, the high numbers of slides, etc., will take longer to convert.
How to Record PowerPoint Presentation with Audio and Video?
When creating a presentation with MS PowerPoint, you can, for example, play audio files for individual slides or in the background. However, there may be difficulties if the presentation is saved as or converted to video, because the sound may be lost.
If you are experiencing or want to avoid similar issues, the second method detailed below will help you get the best results.
Here, I'd like to recommend you to use Filmora Video Editor or Filmora Video Editor for Mac to record your presentations on your PC or Mac without losing anything. It can help you capture all actions on your computer with music and voice. And it can also allows you to edit the recorded video to your wanted effect easily.
Now, let's have a look at the key features of this powerful program.

- Record any actions on your PC, Mac without losing, including operations on the PC screen, voice, background music, etc.
- Edit the recorded videos or local media files without restrictions, such as split, crop, merge, reverse, and so on.
- Customize your recorded videos as you like, including add titles, text, sound effects, etc.
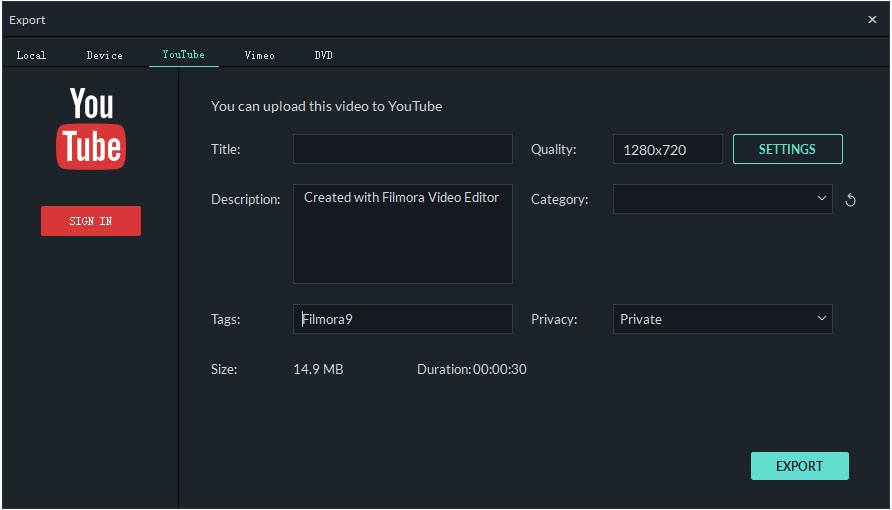
- Export or share videos in multiple ways as you like, for example, YouTube, Vimeo, DVD, iPhone, MP4, etc.
[Quick Tutorial] How to Record PowerPoint Presentation as Video?
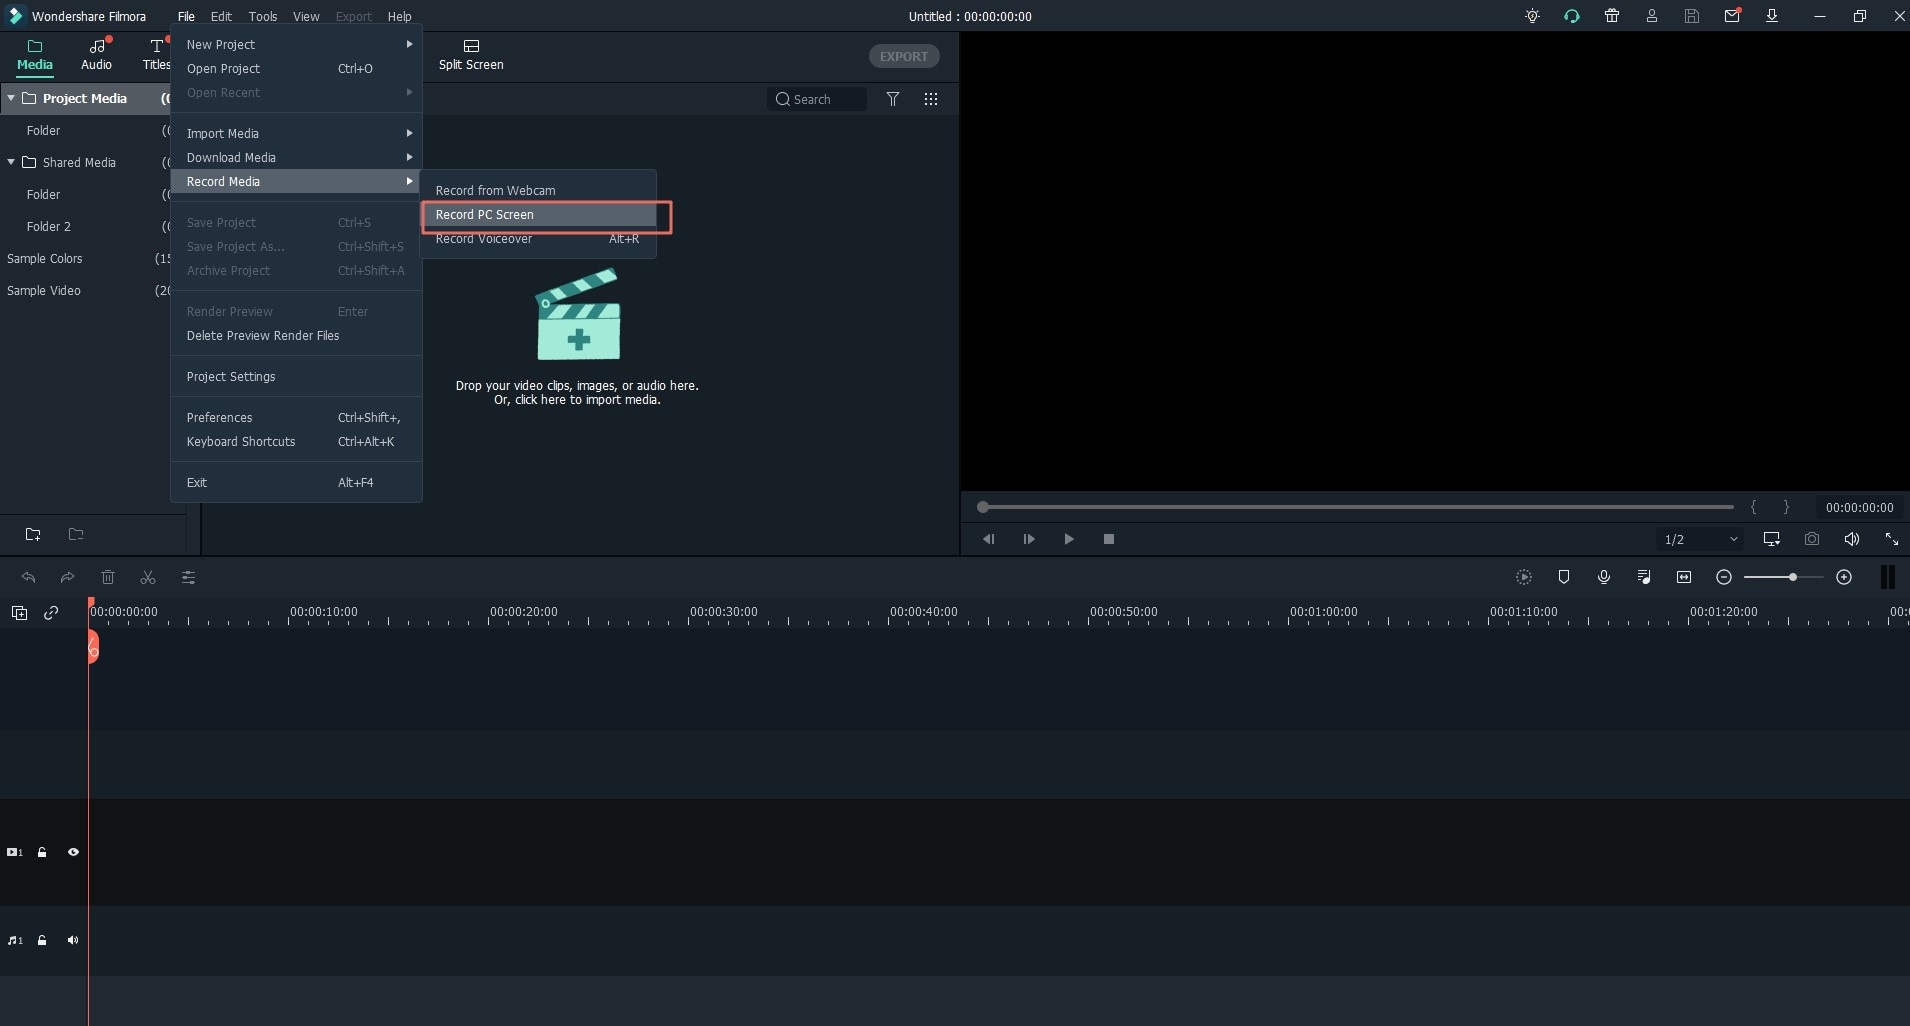
Step 1: Assuming you have already downloaded and installed Filmora Video editor from the official iSkysoft website, click on its icon to launch the program, click "New Project" and navigate to "Record > Record PC Screen".

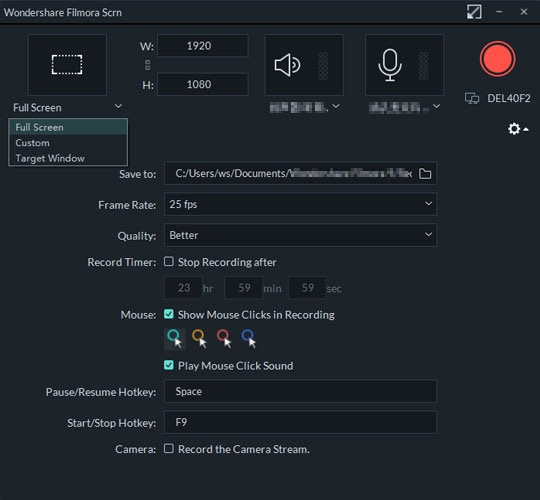
Step 2: Before you continue, adjust your record settings and when ready, click "REC" to start recording. The process will start after a short count down. Play your PowerPoint presentation and then minimize Filmora Video Editor to continue recording.

Step 3: After you are done recording, you can use Filmora video editing tools to enhance your video. For example, you can cut or trim the unnecessary part in video, add title or text to special parts, etc. as you like.

Step 4. When the above steps have done, you can click "Export" button to choose the output format, device or platform according to your own needs.

Conclusion
With so many people consuming media content primarily with their mobile devices, sharing your PowerPoint presentation as a video will ensure that your content is readily and widely accessible.
And...
...recording PowerPoint presentation is a good way to create tutorial video for pubilc speech or online sharing. so which method will you use to save PPT as video?
In my opinion,
If you only need to convert PowerPoint to video, you can reach it in the Microsoft PowerPoint directly as the method 1 shows. But if you wish to record more actions and voice during the process, Filmora Video Editor will be an ideal option here.
Anyway, you can click the below icon to take a free trial on Filmora Video Editor or convert presentation to video in PPT as you like.


