Adobe After Effects is a professional video effects maker, which allows users to create cinematic film titles, intros, and transitions. This program is widely used in professional video creators, and it can work well with other Adobe video editor software. Since it is famous for its effects creating ability, you might don't know that the After Effects also comes with the basic video editing. So it can be used to reverse a video easily.
Sounds great?
In this post, you're going to learn how to reverse videos in After Effects step by step, and you can also get 5 advanced editing tips with After Effects.
Now, let's get started...
How to Reverse Videos with After Effects?
1. Launch After Effects and open the project that has the clip you want to reverse. Here, please save the section as a separate file for security consideration.
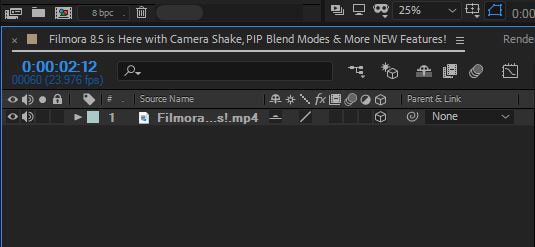
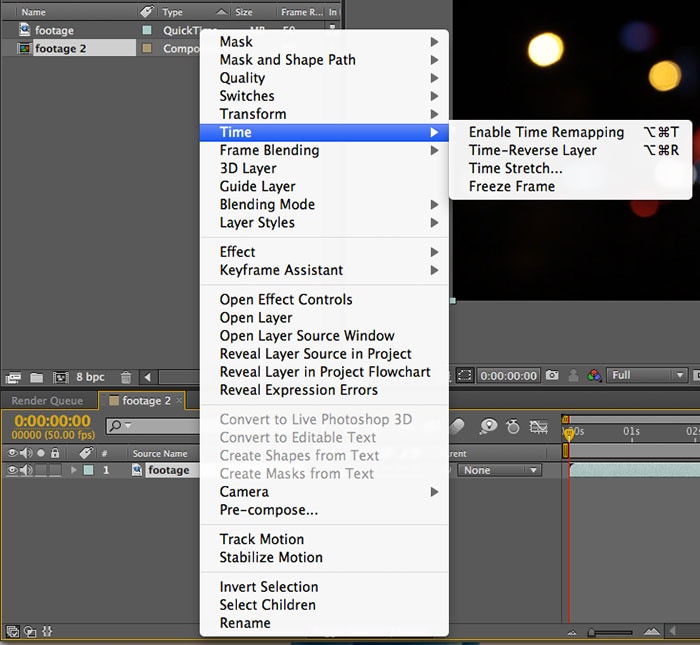
2. Drag and drop the video clip to the New Composition icon, then right click the layer that you want to apply the reverse video effect to. Now, you'll see a drop down menu.

3. Select "Time" > "Time Reverse Layer" to open a new window, here you can adjust the speed you intend to play the video clip at.

4. Click on apply effect and wait for some time for it to get rendered. You can then play the reversed clip on your timeline to ensure that the reverse video after effects appears as you want it. Once you are satisfied with how it looks, go ahead and save the file.
5. If you saved the clip as a separate file then you can save it then export it. You can then choose to replace the original clip with the new one that has the reverse video after effect.
[Attention] Remember to always try your effects on a copy of the original footage since many of the effects tend to use very destructive which may be difficult to undo and that may lead to the original footage being destroyed while applying the effects.
The Best Adobe Premiere Alternative to Reverse Video
As a beginner to video editing, Adobe After Effects might be too professional to handle, or you just want to find an alternative to After Effects, then you can take a free trial on the Filmora Video Editor & Filmora Video Editor for Mac. This program is specially designed for beginners and semi-professionals, which provide users with the user-intuitive interface, and detailed tutorial.
Filmora Video Editor
- Reverse, overly, cut, trim, split, combine, etc. a video on Windows and Mac computer within few simple clicks;
- Advanced editing features like green screen, video stablization, audio mixing, etc. are all supported and can be operated by yourself;
- 1000+ video effects help you customize the video performance.
- Easy to use and support almost all popular video, audio and image formats in the market.
- ...
See Also:
How to split a video into frames
How to rotate video by 90, 180 and 360 degrees
Advanced Tips: How to Edit Videos in After Effects?
As much as people love using After Effects, it can be quite frustrating at times especially when you can figure out why certain things are not working as they should. Here are some of the frequently asked questions that many ask concerning the use of After Effects to edit video.
#1. Why do I have a red or green watermark or X in the composition window?
If you downloaded a trial version of the plugin that you are using then you will not just use them for free as they cost money. You can solve the watermark issue by paying for the plugin you are using (yes, it costs $19.99 per month).
#2. Motion blur doesn't work
Ensure that the motion blur switch option for the specific layer is turned on for your composition. If in case not working still then you could be using and you are using a CC effect then apply CC Force motion blur to adjustment layer on top of your composition layers.
#3. How do I render an alpha channel and also pull video with a black matte?
Regardless of the output module that you decide to render with, instead of using the default RGB setting which is next to channels in your video output, ensure that you change to RGB + Alpha in your drop-down menu. It will help in ensuring that the rendered video encodes and renders the video as transparent instead of the video is rendered in flat black.
#4. Why is RAM preview quite short?
There are a number of things that determine your RAM preview such as the length of the timeline's work area, and the size of RAM available that you can preview with. For 32-bit operating systems, both after effects and the computer can use between 3.5GB to 4GB of RAM per each processor. This RAM may still be shared for other things apart from RAM preview and that’s why rendering may at times fail. So the length of the preview may vary depending on how large your sources could be and other factors.
#5. How do I preview audio in After Effects?
There are about three ways that can be used to RAM preview. You can press on "Enter" or return key to preview video only. If you only want to preview video then you can press the period key on the number pad. You can also preview by pressing on the zero key on the number tab and that will preview both audio and video.


