Have you ever seen movies in which long-duration scenes are fast-forwarded? Sometimes it is used to create a tense mood in action movies, sometimes is used to make a hilarious effect in comedies. Well, those speed effects can be achieved very easily using Filmora. Filmora lets you create top-notch video edits with easy-to-use functions and an interactive user interface. Let's learn how to easily speed up video on windows/mac now!
- Part 1. How to Speed Up Videos on Windows
- Part 2. How to Speed Up a Video on Mac
- Part 3. How to Speed Up Parts of a Video
Part 1. How to Speed Up Videos on Windows
Filmora makes it easy to speed up videos using your Windows device. Filmora is an all-in-one video editing software packed with tons of professional features. You can trim, crop, split, or merge your file in Filmora. In addition, there are countless advanced features like speed control, speed ramping, motion tracking, audio ducking, audio denoise, and an inbuilt equalizer. Not only this, Filmora has a tremendous catalog of built-in stock media (from Giphy, Unslash and Pixabay, filmstock, transitions, effects, audio tracks, and more. As a result, Filmora is a perfect pick for all of your video editing needs.
Now let's see how to use Filmora to speed up your video easily and quickly.
Step 1. Import Video
Import your video into Filmora by going to "File - Import Media - Import Media Files" or press Ctrl+I. Alternatively, you can also import media by dragging and dropping it on Filmora.
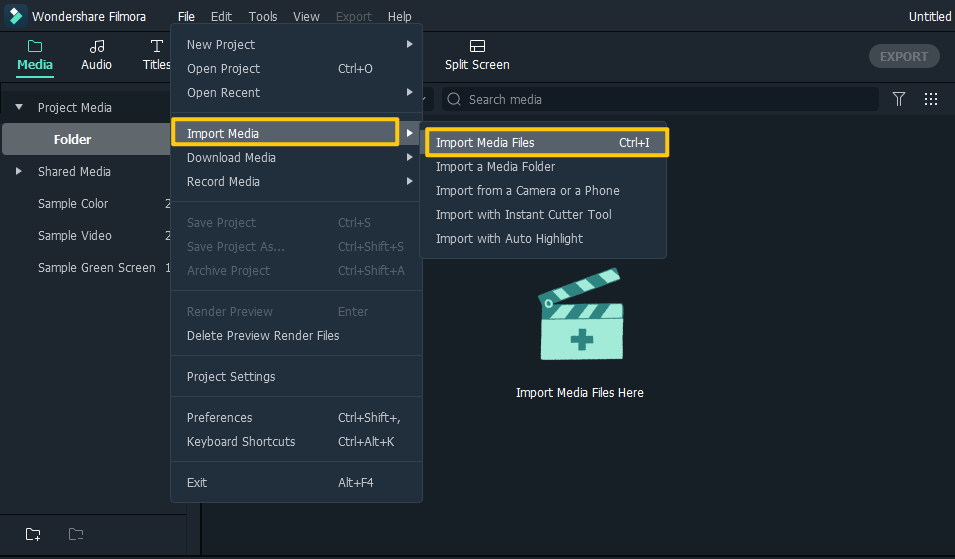
Special Tips: Filmora supports almost all the commonly-used video formats, including: AVI, MP4, MOV, MPG, VOB, WMV and more.
Step 2. Speed Up Video
Right-click the video - Choose "Speed" - Choose "Uniform Speed" - Set the video to the desired speed by adjusting speed or duration. Remember that the greater the speed, the shorter the overall duration.
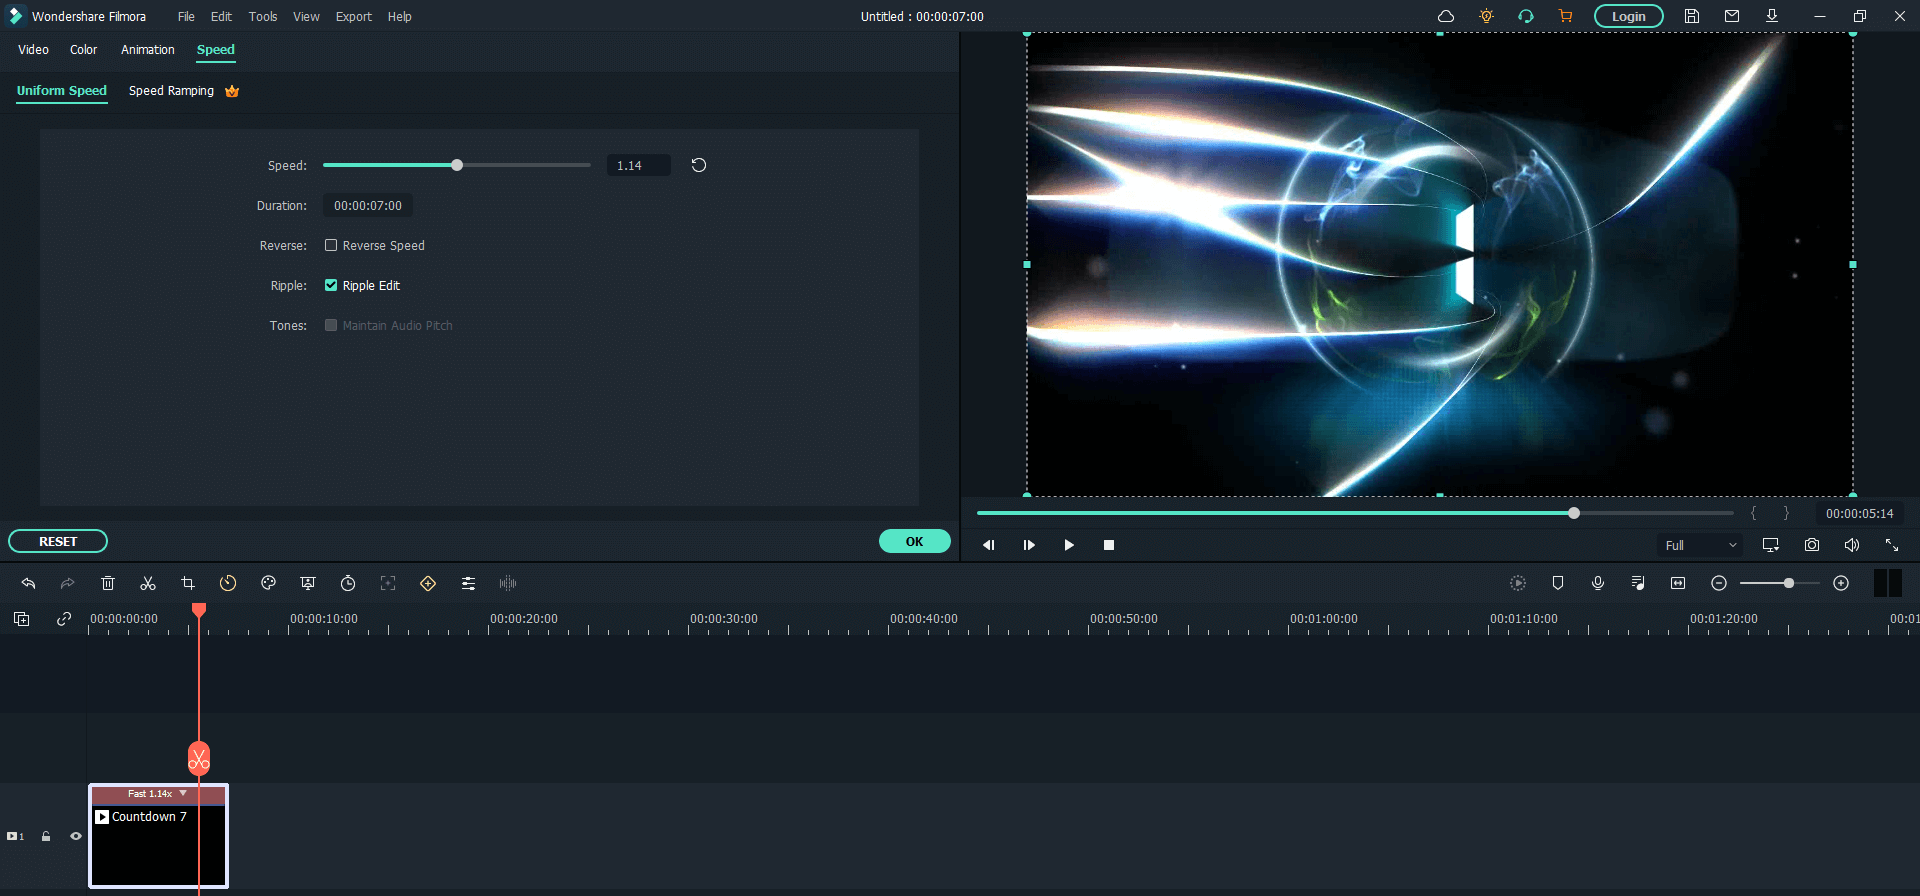
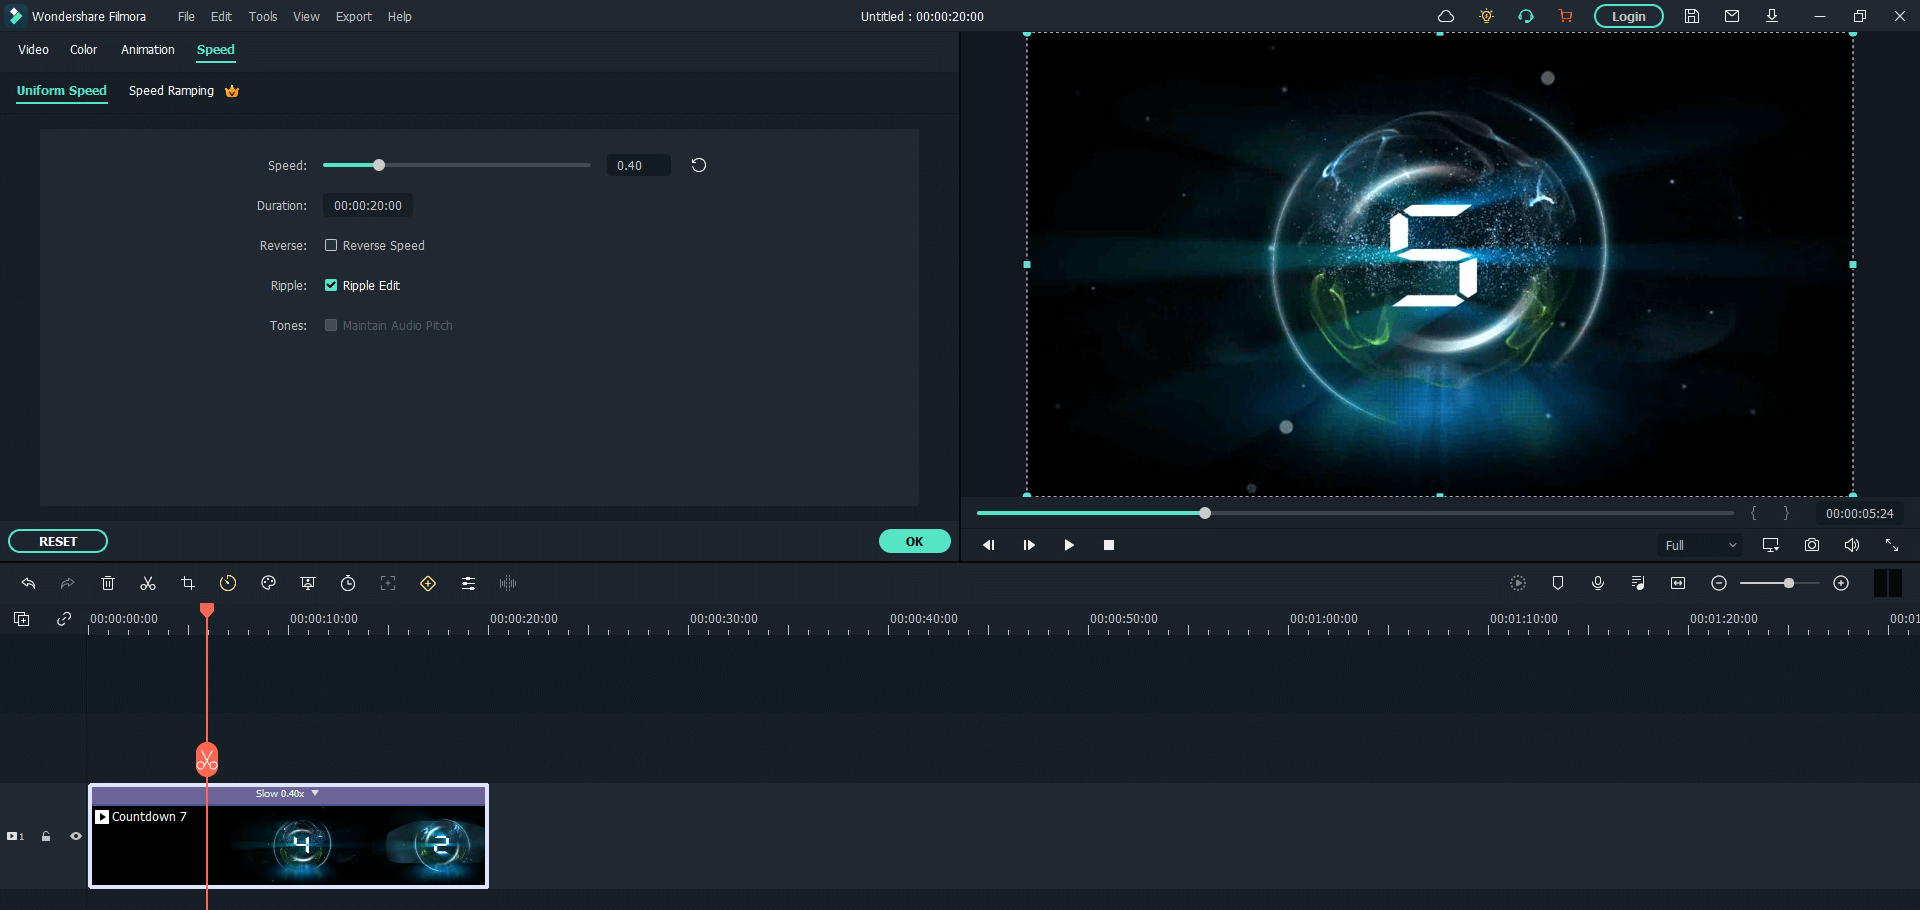
Special Tips: You can also slow down a video in the same way. The only difference is that you need to make the duration longer or the speed slower.
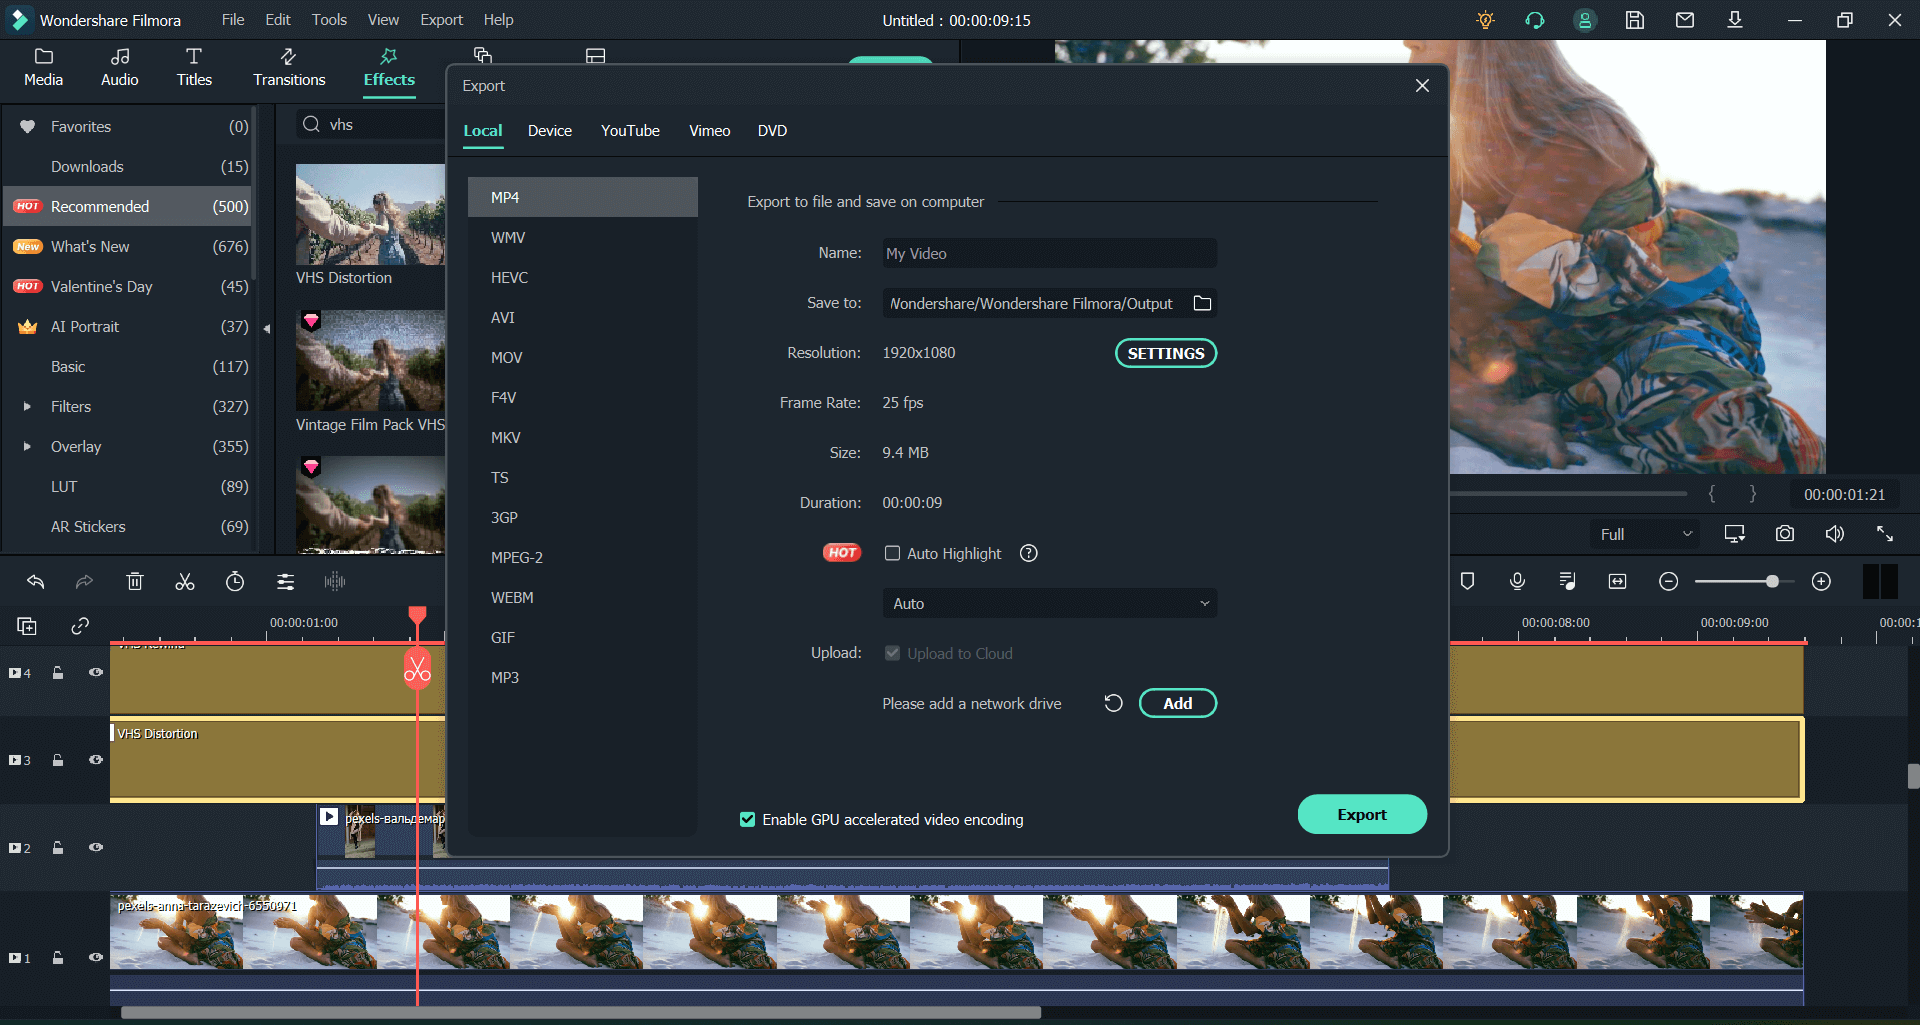
Step 3. Export the Video
Once you're all set, save and export your video. The video processing may take time according to the size of your clip.
Part 2. How to Speed Up a Video on Mac
It is basically the same if you use Filmora's Mac version on your Mac system.
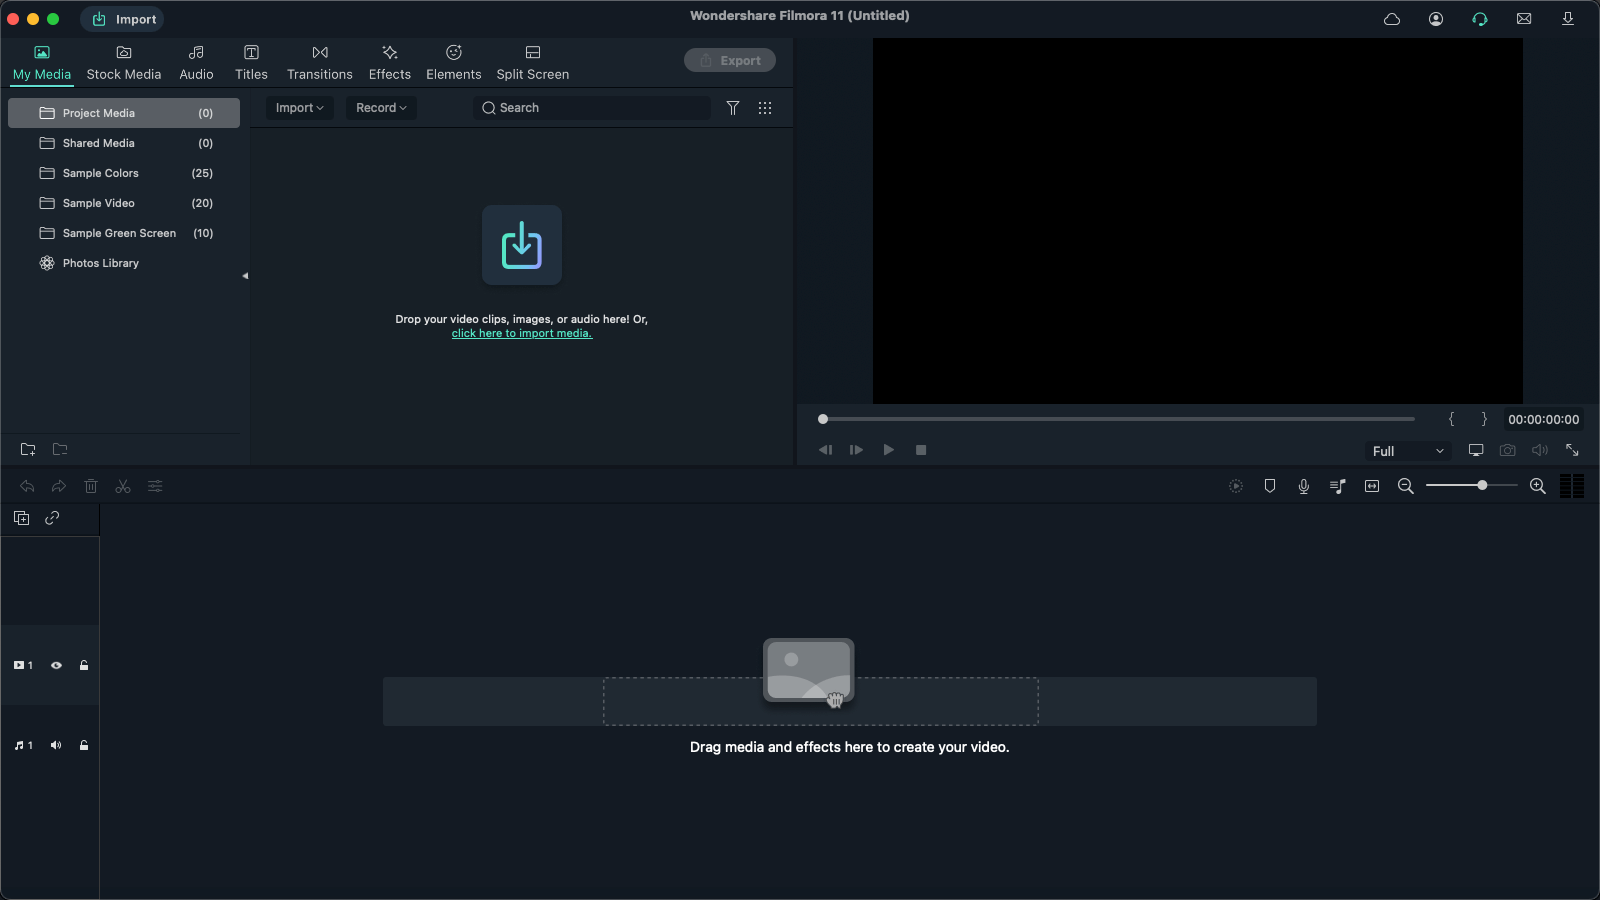
Step 1. Import Video
Import the video by dragging and dropping it on the project media or clicking the "Import" button at the top.
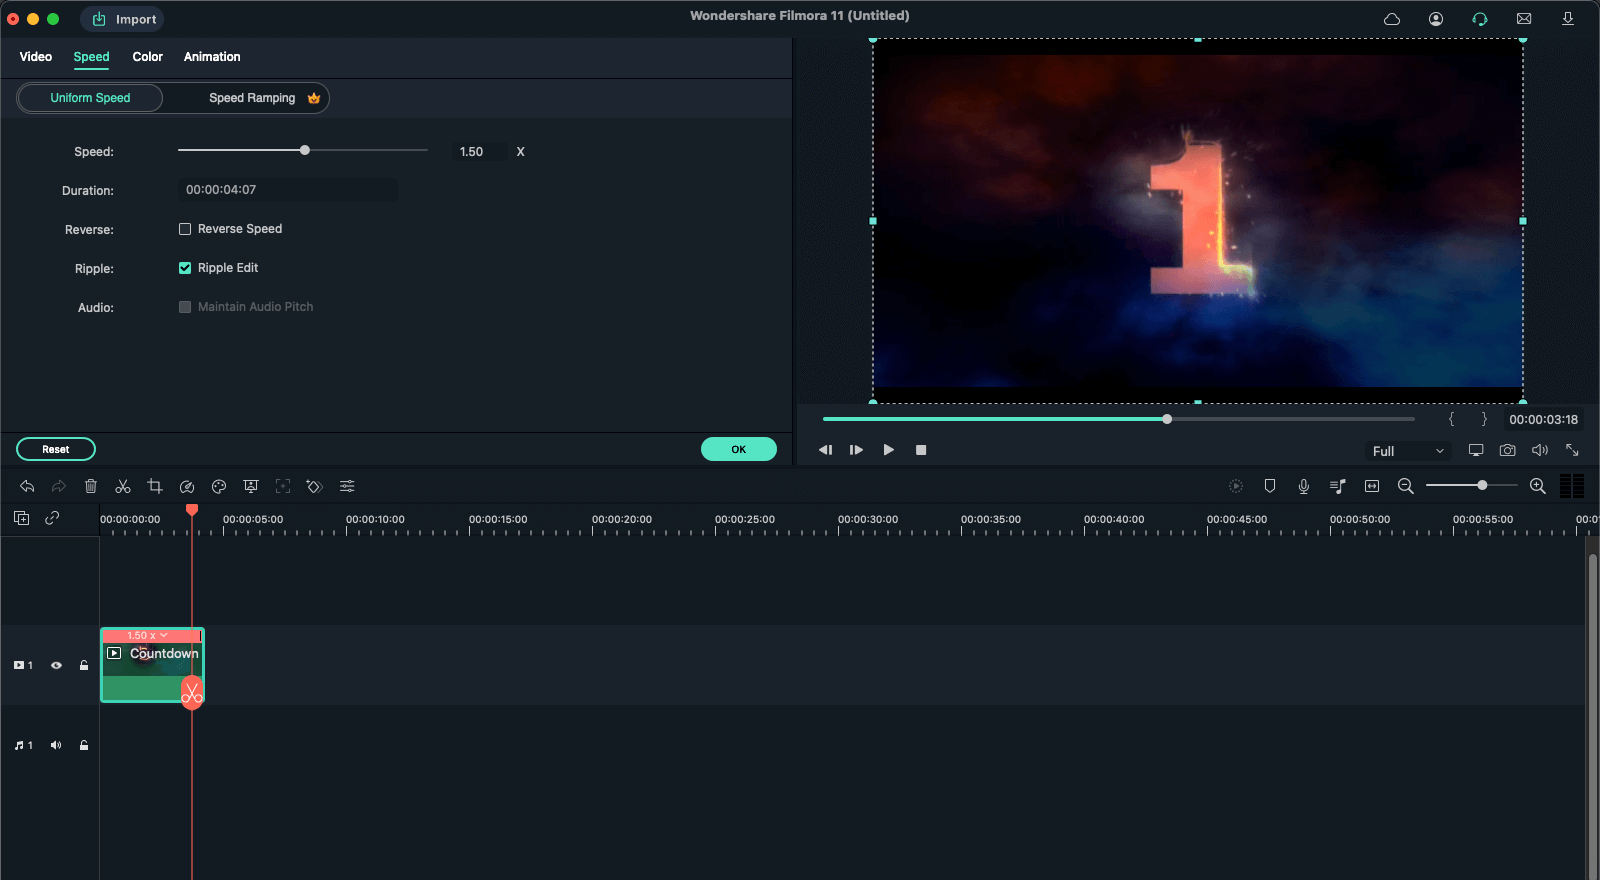
Step 2. Speed Up Video
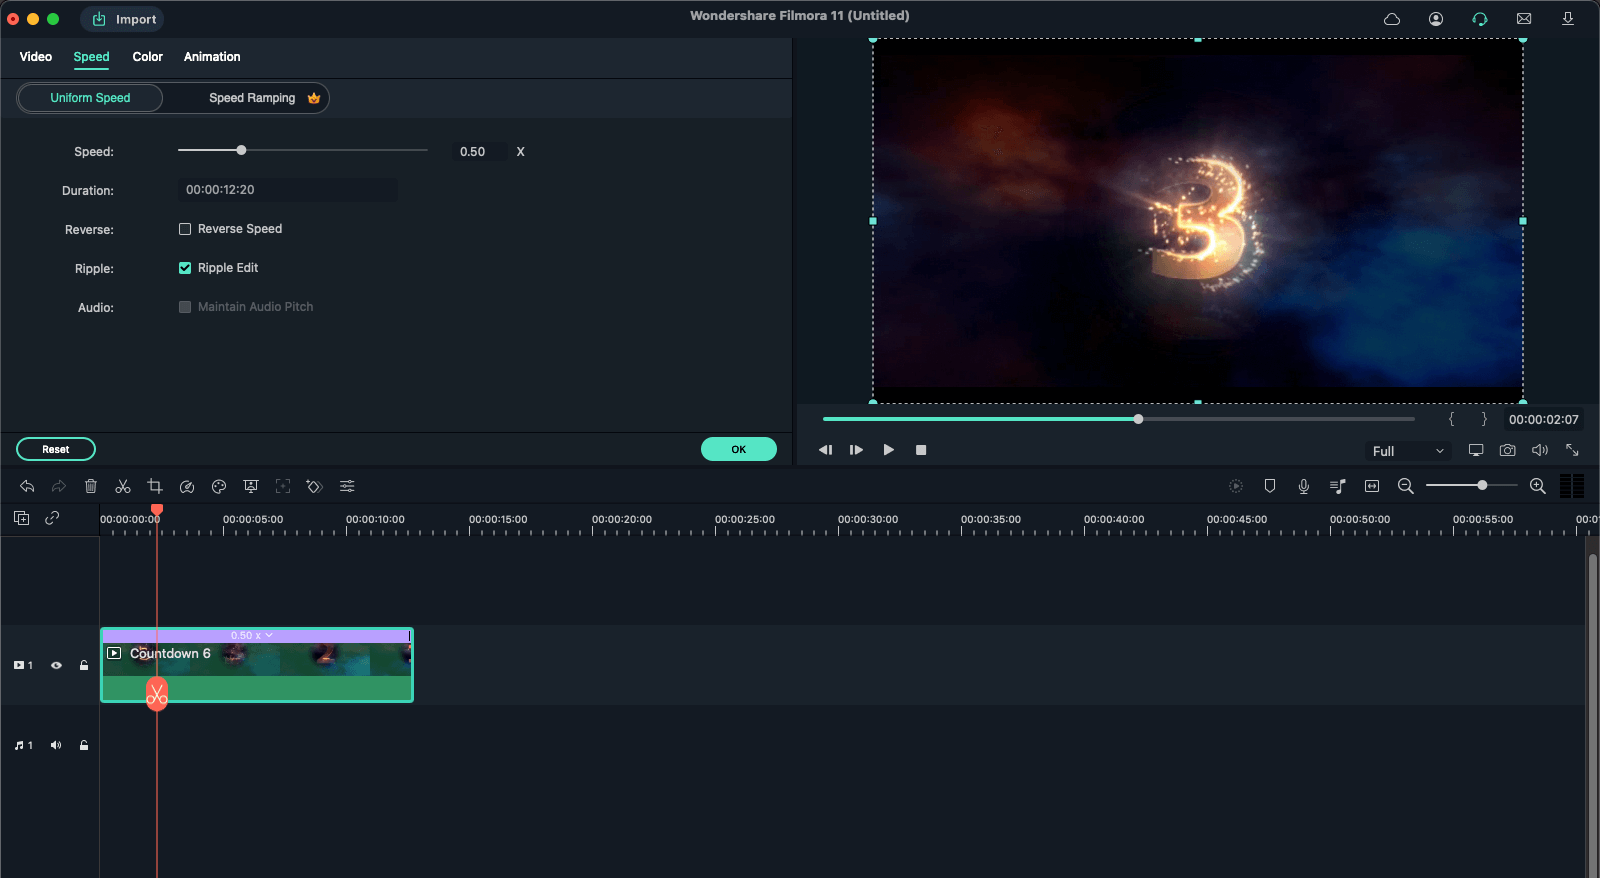
Right-click the video - Choose "Speed" - Choose "Uniform Speed" - Set the video to the desired speed by adjusting the pace or duration.
Special Tips: You can also slow down a video in the same way. The only difference is that you need to make the duration longer or the speed slower.
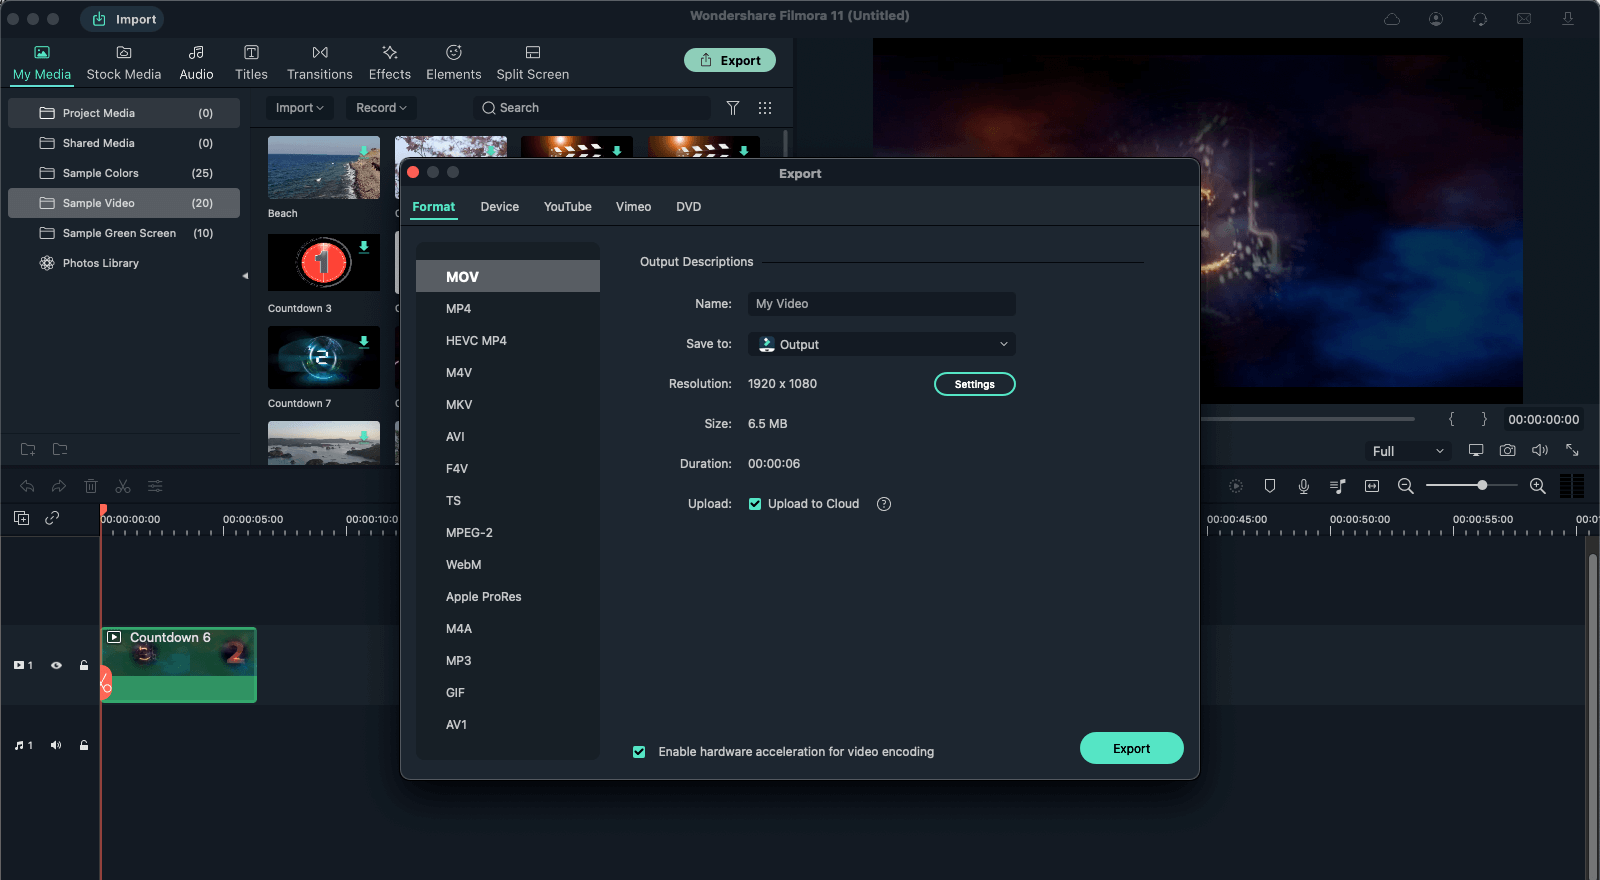
Step 3. Export Video
Export the file once you are satisfied with the output.
Part 3. How to Speed Up Parts of a Video
Have you ever noticed that speeding up or slowing down videos may ruin the audio? Well, we have a solution just for you. Speed Ramping is a feature in Filmora that lets you adjust your speed with keyframe control to make your clips more cinematic. It also preserves the audio quality of the clip. Here's how to use Speed Ramping in a few clicks.
Step 1. Import Video
As we said above, you need to import your video first.
Step 2. Apply Speed Ramping
To apply Speed Ramping, right-click the timeline clip and select "Speed - Speed Ramping." Once the presets panel opens, choose a preset and set it as per the duration of your clip. You can customize the presets if you want. Once you are satisfied with the results, press OK.
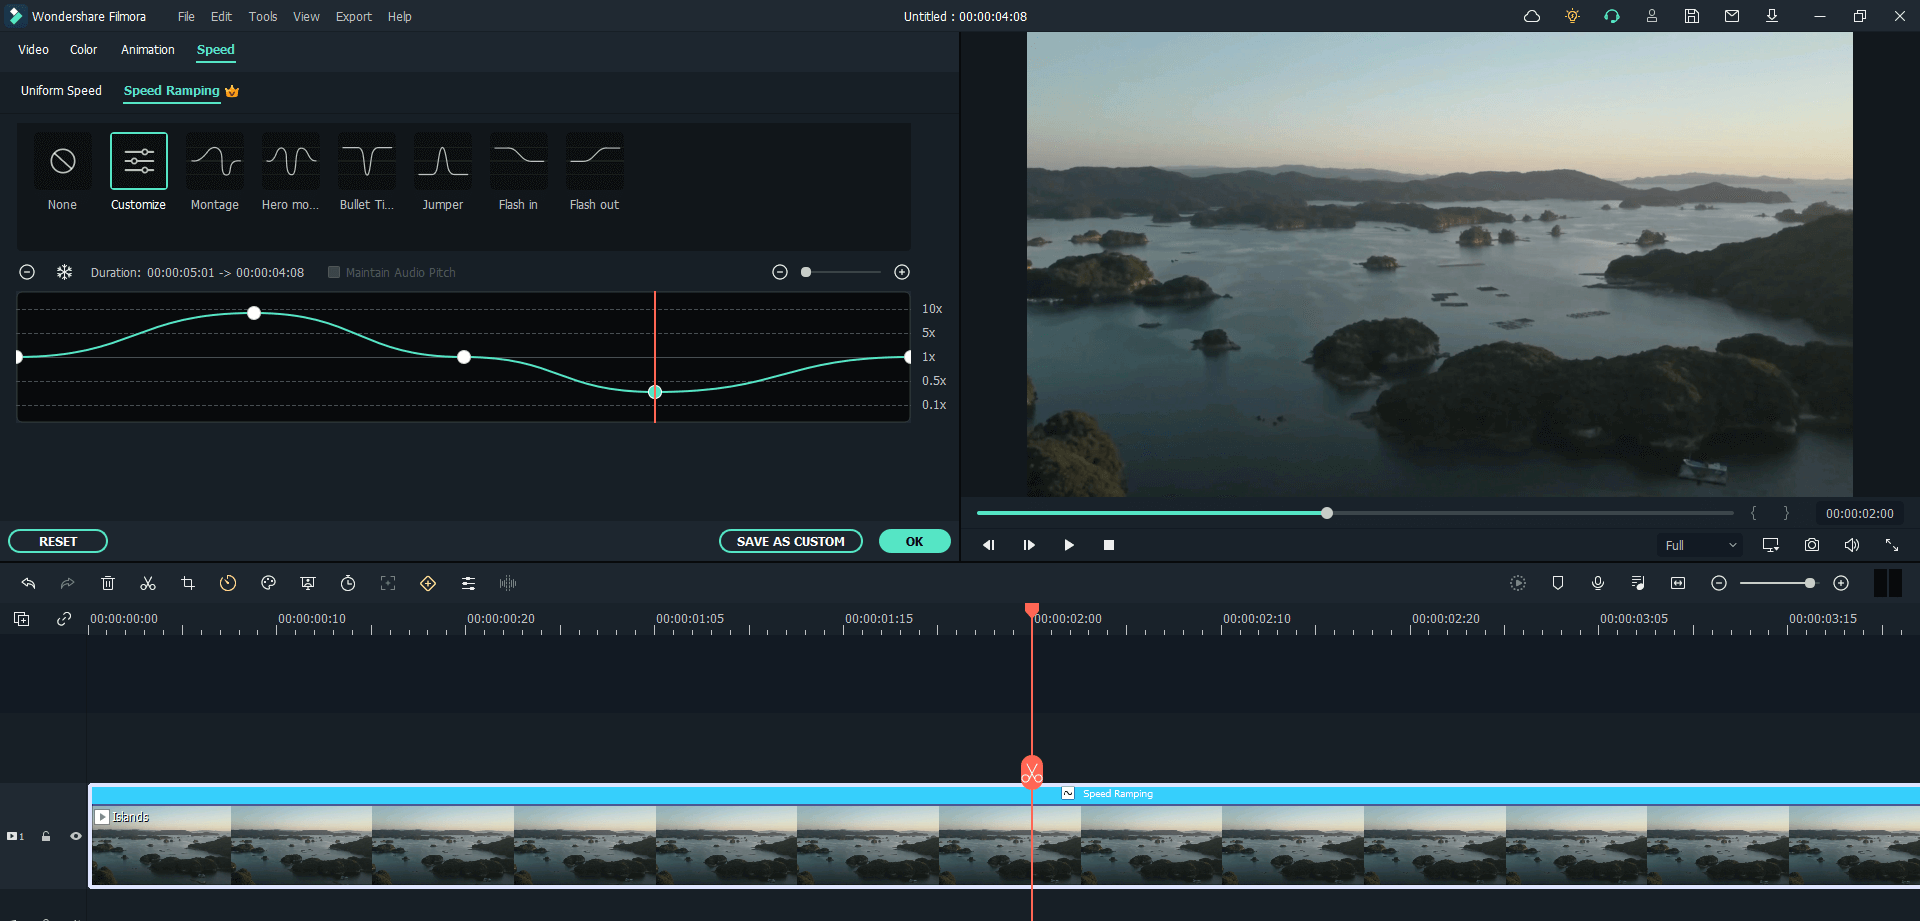
Special Tips: By speed ramping, you can speed up your video without changing pitch. So, it won't sound strange. To do so, check the "Maintain Audio Pitch" option in the Speed Ramping panel.

Key Features
- Best video editing software for beginner and semi-professional, that comes with powerful editing skills like trimming, splitting, rotating, editing, etc.
- 500+ free special video effects to customize and create an awesome movie by yourself.
- 1000+ standalone effects downloading resources to make videos in all kinds of styles.
- Record voice in real-time: you can have you voices recorded in realtime and instantly add them to the video files.


