If you want to split, trim or cut heavy video files and save them as smaller, less heavy clips, then you would definitely want the best video splitter. The Ultra Video Splitter is one of the most popular and widely used splitters in the market that enables you split, trim or cut video files into small parts. With Ultra Video splitter, you can split your videos automatically based on time per part, number of parts or by manually selecting the part to be cut. Once you download ultra video splitter, you can edit most of the video formats since it supports various formats. Even if you just need a video convertor, you can go for ultra video splitter free download and enjoy video conversion features without a video split.
- Part 1. How to Split Video in Ultra Video Splitter
- Part 2. How to Split video in Ultra Video Splitter Alternative
Part 1. How to Split Video in Ultra Video Splitter

To use Ultra Video Splitter to cut or split videos, follow the below steps:
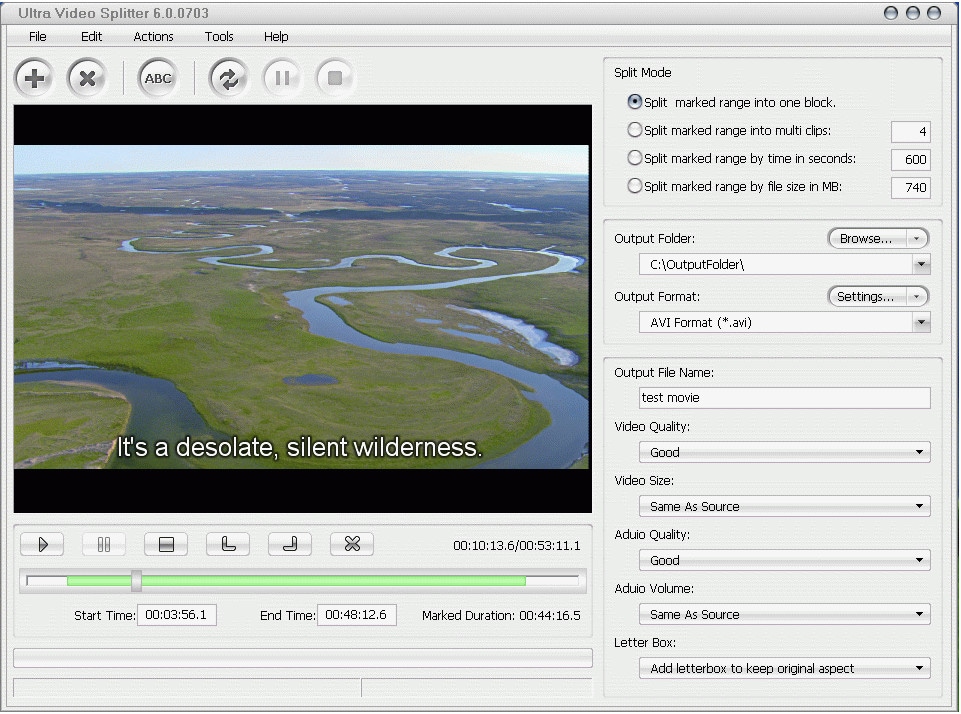
Step 1: Install and launch the program. Click Open” to import the video you want to split.
Step 2: Position the slide bar to choose where you want the new part to start from and then click “Mart Start Time” to mark the staring point. Move the slider bar till the point where you want the clip to end. Click “Mark End Time” to mark the ending point.
Step 3: Choose from the 4 splitting modes and any of the Output Formats given in the program. Click “Start Splitting” to split the file.
Step 4: Once Ultra Video Splitter displays Mission Completed, click “Open”; a sub-menu item ad you will be led to output folder where your split file is saved.
Though Ultra Video splitter is surely a great choice especially for the starters, yet the downsides it has, seem overweighing the strong sides and these include:
• Ultra video splitter often results in a jerky playback up to some extent, even though the source file is free from any such defect.
• Avidemux uses outdated interface that many users of today find difficult to work with.
• It sometimes cracks in Mac systems.
• It doesn’t have advance editing tools and some users reported hanging problems while working on a heavy file.
Part 2. How to Split video in Ultra Video Splitter Alternative
The Best Ultra Video Splitter Alternative

Filmora Video Editor is very simple to use and splits videos in a matter of seconds. It uses easy-to-use interface with high-profile video editing features, making itself suitable both for novice users and professionals to enjoy an enhanced video splitting experience. Filmora Video Editor is the best ultra video splitter alternative since unlike Ultra Video Splitter, it doesn’t affect the video quality while splitting it nor produces shaky results.
- Availability of basic and advance editing tools for video splitting, cropping, trimming and rotating.
- All features have been included in the main windows, saving user’s time.
- With Filmora Video Editor, you can play different scenes of a video at a time.
- Compatible for most of the video formats.
Steps to Split Video with Ultra Video Splitter Alternative
Step 1: Install and launch Filmora Video Editor
Download and install the program easily as per given on-screen instructions. The program will be launched once you finish installation. You can choose the option of “Full Feature Mode” to start editing videos.

Step 2: Import video to the program
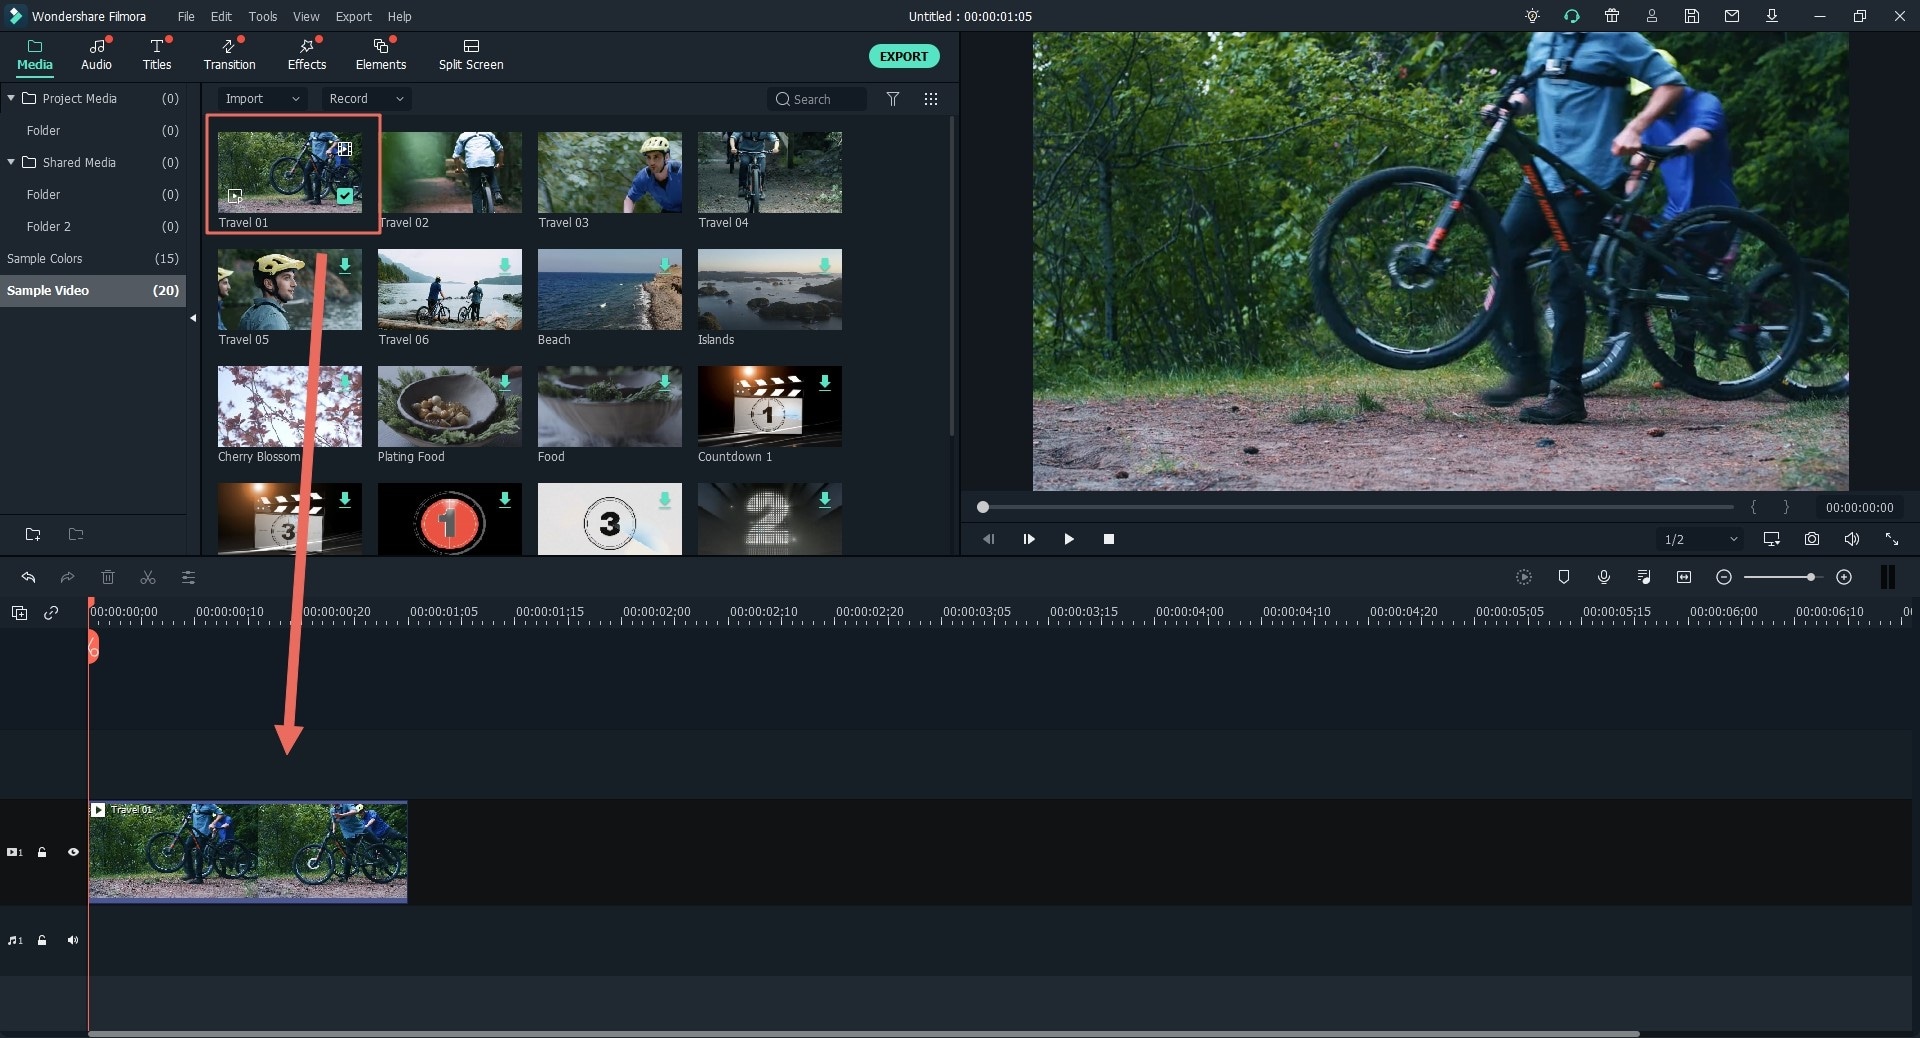
Go to main menu of the program and choose “Import” to put required file into program interface. Another option is to drag and drop the file.

Step 3: Split video into parts
Once your drag the video file into timeline, place the time indicator or slider on split position. Then choose “Scissor” option to split the video.

Step 4: Export the video file
Click “Export” to save the split file and delete the remaining parts. Your file will be exported. Save it to your system in chosen format or share directly to social media.


