Are tripods really essential for Vlogging?
Tripods are often large, heavy, and sometimes quite expensive. They can also be inconvenient to carry around. This makes many Vloggers think that they do not need one. However, a tripod is one of the most important pieces of equipment a good Vlogger needs. Therefore, finding the best tripod for Vlogging is a key step in your Vlog shooting. If you are unsure whether you should get one, here are the four main advantages of using a Vlogging tripod:
Image stabilization: A tripod ensures your camera is steady when recording. Handheld recording reduces image quality caused by shakes that make the video blurry. In contrast, a tripod puts the camera in a fixed position that produces better video quality regardless of the lighting conditions. Travel and outdoor Vloggers especially need a tripod to hold the camera steady when shooting time-lapse/long exposure videos, taking panoramic shots, or recording in strong wind conditions.
Self-recording: A tripod gives Vloggers the freedom of conveniently recording themselves even when Vlogging alone. When you want to record at an optimal height, shoot from a distance, or free your hands for a demonstration video, a tripod becomes an indispensable tool. It also allows the camera to be positioned at convenient angles that provide the viewer's best perspective. This is something that wouldn’t be possible if the camera was placed on a stack of books or a shelf.
Apply the best settings: When the camera is firmly seated on the tripod, optimal recording settings can be determined and applied for that shooting angle. In difficult conditions, such as in an unevenly lit room, the best picture quality can be achieved by finding and setting the right ISO values and filters for the camera’s position. In this situation, handheld recording often produces poor results as the camera is constantly struggling to focus and adjusting its aperture as the handshakes and the light level change.
Improved creativity: A tripod can really boost creativity by making you slow down and think about the shot you are taking. You will find you think more about getting the framing right by adjusting the background, the lighting, colors, angles, and more to get the best possible Vlog video. By taking the time to record more selectively and spending more time in the conception of the video composition, you will have less work with the editing and post-processing afterward.
- Part 1: Factors To Consider When Buying A Vlogging Tripod
- Part 2: Top 5 Vlogging Tripods In 2020
- Part 3: How To Choose Your Best Tripods For Vlogging
Part 1: Factors To Consider When Buying A Vlogging Tripod
Intended use: Whether a tripod is suitable for you depends on which device you are using and where you want to record your Vlogs. If you are a travel Vlogger that frequently goes on trips, the tripod should be not only light and compact but also be shock-proof and able to cope with uneven ground in the outdoors. However, if you need a tripod for home recording or travel less often, you can opt for a larger, heavier model. Another key factor is your shooting equipment, such as a Vlogging tripod for iphone or a tripod for Vlogging cameras.
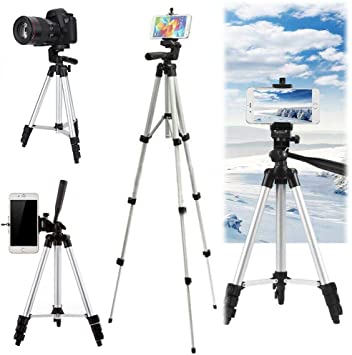
Price: You can get a good Vlogging tripod for as low as $20 tripods to as high as $2000. You should avoid cheap tripods below $20 as the quality is often quite poor, and you likely not use the tripod for very long. With proper care, a high-quality tripod will serve you for at least ten years.
Pack size: With compact travel tripods, the pack size can be between a portable 30 centimeters and up to 50 centimeters. Some models can fit well in a backpack, but almost always include a carry case to hold your vlogging tripod kit. With larger tripods, less attention is paid to the packing size, and the retracted tripod can 80 centimeters long or more.
Weight: In terms of weight, light carbon fiber material offers obvious advantages. Travel tripods, including the head, weigh between 1 - 1.5kg, a good transport weight. Bigger tripods that are constructed with heavier material are often double the weight. Many models weigh at least 2 kilograms, but over 4 kilograms making transport is more complex.
Tripod head: On the one hand, the tripod head must carry the camera securely; on the other hand, it should also allow convenient recording. Travel tripods are usually a spherical head. With a friction setting, the ball joint's resistance can be changed so that the camera does not tip over. The alternative is a three-way head, where all directions of movement can either be released or locked, which enables precise adjustment. For landscape shots, the head should have a separate panorama axis.
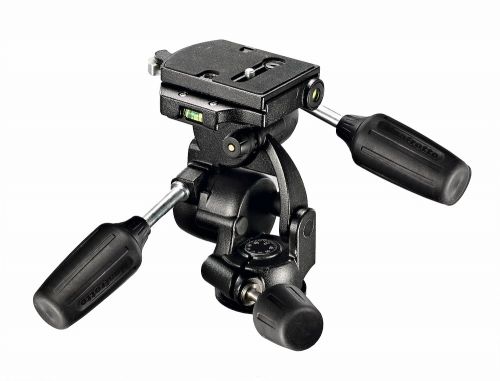
Center column: With the tripod legs extended, travel tripods reach a height of 1 to 1.5 meters. A working height of 1.7 or 1.8 meters is achieved due to the additional extended center column. This is a more economical way to adjust elevation. Models without a center column have longer tripod legs correspondingly, but this makes the tripod bulky and heavy, so this design is more suited to home or studio recording. An extended center column shifts the center of gravity and offers the wind more surface to attack, which harms stability. Good travel tripods are sufficiently stable, but only with larger models without a center column. Sometimes the center column can be swiveled, but this is usually only the case with large tripods.
Tripod legs: Tripod legs on travel tripods use a travel lock mechanism while larger tripods use clamp locks. Both are equally reliable. The material of many tripod legs is carbon fiber, but aluminum models are also available and mostly cheaper and heavier. Sometimes you can remove a tripod leg and convert it into a space-saving monopod. This can be practical, but a dedicated monopod still makes more sense.
Tripod feet: Padding or rubber tips on tripod legs are always an advantage as they dampen ground vibration. They also help to prevent the tripod legs from slipping on smooth surfaces. If you are an outdoor Vlogger shooting on rocky terrain, make sure that spikes are included in the accessories. If spikes are not included with your tripod, these are easy to find and can be bought later. Note that there are different kinds of spikes you can get. Some are specially angled so that the tripod can be more securely positioned. You can also buy other special accessories, such as plates, to prevent your tripod from sinking in the snow.
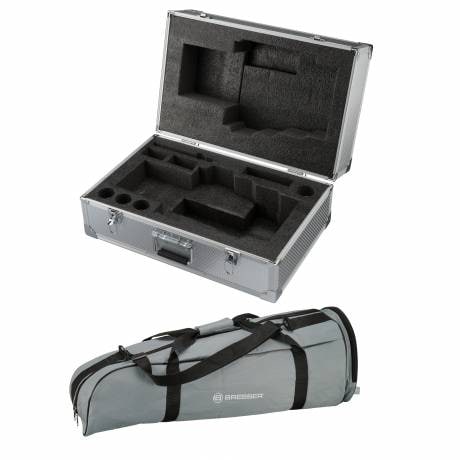
Accessories: The standard accessories for tripods include assembly tools and a carry case. Where required, consider getting extra accessories with your tripod. Examples may include a short center column that enables recordings at lower elevations just above the floor. You may need a second quick release plate, replacement rubber feet or spikes, or smartphone mounts.
Part 2: Top 5 Vlogging Tripods In 2020
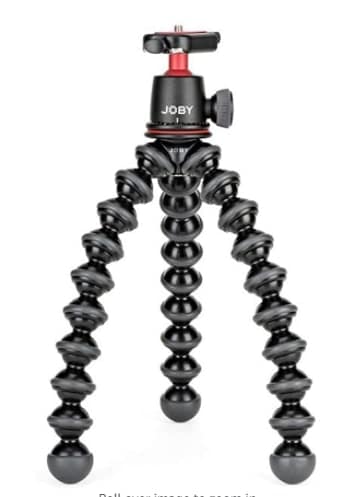
With a load capacity of up to 3 kg, the GorillaPod 3K offers a simple holder for a compact DSLR, mirrorless system camera, or heavier flash units. It is robust enough to hold several video lights or microphones with JOBY's accessories. Coupled with the high-quality 3K ball head with panorama function, it enables precise alignment. Its size makes it the ideal tool for Vlogging.
Specifications
• Material: Plastic.
• Load Capacity: 6.6 lb / 3.0 kg.
• Head Type: Ball Head.
• Dimensions: 7.0 x 6.5 x 6.0 cm.
• Weight: 8.7 oz / 247 g.
• Price: $49.48.
#2: Manfrotto Compact Advanced
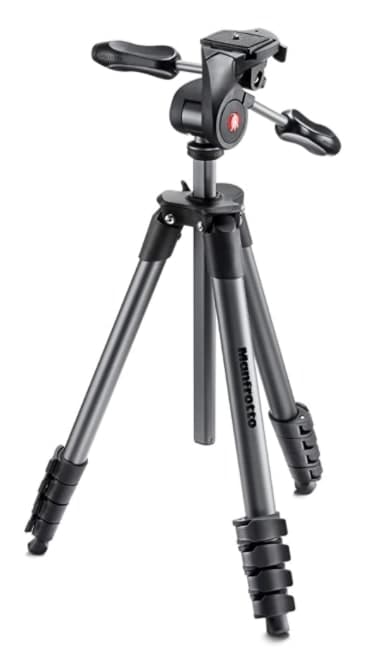
This tripod is equipped with a three-way head with independent control for locking movements separately. It has foldable knobs for maximum compactness, quick coupling for quick installation, and a padded bag is included for increased portability. The Compact Advanced also has a foldable three-way head for high stability and accuracy in image composition. The three-way head has two independent, ergonomic knobs. Both pan and tilt movements are controlled with one, while the other controls were smoothing. With these two joysticks, you have precise control of the camera’s movements.
Specifications
• Material: Aluminum Alloy.
• Load Capacity: 6.6 lb / 3 kg.
• Head Type: Pan & Tilt Head.
• Dimensions: 13 x 13 x 51 cm.
• Weight: 3.1 lb / 1.4 kg.
• Price: $102.77.
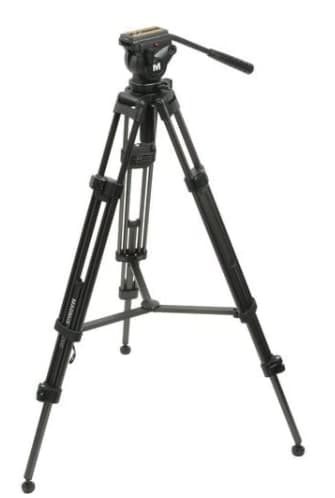
The Magnus VT 4000 is a robust and durable tripod. It is equipped with ‘stage-opening’ legs, allowing users to be more creative with shooting angles. It features a fluid head that has a half-ball mount with dual pan bar mounts. The quick-release plate enables quick and easy mounting of cameras. This relatively cheap Vlogging tripod offers good value.
Specifications
• Material: Anodized aluminum.
• Load Capacity: 8.8 lb / 4 kg.
• Head Type: Ball Head.
• Dimensions: 31.1 x 6.5 x 6.6 inches.
• Weight: 7.9 lb / 3.6 kg.
• Price: $159.95.
#3: AmazonBasics 50” Lightweight
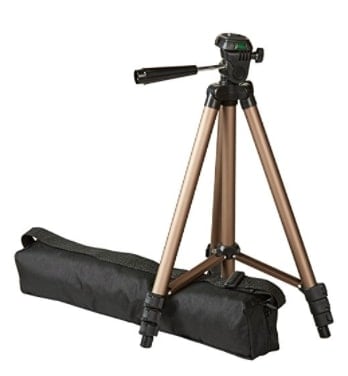
This tripod from retail giant Amazon is one of the best lightweight tripods available today. The Amazon Basics product is quite light but sturdy enough to support almost 1 kg, which is great if you are recording with a smartphone and work with a DSLR camera. It comes with a pistol head grip that is easy to use and features a quick-release plate to save time when mounting or dismounting your camera.
Specifications
• Material: Aluminum.
• Load Capacity: 2.1 lb / 0.95 kg .
• Head Type: Pan & Tilt Head .
• Dimensions: 42.5 x 8 x 8 cm.
• Weight: 1.25 lb / 0.57kg .
• Price: $16.
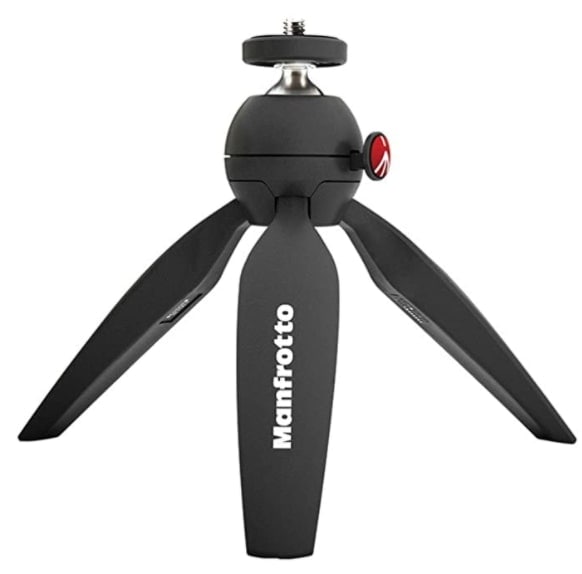
The Pixi Mini has two leg angles that ensure optimal stability. The camera can be tilted by 90 ° for portrait shots. Thanks to the robust construction made of aluminum and Adapto, the tripod is particularly reliable. The two-leg segments can be pulled out in five steps to compensate for height differences on uneven surfaces. The push-button mechanism enables you to position and locks the ball head quickly and intuitively.
Specifications
• Material: Plastic, Stainless Steel.
• Load Capacity: 2.2 lb / 1 kg.
• Head Type: No head.
• Dimensions: 7.3 x 3 x 3 inches.
• Weight: 8.2 oz / 0.23 kg .
• Price: $19.95.
Part 3: How To Choose Your Best Tripods For Vlogging
• The GorillaPod 3K from JOBY is the ideal tripod for all types of Vloggers. It can be used for indoor recording, and its compact size allows you to conveniently pack the tripod in your backpack when going on a trip. This tripod is useful in all situations where you need a compact camera tripod, such as in low light conditions or macro shots in nature. It is the only camera tripod featured here that is flexible enough to stand in different positions.
• The Manfrotto Compact is a high-quality, compact tripod that is suitable for beginners. Its high functionality and modern design characterize this tripod model. If you are a beginner or intermediate level Vlogger, the Manfrotto Compact Advanced can help you develop your skills and make full use of your creative energy.
• The Magnus VT-4000 is aimed at amateur Vloggers looking to gain some experience and find more information about the product and its features before making a final buying decision. Though you can also shoot stills with it, this is not a tripod that would be ideal for that kind of work. But if you like to make videos with your DSLR and don’t have a lot of money to invest in a tripod, this is the one to go with.
• The AmazonBasics 50 Inch Lightweight tripod offers great value for the price and is suitable for Vloggers on a tight budget. Its solid, sturdy frame is capable of holding any equipment then you are likely to use. Although light, this tripod is not the best choice for travel and outdoor Vloggers. Its length makes it inconvenient to carry around. While buyers are generally advised to avoid tripods costing less than $20, you can safely make an exception with this tripod.
• The Manfrotto PIXI Mini is the perfect mini tripod for compact cameras and smartphones. It is light, portable, and easy to use. It can be used with entry-level DSLRs and devices weighing up to 2.5 kg. The PIXI is best suited for smartphone Vloggers because of its small size. Users can close the tripod legs to use them as handles for hand-held camera pans.
Conclusion
After choosing the Vlogging tripod that suits you, you need to select your shooting equipment and consider editing your Vlog video. When everything is ready, you can immediately start making your Vlog video. But at this time, a good video editor is essential for you. Filmora Video Editor is your best choice.

Filmora Video Editor
Filmora Video Editor is the best alternative to Windows Movie Maker. It has everything you need to control the video.
It makes it easy to make any type of your own professional video or Vlog with various visual and audio effects, including filters, transitions, overlays, custom titles, and elements.
Key Features of Filmora Video Editor:
- Filmora has a series of creative features, such as the ability to add overlays and filters to enhance the appearance of the video. The program also allows you to add titles, text, transitions, and motion elements.
- More than 1,000 special effects can easily create Vlog video clips, including transitions, filters, customized titles, text, overlays, elements, etc.
- Includes various basic functions you wish to use in a video editing app, such as speed control, noise removal, framing preview, and color tuning, to mention a few.
- Hand-picked filters, overlays, dynamic graphics, titles, intro/credits to improve video quality according to your needs
- Save the video in popular formats, such as MP4, MOV, M4V, FLV, etc. Or share the resulting video directly from the program and upload it to YouTube and Vimeo.


