For most professionals, the most efficient way to create a high-quality video is to have a foundation they can build on. Audio ducking is one of the tools that make an editor’s job easier and more efficient. While some editors may not be familiar with this powerful feature, it offers so many different possibilities for those who are willing to learn how to use it.
Audio Ducking allows the editor of the video to modify audio volume to make room for audio with greater importance (such as narration, sound effects, or dialogue), lowering or raising the volume of audio that is not as relevant - like background music or ambient noise. As a result, videos look more impressive and presentable to the users!
Here are some situations (under which audio ducking will be helpful) that Youtubers/vlogger might encounter when they create videos:
- 1. When the editor wants to make sure the dialogue is clear and understandable while also making room for music/sound effects.
- 2. When multiple background sounds compete for the viewer’s attention.
- 3. When the editor wants to raise or lower the volume of certain background sounds (such as wind, music, or ambient noise).
- 4. When there is too much dialogue and an insufficient amount of sound effects/ambient noises.
- 5. When one sound effect does not sync with the video!
Not just for Youtubers and vlogger, audio ducking is a powerful tool that can be used by anyone who creates videos professionally or for entertainment purposes! It can help create a more professional-looking video with an optimal level of sound clarity.
- Part 1. How to Use Audio Ducking Quickly Fade Music Video with Filmora: A Step-by-Step Guide
- Part 2. Best 5 Youtube Intro Makers for Youtubers
- Part 3. Top 5 Free Online MP4 Video Editors
- Part 4. Conclusion: Which One is Better?
Part 1. How to Use Audio Ducking Quickly Fade Music Video with Filmora: A Step-by-Step Guide
Getting excited? Wondering how it is possible? Well, technology’s been advancing quite a lot, with everything available at a single click, so it's pretty easy now! Filmora is a video editing software that is extremely simple and easy to use and has numerous features, whether it be themes, stickers, titles, intros, outros, audio ducking and even more for the person video you have in your mind!
We have prepared a step-by-step guide for you to make it even easier!
Step 1: Import Video/Footage and Edit all that you want!
The first step is to import the video to which you want to apply audio ducking; simply drag and drop them into the media library. Or you can also click on shared media. Further, click on Import Media and choose the file you want to add. Or, if you’re already editing your video, select the clip!
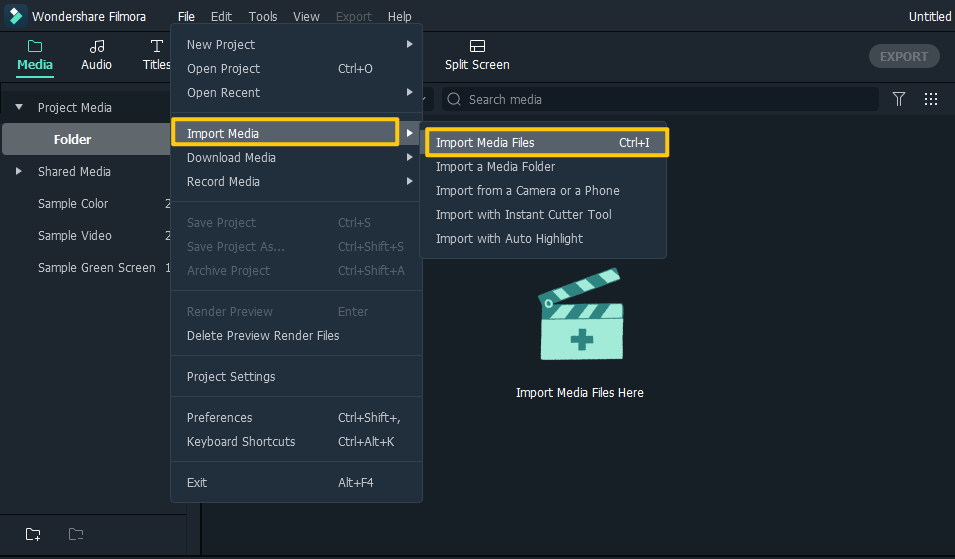
Once you’re done with importing the video, edit it how it suits you and add some background music as well, now let’s apply audio ducking!
Step 2: Apply Audio Ducking
Then, select the specific clip you want to Audio Ducking to. You can also select multiple clips by holding ctrl and select. Right-click on the clips and click on adjust audio in the pop-up menu. Now check Ducking and adjust the audio!
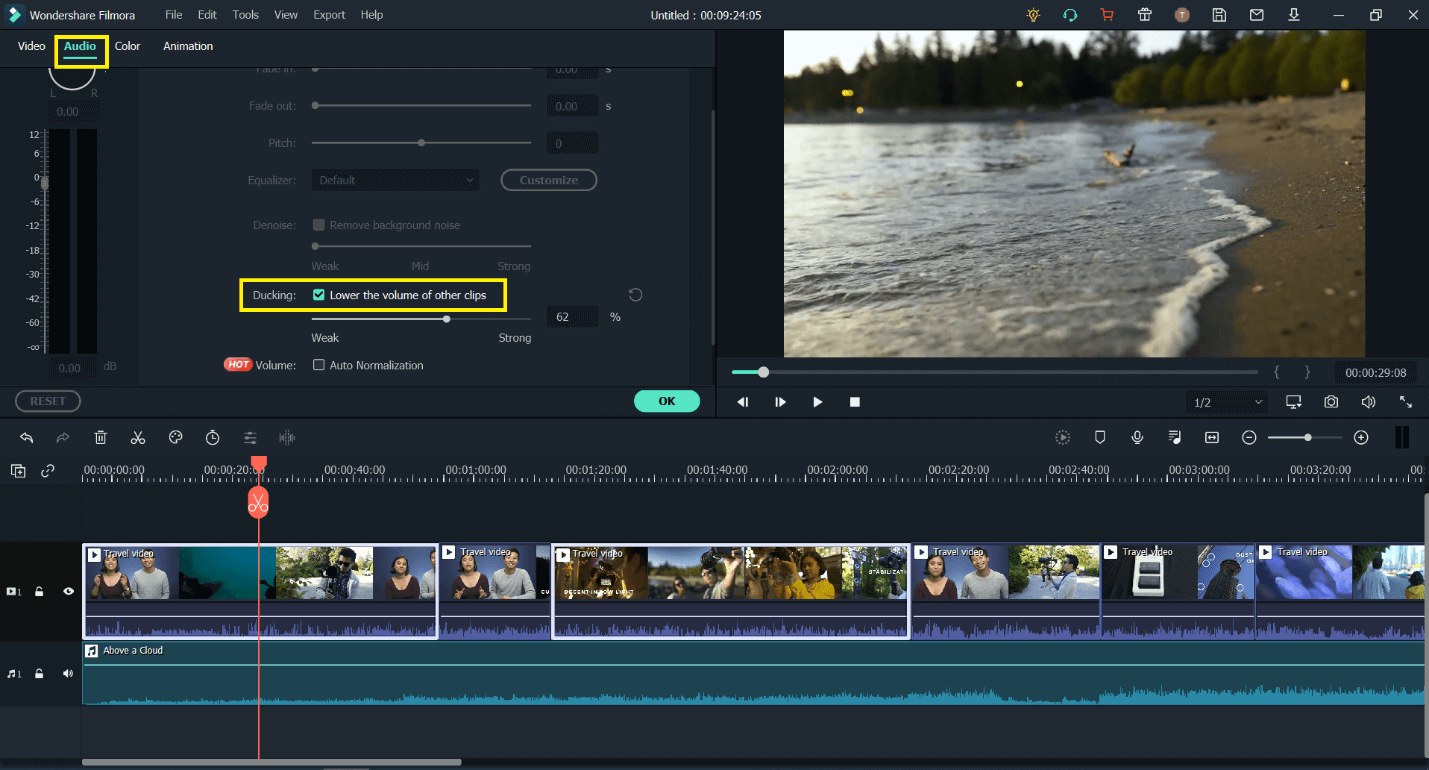
Step 3: Adjust Audio
Now that Audio Ducking is activated, you can adjust the audio by the scale of weak, mild and strong, the higher the number, the lower the background music will be in the selected area!
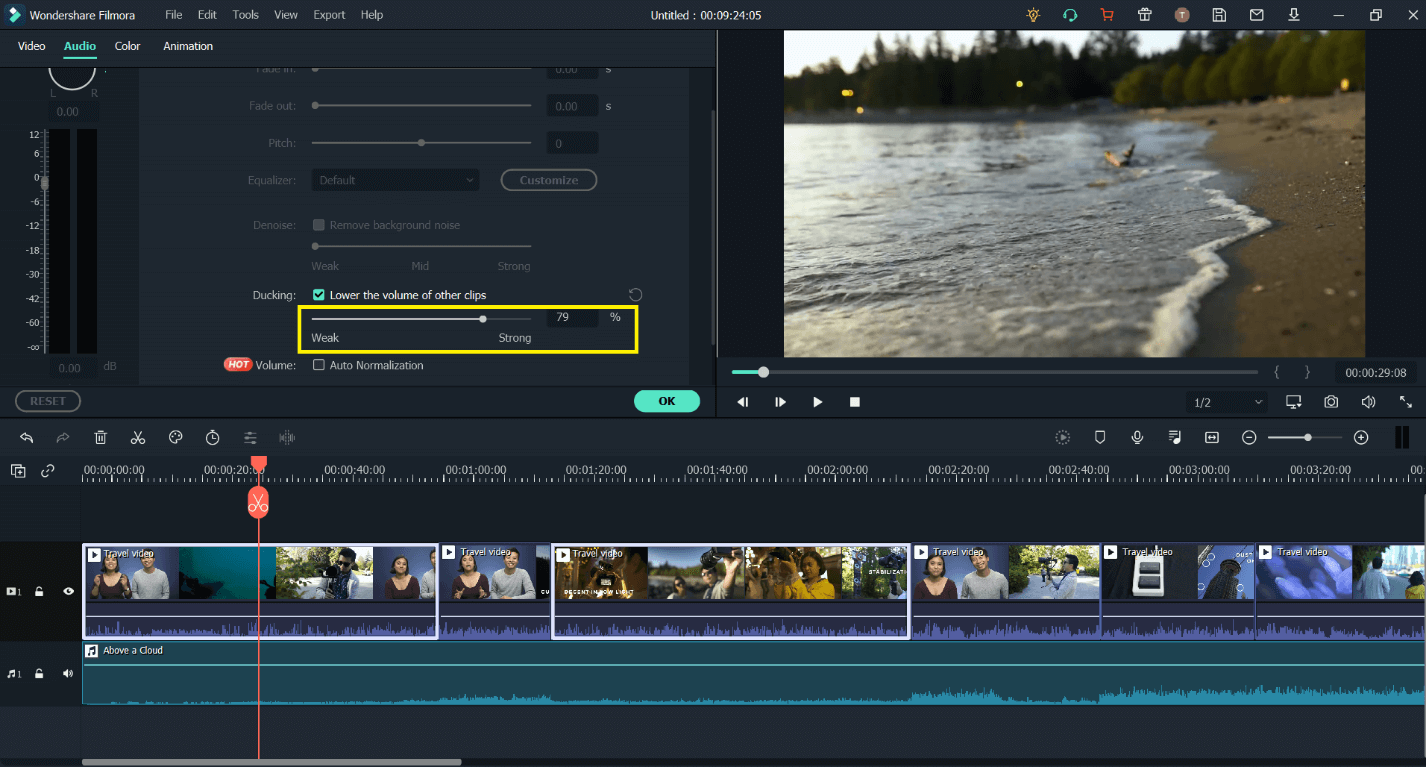
Experiment with adjusting the audio and check which scale is perfect for your video! and you’re done!
When experimenting, you can also check out the other powerful audio editing features in Filmora, such as beat detection, audio equalizer and muting a video!
Beat Detection:
Beat detection allows you to detect the upbeats and downbeats of music and will help you align your clips with the music-making the flow smoother and exciting!
In the media library section, simply right click on the music file and select beat detection. Once Filmora is done with the magic, you’ll see a thumbnail on the clip, and the downbeats will appear. Right-click it again and click on beat edit, uncheck ‘only mark highlight beats’ and click okay, now drag the music file to the timeline, and you’ll see red and blue markers, red are downbeats, and blue are upbeats, only align your clips on the markers and check out the fantastic result!
Audio Equalizer:
The Audio Equalizer is a tool that enables you to bring out or soften high, mid, or low tones in the audio recording, highlighting certain sounds and hiding others. This will also help when editing a vlog when you want the music to lower automatically when someone is speaking.
Double-click the clip, and you’ll see the editing pane open; click on the audio, and it will open the audio settings. Next, click on the equalizer and hit customize; ten sliders will appear. The ones at the left are for low tones, the ones in the middle are for mid-tones, and the ones at the right are for high tones. You’ll need to experiment here again to suit how well pulling down a few on the left/mid/suitable impacts your video. Select the options that sound well with the video and you’re done!
You can also use the de-noise tool to help remove background noise!
Mute a video:
When you don’t want certain audio in your video, it's better to remove it or mute it. In Filmora, you can do this with just one click! Right click on the clip in the timeline and click on detach audio. This will send the audio in the audio timeline. From there, you can delete it or mute it, or bring down the beats, see what works well with your video!
Part 2. Best 5 Youtube Intro Makers for Youtubers
There are many video editing software on the market today. Some are professional-grade products, while others are products for people who want to create a simple video from their footage. Let’s look at five different video editing software - each with audio ducking features!
1. Windows Movie Maker
Windows Movie Maker is part of Microsoft's Windows Operating System and is a free program, and audio ducking is also available in Windows Movie Maker. You can add background music or even an audio narration to your video using Windows Movie Maker. It can easily be used to create YouTube videos with sound over the top of background music to give a narrator's voice.
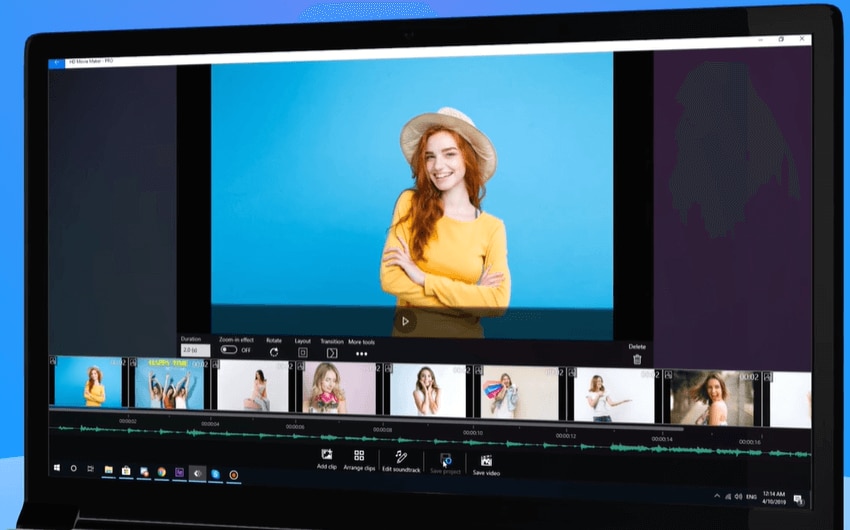
Pros of Windows Movie Maker:
Windows Movie Maker is very easy to use, even for beginners with no experience in video editing software.
It only requires the computer's operating system to function without installing any additional programs or applications.
It allows you to easily save your videos in different formats your desired use for them.
Cons of Windows Movie Maker:
It is only compatible with Windows operating systems, which cannot be used with Apple computers or other non-Windows devices.
Pricing:
Windows users can use Windows Movie Maker for free.
2. Adobe Premiere Pro
Adobe Premiere Pro follows on the list. It is a popular name when it comes to video editing software available in the market. This is a professional-grade product that will give you all of the tools you need to edit your videos. One of these features is audio ducking for background music or sound effects when speaking or any other type of audio is occurring at once.
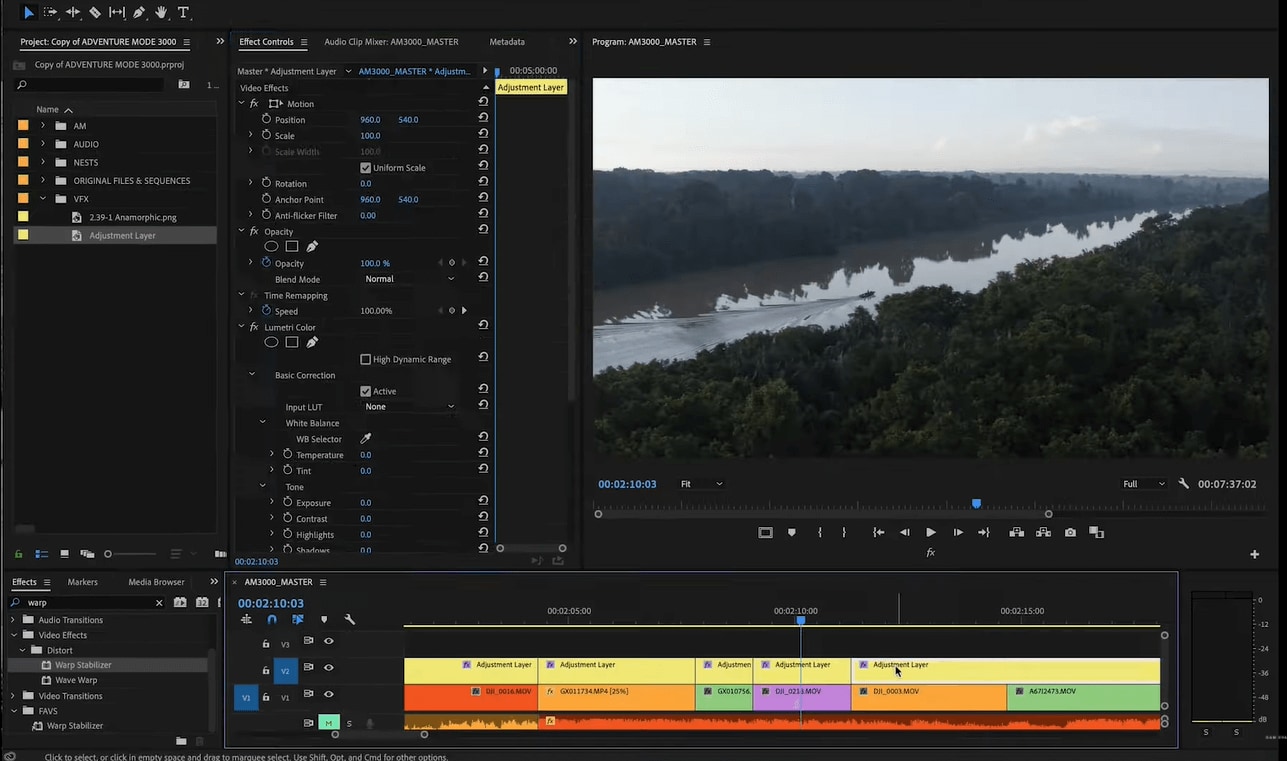
Pros:
Ability to edit in SD, HD, and UHD formats.
It uses Adobe Mercury Playback Engine for better video editing performance.
Ability to edit up to 99 video tracks in UHD resolutions with real-time effects!
Intuitive interface - is similar to other Adobe products like After Effects or Photoshop.
Cons:
It can be difficult to learn how to use this software if you have never used one before, and it's even harder for someone who does not know anything about video editing.
Adobe Premiere Pro is not very stable. If the software crashes, it can corrupt your project files and make them unusable.
Pricing:
Premiere Pro is now subscription-only. It costs $20.99 per month.
3. Final Cut Pro X
Mac users would be familiar with Final Cut Pro X. It is video editing software by Apple used to edit movies and TV shows. Besides the many features that Final Cut Pro X offers, it also provides a wide array of editing options for audio ducking. Additionally, it eliminates the need to use other software such as After Effects, Motion, or Compressor.
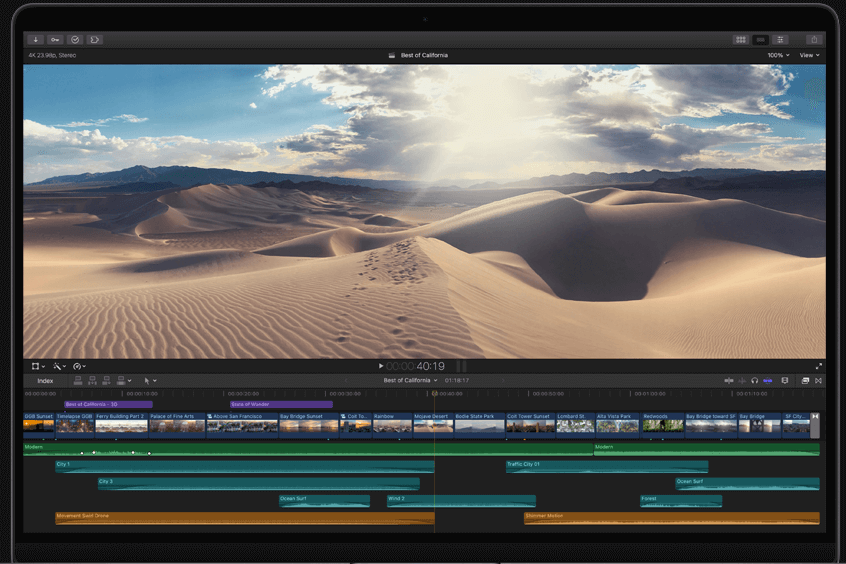
Pros:
It's very easy to learn how to use.
There are a lot of resources online for learning.
Similar UI to iMovie, but with extra features like XML and OMF support!
Cons:
Several limitations when exporting make it difficult to work around.
Many online resources don't provide information on how to work around these limitations.
Pricing:
Final Cut Pro is $299, and the license is for 6 years for the latest version.
4. Sony Vegas Pro
Sony Vegas Pro is popular video editing software that includes different functions from titles to transitions. It records scripts while you edit, which helps when you need to add any text in the future, very useful for tutorials! They have a paid pro version, including a sound mixer, effects, and color correction option. This software also provides an audio ducking feature, making video editing much more enjoyable!
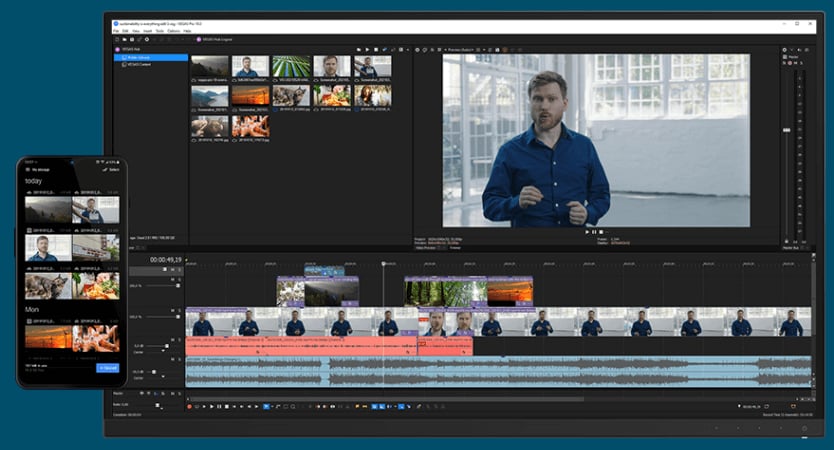
Consider these pros:
You can work on up to 999 tracks at once (and any number of individual timelines).
The effects are live, meaning you can see what the final product will look like as you put it together.
You have access to a vast toolset that includes text titles, professional-level color correction capabilities, advanced audio tools, and more.
It's got powerful rendering functionality for creating broadcast-quality videos!
Cons of Sony Vegas Pro:
This is strictly a Windows application (although there are plans to release a macOS version in the future).
You'll need at least four gigabytes of RAM to get the full benefit of what Sony Vegas Pro can do!
You'll need top-tier hardware if you want your projects to render quickly.
Pricing:
$19.99/month and $29.99/month!
5. Filmora Video Editor
Filmora X is another well-known name that supports and provides an audio ducking feature. New features in Filmora X make creating fantastic video even easier, resulting in excellent output and outcomes that every video maker can enjoy. Filmora X is packed with many advantageous features, and they have a broad audience on their platform. Do check them out!
Pros:
Cheap, easy to learn, basic to advanced effects. Unlimited Features!
Cons:
A lot of filters are locked, so you need to purchase them.
Pricing:
$39.99/year and $69.99 for a lifetime.

Key Features
- Best video editing software for beginner and semi-professional, that comes with powerful editing skills like trimming, splitting, rotating, editing, etc.
- 500+ free special video effects to customize and create an awesome movie by yourself.
- 1000+ standalone effects downloading resources to make videos in all kinds of styles.
- Record voice in real-time: you can have you voices recorded in realtime and instantly add them to the video files.
If you're interested in Filmora, watch the short clip below to learn more about its new amazing features. Then, start your journey of creating!


